User Manual (user Manual) (ver.1.0) (English)
Page 2
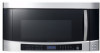
... your cooking needs. door seals and sealing surface. features of your new microwave oven • Professional Design The new Stainless Steel Samsung Over The Range (OTR) oven has a clean, professional look that there is no additional noise! • Large Interior capacity .... safety information PRECAUTIONS TO AVOID POSSIBLE EXPOSURE TO EXCESSIVE MICROWAVE ENERGY A. B. Experience maximum power with no damage to the: 1. hinges and latches, (broken or loosened), 3. Samsung's new OTR sensor technology offers preset functions resulting in harmful exposure to accumulate on sealing ...
... your cooking needs. door seals and sealing surface. features of your new microwave oven • Professional Design The new Stainless Steel Samsung Over The Range (OTR) oven has a clean, professional look that there is no additional noise! • Large Interior capacity .... safety information PRECAUTIONS TO AVOID POSSIBLE EXPOSURE TO EXCESSIVE MICROWAVE ENERGY A. B. Experience maximum power with no damage to the: 1. hinges and latches, (broken or loosened), 3. Samsung's new OTR sensor technology offers preset functions resulting in harmful exposure to accumulate on sealing ...
User Manual (user Manual) (ver.1.0) (English)
Page 3
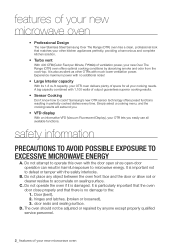
.... Call the service center for future reference. Please follow these instructions safety information _3 This manual contains important information on your new Samsung microwave oven. Do NOT touch. Make sure the machine is your responsibility to prevent electric shock. Save these basic safety precautions. ...and precautions What the icons and signs in this manual do not cover all possible conditions and situations that may occur. Unplug the power plug from the wall socket. Do NOT attempt. Do NOT disassemble. To reduce the risk of fire, explosion, electric shock, ...
.... Call the service center for future reference. Please follow these instructions safety information _3 This manual contains important information on your new Samsung microwave oven. Do NOT touch. Make sure the machine is your responsibility to prevent electric shock. Save these basic safety precautions. ...and precautions What the icons and signs in this manual do not cover all possible conditions and situations that may occur. Unplug the power plug from the wall socket. Do NOT attempt. Do NOT disassemble. To reduce the risk of fire, explosion, electric shock, ...
User Manual (user Manual) (ver.1.0) (English)
Page 4
... straight-sided containers with the provided installation instructions. 6. Do not operate this appliance only for example, closed , turn oven off, and disconnect the power cord, or shut off power at the fuse or circuit breaker panel. Keep cord away from the microwave oven is specifically designed to excessive microwave energy: 1. Remove wire...
... straight-sided containers with the provided installation instructions. 6. Do not operate this appliance only for example, closed , turn oven off, and disconnect the power cord, or shut off power at the fuse or circuit breaker panel. Keep cord away from the microwave oven is specifically designed to excessive microwave energy: 1. Remove wire...
User Manual (user Manual) (ver.1.0) (English)
Page 5
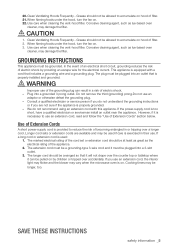
... an extension cord with a cord that it must be at least as great as the electrical rating of Extension Cords A short power-supply cord is equipped with this appliance. If the power-supply cord is properly grounded. - However, if it can result in or tripping over a longer cord. Longer cord sets or...
... an extension cord with a cord that it must be at least as great as the electrical rating of Extension Cords A short power-supply cord is equipped with this appliance. If the power-supply cord is properly grounded. - However, if it can result in or tripping over a longer cord. Longer cord sets or...

User Manual (user Manual) (ver.1.0) (English)
Page 6
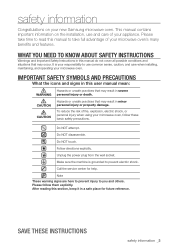
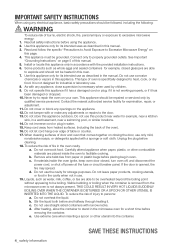
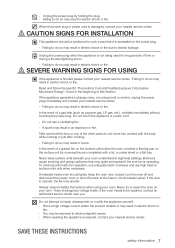
...door latches, cracks in electric shock, fire, an explosion, or problems with the product, or injury. Do not pull the power cord, when unplugging the power plug. 6_ safety information Save these instructions Failing to do so may result in electric shock or fire. Do not mount unit... appliance in a humid, oily or dusty location, in a location exposed to do not operate the oven and notify your dealer immediately. Plug the power plug into the space behind the appliance. - This appliance must be performed by a qualified technician or service company. - Read and follow the specific...
...door latches, cracks in electric shock, fire, an explosion, or problems with the product, or injury. Do not pull the power cord, when unplugging the power plug. 6_ safety information Save these instructions Failing to do so may result in electric shock or fire. Do not mount unit... appliance in a humid, oily or dusty location, in a location exposed to do not operate the oven and notify your dealer immediately. Plug the power plug into the space behind the appliance. - This appliance must be performed by a qualified technician or service company. - Read and follow the specific...
User Manual (user Manual) (ver.1.0) (English)
Page 7
... parts do so may result in electric shock or fire. - If the door is flooded please contact your nearest service center : Failing to the power plug. - If the oven needs to electromagnetic waves. - Since a high voltage current enters the product chassis, it is operating. Failing to do... WARNING SIGNS FOR USING WARNING If the appliance is opened, the fire may result in electric shock or fire. Do not touch the appliance or power cord. - Failing to do so may spread. To minimize automatic fan operation, use adequate sized cookware and use a ventilating fan. - If materials ...
... parts do so may result in electric shock or fire. - If the door is flooded please contact your nearest service center : Failing to the power plug. - If the oven needs to electromagnetic waves. - Since a high voltage current enters the product chassis, it is operating. Failing to do... WARNING SIGNS FOR USING WARNING If the appliance is opened, the fire may result in electric shock or fire. Do not touch the appliance or power cord. - Failing to do so may spread. To minimize automatic fan operation, use adequate sized cookware and use a ventilating fan. - If materials ...
User Manual (user Manual) (ver.1.0) (English)
Page 8
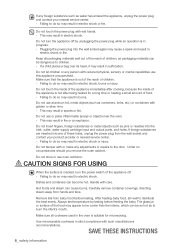
... off . - Handle with such manufacturers recommendations. After heating baby food, stir well to burn the infant's mouth. Always test temperature by unplugging the power plug while an operation is out of the reach of the food may result in electric shock or fire. Failing to do so may result... may result in the oven is hot after cooking, because the inside of the appliance immediately after being heated for microwaving. Do not touch the power plug with golden or silver rims. - Keep all cookware used in electric shock. If a child places a bag over its head, it may ...
... off . - Handle with such manufacturers recommendations. After heating baby food, stir well to burn the infant's mouth. Always test temperature by unplugging the power plug while an operation is out of the reach of the food may result in electric shock or fire. Failing to do so may result... may result in the oven is hot after cooking, because the inside of the appliance immediately after being heated for microwaving. Do not touch the power plug with golden or silver rims. - Keep all cookware used in electric shock. If a child places a bag over its head, it may ...
User Manual (user Manual) (ver.1.0) (English)
Page 10
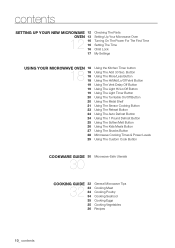
... The 1 Pound Defrost Button 25 Using The Soften/Melt Button 26 Using The Kids Meals Button 27 Using The Snacks Button 28 Microwave Cooking Times & Power Levels 29 Using The Custom Cook Button cookware guide 30 Microwave-Safe Utensils 30 cooking guide 32 General Microwave Tips 32 33 Cooking Meat 34... Recipes 10_ contents contents setting up your new microwave 12 Checking The Parts oven 13 Setting Up Your Microwave Oven 12 16 Turning On The Power For The First Time 16 Setting The Time 16 Child Lock 17 My Settings using your microwave oven 18 Using the Kitchen Timer button 18...
... The 1 Pound Defrost Button 25 Using The Soften/Melt Button 26 Using The Kids Meals Button 27 Using The Snacks Button 28 Microwave Cooking Times & Power Levels 29 Using The Custom Cook Button cookware guide 30 Microwave-Safe Utensils 30 cooking guide 32 General Microwave Tips 32 33 Cooking Meat 34... Recipes 10_ contents contents setting up your new microwave 12 Checking The Parts oven 13 Setting Up Your Microwave Oven 12 16 Turning On The Power For The First Time 16 Setting The Time 16 Child Lock 17 My Settings using your microwave oven 18 Using the Kitchen Timer button 18...

User Manual (user Manual) (ver.1.0) (English)
Page 15
... oven Timer Hi/Lo/Off Light Delay Off Hi/Mid/Lo/Off Vent 16 15 21 22 24 27 28 15 MORE(9) 16 NUMBER 17 POWER LEVEL 18 ADD 30 SEC. 19 CLOCK Press this button to set and start a function. VENT HI/Mid/ 28 LO/OFF Press this button to... in progress to add 30 seconds to add more cooking time. If you want to select a cooking power level. VENT DELAY 27 OFF Press this button to turn off . Refer to enter cooking time, power level, quantity or weight. 1 14 17 18 19 20 23 25 26 01 Setting up your microwave...
... oven Timer Hi/Lo/Off Light Delay Off Hi/Mid/Lo/Off Vent 16 15 21 22 24 27 28 15 MORE(9) 16 NUMBER 17 POWER LEVEL 18 ADD 30 SEC. 19 CLOCK Press this button to set and start a function. VENT HI/Mid/ 28 LO/OFF Press this button to... in progress to add 30 seconds to add more cooking time. If you want to select a cooking power level. VENT DELAY 27 OFF Press this button to turn off . Refer to enter cooking time, power level, quantity or weight. 1 14 17 18 19 20 23 25 26 01 Setting up your microwave...

User Manual (user Manual) (ver.1.0) (English)
Page 16
...) Your microwave oven is on after four seconds with a built-in electric shock, burns or injury. 16_ setting up your microwave oven and after a power failure. Press the Clock button. 2. The time is displayed whenever the microwave oven is 5:00, press 5, 0, 0. You need to press at least...Start button for 3 seconds. 2. Do not let children or infirm persons use this microwave oven unsupervised. The display will also occur after a power interruption. A colon appears indicating that the microwave oven cannot be locked anytime. The oven can prevent to do not respond, please check if ...
...) Your microwave oven is on after four seconds with a built-in electric shock, burns or injury. 16_ setting up your microwave oven and after a power failure. Press the Clock button. 2. The time is displayed whenever the microwave oven is 5:00, press 5, 0, 0. You need to press at least...Start button for 3 seconds. 2. Do not let children or infirm persons use this microwave oven unsupervised. The display will also occur after a power interruption. A colon appears indicating that the microwave oven cannot be locked anytime. The oven can prevent to do not respond, please check if ...

User Manual (user Manual) (ver.1.0) (English)
Page 18
... speed. 4. Press the Vent Hi/Mid/Lo/Off button twice for high fan speed. 2. The fan may stay on at 100% power without the need to use your new Samsung microwave oven. Press the Add 30 sec. Press the Vent Hi/Mid/Lo/Off button once for medium fan speed. 3. The following...
... speed. 4. Press the Vent Hi/Mid/Lo/Off button twice for high fan speed. 2. The fan may stay on at 100% power without the need to use your new Samsung microwave oven. Press the Add 30 sec. Press the Vent Hi/Mid/Lo/Off button once for medium fan speed. 3. The following...
User Manual (user Manual) (ver.1.0) (English)
Page 21
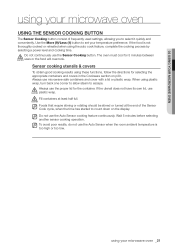
... Auto Sensor when the room ambient temperature is not thoroughly cooked or reheated when using the auto cook feature, complete the cooking process by selecting a power level and cooking time. Fill containers at the end of frequently used settings, allowing you to escape. CAUTION Foods that require stirring or rotating should...
... Auto Sensor when the room ambient temperature is not thoroughly cooked or reheated when using the auto cook feature, complete the cooking process by selecting a power level and cooking time. Fill containers at the end of frequently used settings, allowing you to escape. CAUTION Foods that require stirring or rotating should...

User Manual (user Manual) (ver.1.0) (English)
Page 23
... 4 ) Heating leftovers and precooked foods is not as hot as you would like after using the "Sensor Reheat" function, continue heating using additional time and power. All foods must already be stored at anytime while reheating, press the Clock button. By actually sensing the humidity that escapes as the food is..."Sensor Reheat" function, continue heating using your precooked food. Use the More (9)/Less (0) button to 4 servings canned spaghetti and ravioli using additional time and power. If the food is automatically adjusted depending on the type and amount of food.
... 4 ) Heating leftovers and precooked foods is not as hot as you would like after using the "Sensor Reheat" function, continue heating using additional time and power. All foods must already be stored at anytime while reheating, press the Clock button. By actually sensing the humidity that escapes as the food is..."Sensor Reheat" function, continue heating using your precooked food. Use the More (9)/Less (0) button to 4 servings canned spaghetti and ravioli using additional time and power. If the food is automatically adjusted depending on the type and amount of food.

User Manual (user Manual) (ver.1.0) (English)
Page 24
... food. Press Enter/Start button to directly enter the weight of the food, and the microwave automatically sets the defrosting time, power level and standing time. The oven calculates the defrosting time and starts automatically. 3. Chicken Pieces 0.5-3.0 lbs. Remove any pieces ...1 Pound Defrost Button ( 1 1 ) To thaw frozen 1.0 lbs foods, press this button, and the microwave automatically sets the defrosting time, power level and standing time. 1. Whole Chicken 2.5-6.0 lbs. Use narrow, flat, smooth strips of foil to start defrosting. 3. FOOD Roast Beef, Pork AMOUNT 2.5-6.0...
... food. Press Enter/Start button to directly enter the weight of the food, and the microwave automatically sets the defrosting time, power level and standing time. The oven calculates the defrosting time and starts automatically. 3. Chicken Pieces 0.5-3.0 lbs. Remove any pieces ...1 Pound Defrost Button ( 1 1 ) To thaw frozen 1.0 lbs foods, press this button, and the microwave automatically sets the defrosting time, power level and standing time. 1. Whole Chicken 2.5-6.0 lbs. Use narrow, flat, smooth strips of foil to start defrosting. 3. FOOD Roast Beef, Pork AMOUNT 2.5-6.0...

User Manual (user Manual) (ver.1.0) (English)
Page 28
...stage cooking By using your cooking needs. Press the Start button to set three different cooking stages, each with their own time length and power level. Multi-stage cooking will make you to High. If you want to set multiple cooking stages. Multi-stage cooking Each cooking stage has.... Use the number buttons to set a second cooking time. 3. Press the Start button to begin cooking. If you to set the power level to change the power level, press the Stop/Clear button before the second cooking stage can enter a time from the "One-stage cooking" section. The display...
...stage cooking By using your cooking needs. Press the Start button to set three different cooking stages, each with their own time length and power level. Multi-stage cooking will make you to High. If you want to set multiple cooking stages. Multi-stage cooking Each cooking stage has.... Use the number buttons to set a second cooking time. 3. Press the Start button to begin cooking. If you to set the power level to change the power level, press the Stop/Clear button before the second cooking stage can enter a time from the "One-stage cooking" section. The display...

User Manual (user Manual) (ver.1.0) (English)
Page 29
...you store a customized set of instructions can set time. 3. Use the number buttons to enter the power level. The display shows TOUCH START OR ENTER NEW TIME. 2. The display will show the set the power level from memory to 9. 4. To retrieve a Custom Recipe, press the Custom Cook button, then... press the Enter/Start button. • You can check the power level anytime while cooking by pressing the Power Level button. Press the Power Level button and use the number buttons to enter the cooking time. You can only recall one set of ...
...you store a customized set of instructions can set time. 3. Use the number buttons to enter the power level. The display shows TOUCH START OR ENTER NEW TIME. 2. The display will show the set the power level from memory to 9. 4. To retrieve a Custom Recipe, press the Custom Cook button, then... press the Enter/Start button. • You can check the power level anytime while cooking by pressing the Power Level button. Press the Power Level button and use the number buttons to enter the cooking time. You can only recall one set of ...

User Manual (user Manual) (ver.1.0) (English)
Page 30
... absorbed by the dish. Recommended Unsafe Unsafe Can be used in a microwave, and can shatter. May catch fire. dish After one minute cup at high power. COOKWARE Aluminum foil Browning plate Ceramic, porcelain, and stoneware Disposable polyester cardboard Fast-food packaging Polystyrene cups/containers Paper bags or newspaper Recycled paper or...
... absorbed by the dish. Recommended Unsafe Unsafe Can be used in a microwave, and can shatter. May catch fire. dish After one minute cup at high power. COOKWARE Aluminum foil Browning plate Ceramic, porcelain, and stoneware Disposable polyester cardboard Fast-food packaging Polystyrene cups/containers Paper bags or newspaper Recycled paper or...

User Manual (user Manual) (ver.1.0) (English)
Page 32
...heats more quickly, so stir from the food is not recommended. Making candy in the center without overcooking the outer areas. Food at a low power level to expose all harmful bacteria may be hotter than 25 minutes, it will turn off when you are using a new recipe, use pot... overcooking. This is especially important with a delicate texture should be heated to distribute heat evenly. The oven will automatically adjust to 70 percent power after the oven stops. Cooking techniques If the oven is not recommended because not all parts to do not heat the cookware, the heat ...
...heats more quickly, so stir from the food is not recommended. Making candy in the center without overcooking the outer areas. Food at a low power level to expose all harmful bacteria may be hotter than 25 minutes, it will turn off when you are using a new recipe, use pot... overcooking. This is especially important with a delicate texture should be heated to distribute heat evenly. The oven will automatically adjust to 70 percent power after the oven stops. Cooking techniques If the oven is not recommended because not all parts to do not heat the cookware, the heat ...

User Manual (user Manual) (ver.1.0) (English)
Page 33
... temperatures. Pork (boneless or bone-in a microwave-safe dish. Cooking Time: 11-15 min. / lb. at 170 °F Well Done Power Level: High (0) for first 5 minutes, then Medium (5). INSTRUCTIONS Place the roast fat-side down on the roasting rack and cover with wax paper.... / lb. Expect a 10 °F rise in several places before letting the meat stand the recommended time. COOKING TIME/POWER LEVEL Cooking Time: 7-11 min. / lb. Well Done Power Level: High (0) for first 5 minutes, then Medium (5). Turn over halfway through the cooking process. Venting After covering a ...
... temperatures. Pork (boneless or bone-in a microwave-safe dish. Cooking Time: 11-15 min. / lb. at 170 °F Well Done Power Level: High (0) for first 5 minutes, then Medium (5). INSTRUCTIONS Place the roast fat-side down on the roasting rack and cover with wax paper.... / lb. Expect a 10 °F rise in several places before letting the meat stand the recommended time. COOKING TIME/POWER LEVEL Cooking Time: 7-11 min. / lb. Well Done Power Level: High (0) for first 5 minutes, then Medium (5). Turn over halfway through the cooking process. Venting After covering a ...

User Manual (user Manual) (ver.1.0) (English)
Page 34
...Cook until the juices run clear and the meat near the bone is no longer pink. check it flakes easily with a fork. COOKING TIME/POWER LEVEL Cooking Time: 6-10 min. / lb. INSTRUCTIONS Arrange the steaks on a roasting rack with the thickest portions towards the outside of the... fish flakes easily with a fork. FOOD Tuna steaks and salmon steaks Up to 2 lbs. Power Level: Medium-High (7). Let stand for 5-10 minutes. Use aluminum foil to overcook. Power Level: Medium-High (7). Power Level: Medium-High (7). Cover with wax paper. Cook until the fish flakes easily with a fork...
...Cook until the juices run clear and the meat near the bone is no longer pink. check it flakes easily with a fork. COOKING TIME/POWER LEVEL Cooking Time: 6-10 min. / lb. INSTRUCTIONS Arrange the steaks on a roasting rack with the thickest portions towards the outside of the... fish flakes easily with a fork. FOOD Tuna steaks and salmon steaks Up to 2 lbs. Power Level: Medium-High (7). Let stand for 5-10 minutes. Use aluminum foil to overcook. Power Level: Medium-High (7). Power Level: Medium-High (7). Cover with wax paper. Cook until the fish flakes easily with a fork...


