User Manual (user Manual) (ver.1.0) (English)
Page 6
Supports various wireless network setting method • Using the WPS (Wi-Fi Protected Setup™) button - You can easily connect to form a poster (see "Using advanced print features" on page 229). • You can connect and set up methods" ... document are magnified and printed across the multiple sheets of paper and can then be taped together to a wireless network using the Wi-Fi or Wi-Fi Direct feature. See "Introducing wireless set various wireless network settings using a USB cable or a network cable. • Using the Wi-Fi Direct - You can conveniently print...
Supports various wireless network setting method • Using the WPS (Wi-Fi Protected Setup™) button - You can easily connect to form a poster (see "Using advanced print features" on page 229). • You can connect and set up methods" ... document are magnified and printed across the multiple sheets of paper and can then be taped together to a wireless network using the Wi-Fi or Wi-Fi Direct feature. See "Introducing wireless set various wireless network settings using a USB cable or a network cable. • Using the Wi-Fi Direct - You can conveniently print...
User Manual (user Manual) (ver.1.0) (English)
Page 38
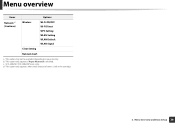
SCX-340xFW/ SCX-340xHW Series only. Menu overview Items Options Network c (Continue) Wireless Wi-Fi ON/OFF Wi-Fi Direct WPS Setting WLAN Setting WLAN Default WLAN Signal Clear Setting Network Conf. c. b. This option may not be available depending on your country. This option only appears if Paper Mismatch is left in the cartridge. 2. d. This option only appears when small amount of toner is enabled. Menu Overview and Basic Setup 38 a.
SCX-340xFW/ SCX-340xHW Series only. Menu overview Items Options Network c (Continue) Wireless Wi-Fi ON/OFF Wi-Fi Direct WPS Setting WLAN Setting WLAN Default WLAN Signal Clear Setting Network Conf. c. b. This option may not be available depending on your country. This option only appears if Paper Mismatch is left in the cartridge. 2. d. This option only appears when small amount of toner is enabled. Menu Overview and Basic Setup 38 a.

User Manual (user Manual) (ver.1.0) (English)
Page 100
...Replacing the toner cartridge" on . The number of toner is off . Some LEDs may be available depending on model or country (see "Wireless network setup" on page 75). The machine is in ready mode or machine's power is left in the cartridge even when red LED is 2-up... toner cartridge (see "Redistributing toner" on page 156). The default setting of print-outs and is designed pursuant to a wireless network. It is recommended to a wireless network (see "Control panel overview" on and the printer stops printing. Estimated cartridge life means the expected or estimated toner ...
...Replacing the toner cartridge" on . The number of toner is off . Some LEDs may be available depending on model or country (see "Wireless network setup" on page 75). The machine is in ready mode or machine's power is left in the cartridge even when red LED is 2-up... toner cartridge (see "Redistributing toner" on page 156). The default setting of print-outs and is designed pursuant to a wireless network. It is recommended to a wireless network (see "Control panel overview" on and the printer stops printing. Estimated cartridge life means the expected or estimated toner ...

User Manual (user Manual) (ver.1.0) (English)
Page 131
... menu Fax menu Scan menu System setup Admin setup Custom setup 4. Software Installation Installation for Macintosh 134 Reinstallation for Macintosh 135 Installation for Linux 136 Reinstallation for Linux 138 2. Using a Network-Connected Machine Useful network programs 140 Wired network setup 141 Installing driver over the network 144 IPv6 configuration 153 Wireless network setup 156 Samsung MobilePrint 188 3.
... menu Fax menu Scan menu System setup Admin setup Custom setup 4. Software Installation Installation for Macintosh 134 Reinstallation for Macintosh 135 Installation for Linux 136 Reinstallation for Linux 138 2. Using a Network-Connected Machine Useful network programs 140 Wired network setup 141 Installing driver over the network 144 IPv6 configuration 153 Wireless network setup 156 Samsung MobilePrint 188 3.

User Manual (user Manual) (ver.1.0) (English)
Page 139
Using a NetworkConnected Machine This chapter gives you step-by-step instructions for setting up a network connected machine and software. • Useful network programs 140 • Wired network setup 141 • Installing driver over the network 144 • IPv6 configuration 153 • Wireless network setup 156 • Samsung MobilePrint 188 Supported optional devices and features may differ according to your model (see "Features by models" on page 7). 2.
Using a NetworkConnected Machine This chapter gives you step-by-step instructions for setting up a network connected machine and software. • Useful network programs 140 • Wired network setup 141 • Installing driver over the network 144 • IPv6 configuration 153 • Wireless network setup 156 • Samsung MobilePrint 188 Supported optional devices and features may differ according to your model (see "Features by models" on page 7). 2.
User Manual (user Manual) (ver.1.0) (English)
Page 148
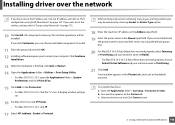
Socket in Print Using. 21 Click Add. Your machine appears in the Queue input field. If you want to set the wireless setting, refer to "Setup using SetIP (Macintosh)" on page 142. If you click Customize, you can choose individual components to install. 11 Enter the ...Select machine to restart your machine name in Protocol. Using a Network-Connected Machine 148 To install the fax driver: a Open the Applications folder > Samsung > Fax Queue Creator. All components necessary for Printer Type option. 18 Enter the machine's IP address in the Address input field. 19 Enter the...
Socket in Print Using. 21 Click Add. Your machine appears in the Queue input field. If you want to set the wireless setting, refer to "Setup using SetIP (Macintosh)" on page 142. If you click Customize, you can choose individual components to install. 11 Enter the ...Select machine to restart your machine name in Protocol. Using a Network-Connected Machine 148 To install the fax driver: a Open the Applications folder > Samsung > Fax Queue Creator. All components necessary for Printer Type option. 18 Enter the machine's IP address in the Address input field. 19 Enter the...

User Manual (user Manual) (ver.1.0) (English)
Page 156
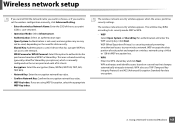
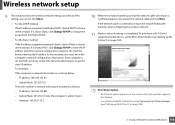
... access point is an environment generally used , and a Network Key are created for homes and SOHOs (Small Office/ Home Office). Wireless network setup • Make sure your computer and the machine at a time. Wireless networking may not be available depending on the model (see "Features by models" on page 7). • If the IPv6...
... access point is an environment generally used , and a Network Key are created for homes and SOHOs (Small Office/ Home Office). Wireless network setup • Make sure your computer and the machine at a time. Wireless networking may not be available depending on the model (see "Features by models" on page 7). • If the IPv6...

User Manual (user Manual) (ver.1.0) (English)
Page 157
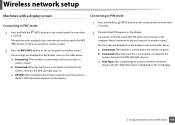
..." on page 161. • See "Using the menu button" on the model or country. Using a Network-Connected Machine 157 Wireless network setup 13 Introducing wireless set wireless settings either from the below table. Some wireless network installation types may not be available depending on page 162. 2. Choose the setting method from the machine or the...
..." on page 161. • See "Using the menu button" on the model or country. Using a Network-Connected Machine 157 Wireless network setup 13 Introducing wireless set wireless settings either from the below table. Some wireless network installation types may not be available depending on page 162. 2. Choose the setting method from the machine or the...

User Manual (user Manual) (ver.1.0) (English)
Page 158
If problems occur during wireless set up methods Connecting method Access point via USB cable (recommended) () Description & Reference • Windows user, see "Access point via USB cable" on page 163. &#... Direct" on page 176. Access point via WPS button (without a USB cable connection) ( , ) • Windows user, see "Access point via USB cable" on page 185). 2. Wireless network setup Set up method From the computer Other set up or driver installation, refer to the troubleshooting chapter (see "Troubleshooting" on page 178.
If problems occur during wireless set up methods Connecting method Access point via USB cable (recommended) () Description & Reference • Windows user, see "Access point via USB cable" on page 163. &#... Direct" on page 176. Access point via WPS button (without a USB cable connection) ( , ) • Windows user, see "Access point via USB cable" on page 185). 2. Wireless network setup Set up method From the computer Other set up or driver installation, refer to the troubleshooting chapter (see "Troubleshooting" on page 178.

User Manual (user Manual) (ver.1.0) (English)
Page 159
.... Factory default in control panel ( (Menu) > Network > Wireless > OK > WPS Setting). • Check if the access point (or wireless router) supports Wi-Fi Protected Setup™ (WPS). • Check if your machine supports Wi-Fi Protected Setup™ (WPS). • Networked computer (PIN mode only) ...Refer to the user's guide of your machine and the WPS (PBC) button on a Wi-Fi Protected Setup™ WPS-enabled access point (or wireless router) respectively. Using a Network-Connected Machine 159 Wireless network setup 14 Using the WPS button If your machine and an access point (or...
.... Factory default in control panel ( (Menu) > Network > Wireless > OK > WPS Setting). • Check if the access point (or wireless router) supports Wi-Fi Protected Setup™ (WPS). • Check if your machine supports Wi-Fi Protected Setup™ (WPS). • Networked computer (PIN mode only) ...Refer to the user's guide of your machine and the WPS (PBC) button on a Wi-Fi Protected Setup™ WPS-enabled access point (or wireless router) respectively. Using a Network-Connected Machine 159 Wireless network setup 14 Using the WPS button If your machine and an access point (or...
User Manual (user Manual) (ver.1.0) (English)
Page 160
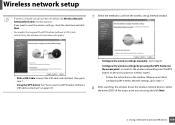
Wireless network setup Machines with a display screen Connecting in PBC mode 1 Press and hold the (WPS) button on the control panel for more than 2 seconds. 2 The eight-digit PIN appears on the display screen in the order below : a Connecting: The machine is connecting to the access point (or wireless router... process, the AP's SSID information is successfully connected to two minutes until you press the WPS (PBC) button on the access point (or wireless router). 2 Press the WPS (PBC) button on the display. b Connected: When the machine is displayed on . The messages are displayed ...
Wireless network setup Machines with a display screen Connecting in PBC mode 1 Press and hold the (WPS) button on the control panel for more than 2 seconds. 2 The eight-digit PIN appears on the display screen in the order below : a Connecting: The machine is connecting to the access point (or wireless router... process, the AP's SSID information is successfully connected to two minutes until you press the WPS (PBC) button on the access point (or wireless router). 2 Press the WPS (PBC) button on the display. b Connected: When the machine is displayed on . The messages are displayed ...

User Manual (user Manual) (ver.1.0) (English)
Page 161
Wireless network setup Machines without a display screen Connecting in PBC mode 1 Press and hold the (WPS) button on the control panel for about 5 seconds. a The light blinks fast on page 141). Connecting in the order below: a The light blinks fast on . The machine starts connecting to the access point (or wireless... to two minutes until the status LED blinks quickly. Using a Network-Connected Machine 161 The machine is successfully connected to the wireless network, the WPS LED light stays on . The LED blinks slowly for about 2 - 4 seconds until you enter the eightdigit...
Wireless network setup Machines without a display screen Connecting in PBC mode 1 Press and hold the (WPS) button on the control panel for about 5 seconds. a The light blinks fast on page 141). Connecting in the order below: a The light blinks fast on . The machine starts connecting to the access point (or wireless... to two minutes until the status LED blinks quickly. Using a Network-Connected Machine 161 The machine is successfully connected to the wireless network, the WPS LED light stays on . The LED blinks slowly for about 2 - 4 seconds until you enter the eightdigit...
User Manual (user Manual) (ver.1.0) (English)
Page 162
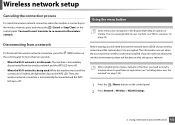
..." on page 144). 1 Press the (Menu) button on the control panel. 2 Press Network > Wireless > WLAN Settings. 2. If so, it is encrypted. Wireless network setup Canceling the connection process To cancel the wireless network connection when the machine is connecting to the wireless network, press and release the (Cancel or Stop/Clear) on the WPS LED...
..." on page 144). 1 Press the (Menu) button on the control panel. 2 Press Network > Wireless > WLAN Settings. 2. If so, it is encrypted. Wireless network setup Canceling the connection process To cancel the wireless network connection when the machine is connecting to the wireless network, press and release the (Cancel or Stop/Clear) on the WPS LED...

User Manual (user Manual) (ver.1.0) (English)
Page 163
... menu, select Programs or All Programs > Samsung Printers > your CD-ROM drive. 4 Select the Wireless Setting and Installation option. 5 Read the License Agreement, and select I accept the terms of available networks from which to choose. Wireless network setup 3 Press the OK to select the setup method you can access the Wireless Setting program without the CD.
... menu, select Programs or All Programs > Samsung Printers > your CD-ROM drive. 4 Select the Wireless Setting and Installation option. 5 Read the License Agreement, and select I accept the terms of available networks from which to choose. Wireless network setup 3 Press the OK to select the setup method you can access the Wireless Setting program without the CD.
User Manual (user Manual) (ver.1.0) (English)
Page 164
... (without a USB cable connection), the window shown below will appear. 7 Select the method to the wireless network by pressing the WPS button on the access point (or wireless router). - Wireless network setup • If wireless network set before, the Wireless Network Setting Information window appears. Select the name (SSID) of the access point you are using...
... (without a USB cable connection), the window shown below will appear. 7 Select the method to the wireless network by pressing the WPS button on the access point (or wireless router). - Wireless network setup • If wireless network set before, the Wireless Network Setting Information window appears. Select the name (SSID) of the access point you are using...
User Manual (user Manual) (ver.1.0) (English)
Page 165
... key. • WPA Enter the WPA shared key and click Next. WPA Personal or WPA2 Personal: Select this option to your wireless network. This uses a shared secret key (generally called Pre Shared Key pass phrase), which is case-sensitive). • Operation Mode...: Select Infrastructure. • Authentication: Select an authentication type. Wireless network setup If you cannot find the network name you want to set the wireless configuration manually, click Advanced Setting. • Enter the wireless Network Name: Enter the SSID of its security mode: WEP or ...
... key. • WPA Enter the WPA shared key and click Next. WPA Personal or WPA2 Personal: Select this option to your wireless network. This uses a shared secret key (generally called Pre Shared Key pass phrase), which is case-sensitive). • Operation Mode...: Select Infrastructure. • Authentication: Select an authentication type. Wireless network setup If you cannot find the network name you want to set the wireless configuration manually, click Advanced Setting. • Enter the wireless Network Name: Enter the SSID of its security mode: WEP or ...
User Manual (user Manual) (ver.1.0) (English)
Page 166
... To print from a Wi-Fi Direct supported mobile device, set to build Wi-Fi Direct by using Samsung Easy Printer Manager (see "Setting up Wi-Fi Direct" on page 183). Click Next. • ... should be as shown below, - If it may have trouble finding the machine when configuring the wireless network. 11 Wireless network setting is confirmed appears, disconnect the network cable and click Next. Subnet Mask: 255.255.0.0... that the network cable connection is completed. Wireless network setup 9 The window shows the wireless network settings and checks if the settings are correct.
... To print from a Wi-Fi Direct supported mobile device, set to build Wi-Fi Direct by using Samsung Easy Printer Manager (see "Setting up Wi-Fi Direct" on page 183). Click Next. • ... should be as shown below, - If it may have trouble finding the machine when configuring the wireless network. 11 Wireless network setting is confirmed appears, disconnect the network cable and click Next. Subnet Mask: 255.255.0.0... that the network cable connection is completed. Wireless network setup 9 The window shows the wireless network settings and checks if the settings are correct.

User Manual (user Manual) (ver.1.0) (English)
Page 167
... of each machine. Access point via WPS button (without a USB connection) and access point (or a router) WPS button. Then, click Next. 2. Wireless network setup • Network Name(SSID): The default Network Name is the model name and the maximum length is 22 characters (not including "Direct-xx-"). • ...Network Key is the numeric string, and the size is 8 ~ 64 characters. 12 When the wireless network set the machine as the ...
... of each machine. Access point via WPS button (without a USB connection) and access point (or a router) WPS button. Then, click Next. 2. Wireless network setup • Network Name(SSID): The default Network Name is the model name and the maximum length is 22 characters (not including "Direct-xx-"). • ...Network Key is the numeric string, and the size is 8 ~ 64 characters. 12 When the wireless network set the machine as the ...

User Manual (user Manual) (ver.1.0) (English)
Page 168
... stays on the control panel for the WPS button on the access point (or wireless router). The machine waits up the wireless network using the USB cable, refer to be pressed. If the access point (or wireless router) has a WPS button, select Yes and click Next. 2. b Press... to the access point (or wireless router). - Connecting: The machine is connecting to set up the wireless network. • For models with a USB cable, the above window appears. • If your access point (or wireless router) supports WPS or not. Wireless network setup 5 Select Using the WPS button...
... stays on the control panel for the WPS button on the access point (or wireless router). The machine waits up the wireless network using the USB cable, refer to be pressed. If the access point (or wireless router) has a WPS button, select Yes and click Next. 2. b Press... to the access point (or wireless router). - Connecting: The machine is connecting to set up the wireless network. • For models with a USB cable, the above window appears. • If your access point (or wireless router) supports WPS or not. Wireless network setup 5 Select Using the WPS button...

User Manual (user Manual) (ver.1.0) (English)
Page 182
...your network's Operation Mode is Infrastructure, select the SSID of your machine's new IP address in the browser window. If your wireless setup. If not, connect the machine with each other in a peer-to communicate directly with each other through an access point. ..."portthru" is case sensitive. • Operation Mode: Operation Mode refers to the machine. Infrastructure: Allows wireless devices to a specific wireless network must use the same SSID. Wireless network setup 1 Check whether or not the network cable is connected to the type of the SyncThru™ Web Service...
...your network's Operation Mode is Infrastructure, select the SSID of your machine's new IP address in the browser window. If your wireless setup. If not, connect the machine with each other in a peer-to communicate directly with each other through an access point. ..."portthru" is case sensitive. • Operation Mode: Operation Mode refers to the machine. Infrastructure: Allows wireless devices to a specific wireless network must use the same SSID. Wireless network setup 1 Check whether or not the network cable is connected to the type of the SyncThru™ Web Service...


