
User Manual Ver.1.0 (English)
Page 2
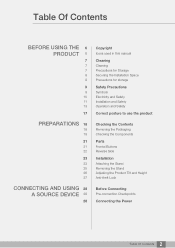
Table Of Contents BEFORE USING THE 6 PRODUCT 6 7 7 7 8 8 9 9 10 11 13 17 PREPARATIONS 18 18 19 21 21 22 23 23 25 26 27 CONNECTING AND USING 28 A SOURCE DEVICE 28 28 Copyright Icons used in this manual Cleaning Cleaning Precautions for Storage Securing the Installation ...
Table Of Contents BEFORE USING THE 6 PRODUCT 6 7 7 7 8 8 9 9 10 11 13 17 PREPARATIONS 18 18 19 21 21 22 23 23 25 26 27 CONNECTING AND USING 28 A SOURCE DEVICE 28 28 Copyright Icons used in this manual Cleaning Cleaning Precautions for Storage Securing the Installation ...

User Manual Ver.1.0 (English)
Page 23
Check that the stand neck is completely fixed. 23 1 Preparations Turn the connecting screws fully so that it is firmly connected. 1 Preparations 1.3 Installation 1.3.1 Attaching the Stand Before assembling the product, place the product down ...
Check that the stand neck is completely fixed. 23 1 Preparations Turn the connecting screws fully so that it is firmly connected. 1 Preparations 1.3 Installation 1.3.1 Attaching the Stand Before assembling the product, place the product down ...

User Manual Ver.1.0 (English)
Page 60
6 Specifications 6.1 General Model Name S24C230BL S24C230JL S24C230JY Panel Size 23.6 Inches (59 cm) Display area (H x V) 521.28 mm x 293.22 mm 20.52 x 11.54 Inches Pixel Pitch (H x V) 0.2715 x 0.2715 mm 0.010689 x 0.010689 Inches Maximum ... x 17.0 x 9.5 Inches / 8.7 lbs Model Name Panel Size Display area Pixel Pitch Maximum Pixel Clock S27C230B S27C230J 27 Inches (68 cm) 597.6 mm (H) x 336.15 mm (V) 23.53 Inches (H) x 13.23 Inches (V) 0.31125 mm (H) x 0.31125 mm (V) 0.012254 Inches (H) x 0.012254 Inches (V) 148MHz (Analog, Digital) 148 MHz (Digital) 60 6 Specifications
6 Specifications 6.1 General Model Name S24C230BL S24C230JL S24C230JY Panel Size 23.6 Inches (59 cm) Display area (H x V) 521.28 mm x 293.22 mm 20.52 x 11.54 Inches Pixel Pitch (H x V) 0.2715 x 0.2715 mm 0.010689 x 0.010689 Inches Maximum ... x 17.0 x 9.5 Inches / 8.7 lbs Model Name Panel Size Display area Pixel Pitch Maximum Pixel Clock S27C230B S27C230J 27 Inches (68 cm) 597.6 mm (H) x 336.15 mm (V) 23.53 Inches (H) x 13.23 Inches (V) 0.31125 mm (H) x 0.31125 mm (V) 0.012254 Inches (H) x 0.012254 Inches (V) 148MHz (Analog, Digital) 148 MHz (Digital) 60 6 Specifications

User Manual Ver.1.0 (English)
Page 76
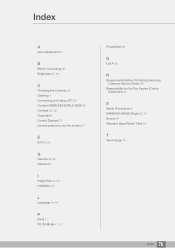
Index A Auto Adjustment 40 B Before Connecting 28 Brightness 37, 48 C Checking the Contents 18 Cleaning 7 Connecting and Using a PC 29 Contact SAMSUNG WORLD WIDE 66 Contrast 38, 49 Copyright 6 Correct Disposal 73 Correct posture to use the product 17 E Exit 46, 55 G Gamma 39, 50 ...General 60 I Image Size 42, 52 Installation 23 L Language 44, 54 P Parts 21 PC/AV Mode 41, 51 PowerSaver 63 Q Q & A 58 R Requirements Before Contacting Samsung Customer Service Center 56 Responsibility for the Pay Service (Cost to Customers) 72 S Safety Precautions...
Index A Auto Adjustment 40 B Before Connecting 28 Brightness 37, 48 C Checking the Contents 18 Cleaning 7 Connecting and Using a PC 29 Contact SAMSUNG WORLD WIDE 66 Contrast 38, 49 Copyright 6 Correct Disposal 73 Correct posture to use the product 17 E Exit 46, 55 G Gamma 39, 50 ...General 60 I Image Size 42, 52 Installation 23 L Language 44, 54 P Parts 21 PC/AV Mode 41, 51 PowerSaver 63 Q Q & A 58 R Requirements Before Contacting Samsung Customer Service Center 56 Responsibility for the Pay Service (Cost to Customers) 72 S Safety Precautions...

User Manual Ver.1.0 (English)
Page 2
Table Of Contents BEFORE USING THE 6 PRODUCT 6 7 7 7 8 8 9 9 10 11 13 17 PREPARATIONS 18 18 19 21 21 22 23 23 25 26 27 CONNECTING AND USING 28 A SOURCE DEVICE 28 28 Copyright Icons used in this manual Cleaning Cleaning Precautions for Storage Securing the Installation ...
Table Of Contents BEFORE USING THE 6 PRODUCT 6 7 7 7 8 8 9 9 10 11 13 17 PREPARATIONS 18 18 19 21 21 22 23 23 25 26 27 CONNECTING AND USING 28 A SOURCE DEVICE 28 28 Copyright Icons used in this manual Cleaning Cleaning Precautions for Storage Securing the Installation ...

User Manual Ver.1.0 (English)
Page 23
... downwards. 1 Preparations 1.3 Installation 1.3.1 Attaching the Stand Before assembling the product, place the product down on a flat and stable surface so that it is completely fixed. 23 1 Preparations Tightly fasten the connecting screw at the bottom of the product is facing downwards.
... downwards. 1 Preparations 1.3 Installation 1.3.1 Attaching the Stand Before assembling the product, place the product down on a flat and stable surface so that it is completely fixed. 23 1 Preparations Tightly fasten the connecting screw at the bottom of the product is facing downwards.
User Manual Ver.1.0 (English)
Page 76
Index A Auto Adjustment 40 B Before Connecting 28 Brightness 37, 48 C Checking the Contents 18 Cleaning 7 Connecting and Using a PC 29 Contact SAMSUNG WORLD WIDE 66 Contrast 38, 49 Copyright 6 Correct Disposal 73 Correct posture to use the product 17 E Exit 46, 55 G Gamma 39, 50 ...General 60 I Image Size 42, 52 Installation 23 L Language 44, 54 P Parts 21 PC/AV Mode 41, 51 PowerSaver 63 Q Q & A 58 R Requirements Before Contacting Samsung Customer Service Center 56 Responsibility for the Pay Service (Cost to Customers) 72 S Safety Precautions...
Index A Auto Adjustment 40 B Before Connecting 28 Brightness 37, 48 C Checking the Contents 18 Cleaning 7 Connecting and Using a PC 29 Contact SAMSUNG WORLD WIDE 66 Contrast 38, 49 Copyright 6 Correct Disposal 73 Correct posture to use the product 17 E Exit 46, 55 G Gamma 39, 50 ...General 60 I Image Size 42, 52 Installation 23 L Language 44, 54 P Parts 21 PC/AV Mode 41, 51 PowerSaver 63 Q Q & A 58 R Requirements Before Contacting Samsung Customer Service Center 56 Responsibility for the Pay Service (Cost to Customers) 72 S Safety Precautions...