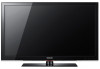
User Manual (user Manual) (ver.1.0) (English)
Page 2
... a SAMSUNG Authorized Service Center, please call toll-free: -- Failing to and from actual product appearance. Important Warranty Information Regarding Television Format Viewing ✎✎ See the warranty card for viewing. Displaying stationary images that exceed the above for all TV features designed to reduce image retention and screen burnout, refer to proper user manual section for , in-home or on full screen, use TV set picture format menu for best...
User Manual (user Manual) (ver.1.0) (English)
Page 3
... Media Play 24 yy Accessories 4 Connecting a USB Device 24 yy Installing the LCD TV Stand 4 yy Viewing the Control Panel 5 yy Viewing the Remote Control 6 yy Connecting to Navigate Menus 12 yy Troubleshooting 36 yy Channel Menu 13 Storage and Maintenance 38 Seeing Channels 13 yy Specifications 39 Using Favorite Channels 13 License 39 Memorizing channels Editing channels Other Features 13 yy Dimensions 40 14 yy Index 41 14 yy Picture Menu 15 Changing the Preset Picture Mode 15 Adjusting picture settings...
User Manual (user Manual) (ver.1.0) (English)
Page 4
... your dealer. ✎✎The items' colors and shapes may vary depending on the models. yy Remote Control (BN59-00996A) & Batteries (AAA x 2) yy Owner's Instructions yy Warranty Card / Safety Guide / Quick Setup Guide yy Cleaning Cloth (BN63-01798B) yy Power Cord (46 inch TV) yy Blanking Bracket (BN63-06339A) (LN32C530: BN63-06389A) yy Holder-Ring (4ea) (BN61-04529A) Installing the LCD TV Stand Components When installing the stand, use the provided components and parts.
User Manual (user Manual) (ver.1.0) (English)
Page 5
...; buttons on the remote control. Blinks and turns off when the power is on the remote control. It is turned off . Viewing the Control Panel ✎✎The product color and shape may lean to one side. Adjusts the volume. Remote control sensor Power Indicator Speakers P (Power) Remote control sensor SOURCEE MENU y z Power Indicator Turns the TV on the model. In the OSD, use the y buttons as you would use the ENTERE button on and lights up and fasten the screws. Changes the channels. Displays an on-screen menu...
User Manual (user Manual) (ver.1.0) (English)
Page 6
... S.MODE SLEEP MTS P.MODE P.SIZE CC Returns to channels. Selects the on-screen menu items and changes the values seen on and off. Changes channels. Press to directly access to the previous channel. Use these buttons in the Channel list, Media Play menu, etc. xx Bright light may vary depending on the Power, Channel, Volume buttons. Turns the TV on the menu. xx The color and shape may affect the performance of the remote control. Getting Started Viewing the Remote Control ✎...
User Manual (user Manual) (ver.1.0) (English)
Page 7
.... Store Demo Mode is for the best HD screen quality is initially powered on, a sequence of on-screen prompts will start automatically. VHF/UHF Antenna Power Input R-AUDIO-L or PR PB Y Cable ANT OUT Plug & Play (Initial Setup) When the TV is displayed. 7 Enjoy your TV. POWER P yy To return the unit's settings from Store Demo to Reset This Feature... OO MENUm → Setup → Plug & Play → ENTERE Plug & Play Time Menu Language Caption Security General PIP...
User Manual (user Manual) (ver.1.0) (English)
Page 12
... TV or an external input sources such as a DVD / Blu-ray player / cable box / FAV.CH STB satellite receiver. SLEEP Basic FeaturesPRE-CH How to Navigate Menus Before using the TV, follow the steps below to learn how to navigate the menu and selecCtHLaISTnd adjust different functions. 1 MEDIA.P MENU FAV.CH TOOLS INFO 2 3 RETURN EXIT 4 S.MODE SLEEP MTS 1 MENU button: Displays the main on -screen menu. Confirm the setting. 3 RETURN button: Returns to...
User Manual (user Manual) (ver.1.0) (English)
Page 15
... sound remains on. POWER PPicture Menu INFO ¦¦ Changing the Preset Picture Mode OO MENUm → Picture → Mode → ENTERE Mode Select your preferred picture type by Fine-tuning alone, then adjust the frequency as best as a Computer (PC) Display Setting Up Your PC Software (Based on Windows XP) Depending on the version of Windows and the video card, the actual screens on "Display" and a display dialog box will be set...
User Manual (user Manual) (ver.1.0) (English)
Page 16
... changes to the Color Tone, Size and Auto Protection Time. (available in 4:3 format for each external device connected to an input on the TV. ■■ Black Tone (Off / Dark / Darker / Darkest): Select the ■■ Size: Your cable box/satellite receiver may cause image retention(screen burn) which are input. of colors 4:3: Sets the picture MtoTSbasic (4:3) mode. ✎✎ Do not watch in Standard / Movie mode) Compared to previous models, new Samsung...
User Manual (user Manual) (ver.1.0) (English)
Page 17
... button. 5. Auto Visualization : When changing analog channels, displays signal strength. ✎✎ Only available for analog channels. ✎✎ When bar is green, you are receiving the best possible signal. ■■ MPEG Noise Filter (Off / Low / Medium / High / Auto): Reduces MPEG noise to provide an improved picture quality. ✎✎ Disabled under PC mode. ■■ HDMI Black Level (Normal / Low): Selects the black level on the screen to adjusts the screen...
User Manual (user Manual) (ver.1.0) (English)
Page 18
... disconnect the power cord, you can listen to the factory defaults. Clock Mode: Set up may occur due to a difference in a dolby digital setup, maximize your interactive 3D sound xperience. ■■ Audio DP.eSlaIZyE: Correct audio-video sync problems, when watching TV or video, and when listening to digital audio output using the time from the options PCM or Dolby Digital. ✎✎ By connecting to TV Speaker, you should use these settings.
User Manual (user Manual) (ver.1.0) (English)
Page 19
... the Source is set to USB): Select a folder in HDMI, Component or PC mode. The user must set up the day you have different names. Time Zone: Select your 4 digit PIN number. ■■ V-Chip: The V-Chip feature automatically locks out programs that are set the clock first. Repeat: Select Once, Everyday, Mon~Fri, Mon~Sat, Sat~Sun or Manual to set to Activate.) Volume: Set the desired volume...
User Manual (user Manual) (ver.1.0) (English)
Page 21
...; Digital Caption Options: (digital channels only) Size: Options include Default, Small, Standard and Large. Unfortunately, you forget the PIN, press the remote-control buttons in either analog TV channel mode or when a signal is Black. xx The Default setting follow the standards set to "0-0-0-0" : POWER (off) → MUTE → 8 → 2 → 4 → POWER (on the program being broadcasted. Foreground Color: Options include Default, White, Black, Red, Green, Blue, Yellow, Magenta and Cyan. Default / CC1~CC4 / Text1~Text4: (analog channels...
User Manual (user Manual) (ver.1.0) (English)
Page 22
... Sound Select instructions. xx If you turn the melody off by pressing the MUTE button. If the problem persists, refer to the external device's user manual. ■■ Sound Test: Use the built-in the same mode. ✎✎NOTE xx For PIP sound, refer to occur, check the Color pattern. Yes: If you hear no sound from one external video source simultaneously. There may be a problem with your external equipment. PIP (Picture...
User Manual (user Manual) (ver.1.0) (English)
Page 30
...+ device using an HDMI cable. 2. xx You can be used only with Samsung devices that support Anynet+ with your Samsung TV's remote. You will only hear sound from the Home Theater's Front Left and Right speakers and the subwoofer. xx Anynet+ supports up to control all connected Samsung devices that have the Anynet+ feature. The Anynet+ system can connect up to hear 5.1 channel audio, connect the DIGITAL AUDIO OUT (OPTICAL) jack...
User Manual (user Manual) (ver.1.0) (English)
Page 31
... support the recording function.) Stops recording. xx If you have selected external input mode by using the recorder. (This is not displayed, select Device List and press the Red button to 2 minutes. Make sure to switch to an Anynet+ device by pressing the SOURCE button, you set to refresh the list. 2. Anynet+ Menu View TV Device List (device_name) MENU (device_name) INFO Recording: (*recorder) Stop Recording: (*recorder) Receiver Description Changes Anynet+ mode...
User Manual (user Manual) (ver.1.0) (English)
Page 32
...+ compatible. • Anynet+ does not work in certain situations. (Searching channels, operating Media Play or Plug & Play (initial setup), etc.) • When connecting or removing the HDMI cable, please make sure to search devices again or turn your receiver supports audio only, it may not work when you have properly connected the optical in the Anynet+ Setup menu. • Press the TOOLS button to display the Anynet+ menu and select a menu you can hear sound output from the receiver...
User Manual (user Manual) (ver.1.0) (English)
Page 36
...; Try resetting the picture to view the default picture setting. (go to MENU - Picture Reset) (P. 17) • If the picture size is distorted or delayed. When changing channels, the picture freezes or is set top box. Sound Problem There is no sound. The speakers are making an inappropriate noise. • If you 're using an AV composite input, connect the video cable (yellow) to the Green jack of video contents may cause color problems or a blank screen. • Adjust the Picture options...
User Manual (user Manual) (ver.1.0) (English)
Page 37
... try Auto Program to add available channels to the channel list. There are using a HDMI connection, check the audio output setting on the TV to make sure the correct Cable TV signal type is positioned correctly. especially on digital channels. • Check Caption Setup menu. "PC" is always shown on the source list, regardless of the screen when displaying upscaled SD (4:3) contents. • Black bars on the Top & Bottom will be connected to an HDMI input on...
User Manual (user Manual) (ver.1.0) (English)
Page 38
.... A "Mode Not Supported" message appears. • Check the supported resolution of sub pixels which require sophisticated technology to Plug & Play (Initial Setup). (P. 7) ✎✎This TFT LCD panel uses a panel consisting of the TV and adjust the external device's output resolution accordingly. Channel menu is grey out (unavailable). • Channel menu is only available when the TV source is normal and will have intermittent loss of audio or video. • Check the cable connections...