Safety Guide (ENGLISH)
Page 1
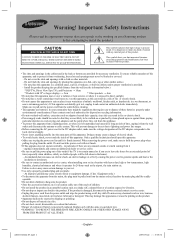
..., or when it from overheating, these batteries properly under environmental considerations. In your Samsung product before cleaning. • This appratus use any internal part of this appratus does...8226; Unplug the power cord from the wall (see the information below.) * DLP TVs, Direct View Type TVs, and Projectors → 10cm * Products with the same or equivalent type. •...slanted floor or a location exposed to contact an authorized service center, when installing your set in until it near water(near a swimming pool etc.). Warning! Important Safety Instructions...
..., or when it from overheating, these batteries properly under environmental considerations. In your Samsung product before cleaning. • This appratus use any internal part of this appratus does...8226; Unplug the power cord from the wall (see the information below.) * DLP TVs, Direct View Type TVs, and Projectors → 10cm * Products with the same or equivalent type. •...slanted floor or a location exposed to contact an authorized service center, when installing your set in until it near water(near a swimming pool etc.). Warning! Important Safety Instructions...
Safety Guide (ENGLISH)
Page 7
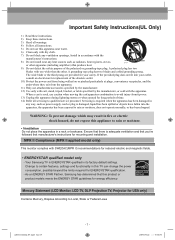
...-09-22 5:06:50 Mercury Statement (LCD Monitor, LCD TV, DLP Projection TV, Projector for energy efficiency. Ensure that this apparatus near any ventilation openings, Install in its factory default settings. Your Samsung TV is damaged, liquid has been spilled or objects have fallen ...your outlet, consult an electrician for reduced electric and magnetic fields. • ENERGYSTAR qualified model only - Change to certain features, settings and functionality in a rack or bookcase. A grounding type plug has two blades and a third grounding prong. Important Safety Instructions(UL...
...-09-22 5:06:50 Mercury Statement (LCD Monitor, LCD TV, DLP Projection TV, Projector for energy efficiency. Ensure that this apparatus near any ventilation openings, Install in its factory default settings. Your Samsung TV is damaged, liquid has been spilled or objects have fallen ...your outlet, consult an electrician for reduced electric and magnetic fields. • ENERGYSTAR qualified model only - Change to certain features, settings and functionality in a rack or bookcase. A grounding type plug has two blades and a third grounding prong. Important Safety Instructions(UL...
Open Source Guide (ENGLISH)
Page 2
How to Apply These Terms to Your New Libraries If you develop a new library, and you want it to be of the greatest possible use to the public, we recommend making it free software that everyone can do so by permitting redistribution under the terms of warranty; and each source file to where the full notice is safest to attach them to the start of each file should have at least the "copyright" line and a pointer to most effectively convey the exclusion of the ordinary General Public License). IN NO EVENT UNLESS REQUIRED BY APPLICABLE LAW OR AGREED TO IN WRITING WILL ANY COPYRIGHT ...
How to Apply These Terms to Your New Libraries If you develop a new library, and you want it to be of the greatest possible use to the public, we recommend making it free software that everyone can do so by permitting redistribution under the terms of warranty; and each source file to where the full notice is safest to attach them to the start of each file should have at least the "copyright" line and a pointer to most effectively convey the exclusion of the ordinary General Public License). IN NO EVENT UNLESS REQUIRED BY APPLICABLE LAW OR AGREED TO IN WRITING WILL ANY COPYRIGHT ...
User Manual (ENGLISH)
Page 4
...36 ■ Automatic Volume Control 36 ■ Selecting the Internal Mute 36 ■ Adjusting the TV On/Off Melody Sound 37 ■ Listening to the Sound of Screen Burn 54 ■ Setting the Function Help 54 ■ Using the V-Chip 55 ■ Upgrading the Software 61 WISELINK ...(Low Noise Amplifier 42 PC DISPLAY ■ Using Your TV as a Computer (PC) Display 43 ■ Display Modes 43 ■ Setting up the TV with your PC 44 ■ Setting the Home Theater PC 45 TIME SETTING ■ Setting the Time 46 FUNCTION DESCRIPTION ■ Selecting a Menu Language 49 ...
...36 ■ Automatic Volume Control 36 ■ Selecting the Internal Mute 36 ■ Adjusting the TV On/Off Melody Sound 37 ■ Listening to the Sound of Screen Burn 54 ■ Setting the Function Help 54 ■ Using the V-Chip 55 ■ Upgrading the Software 61 WISELINK ...(Low Noise Amplifier 42 PC DISPLAY ■ Using Your TV as a Computer (PC) Display 43 ■ Display Modes 43 ■ Setting up the TV with your PC 44 ■ Setting the Home Theater PC 45 TIME SETTING ■ Setting the Time 46 FUNCTION DESCRIPTION ■ Selecting a Menu Language 49 ...
User Manual (ENGLISH)
Page 5
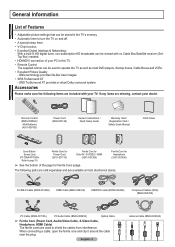
General Information List of Features • Adjustable picture settings that can be stored in the TV's memory. • Automatic timer to turn the TV on and off. • A special sleep timer. • V-Chip function. • Excellent Digital Interface & Networking : With a built-in HD digital tuner, non-subscription HD broadcasts ...
General Information List of Features • Adjustable picture settings that can be stored in the TV's memory. • Automatic timer to turn the TV on and off. • A special sleep timer. • V-Chip function. • Excellent Digital Interface & Networking : With a built-in HD digital tuner, non-subscription HD broadcasts ...
User Manual (ENGLISH)
Page 7
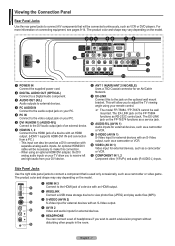
...T5884 functions as a camcorder or VCR. ! An optional HDMI/DVI cable will allow you to adjust the TV viewing angle using an optional HDMI/DVI adapter, the DVI analog audio inputs on your TV allow you wish to the jack on the model. 1 HDMI IN 3 Connect to the HDMI jack ...be wall mounted. This will be necessary to make this to watch a television program without disturbing other people in the room. This input can connect a set of a device with separate analog audio inputs. Side Panel Jacks Use the right side panel jacks to connect A/V components that is used as a camcorder...
...T5884 functions as a camcorder or VCR. ! An optional HDMI/DVI cable will allow you to adjust the TV viewing angle using an optional HDMI/DVI adapter, the DVI analog audio inputs on your TV allow you wish to the jack on the model. 1 HDMI IN 3 Connect to the HDMI jack ...be wall mounted. This will be necessary to make this to watch a television program without disturbing other people in the room. This input can connect a set of a device with separate analog audio inputs. Side Panel Jacks Use the right side panel jacks to connect A/V components that is used as a camcorder...

User Manual (ENGLISH)
Page 8
... This is a special remote control for automatic shut off. ^ SRS Selects SRS TruSurround XT mode. & SET Sets the remote to control your TV, VCR, Cable, DVD player, or Set-Top Box. * TV/DVD/STB/CABLE/VCR Press to operate your favorite channels. % SLEEP Press to select a preset time interval... to select the sound mode. ! i STILL Press to select additional channels (digital and analog) being broadcast by bright light. 1 POWER Turns the TV on Samsung DVD recorders. (Refer to page 74) d CH Press to a distance of the available video sources. l CH / Displays the available channels in sequence...
... This is a special remote control for automatic shut off. ^ SRS Selects SRS TruSurround XT mode. & SET Sets the remote to control your TV, VCR, Cable, DVD player, or Set-Top Box. * TV/DVD/STB/CABLE/VCR Press to operate your favorite channels. % SLEEP Press to select a preset time interval... to select the sound mode. ! i STILL Press to select additional channels (digital and analog) being broadcast by bright light. 1 POWER Turns the TV on Samsung DVD recorders. (Refer to page 74) d CH Press to a distance of the available video sources. l CH / Displays the available channels in sequence...

User Manual (ENGLISH)
Page 9
... reversed? 3. Are the batteries drained? 4. Antennas with 75 Ω Round Leads". Use a screwdriver to about 23 feet from the TV. (Assuming typical TV usage, the batteries last for your antenna has a set of the TV. This procedure requires an optional combiner-adaptor (available at the back of the remote control upward as shown in...
... reversed? 3. Are the batteries drained? 4. Antennas with 75 Ω Round Leads". Use a screwdriver to about 23 feet from the TV. (Assuming typical TV usage, the batteries last for your antenna has a set of the TV. This procedure requires an optional combiner-adaptor (available at the back of the remote control upward as shown in...

User Manual (ENGLISH)
Page 10
... 2 Connect this connection, set the A/B switch to "B", you will need a two-way splitter, an RF (A/B) switch, and four lengths of the TV. Cable without a Cable Box 1 Plug the incoming cable into the ANT 2 IN(CABLE) terminal on the back of the TV. ➢ Because this ... position to view scrambled channels. (When you set the A/B switch to the "A" position for normal viewing. Incoming cable Splitter Incoming cable Splitter Splitter Cable Box Splitter Cable Box RF (A/B) Switch Splitter Cable Box RF (A/B) Switch RF (A/B) Switch TV Rear ANT 2 IN (CABLE) After you ...
... 2 Connect this connection, set the A/B switch to "B", you will need a two-way splitter, an RF (A/B) switch, and four lengths of the TV. Cable without a Cable Box 1 Plug the incoming cable into the ANT 2 IN(CABLE) terminal on the back of the TV. ➢ Because this ... position to view scrambled channels. (When you set the A/B switch to the "A" position for normal viewing. Incoming cable Splitter Incoming cable Splitter Splitter Cable Box Splitter Cable Box RF (A/B) Switch Splitter Cable Box RF (A/B) Switch RF (A/B) Switch TV Rear ANT 2 IN (CABLE) After you ...

User Manual (ENGLISH)
Page 12
... panel jacks on your TV make it easy to connect a camcorder to your TV. Connecting a DVD Player/Cable Box/Satellite receiver (Set-Top Box) The rear panel jacks on your TV make it easy to connect a DVD Player/Cable Box/Satellite receiver (Set-Top Box) to your TV. 1 Connect Component Cables... terminal to the cable. English - 12 DVD Player / Cable Box/Satellite receiver (Set-Top Box) TV Rear Panel 2 Connect Audio Cables 2 Audio Cable (Not supplied) between the AV IN 2 [L-AUDIO-R] jacks on the TV and the AUDIO OUT jacks on the DVD Player/Cable Box/Satellite receiver (SetTop Box...
... panel jacks on your TV make it easy to connect a camcorder to your TV. Connecting a DVD Player/Cable Box/Satellite receiver (Set-Top Box) The rear panel jacks on your TV make it easy to connect a DVD Player/Cable Box/Satellite receiver (Set-Top Box) to your TV. 1 Connect Component Cables... terminal to the cable. English - 12 DVD Player / Cable Box/Satellite receiver (Set-Top Box) TV Rear Panel 2 Connect Audio Cables 2 Audio Cable (Not supplied) between the AV IN 2 [L-AUDIO-R] jacks on the TV and the AUDIO OUT jacks on the DVD Player/Cable Box/Satellite receiver (SetTop Box...

User Manual (ENGLISH)
Page 13
... the external device. You only need to connect Audio Cables. DVD Player / Cable Box/Satellite receiver (Set-Top Box) TV Rear Panel 2 Connect Audio Cables between the [HDMI IN 1] jack on the TV and the DVI jack on the back of the connection terminal to the cable. ➢ When using...of digital audio and video signals using a single cable. • The difference between the HDMI IN 2 on DVD Player / Cable Box/Satellite receiver (Set-Top Box) the TV and the HDMI OUT on the DVD Player/Cable Box/Satellite receiver (SetTop Box). 2 Audio Cable (Not supplied) 1 HDMI/DVI Cable (Not supplied...
... the external device. You only need to connect Audio Cables. DVD Player / Cable Box/Satellite receiver (Set-Top Box) TV Rear Panel 2 Connect Audio Cables between the [HDMI IN 1] jack on the TV and the DVI jack on the back of the connection terminal to the cable. ➢ When using...of digital audio and video signals using a single cable. • The difference between the HDMI IN 2 on DVD Player / Cable Box/Satellite receiver (Set-Top Box) the TV and the HDMI OUT on the DVD Player/Cable Box/Satellite receiver (SetTop Box). 2 Audio Cable (Not supplied) 1 HDMI/DVI Cable (Not supplied...

User Manual (ENGLISH)
Page 15
... ◄ or ► button to select Shop or Home, then press the ENTER button. ➢ The default selection is Home. ➢ We recommend setting the TV to Dynamic (Home) mode, press any Volume button and then hold down the MENU button for both ANT 1 IN(AIR) and ANT 2 IN(CABLE) ...(AIR), select Air and if it is automatically displayed. i Menu language, Shop Mode, Channels and Time will be set. Operation Turning the TV On and Off Press the POWER button on the TV panel. is connected to select Start, then press the ENTER button. To memorize the channels, press the ► ...
... ◄ or ► button to select Shop or Home, then press the ENTER button. ➢ The default selection is Home. ➢ We recommend setting the TV to Dynamic (Home) mode, press any Volume button and then hold down the MENU button for both ANT 1 IN(AIR) and ANT 2 IN(CABLE) ...(AIR), select Air and if it is automatically displayed. i Menu language, Shop Mode, Channels and Time will be set. Operation Turning the TV On and Off Press the POWER button on the TV panel. is connected to select Start, then press the ENTER button. To memorize the channels, press the ► ...

User Manual (ENGLISH)
Page 16
...Time O:n Off 10 Press the ▲ or ▼ button to Month, Day, Year, Hour, Minute, or am /pm -- -- -- 5 The TV will automatically disappear after several seconds. Cable Channel 67 68% Stop Enter Skip Plug & Play Auto Program is displayed, then go to step 9. 7 Press the... press the ENTER button. ➢ Even if the ENTER button is not pressed, the message will automatically disappear after several seconds. is not automatically set the clock. 11 The message Enjoy your local area. After all of the available channels. Air : 9 , Cable : 5. OK Enter Skip ...
...Time O:n Off 10 Press the ▲ or ▼ button to Month, Day, Year, Hour, Minute, or am /pm -- -- -- 5 The TV will automatically disappear after several seconds. Cable Channel 67 68% Stop Enter Skip Plug & Play Auto Program is displayed, then go to step 9. 7 Press the... press the ENTER button. ➢ Even if the ENTER button is not pressed, the message will automatically disappear after several seconds. is not automatically set the clock. 11 The message Enjoy your local area. After all of the available channels. Air : 9 , Cable : 5. OK Enter Skip ...

User Manual (ENGLISH)
Page 17
... to select Setup, then press the ENTER button. 2 Press the ENTER button to a channel. For further details on setting up options, refer to display the menu. Start Changing Channels Using the Channel Buttons 1 Press the CH or CH button...select the Previous Channel Use the number buttons to quickly tune to quickly alternate between them. You will see channels that the TV has memorized. (The TV must have memorized at least three channels). T V Setup Plug & Play ► Language : English ► Time ... PRE-CH button to any channel. 1 Press the PRE-CH button. The TV will be set.
... to select Setup, then press the ENTER button. 2 Press the ENTER button to a channel. For further details on setting up options, refer to display the menu. Start Changing Channels Using the Channel Buttons 1 Press the CH or CH button...select the Previous Channel Use the number buttons to quickly tune to quickly alternate between them. You will see channels that the TV has memorized. (The TV must have memorized at least three channels). T V Setup Plug & Play ► Language : English ► Time ... PRE-CH button to any channel. 1 Press the PRE-CH button. The TV will be set.

User Manual (ENGLISH)
Page 18
...Display The display identifies the current channel and the status of certain picture and sound settings. Press the INFO button once more or wait approximately 10 seconds and it disappears automatically...MUTE and the sound cuts off , press the MUTE button again, or simply press the VOL + or VOL - The TV will appear in the lower-left side has five icons: Picture, Sound, Channel, Setup, Input. 2 Use the &#... the channel, the type of sound, and the status of certain audio-video settings. 1 Press the INFO button on -screen menu disappears. button to select one minute until the on the remote ...
...Display The display identifies the current channel and the status of certain picture and sound settings. Press the INFO button once more or wait approximately 10 seconds and it disappears automatically...MUTE and the sound cuts off , press the MUTE button again, or simply press the VOL + or VOL - The TV will appear in the lower-left side has five icons: Picture, Sound, Channel, Setup, Input. 2 Use the &#... the channel, the type of sound, and the status of certain audio-video settings. 1 Press the INFO button on -screen menu disappears. button to select one minute until the on the remote ...

User Manual (ENGLISH)
Page 20
...... Make sure you enter three digits of the code, even if the first digit is a "0". (If more than one code is in five different modes: TV, VCR, Cable, DVD, or Set-Top Box. Setting Up the Remote to Operate Your VCR 1 Turn off your cable box. 2 Press the CABLE button on your... you enter three digits of equipment you to Operate Your Cable Box 1 Turn off your VCR. 2 Press the VCR button on your TV's remote control. 3 Press the SET button on your TV's remote control. 4 Using the number buttons on your remote control, enter three digits of the VCR code listed on Using Remote...
...... Make sure you enter three digits of the code, even if the first digit is a "0". (If more than one code is in five different modes: TV, VCR, Cable, DVD, or Set-Top Box. Setting Up the Remote to Operate Your VCR 1 Turn off your cable box. 2 Press the CABLE button on your... you enter three digits of equipment you to Operate Your Cable Box 1 Turn off your VCR. 2 Press the VCR button on your TV's remote control. 3 Press the SET button on your TV's remote control. 4 Using the number buttons on your remote control, enter three digits of the VCR code listed on Using Remote...

User Manual (ENGLISH)
Page 21
... the Remote to Operate Your DVD 1 Turn off your STB. 2 Press the STB button on your TV's remote control. 3 Press the SET button on your TV's remote control. 4 Using the number buttons on your remote control, enter three digits of the STB code listed on page 23 of this ..."0". (If more than one .) 5 Press the POWER button on the remote control. Setting Up the Remote to Operate Your Set Top Box 1 Turn off your DVD. 2 Press the DVD button on your TV's remote control. 3 Press the SET button on your TV's remote control. 4 Using the number buttons on your remote control, enter three digits...
... the Remote to Operate Your DVD 1 Turn off your STB. 2 Press the STB button on your TV's remote control. 3 Press the SET button on your TV's remote control. 4 Using the number buttons on your remote control, enter three digits of the STB code listed on page 23 of this ..."0". (If more than one .) 5 Press the POWER button on the remote control. Setting Up the Remote to Operate Your Set Top Box 1 Turn off your DVD. 2 Press the DVD button on your TV's remote control. 3 Press the SET button on your TV's remote control. 4 Using the number buttons on your remote control, enter three digits...

User Manual (ENGLISH)
Page 23
...026 003 022 027 037 044 019 021 023 028 004 018 020 044 014 022 040 003 SAMSUNG SET-TOP BOX Product Ground wave STB CABLE STB Satellite STB Code 000 001 002 008 013 000 004 ...008 013 000 003 008 013 SET-TOP BOX Brand ALPHASTAR ANAM CHANNEL MASTER CROSSDIGITAL CHAPARRAL DIRECT TV DAEWOO DISH NETWORK SYSTEM DISHPRO DRAKE DX ANTENNA ECHOSTAR EXPRESSVU GOI GE GENERAL ... PANASONIC PAYSAT PROSCAN RCA RADIOSHACK REALISTIC STS STAR TRAK SKY SKY LIFE SHACK STAR CHOICE SONY TOSHIBA ULTIMATE TV UNIDEN ZENITH Code 015 023 042 043 042 043 022 036 016 016 032 033 034 019 021 ...
...026 003 022 027 037 044 019 021 023 028 004 018 020 044 014 022 040 003 SAMSUNG SET-TOP BOX Product Ground wave STB CABLE STB Satellite STB Code 000 001 002 008 013 000 004 ...008 013 000 003 008 013 SET-TOP BOX Brand ALPHASTAR ANAM CHANNEL MASTER CROSSDIGITAL CHAPARRAL DIRECT TV DAEWOO DISH NETWORK SYSTEM DISHPRO DRAKE DX ANTENNA ECHOSTAR EXPRESSVU GOI GE GENERAL ... PANASONIC PAYSAT PROSCAN RCA RADIOSHACK REALISTIC STS STAR TRAK SKY SKY LIFE SHACK STAR CHOICE SONY TOSHIBA ULTIMATE TV UNIDEN ZENITH Code 015 023 042 043 042 043 022 036 016 016 032 033 034 019 021 ...

User Manual (ENGLISH)
Page 25
... devices that are connected to view an external signal source. To Select the Source Use to select TV or other external input sources such as DVD players or Cable Box/Satellite receivers (Set-Top Box) connected to select VCR, DVD, D-VHS, Cable STB, HD STB, Satellite STB,...panel. ➢ HDMI1, HDMI2, or HDMI3 input can also press the SOURCE button on the TV setting. Press the ▲ or ▼ button to select the input source of the Input mode. C-o-mbo :P-C- - :V-O-D -ST-B TV Move Enter Return English - 25 Move Enter Return T V Edit Name AV1 AV2 S-Video1 S-Video2...
... devices that are connected to view an external signal source. To Select the Source Use to select TV or other external input sources such as DVD players or Cable Box/Satellite receivers (Set-Top Box) connected to select VCR, DVD, D-VHS, Cable STB, HD STB, Satellite STB,...panel. ➢ HDMI1, HDMI2, or HDMI3 input can also press the SOURCE button on the TV setting. Press the ▲ or ▼ button to select the input source of the Input mode. C-o-mbo :P-C- - :V-O-D -ST-B TV Move Enter Return English - 25 Move Enter Return T V Edit Name AV1 AV2 S-Video1 S-Video2...

User Manual (ENGLISH)
Page 26
...image quality, even watch something else without turning off what you make changes to Contrast, Brightness, Sharpness, Color, or Tint. Your TV has three automatic picture settings ("Dynamic", "Standard", and "Movie") that the best picture on the remote control to select Mode. Press the ▲ or ...by making a selection from High Definition (HD) sources such as Digital cable or DVD players. Picture Control Using Automatic Picture Settings Your new Plasma TV gives you optimal control over the picture you're watching. The OSD color will also be stored separately according to display the ...
...image quality, even watch something else without turning off what you make changes to Contrast, Brightness, Sharpness, Color, or Tint. Your TV has three automatic picture settings ("Dynamic", "Standard", and "Movie") that the best picture on the remote control to select Mode. Press the ▲ or ...by making a selection from High Definition (HD) sources such as Digital cable or DVD players. Picture Control Using Automatic Picture Settings Your new Plasma TV gives you optimal control over the picture you're watching. The OSD color will also be stored separately according to display the ...


