Cl21m6w Video - Samsung CL 21M6W
Cl21m6w Video

Related Manual Pages


Similar Questions

How To Hook-up A Magnavox Dvd Video/vhs Combi Mdv 560vr
(Posted by billbonnen 12 years ago)

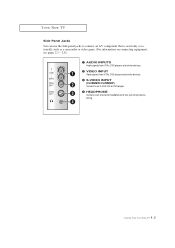
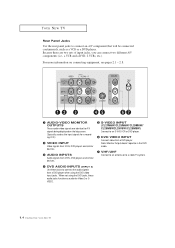
Audio Video Input
how many inputs does this tv have and what are they?
how many inputs does this tv have and what are they?
(Posted by manjukarthick 12 years ago)