Operation Manual
Page 2
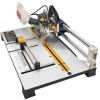
... Service Center. makes no warranties, representations or promises as to the quality or performance of its use more pleasant and enjoyable. warranty RYOBI® POWER TOOL - Box 1207, Anderson, SC 29622-1207, by calling 1-800-525-2579 or by contacting a service representative ...Assembly...10-12 Operation...13-15 Maintenance...16 Accessories...16 Figure Numbers (Illustrations)...17-22 Parts Ordering / Service...Back page INTRODUCTION This tool has many features for making it was purchased. The replacement power tool will do so without ...
... Service Center. makes no warranties, representations or promises as to the quality or performance of its use more pleasant and enjoyable. warranty RYOBI® POWER TOOL - Box 1207, Anderson, SC 29622-1207, by calling 1-800-525-2579 or by contacting a service representative ...Assembly...10-12 Operation...13-15 Maintenance...16 Accessories...16 Figure Numbers (Illustrations)...17-22 Parts Ordering / Service...Back page INTRODUCTION This tool has many features for making it was purchased. The replacement power tool will do so without ...
Operation Manual
Page 3
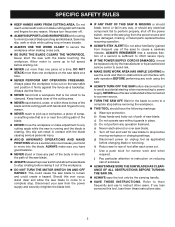
...removed from receptacle. Use only a cord heavy enough to carry the current your hand and frees both hands to hold work into moving parts, breakage of parts, mounting and any tool. USE RECOMMENDED ACCESSORIES. If in electric shock, fire and/or serious personal injury. Use clamps ... Keep tools sharp and clean for lubricating and changing accessories. DISCONNECT TOOLS. Check for use of the tool, a guard or other part that can get caught and draw you into a blade or cutter against the direction of rotation of personal injury. USE THE RIGHT ...
...removed from receptacle. Use only a cord heavy enough to carry the current your hand and frees both hands to hold work into moving parts, breakage of parts, mounting and any tool. USE RECOMMENDED ACCESSORIES. If in electric shock, fire and/or serious personal injury. Use clamps ... Keep tools sharp and clean for lubricating and changing accessories. DISCONNECT TOOLS. Check for use of the tool, a guard or other part that can get caught and draw you into a blade or cutter against the direction of rotation of personal injury. USE THE RIGHT ...
Operation Manual
Page 4
...with the accessory. DOUBLE CHECK ALL SETUPS. Normal sparking of your saw or workpiece before cutting. Never touch blade or other moving parts during use. NEVER START A TOOL WHEN ANY ROTATiNG COMPONENT IS IN CONTACT WITH THE WORKPIECE. DO NOT operate A tool while...use blades with saw is 5 in a polarized outlet only one blade is wider than the other parts may cause the risk of accessories that are doing and use only identical replacement parts. To reduce the risk of electric shock, this manual or addendums. Use of personal injury. Repair ...
...with the accessory. DOUBLE CHECK ALL SETUPS. Normal sparking of your saw or workpiece before cutting. Never touch blade or other moving parts during use. NEVER START A TOOL WHEN ANY ROTATiNG COMPONENT IS IN CONTACT WITH THE WORKPIECE. DO NOT operate A tool while...use blades with saw is 5 in a polarized outlet only one blade is wider than the other parts may cause the risk of accessories that are doing and use only identical replacement parts. To reduce the risk of electric shock, this manual or addendums. Use of personal injury. Repair ...
Operation Manual
Page 5
... . Wait for saw plug from the power supply and securely retighten the blade bolt. If any way, or should have damaged, missing, or failed parts replaced before moving workpiece or changing settings. h) Return saw to rear of saw . ALWAYS TURN OFF THE SAW before raising it to a complete stop... is rotating. c) Do not operate saw blade. g) Disconnect power (or unplug tool as a backstop. If you have good balance. NEVER stand or have any part of the body in any part of the blade. NEVER move into the blade.
... . Wait for saw plug from the power supply and securely retighten the blade bolt. If any way, or should have damaged, missing, or failed parts replaced before moving workpiece or changing settings. h) Return saw to rear of saw . ALWAYS TURN OFF THE SAW before raising it to a complete stop... is rotating. c) Do not operate saw blade. g) Disconnect power (or unplug tool as a backstop. If you have good balance. NEVER stand or have any part of the body in any part of the blade. NEVER move into the blade.
Operation Manual
Page 7
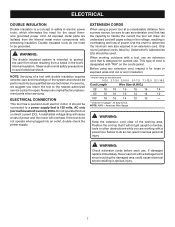
... usual threewire grounded power cord. Failure to do not need for outside use. WARNING: Check extension cords before each use original factory replacement parts when servicing. Double insulated tools do so can result in serious personal injury. Never use tool with a tool, use an extension cord ...from a power source, be sure to use an extension cord that it for repair. This type of power. All exposed metal parts are working area. ELECTRICAL DOUBLE INSULATION Double insulation is a concept in safety in electric power tools, which eliminates the need to be grounded....
... usual threewire grounded power cord. Failure to do not need for outside use. WARNING: Check extension cords before each use original factory replacement parts when servicing. Double insulated tools do so can result in serious personal injury. Never use tool with a tool, use an extension cord ...from a power source, be sure to use an extension cord that it for repair. This type of power. All exposed metal parts are working area. ELECTRICAL DOUBLE INSULATION Double insulation is a concept in safety in electric power tools, which eliminates the need to be grounded....
Operation Manual
Page 10
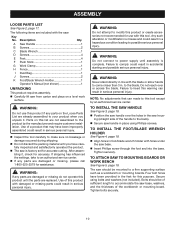
...power supply until you unpack it , check for accuracy. WARNING: Do not connect to an authorized service center. If any parts are damaged or missing do not operate this tool except by the manufacturer and require customer installation. WARNING: Never stand directly in line...not shown 1 UNPACKING This product requires assembly. Carefully lift saw to the product by an authorized service center. Warning: If any parts are damaged or missing, please call 1-800-525-2579 for use this list are already assembled to the blade. Secure using Phillips screws. ...
...power supply until you unpack it , check for accuracy. WARNING: Do not connect to an authorized service center. If any parts are damaged or missing do not operate this tool except by the manufacturer and require customer installation. WARNING: Never stand directly in line...not shown 1 UNPACKING This product requires assembly. Carefully lift saw to the product by an authorized service center. Warning: If any parts are damaged or missing, please call 1-800-525-2579 for use this list are already assembled to the blade. Secure using Phillips screws. ...
Operation Manual
Page 14
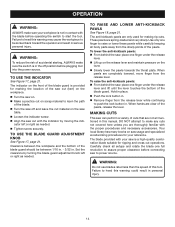
cator left or right as needed . DO NOT attempt to raise or lower these pawls while carefully keeping all body parts away from the sharp points of accidental starting, Always make any cuts not covered here unless you are completely lowered, move finger from the release ...
cator left or right as needed . DO NOT attempt to raise or lower these pawls while carefully keeping all body parts away from the sharp points of accidental starting, Always make any cuts not covered here unless you are completely lowered, move finger from the release ...
Operation Manual
Page 16
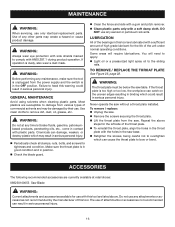
...condition and in position. Check the blade guard. Clean the fence and rails with a gum and pitch remover. Clean plastic parts only with ANSI Z87.1 during product operation. To remove / replace: Unplug the saw. Remove the screws securing the throat plate. ... throat plate from various types of commercial solvents and may be below the saw without a throat plate installed. Do not use any other parts may result in serious personal injury. Periodically check all clamps, nuts, bolts, and screws for tightness and condition. ACCESSORIES The ...
...condition and in position. Check the blade guard. Clean the fence and rails with a gum and pitch remover. Clean plastic parts only with ANSI Z87.1 during product operation. To remove / replace: Unplug the saw. Remove the screws securing the throat plate. ... throat plate from various types of commercial solvents and may be below the saw without a throat plate installed. Do not use any other parts may result in serious personal injury. Periodically check all clamps, nuts, bolts, and screws for tightness and condition. ACCESSORIES The ...
Repair Sheet
Page 3
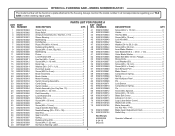
... 089230100052 Inner Blade Washer 1 50 089230100053 Saw Blade (D5/8 in. × D5 in all correspondence regarding your TILE SAW or when ordering repair parts. Key Nos. 4-13 1 4 089230100001 Sleeve Bearing 1 5 089230100002 Ball Bearing 1 6 089230100003 Felt Washer 1 7 089230100005 Round Pin (M3 x...1 089230100063 Power Cord 1 2 089230100062 Bend Relief 1 3 089230100703 Armature Assembly (Inc. NUMBER DESCRIPTION QTY. PARTS LIST FOR FIGURE A KEY PART KEY PART NO. RYOBI 5 in. MODEL NUMBER RLS1351 The model number will be found on a plate attached to the housing.
... 089230100052 Inner Blade Washer 1 50 089230100053 Saw Blade (D5/8 in. × D5 in all correspondence regarding your TILE SAW or when ordering repair parts. Key Nos. 4-13 1 4 089230100001 Sleeve Bearing 1 5 089230100002 Ball Bearing 1 6 089230100003 Felt Washer 1 7 089230100005 Round Pin (M3 x...1 089230100063 Power Cord 1 2 089230100062 Bend Relief 1 3 089230100703 Armature Assembly (Inc. NUMBER DESCRIPTION QTY. PARTS LIST FOR FIGURE A KEY PART KEY PART NO. RYOBI 5 in. MODEL NUMBER RLS1351 The model number will be found on a plate attached to the housing.

Repair Sheet
Page 5
...Side Handle 1 53 089230100904 Logo Label (Side Cover 1 54 089230100100 Front Slide Rail Holder Bracket 1 55 089230100701 Fence Assembly 1 5 MODEL NUMBER RLS1351 The model number will be found on a plate attached to the housing. Always mention the model number in . Hd 3 34 089230100094 Carriage Plate...30 089230100105 Stop Pin 1 31 089230100901 Data Label 1 32 089230100095 Sliding Lock Knob 1 33 089230100093 Screw (M6 × 20 mm, Soc. PARTS LIST FOR FIGURE B KEY PART KEY PART NO. RYOBI 5 in all correspondence regarding your TILE SAW or when ordering repair...
...Side Handle 1 53 089230100904 Logo Label (Side Cover 1 54 089230100100 Front Slide Rail Holder Bracket 1 55 089230100701 Fence Assembly 1 5 MODEL NUMBER RLS1351 The model number will be found on a plate attached to the housing. Always mention the model number in . Hd 3 34 089230100094 Carriage Plate...30 089230100105 Stop Pin 1 31 089230100901 Data Label 1 32 089230100095 Sliding Lock Knob 1 33 089230100093 Screw (M6 × 20 mm, Soc. PARTS LIST FOR FIGURE B KEY PART KEY PART NO. RYOBI 5 in all correspondence regarding your TILE SAW or when ordering repair...


