
Operating Instructions
Page 1
Operating Instructions Hardware Guide 1 Guide to the Printer 2 Installing Options 3 Connecting the Printer Cables 4 Configuration 5 Paper and Other Media 6 Replacing Consumables 7 Cleaning the Printer 8 Adjusting the Printer 9 Troubleshooting 10 Removing Misfed Paper 11 Appendix Read this manual carefully before you use , be sure to read the Safety Information before using the machine. For safe and correct use this machine and keep it handy for future reference.
Operating Instructions Hardware Guide 1 Guide to the Printer 2 Installing Options 3 Connecting the Printer Cables 4 Configuration 5 Paper and Other Media 6 Replacing Consumables 7 Cleaning the Printer 8 Adjusting the Printer 9 Troubleshooting 10 Removing Misfed Paper 11 Appendix Read this manual carefully before you use , be sure to read the Safety Information before using the machine. For safe and correct use this machine and keep it handy for future reference.

Operating Instructions
Page 2
.... and other countries. Adobe®, PostScript®, Acrobat®, PageMaker® and Adobe Type Manager are registered trademarks of Windows NT® 4.0 are owned by Ricoh Company, Ltd. is a registered trademark of Xerox Corporation. Ethernet is under license.
.... and other countries. Adobe®, PostScript®, Acrobat®, PageMaker® and Adobe Type Manager are registered trademarks of Windows NT® 4.0 are owned by Ricoh Company, Ltd. is a registered trademark of Xerox Corporation. Ethernet is under license.

Operating Instructions
Page 3
... Direct Print Card or Security Card 56 3. Installing Options Available Options...21 Order of WARNING and CAUTION Labels 5 Manuals for This Printer...7 How to the Printer Exterior: Front View...11 Exterior: Rear View...13 Interior...15 Control Panel...17 Display Panel...19 Reading the Display and Using Keys......20 2. Guide to Read This Manual...8 Description for the Specified Model...9 Installing the Operating Instructions...10 1. Connecting the Printer Cables Ethernet Cable Connection...59 Reading the LED Lamps...61 USB Cable Connection...62 Digital Camera Connection...63 1
... Direct Print Card or Security Card 56 3. Installing Options Available Options...21 Order of WARNING and CAUTION Labels 5 Manuals for This Printer...7 How to the Printer Exterior: Front View...11 Exterior: Rear View...13 Interior...15 Control Panel...17 Display Panel...19 Reading the Display and Using Keys......20 2. Guide to Read This Manual...8 Description for the Specified Model...9 Installing the Operating Instructions...10 1. Connecting the Printer Cables Ethernet Cable Connection...59 Reading the LED Lamps...61 USB Cable Connection...62 Digital Camera Connection...63 1

Operating Instructions
Page 4
... 3)...83 Bypass Tray...83 Paper Recommendations...86 Loading Paper...86 Storing Paper...86 Types of Paper and Other Media...86 Paper Not Supported by This Printer...95 Print Area...95 Loading Paper...97 Loading Paper into the Paper Tray, 500/1000-sheet Paper Feed Unit 97 Loading Paper into the 2000...
... 3)...83 Bypass Tray...83 Paper Recommendations...86 Loading Paper...86 Storing Paper...86 Types of Paper and Other Media...86 Paper Not Supported by This Printer...95 Print Area...95 Loading Paper...97 Loading Paper into the Paper Tray, 500/1000-sheet Paper Feed Unit 97 Loading Paper into the 2000...

Operating Instructions
Page 5
... Punch Waste...194 When the Booklet Finisher is Installed...147 7. Adjusting the Printer Adjusting the Color Registration...159 Correcting the Color Gradation...161 Setting the Gradation Correction Value 161 Viewing the Color Calibration Sample Sheet and Gradation Correction Sheet 163 Resetting the Gradation Correction Value ...140 Adding Staples...142 When the Booklet Finisher is Installed...143 When the 2 Tray Finisher is Installed...194 3 Cleaning the Printer Cautions When Cleaning...151 Cleaning the Friction Pads...152 Paper Tray, 500/1000-sheet Paper Feed Unit 152 2000-sheet Paper ...
... Punch Waste...194 When the Booklet Finisher is Installed...147 7. Adjusting the Printer Adjusting the Color Registration...159 Correcting the Color Gradation...161 Setting the Gradation Correction Value 161 Viewing the Color Calibration Sample Sheet and Gradation Correction Sheet 163 Resetting the Gradation Correction Value ...140 Adding Staples...142 When the Booklet Finisher is Installed...143 When the 2 Tray Finisher is Installed...194 3 Cleaning the Printer Cautions When Cleaning...151 Cleaning the Friction Pads...152 Paper Tray, 500/1000-sheet Paper Feed Unit 152 2000-sheet Paper ...

Operating Instructions
Page 6
... Finisher is Installed...213 Paper Misfeed Message (Y)...217 Paper Misfeed Message (Z)...218 Duplex Print Always Misfeeds...220 11. Appendix Moving and Transporting the Printer...223 Moving the Printer...223 Consumables...226 Toner...226 Photo Conductor Unit...227 Waste Toner Bottle...227 Staple Cartridge...227 Intermediate Transfer Unit...228 Fusing Unit...228 Specifications...
... Finisher is Installed...213 Paper Misfeed Message (Y)...217 Paper Misfeed Message (Z)...218 Duplex Print Always Misfeeds...220 11. Appendix Moving and Transporting the Printer...223 Moving the Printer...223 Consumables...226 Toner...226 Photo Conductor Unit...227 Waste Toner Bottle...227 Staple Cartridge...227 Intermediate Transfer Unit...228 Fusing Unit...228 Specifications...

Operating Instructions
Page 7
For safety, please follow the instructions and handle the machine as indicated. ATU082S 5 Positions of WARNING and CAUTION Labels This machine has labels for WARNING and CAUTION at the positions shown below.
For safety, please follow the instructions and handle the machine as indicated. ATU082S 5 Positions of WARNING and CAUTION Labels This machine has labels for WARNING and CAUTION at the positions shown below.

Operating Instructions
Page 9
... Contains information about safe usage of the machine. Also refer to this machine. Manuals for This Printer Refer to each manual as setting user and administrator authentication. 7 Quick Installation Guide Contains procedures for removing the printer from its box, connecting it to a computer, and installing its security functions. Hardware Guide (this . To...
... Contains information about safe usage of the machine. Also refer to this machine. Manuals for This Printer Refer to each manual as setting user and administrator authentication. 7 Quick Installation Guide Contains procedures for removing the printer from its box, connecting it to a computer, and installing its security functions. Hardware Guide (this . To...

Operating Instructions
Page 10
Indicates supplementary explanations of keys on resolving user errors. This symbol is located at the end of data. Indicates where you can find further relevant information. [ ] Indicates the names of keys on the machine's display panel. [ ] Indicates the names of the machine's functions, and instructions on the machine's control panel. 8 How to Read This Manual This manual uses the following symbols: • Indicates a potentially hazardous situation which, if instructions are not followed, could result in death or serious injury. • Indicates a potentially hazardous ...
Indicates supplementary explanations of keys on resolving user errors. This symbol is located at the end of data. Indicates where you can find further relevant information. [ ] Indicates the names of keys on the machine's display panel. [ ] Indicates the names of the machine's functions, and instructions on the machine's control panel. 8 How to Read This Manual This manual uses the following symbols: • Indicates a potentially hazardous situation which, if instructions are not followed, could result in death or serious injury. • Indicates a potentially hazardous ...

Operating Instructions
Page 11
ATU088S 9 This indicates information about the 120 V model printer. Read if you have purchased this model. • Check the label on the rear of the printer to 240 V model printer. Description for the Specified Model In this model. Read if you have purchased this manual, the following symbols indicate information that relates to a specific printer model. This indicates information about the 220 to identify the printer's model.
ATU088S 9 This indicates information about the 120 V model printer. Read if you have purchased this model. • Check the label on the rear of the printer to 240 V model printer. Description for the Specified Model In this model. Read if you have purchased this manual, the following symbols indicate information that relates to a specific printer model. This indicates information about the 220 to identify the printer's model.

Operating Instructions
Page 12
... Internet Explorer 5.5 SP2 or higher • Firefox 1.0 or higher 1. Installing the Operating Instructions The CD-ROM "Manuals" provided with this printer driver, and then click [Uninstall]. The installer starts. Auto Run may not work under certain operating system settings. Click [Install manuals]. ...the manuals: a standard version and a simpler version. In this case, launch "Setup.exe" in the [Start] menu, select this printer contains HTML version Operating Instructions. Follow the instructions below to complete the installation. 6. Follow the instructions on "index.htm". 10 Quit ...
... Internet Explorer 5.5 SP2 or higher • Firefox 1.0 or higher 1. Installing the Operating Instructions The CD-ROM "Manuals" provided with this printer driver, and then click [Uninstall]. The installer starts. Auto Run may not work under certain operating system settings. Click [Install manuals]. ...the manuals: a standard version and a simpler version. In this case, launch "Setup.exe" in the [Start] menu, select this printer contains HTML version Operating Instructions. Follow the instructions below to complete the installation. 6. Follow the instructions on "index.htm". 10 Quit ...

Operating Instructions
Page 13
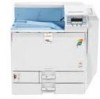
... the front and right side of the parts on the display, replace the waste toner bottle. 11 Guide to the Printer Exterior: Front View 1 This section explains names and functions of the printer. The waste toner bottle collects toner that can be loaded. 4. Standard Output Tray Printed pages are output here. 2. Bypass... the fusing unit and transfer roller, or to remove jammed paper. 3. Tray 1, Tray 2 in each tray. Left Front Cover Open this handle when lifting the printer. 7.
... the front and right side of the parts on the display, replace the waste toner bottle. 11 Guide to the Printer Exterior: Front View 1 This section explains names and functions of the printer. The waste toner bottle collects toner that can be loaded. 4. Standard Output Tray Printed pages are output here. 2. Bypass... the fusing unit and transfer roller, or to remove jammed paper. 3. Tray 1, Tray 2 in each tray. Left Front Cover Open this handle when lifting the printer. 7.

Operating Instructions
Page 14
Control Panel Contains keys for Each Tray". 12 Paper Support Extend the paper support when printing to the Printer 9. Guide to paper larger than A3 . • p.81 "Supported Paper for printer control and a display that shows printer status. 12. Power Switch Use this when replacing the toner, photo conductor units or intermediate transfer unit. 11. Front Cover 1 Open this switch to turn the power on or off. 10. 1.
Control Panel Contains keys for Each Tray". 12 Paper Support Extend the paper support when printing to the Printer 9. Guide to paper larger than A3 . • p.81 "Supported Paper for printer control and a display that shows printer status. 12. Power Switch Use this when replacing the toner, photo conductor units or intermediate transfer unit. 11. Front Cover 1 Open this switch to turn the power on or off. 10. 1.

Operating Instructions
Page 15
... intermediate transfer unit together. 5. Doing so results in the right slot. 2. Ethernet Port Use a network interface cable to connect the printer to the printer. Expansion Card Slots Insert a security, digital camera or encryption card. 3. Optional Interface Board Slots Optional interface boards can be inserted.... Ventilator Releases heat from internal components to high humidity, the print quality may decrease. Insert a USB host board in printer malfunction. Drying Heater Switch If the paper in the left slot. If humidity is moist due to prevent overheating. Insert ...
... intermediate transfer unit together. 5. Doing so results in the right slot. 2. Ethernet Port Use a network interface cable to connect the printer to the printer. Expansion Card Slots Insert a security, digital camera or encryption card. 3. Optional Interface Board Slots Optional interface boards can be inserted.... Ventilator Releases heat from internal components to high humidity, the print quality may decrease. Insert a USB host board in printer malfunction. Drying Heater Switch If the paper in the left slot. If humidity is moist due to prevent overheating. Insert ...

Operating Instructions
Page 16
1. Guide to a host computer. 1 14 USB Port Use a USB cable to connect the printer to the Printer 8.
1. Guide to a host computer. 1 14 USB Port Use a USB cable to connect the printer to the Printer 8.

Operating Instructions
Page 17
... Replace the fusing unit and the transfer roller together. 2. Photo Conductor Unit From the left, the photo conductors are installed in the order of the printer. Replace the transfer roller and the fusing unit together. 3. Intermediate Transfer Unit Replace the intermediate transfer unit when the following messages appear: • "Replacement Alert...
... Replace the fusing unit and the transfer roller together. 2. Photo Conductor Unit From the left, the photo conductors are installed in the order of the printer. Replace the transfer roller and the fusing unit together. 3. Intermediate Transfer Unit Replace the intermediate transfer unit when the following messages appear: • "Replacement Alert...

Operating Instructions
Page 18
Toner 1 From the left, the toner is installed in the order of toner." • " Add toner." 16 Guide to the Printer • "Replacement Alert/Replace IntTrans Unit soon." • "Replace IntTrans Unit." 6. Replace the relevant toner when the following messages appear: • " Out of black (K), yellow (Y), cyan (C), and magenta (M). 1.
Toner 1 From the left, the toner is installed in the order of toner." • " Add toner." 16 Guide to the Printer • "Replacement Alert/Replace IntTrans Unit soon." • "Replace IntTrans Unit." 6. Replace the relevant toner when the following messages appear: • " Out of black (K), yellow (Y), cyan (C), and magenta (M). 1.

Operating Instructions
Page 19
... the power is off the back light. For details about energy saver mode, see Software Guide. 2. Data In indicator Blinks when the printer is data to be printed. 7. Power Indicator Remains lit while the power is online, press this key to cancel an ongoing print job...Indicator Lights up if there is receiving data from a computer. Control Panel 1 ATU049S 1. When the keys appear in each direction. Display Displays current printer status and error messages. Follow the instructions that appear on . Control Panel This section explains names and usage of the parts of the display. ...
... the power is off the back light. For details about energy saver mode, see Software Guide. 2. Data In indicator Blinks when the printer is data to be printed. 7. Power Indicator Remains lit while the power is online, press this key to cancel an ongoing print job...Indicator Lights up if there is receiving data from a computer. Control Panel 1 ATU049S 1. When the keys appear in each direction. Display Displays current printer status and error messages. Follow the instructions that appear on . Control Panel This section explains names and usage of the parts of the display. ...

Operating Instructions
Page 20
Press this to the initial screen. 18 1. When the lamp is lit, the printer is online, enabling data reception from connected computers. 1 When the lamp is unlit, the printer is online or offline. While configuring settings, press the [Online] key to return to switch between online and offline status. Guide to the Printer 11. [Online] Key Indicates whether the printer is offline, disabling data reception from the connected computers.
Press this to the initial screen. 18 1. When the lamp is lit, the printer is online, enabling data reception from connected computers. 1 When the lamp is unlit, the printer is online or offline. While configuring settings, press the [Online] key to return to switch between online and offline status. Guide to the Printer 11. [Online] Key Indicates whether the printer is offline, disabling data reception from the connected computers.

Operating Instructions
Page 21
...the screen is dark. 19 The items are displayed by default. Operational Status or Messages Displays the printer status or the messages. 2. [Option] Press to display the status of options installed in the printer. 3. [Prt.Jobs] Press to display print jobs sent from a computer. 4. [Supplies] ...Press to display the menu of the display panel. To turn on the printer. Display Panel This section explains configuration using the initial screen of supplies for the printer. • Toner levels are highlighted when selected. • Do not touch the display panel.
...the screen is dark. 19 The items are displayed by default. Operational Status or Messages Displays the printer status or the messages. 2. [Option] Press to display the status of options installed in the printer. 3. [Prt.Jobs] Press to display print jobs sent from a computer. 4. [Supplies] ...Press to display the menu of the display panel. To turn on the printer. Display Panel This section explains configuration using the initial screen of supplies for the printer. • Toner levels are highlighted when selected. • Do not touch the display panel.
