
Hardware Guide
Page 4
Turn off the main power and be careful when replacing fusing unit/removing misfed paper. Touching these parts will result in burns. Do not touch parts labelled "v" (indicating a hot surface). ii For safety, please follow the instructions and handle the machine as indicated. The inside of RWARNING and RCAUTION labels This machine has labels for RWARNING and RCAUTION at the positions shown below. AQC0 High temperature parts. Positions of this printer becomes very hot.
Turn off the main power and be careful when replacing fusing unit/removing misfed paper. Touching these parts will result in burns. Do not touch parts labelled "v" (indicating a hot surface). ii For safety, please follow the instructions and handle the machine as indicated. The inside of RWARNING and RCAUTION labels This machine has labels for RWARNING and RCAUTION at the positions shown below. AQC0 High temperature parts. Positions of this printer becomes very hot.

Hardware Guide
Page 6
iv Also refer to this machine. Manuals for This Printer For particular functions, see the relevant parts of the manual. ❖ Safety Information Provides information on safe usage of the machine. To avoid injury and prevent damage to the machine, be ...sure to read this. ❖ Quick Installation Guide Contains procedures for removing the printer from unauthorized use to protect data from...
iv Also refer to this machine. Manuals for This Printer For particular functions, see the relevant parts of the manual. ❖ Safety Information Provides information on safe usage of the machine. To avoid injury and prevent damage to the machine, be ...sure to read this. ❖ Quick Installation Guide Contains procedures for removing the printer from unauthorized use to protect data from...
Hardware Guide
Page 98
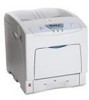
...• Before loading envelopes, flatten their leading edges (the edge going into the printer) by running a pencil or ruler across them. • Some kinds of envelope might be uneven if parts of these items is no problem. 86 Print one size and type of envelope ... may be output creased or improper printing quality. The one from [Envelope 1], [Envelope 2], [Envelope 3], or [Envelope 4]. Paper and Other Media Envelopes Printer setup Make the following : • Press the {Menu} key, select [Maintenance], [General Settings], and then select [Envelope]. Duplex printing Not possible ...
...• Before loading envelopes, flatten their leading edges (the edge going into the printer) by running a pencil or ruler across them. • Some kinds of envelope might be uneven if parts of these items is no problem. 86 Print one size and type of envelope ... may be output creased or improper printing quality. The one from [Envelope 1], [Envelope 2], [Envelope 3], or [Envelope 4]. Paper and Other Media Envelopes Printer setup Make the following : • Press the {Menu} key, select [Maintenance], [General Settings], and then select [Envelope]. Duplex printing Not possible ...

Hardware Guide
Page 127
... anticlockwise ( ), and then slowly open the left cover of the printer. 6 AQC012S C Turn the two green levers of this printer becomes very hot. A Turn off the power, and then unplug the power cable. Do not touch parts labelled "v" (indicating a hot surface). Touching these parts will result in burns. ❖ When to replace the transfer...
... anticlockwise ( ), and then slowly open the left cover of the printer. 6 AQC012S C Turn the two green levers of this printer becomes very hot. A Turn off the power, and then unplug the power cable. Do not touch parts labelled "v" (indicating a hot surface). Touching these parts will result in burns. ❖ When to replace the transfer...

Hardware Guide
Page 134
AET156S H The green lever will slide automatically when the waste toner bottle is set. 6 AET157S I Check the waste toner bottle is correctly locked. Replacing Consumables and Maintenance Kit G Insert the projection part into the pivot inside the left cover. 122 J Carefully close the left cover, and then place the waste toner bottle in the horizontal position.
AET156S H The green lever will slide automatically when the waste toner bottle is set. 6 AET157S I Check the waste toner bottle is correctly locked. Replacing Consumables and Maintenance Kit G Insert the projection part into the pivot inside the left cover. 122 J Carefully close the left cover, and then place the waste toner bottle in the horizontal position.

Hardware Guide
Page 135
... shock. • Wait at least one hour after power off to allow internal parts to cool down before replacing parts. R CAUTION: • The inside of this printer becomes very hot. Touching these parts will result in the Maintenance Kit at least an hour after power off the power... the box contains the following messages appear on the display: • "Replace Maintenance Kit." 6 Before Replacing The Maintenance Kit contains parts for maintaining the printer. Pulling the cord causes wear and tear that can result in burns. ❖ When to the following procedure. Do not touch...
... shock. • Wait at least one hour after power off to allow internal parts to cool down before replacing parts. R CAUTION: • The inside of this printer becomes very hot. Touching these parts will result in the Maintenance Kit at least an hour after power off the power... the box contains the following messages appear on the display: • "Replace Maintenance Kit." 6 Before Replacing The Maintenance Kit contains parts for maintaining the printer. Pulling the cord causes wear and tear that can result in burns. ❖ When to the following procedure. Do not touch...
Hardware Guide
Page 147
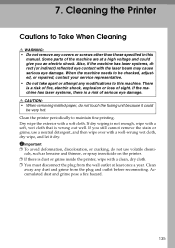
... it could give you still cannot remove the stain or grime, use volatile chemicals, such as benzine and thinner, or spray insecticide on the printer. ❒ If there is wrung out well. Important ❒ To avoid deformation, discoloration, or cracking, do not touch the fusing unit because.... • Do not take apart or attempt any modifications to maintain fine printing. Dry wipe the exterior with the laser beam may cause serious eye damage. Some parts of serious eye damage. 7. If you an electric shock. Clean away any covers or screws other than those specified ...
... it could give you still cannot remove the stain or grime, use volatile chemicals, such as benzine and thinner, or spray insecticide on the printer. ❒ If there is wrung out well. Important ❒ To avoid deformation, discoloration, or cracking, do not touch the fusing unit because.... • Do not take apart or attempt any modifications to maintain fine printing. Dry wipe the exterior with the laser beam may cause serious eye damage. Some parts of serious eye damage. 7. If you an electric shock. Clean away any covers or screws other than those specified ...

Hardware Guide
Page 151
... the paper feed roller to remove the water. Do not use chemical cleaner or organic solvent such as thinner or benzene. AET402S F Wipe the rubber part of the roller with a dry cloth to its original position ( ). 7 AET401S Confirm that the green lock lever secures the roller correctly by confirming that the...
... the paper feed roller to remove the water. Do not use chemical cleaner or organic solvent such as thinner or benzene. AET402S F Wipe the rubber part of the roller with a dry cloth to its original position ( ). 7 AET401S Confirm that the green lock lever secures the roller correctly by confirming that the...

Hardware Guide
Page 153
Clean the registration roller if dots (caused by pulling left and right side levers. B Carefully open the printer's front cover (A) of by specks of this printer becomes very hot. AQC018S C Set the registration roller as shown. 7 AQC171S 141 Touching these parts will result in burns. A Turn off the power, and then unplug the power cable. Cleaning the Registration Roller Cleaning the Registration Roller R CAUTION: • The inside of paper stuck to the roller) appear on printed OHP transparencies. Do not touch parts labelled "v" (indicating a hot surface).
Clean the registration roller if dots (caused by pulling left and right side levers. B Carefully open the printer's front cover (A) of by specks of this printer becomes very hot. AQC018S C Set the registration roller as shown. 7 AQC171S 141 Touching these parts will result in burns. A Turn off the power, and then unplug the power cable. Cleaning the Registration Roller Cleaning the Registration Roller R CAUTION: • The inside of paper stuck to the roller) appear on printed OHP transparencies. Do not touch parts labelled "v" (indicating a hot surface).

Hardware Guide
Page 157
... type of paper when printing a run of highlight colors. Set the correction value. Correcting the Color Gradation Correcting the Color Gradation Color gradation during color printing changes slightly, depending on a number of the supplied Color Calibration Sample Sheet. ❒ Corrections to color gradation are performed in color tones. B Adjust the parts of gradation corrections. Note ❒ If suitable results...
... type of paper when printing a run of highlight colors. Set the correction value. Correcting the Color Gradation Correcting the Color Gradation Color gradation during color printing changes slightly, depending on a number of the supplied Color Calibration Sample Sheet. ❒ Corrections to color gradation are performed in color tones. B Adjust the parts of gradation corrections. Note ❒ If suitable results...

Hardware Guide
Page 158
K C M Y AQC001S B Select [Maintenance] using {T} or {U}, and then press the {OK} key. 8 C Select [Quality Maintenance] using {T} or {U}, and then press the {OK} key. 146 A Press the {Menu} key. D Select [Colour Calibration] using {T} or {U}, and then press the {OK} key. The correction value for the highlight and the medium parts are set using [Print Sheet 1] and [Print Sheet 2] respectively. Adjusting the Printer Set the Gradation Correction Value During printing, you can correct the gradation in two areas: bright part (highlight) and the medium (middle).
K C M Y AQC001S B Select [Maintenance] using {T} or {U}, and then press the {OK} key. 8 C Select [Quality Maintenance] using {T} or {U}, and then press the {OK} key. 146 A Press the {Menu} key. D Select [Colour Calibration] using {T} or {U}, and then press the {OK} key. The correction value for the highlight and the medium parts are set using [Print Sheet 1] and [Print Sheet 2] respectively. Adjusting the Printer Set the Gradation Correction Value During printing, you can correct the gradation in two areas: bright part (highlight) and the medium (middle).

Hardware Guide
Page 161
... of gradation correction 1 of the gradation correction sheet. Correcting the Color Gradation Viewing the Color Calibration Sample Sheet and Gradation Correction Sheet The color gradation correction value setting sheet contains two color sample columns "Sample 1" column for setting the highlight part, and "Sample 2" column for M (magenta) is similar. The setting method for setting the medium...
... of gradation correction 1 of the gradation correction sheet. Correcting the Color Gradation Viewing the Color Calibration Sample Sheet and Gradation Correction Sheet The color gradation correction value setting sheet contains two color sample columns "Sample 1" column for setting the highlight part, and "Sample 2" column for M (magenta) is similar. The setting method for setting the medium...

Hardware Guide
Page 184
Open the front cover (A) to pull it strongly. A Carefully open the printer's front cover (A) of the machine becomes very hot. message appears: A paper misfeed occurs in... If a misfeed occurs when using the bypass tray, open cover and remove paper." Do not touch the parts with a "v" label (means hot surface) could result in the paper feeding. If you do, the tray might... fall and cause an injury. Touching a part with a "v" label (means hot surface). R CAUTION: • The inside of by pulling left and right side...
Open the front cover (A) to pull it strongly. A Carefully open the printer's front cover (A) of the machine becomes very hot. message appears: A paper misfeed occurs in... If a misfeed occurs when using the bypass tray, open cover and remove paper." Do not touch the parts with a "v" label (means hot surface) could result in the paper feeding. If you do, the tray might... fall and cause an injury. Touching a part with a "v" label (means hot surface). R CAUTION: • The inside of by pulling left and right side...
Software User Guide
Page 3
...manual) Contain procedures for using this manual for the procedures for administrators of this . ❖ Quick Installation Guide Contains procedures for removing the printer from its box, connecting it to a computer, and installing its driver. ❖ Hardware Guide Contains information about paper and procedures such ...authentication. To avoid injury and prevent damage to the machine, be sure to read this machine. Manuals for This Printer For particular functions, see the relevant parts of the manual. ❖ Safety Information Provides information on safe usage of the machine.
...manual) Contain procedures for using this manual for the procedures for administrators of this . ❖ Quick Installation Guide Contains procedures for removing the printer from its box, connecting it to a computer, and installing its driver. ❖ Hardware Guide Contains information about paper and procedures such ...authentication. To avoid injury and prevent damage to the machine, be sure to read this machine. Manuals for This Printer For particular functions, see the relevant parts of the manual. ❖ Safety Information Provides information on safe usage of the machine.

Software User Guide
Page 153
... You can reset the gradation correction value to default. Select [Photo Priority] for printing. • Adjust Auto Density You can print the gradation of toner color overlap. Note ❒ Default: Photo Priority 141 Maintenance Menu Maintenance menu parameters This section explains about parameters that can be set on a page. Tray 1, Tray... ❖ Colour Registration You can specify Auto Adjust or Fuser Adjust for this feature. ❖ Colour Calibration You can adjust the gradation of bright (highlighted parts) and medium areas (middle parts) for normal use.
... You can reset the gradation correction value to default. Select [Photo Priority] for printing. • Adjust Auto Density You can print the gradation of toner color overlap. Note ❒ Default: Photo Priority 141 Maintenance Menu Maintenance menu parameters This section explains about parameters that can be set on a page. Tray 1, Tray... ❖ Colour Registration You can specify Auto Adjust or Fuser Adjust for this feature. ❖ Colour Calibration You can adjust the gradation of bright (highlighted parts) and medium areas (middle parts) for normal use.

Software User Guide
Page 337
... Function Dynamic DNS is a function which this printer, a DNS client, is part of the MAC address) 325 Note ❒ When the dynamic DNS function is not used, records managed by DHCP. Updating Updating procedure varies depending on whether the printer IP address is changed . ❒ To ... E In the left area, click [Configuration], and then click [Network]. When a DNS server is connected, records can be dynamically updated using the printer, the DNS server has to Take When Using in a network D Enter the user name and password, and then click [OK]. CNAMEs that [Enable...
... Function Dynamic DNS is a function which this printer, a DNS client, is part of the MAC address) 325 Note ❒ When the dynamic DNS function is not used, records managed by DHCP. Updating Updating procedure varies depending on whether the printer IP address is changed . ❒ To ... E In the left area, click [Configuration], and then click [Network]. When a DNS server is connected, records can be dynamically updated using the printer, the DNS server has to Take When Using in a network D Enter the user name and password, and then click [OK]. CNAMEs that [Enable...

Software User Guide
Page 344
..., and/or sell copies of the Software, and to permit persons to whom the Software is furnished to do so, subject to be included in part on the work of the Software.
..., and/or sell copies of the Software, and to permit persons to whom the Software is furnished to do so, subject to be included in part on the work of the Software.

Software User Guide
Page 345
... Copyright Notice of NetBSD For all users to endorse or promote products derived from this product: This product contains NetBSD operating system: For the most part, the software constituting the NetBSD operating system is not in the public domain; C All advertising materials mentioning features or use this software without modification, are...
... Copyright Notice of NetBSD For all users to endorse or promote products derived from this product: This product contains NetBSD operating system: For the most part, the software constituting the NetBSD operating system is not in the public domain; C All advertising materials mentioning features or use this software without modification, are...


