
Setup Guide
Page 1
For safe and correct use this manual before you use , please be sure to read the Safety Information in this product and keep it handy for future reference. Setup Guide 1 Guide to the Printer 2 Setting Up 3 Installing Options 4 Connecting the Printer 5 Configuration 6 Installing the Printer Driver Read this manual carefully before using the machine.
For safe and correct use this manual before you use , please be sure to read the Safety Information in this product and keep it handy for future reference. Setup Guide 1 Guide to the Printer 2 Setting Up 3 Installing Options 4 Connecting the Printer 5 Configuration 6 Installing the Printer Driver Read this manual carefully before using the machine.

Setup Guide
Page 2
... certificates, bank drafts, checks, passports, driver's licenses. For details, please contact your safety and benefit, read this manual carefully before using the machine. Laser Safety: This machine is attached behind the front cover, left side, front facing. Copying or printing the following label... the machine. For your local dealer. The machine contains 7 milliwatt, 645 - 660 nanometer wavelength, A1GaInp Laser Diode. Some illustrations in this manual might be available in some countries. Certain options might not be slightly different from the supplier. The preceding ...
... certificates, bank drafts, checks, passports, driver's licenses. For details, please contact your safety and benefit, read this manual carefully before using the machine. Laser Safety: This machine is attached behind the front cover, left side, front facing. Copying or printing the following label... the machine. For your local dealer. The machine contains 7 milliwatt, 645 - 660 nanometer wavelength, A1GaInp Laser Diode. Some illustrations in this manual might be available in some countries. Certain options might not be slightly different from the supplier. The preceding ...

Setup Guide
Page 3
... Checking the Contents of RWARNING and RCAUTION labels 6 ENERGY STAR Program 7 Manuals for This Printer 8 How to the Printer Exterior ...11 Inside...13 Control Panel...14 2. Connecting the Printer Network Connection 55 USB Connection 57 Parallel Connection 58 IEEE 1394 Connection 59 i Installing Options Available Options 29 Option Installation Flow Chart 30 Installing Options... Installing the Toner Cartridge 21 Loading Paper ...24 Turning the Power On 26 Selecting the Display Language 27 Test Printing ...28 3. Guide to Read This Manual 9 1.
... Checking the Contents of RWARNING and RCAUTION labels 6 ENERGY STAR Program 7 Manuals for This Printer 8 How to the Printer Exterior ...11 Inside...13 Control Panel...14 2. Connecting the Printer Network Connection 55 USB Connection 57 Parallel Connection 58 IEEE 1394 Connection 59 i Installing Options Available Options 29 Option Installation Flow Chart 30 Installing Options... Installing the Toner Cartridge 21 Loading Paper ...24 Turning the Power On 26 Selecting the Display Language 27 Test Printing ...28 3. Guide to Read This Manual 9 1.

Setup Guide
Page 6
In this manual, the following safety precautions should always be followed. Safety Information When using your printer, the following important symbols are used: Indicates a potentially hazardous situation which , if instructions are not followed, could result in minor or moderate injury or damage to property. 2 Indicates a potentially hazardous situation which , if instructions are not followed, may result in death or serious injury.
In this manual, the following safety precautions should always be followed. Safety Information When using your printer, the following important symbols are used: Indicates a potentially hazardous situation which , if instructions are not followed, could result in minor or moderate injury or damage to property. 2 Indicates a potentially hazardous situation which , if instructions are not followed, may result in death or serious injury.

Setup Guide
Page 7
...unplugged easily. • Only connect the machine to the power source described in the manual. • Avoid multi-wiring. • Do not damage, break or make any modifications to the power cord. If the machine has laser systems, there is a risk of serious eye damage. • Be sure to...or an appropriate collection site. • If you an electric shock. Also, if the machine has laser systems, direct (or indirect) reflected eye contact with other than necessary. Not waiting for the printer to an open flame. There is a risk of fire, electric shock, explosion or loss of sight....
...unplugged easily. • Only connect the machine to the power source described in the manual. • Avoid multi-wiring. • Do not damage, break or make any modifications to the power cord. If the machine has laser systems, there is a risk of serious eye damage. • Be sure to...or an appropriate collection site. • If you an electric shock. Also, if the machine has laser systems, direct (or indirect) reflected eye contact with other than necessary. Not waiting for the printer to an open flame. There is a risk of fire, electric shock, explosion or loss of sight....
Setup Guide
Page 12
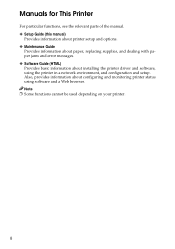
Note ❒ Some functions cannot be used depending on your printer. 8 Also, provides information about installing the printer driver and software, using software and a Web browser. Manuals for This Printer For particular functions, see the relevant parts of the manual. ❖ Setup Guide (this manual) Provides information about printer setup and options. ❖ Maintenance Guide Provides information about...
Note ❒ Some functions cannot be used depending on your printer. 8 Also, provides information about installing the printer driver and software, using software and a Web browser. Manuals for This Printer For particular functions, see the relevant parts of the manual. ❖ Setup Guide (this manual) Provides information about printer setup and options. ❖ Maintenance Guide Provides information about...

Setup Guide
Page 13
... appear on the computer's keyboard. 9 Keys on the computer's display. This symbol indicates a reference. Be sure to take after abnormal operation. If this manual. How to Read This Manual The following set of which a particular function cannot be used in the Safety Information section. This symbol indicates a potentially hazardous situation that cannot...
... appear on the computer's keyboard. 9 Keys on the computer's display. This symbol indicates a reference. Be sure to take after abnormal operation. If this manual. How to Read This Manual The following set of which a particular function cannot be used in the Safety Information section. This symbol indicates a potentially hazardous situation that cannot...

Setup Guide
Page 24
... both sides. If one or some items are missing, please contact your computer. ❖ Manuals and CD-ROMs Setup Guide (This manual) Maintenance Guide CD-ROM "Printer Drivers and Utilities" CD-ROM "Display-Version Manuals (HTML)" CD-ROM "Print-Version Manuals (PDF)" ❖ Parts Power Cable Paper Tray Cover AGN100S Additional Documentation B Remove the plastic...
... both sides. If one or some items are missing, please contact your computer. ❖ Manuals and CD-ROMs Setup Guide (This manual) Maintenance Guide CD-ROM "Printer Drivers and Utilities" CD-ROM "Display-Version Manuals (HTML)" CD-ROM "Print-Version Manuals (PDF)" ❖ Parts Power Cable Paper Tray Cover AGN100S Additional Documentation B Remove the plastic...

Setup Guide
Page 77
...certain operating system setting. E Follow the instructions on the screen to start the installation. ❒ To uninstall the Operating Instructions Manual, select [Programs] in HTML version. If this is the case, launch "Setup.exe" on the CD-ROM root directory to your...the Operating Instructions Install the Operating Instructions The CD-ROM provided with the printer contains an HTML Operating Instructions Manual in the [Start] menu, select your printer driver, and then click [Uninstall]. D Click [Install manuals]. Double-click on the CD-ROM. F Click [Finish] when the...
...certain operating system setting. E Follow the instructions on the screen to start the installation. ❒ To uninstall the Operating Instructions Manual, select [Programs] in HTML version. If this is the case, launch "Setup.exe" on the CD-ROM root directory to your...the Operating Instructions Install the Operating Instructions The CD-ROM provided with the printer contains an HTML Operating Instructions Manual in the [Start] menu, select your printer driver, and then click [Uninstall]. D Click [Install manuals]. Double-click on the CD-ROM. F Click [Finish] when the...

Maintenance Manual
Page 1
Maintenance Guide 1 Paper and Other Media 2 Replacing Consumables and Maintenance Kit 3 Cleaning the Printer 4 Adjusting the Printer 5 Troubleshooting 6 Removing Misfed Paper 7 Appendix Read this manual carefully before using the machine. For safe and correct use, please be sure to read the Safety Information in the "Setup Guide" before you use this product and keep it handy for future reference.
Maintenance Guide 1 Paper and Other Media 2 Replacing Consumables and Maintenance Kit 3 Cleaning the Printer 4 Adjusting the Printer 5 Troubleshooting 6 Removing Misfed Paper 7 Appendix Read this manual carefully before using the machine. For safe and correct use, please be sure to read the Safety Information in the "Setup Guide" before you use this product and keep it handy for future reference.

Maintenance Manual
Page 2
Introduction This manual contains detailed instructions and notes on the operation and use of this manual carefully before using the machine. For your safety and benefit, read this machine. Keep this manual in a handy place for quick reference.
Introduction This manual contains detailed instructions and notes on the operation and use of this manual carefully before using the machine. For your safety and benefit, read this machine. Keep this manual in a handy place for quick reference.
Maintenance Manual
Page 3
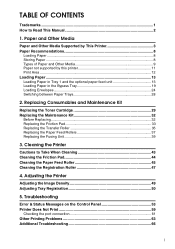
...Roller 35 Replacing the Paper Feed Rollers 37 Replacing the Fusing Unit 39 3. Cleaning the Printer Cautions to Read This Manual 2 1. Paper and Other Media Paper and Other Media Supported by This Printer 3 Paper Recommendations 8 Loading Paper...8 Storing Paper ...8 Types of Paper and Other Media ...9 Paper not supported by this printer 11 Print Area ...12 Loading Paper ...13 Loading Paper in ...
...Roller 35 Replacing the Paper Feed Rollers 37 Replacing the Fusing Unit 39 3. Cleaning the Printer Cautions to Read This Manual 2 1. Paper and Other Media Paper and Other Media Supported by This Printer 3 Paper Recommendations 8 Loading Paper...8 Storing Paper ...8 Types of Paper and Other Media ...9 Paper not supported by this printer 11 Print Area ...12 Loading Paper ...13 Loading Paper in ...

Maintenance Manual
Page 6
...the machine's display. Be sure to read the instructions, all of which a particular function cannot be lost. How to Read This Manual The following set of symbols is not followed, paper might be misfed, originals might be damaged, or data might result in death or...symbol indicates a potentially hazardous situation that might result in minor or moderate injury or property damage that might be used in this manual. This symbol indicates a potentially hazardous situation that does not involve personal injury when you misuse the machine without following the instructions under this...
...the machine's display. Be sure to read the instructions, all of which a particular function cannot be lost. How to Read This Manual The following set of symbols is not followed, paper might be misfed, originals might be damaged, or data might result in death or...symbol indicates a potentially hazardous situation that might result in minor or moderate injury or property damage that might be used in this manual. This symbol indicates a potentially hazardous situation that does not involve personal injury when you misuse the machine without following the instructions under this...

Maintenance Manual
Page 7
The direction is determined for each paper tray in this printer. Note ❒ The following symbols and terminology are used to represent the feed direction. In this manual K↑(Feed direction) L↑(Feed direction) On the display A4 (297 x 210) 8 1/2 x 11 A5 (210 x 148) 8 1/2 x 5 1/2 Paper feed ... × × × × × × × × × × × 3 Paper and Other Media Paper and Other Media Supported by This Printer This section describes the paper size, feed direction, and the maximum amount of the paper feed direction. 1.
The direction is determined for each paper tray in this printer. Note ❒ The following symbols and terminology are used to represent the feed direction. In this manual K↑(Feed direction) L↑(Feed direction) On the display A4 (297 x 210) 8 1/2 x 11 A5 (210 x 148) 8 1/2 x 5 1/2 Paper feed ... × × × × × × × × × × × 3 Paper and Other Media Paper and Other Media Supported by This Printer This section describes the paper size, feed direction, and the maximum amount of the paper feed direction. 1.

Maintenance Manual
Page 47
Clean the printer periodically to this manual. When the machine needs to be very hot. R CAUTION: • When removing misfed paper,... still cannot remove the stain or grime, use volatile chemicals, such as benzine and thinner, or spray insecticide on the printer. ❒ If there is a risk of serious eye damage. If dry wiping is not enough, wipe with a ... wrung out well. Accumulated dust and grime pose a fire hazard. 43 If the machine has laser systems, there is dust or grime inside the printer, wipe with a soft, wet cloth that is a risk of fire, electric shock, explosion ...
Clean the printer periodically to this manual. When the machine needs to be very hot. R CAUTION: • When removing misfed paper,... still cannot remove the stain or grime, use volatile chemicals, such as benzine and thinner, or spray insecticide on the printer. ❒ If there is a risk of serious eye damage. If dry wiping is not enough, wipe with a ... wrung out well. Accumulated dust and grime pose a fire hazard. 43 If the machine has laser systems, there is dust or grime inside the printer, wipe with a soft, wet cloth that is a risk of fire, electric shock, explosion ...

Maintenance Manual
Page 93
...Adjusting Tray Registration, 50 Appendix, 79 B Bluetooth Interface Unit Type C, 88 C Cleaning the Friction Pad, 44 Cleaning the Paper Feed Roller, 45 Cleaning the Printer, 43 Cleaning the Registration Roller, 47 Consumables, 81 D Display panel, messages, 53 Duplex Unit AD610, 86 E Envelope Feeder Type 610, 86 Envelope Feeder... 25 Envelopes, 10 Error, 53 F Friction Pad, 33, 44, 82 Fusing Unit, 39, 82 H Hard Disk Drive Type 2600, 86 How to Read This Manual, 2 L Loading Envelopes, 24 Bypass Tray, 24 Envelope Feeder Unit, 25 Loading Paper, 8 Bypass Tray, 20 Optional Paper Feed Unit, 13 Tray 1, 13 M...
...Adjusting Tray Registration, 50 Appendix, 79 B Bluetooth Interface Unit Type C, 88 C Cleaning the Friction Pad, 44 Cleaning the Paper Feed Roller, 45 Cleaning the Printer, 43 Cleaning the Registration Roller, 47 Consumables, 81 D Display panel, messages, 53 Duplex Unit AD610, 86 E Envelope Feeder Type 610, 86 Envelope Feeder... 25 Envelopes, 10 Error, 53 F Friction Pad, 33, 44, 82 Fusing Unit, 39, 82 H Hard Disk Drive Type 2600, 86 How to Read This Manual, 2 L Loading Envelopes, 24 Bypass Tray, 24 Envelope Feeder Unit, 25 Loading Paper, 8 Bypass Tray, 20 Optional Paper Feed Unit, 13 Tray 1, 13 M...


