User Guide & Warranty
Page 4
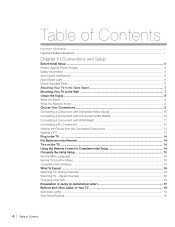
... a PC Component ...12 Viewing the Picture from the Connected Component 13 Viewing a PC...13 Plug in the TV ...14 Put Batteries in the Remote ...14 Turn on the TV ...14 Using the Remote Control to Complete Initial Setup 14 Complete the Initial Setup ...15 Set the Menu Language ...15 Set the...
... a PC Component ...12 Viewing the Picture from the Connected Component 13 Viewing a PC...13 Plug in the TV ...14 Put Batteries in the Remote ...14 Turn on the TV ...14 Using the Remote Control to Complete Initial Setup 14 Complete the Initial Setup ...15 Set the Menu Language ...15 Set the...
User Guide & Warranty
Page 6
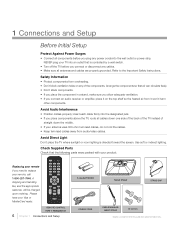
... contained within this publication are properly grounded. Avoid Direct Light Don't place the TV where sunlight or room lighting is controlled by a wall switch. • Turn off the TV before you need to the Important Safety Instructions Safety Information • Protect components from overheating. • Don't block ventilation holes on the...
... contained within this publication are properly grounded. Avoid Direct Light Don't place the TV where sunlight or room lighting is controlled by a wall switch. • Turn off the TV before you need to the Important Safety Instructions Safety Information • Protect components from overheating. • Don't block ventilation holes on the...

User Guide & Warranty
Page 13
... viewing TV channels, use the number buttons to enter the channel you wish to the wrong input. Note: If the picture from the Connected Component 1. Turn on the TV and the component you have connected all additional components to your TV, go to the HDMI/DVI INPUT 1 jack). HDMI/DVI INPU... to confirm your component is an example of the TV screen. Go to page 8 for details) and the component, such as a DVD player or a VCR. 2. Turn on the TV and the computer. 3. Make sure you see page 14 for instructions. Go to page 12 for initial setup instructions. Press OK to...
... viewing TV channels, use the number buttons to enter the channel you wish to the wrong input. Note: If the picture from the Connected Component 1. Turn on the TV and the component you have connected all additional components to your TV, go to the HDMI/DVI INPUT 1 jack). HDMI/DVI INPU... to confirm your component is an example of the TV screen. Go to page 8 for details) and the component, such as a DVD player or a VCR. 2. Turn on the TV and the computer. 3. Make sure you see page 14 for instructions. Go to page 12 for initial setup instructions. Press OK to...

User Guide & Warranty
Page 14
... Batteries in the on the list (appear darker, brighter, or a different color). The process works the same on your choice and select it. Turn on the TV Turn on all menu screens: highlight your TV by a light switch. To return to move up or down arrow to the previous menu, press the...
... Batteries in the on the list (appear darker, brighter, or a different color). The process works the same on your choice and select it. Turn on the TV Turn on all menu screens: highlight your TV by a light switch. To return to move up or down arrow to the previous menu, press the...
User Guide & Warranty
Page 15
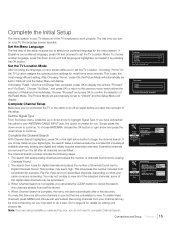
... steps: 1. This is because the number includes both scrambled (for digital channels. Set the TV Location Mode After choosing the language, a menu screen asks you turn on what your signal type, the search takes a while because the compiled list includes all available channels, (analog and digital) and initially includes scrambled channels...
... steps: 1. This is because the number includes both scrambled (for digital channels. Set the TV Location Mode After choosing the language, a menu screen asks you turn on what your signal type, the search takes a while because the compiled list includes all available channels, (analog and digital) and initially includes scrambled channels...
User Guide & Warranty
Page 18
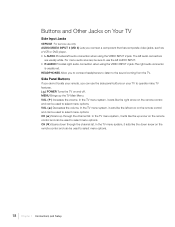
... VIDEO INPUT 2 jack.The right audio connector is usually red. Side Panel Buttons If you cannot locate your TV to operate many TV features. ( ) POWER Turns the TV on the remote control and can be used to select menu options. In the TV menu system, it acts like the up arrow...
... VIDEO INPUT 2 jack.The right audio connector is usually red. Side Panel Buttons If you cannot locate your TV to operate many TV features. ( ) POWER Turns the TV on the remote control and can be used to select menu options. In the TV menu system, it acts like the up arrow...
User Guide & Warranty
Page 19
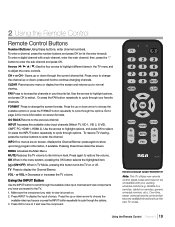
... if available. INPUT Accesses the available video input channels (Watch TV, VID 1, VID 2, S-VID, CMPT, PC, HDMI 1, HDMI 2). press again to view is turned on or off. Press again to enter the sub-channel and press OK. button to restore the volume. Press the up or down arrow to... OK to tune to adjust the menu controls. Arrows ( / / / ) Use the four arrows to highlight different items in TV Mode, pressing this button turns the TV on . 2. FORMAT Press to select. Using the INPUT Button Use the INPUT button to cycle through the options. 3. Use the arrows to highlight...
... if available. INPUT Accesses the available video input channels (Watch TV, VID 1, VID 2, S-VID, CMPT, PC, HDMI 1, HDMI 2). press again to view is turned on or off. Press again to enter the sub-channel and press OK. button to restore the volume. Press the up or down arrow to... OK to tune to adjust the menu controls. Arrows ( / / / ) Use the four arrows to highlight different items in TV Mode, pressing this button turns the TV on . 2. FORMAT Press to select. Using the INPUT Button Use the INPUT button to cycle through the options. 3. Use the arrows to highlight...
User Guide & Warranty
Page 20
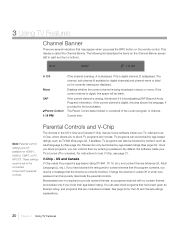
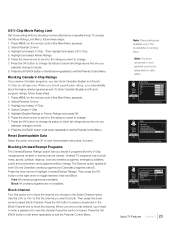
... content themes (Violence (V), Adult Language (L), etc.). You can only be blocked by content, such as adult language (L) (See page 22). If the current channel is turned off or unlocked. Change the channel or press OK to bottom). See page 34 for the US and Canada ratings explanations. 20 Chapter 3 Using TV...
... content themes (Violence (V), Adult Language (L), etc.). You can only be blocked by content, such as adult language (L) (See page 22). If the current channel is turned off or unlocked. Change the channel or press OK to bottom). See page 34 for the US and Canada ratings explanations. 20 Chapter 3 Using TV...
User Guide & Warranty
Page 21
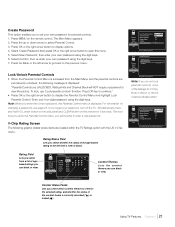
... CLEAR button on the remote for V-Chip, Button Block or Block Channel will take effect. Select Create Password; Select Confirm, then re-enter your password, turn off the TV. For information on the remote control. If you forget your own password using the digit keys. 7. Using TV Features Chapter 3 21 Press...
... CLEAR button on the remote for V-Chip, Button Block or Block Channel will take effect. Select Create Password; Select Confirm, then re-enter your password, turn off the TV. For information on the remote control. If you forget your own password using the digit keys. 7. Using TV Features Chapter 3 21 Press...
User Guide & Warranty
Page 23
... Ratings. 6. Select Canada V-Chip. 5. Press the down arrow to scroll to the rating you want to change . 7. Block All unrated programs are available. Block Channel Turn this rating. Note: You must remember to lock parental controls for rating limits to reset downloadable rating data, if present. Then highlight and select US...
... Ratings. 6. Select Canada V-Chip. 5. Press the down arrow to scroll to the rating you want to change . 7. Block All unrated programs are available. Block Channel Turn this rating. Note: You must remember to lock parental controls for rating limits to reset downloadable rating data, if present. Then highlight and select US...
User Guide & Warranty
Page 26
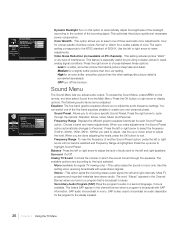
...optimizes the picture quality and decreases power consumption. or Warm for a softer, smoother picture that is broadcast with weak stereo signals. OFF turn off this setting. Sound Menu The Sound Menu lets you are done adjusting the levels, press the OK button to the left and ...press MENU on PC channels) - This feature is especially useful for an even softer, smoother picture than the Low setting. Dynamic Backlight Turn on this setting when receiving broadcasts with SAP information. Frequency Range To view the frequency of the incoming signal. This option allows you ...
...optimizes the picture quality and decreases power consumption. or Warm for a softer, smoother picture that is broadcast with weak stereo signals. OFF turn off this setting. Sound Menu The Sound Menu lets you are done adjusting the levels, press the OK button to the left and ...press MENU on PC channels) - This feature is especially useful for an even softer, smoother picture than the Low setting. Dynamic Backlight Turn on this setting when receiving broadcasts with SAP information. Frequency Range To view the frequency of the incoming signal. This option allows you ...
User Guide & Warranty
Page 27
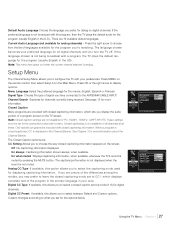
... currently being broadcast with closed captioning information. The Closed Caption options are encoded with a program, the TV plays the default language for the program you turn the TV off. Default Audio Language Choose the language you to choose the way closed captioning information appears on the screen. Current Audio Language (not...
... currently being broadcast with closed captioning information. The Closed Caption options are encoded with a program, the TV plays the default language for the program you turn the TV off. Default Audio Language Choose the language you to choose the way closed captioning information appears on the screen. Current Audio Language (not...
User Guide & Warranty
Page 28
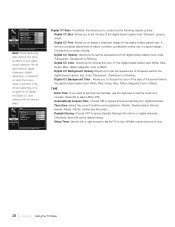
... to set the time manually, use the digit keys to set the hours and minutes. Digital CC Color Allows you to set the TV to turn off after a given amount of the space behind the digital closed caption text: Solid, Transparent, Translucent or Flashing. Digital CC Background Opacity Allows you to...
... to set the time manually, use the digit keys to set the hours and minutes. Digital CC Color Allows you to set the TV to turn off after a given amount of the space behind the digital closed caption text: Solid, Transparent, Translucent or Flashing. Digital CC Background Opacity Allows you to...
User Guide & Warranty
Page 31
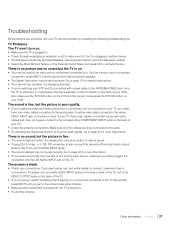
... no sound but the picture is "live" by consulting the following troubleshooting list. If you used yellow, red, and white cables to the TV is turned on the TV. Go to the wrong jacks. The screen is selected on the 3/4 switch on the back of your TV. • Check the antenna... TV can be blank. The sound is fine, but the TV is plugged in another channel. Other Information Chapter 5 31 TV Problems The TV won't turn on. • Make sure the TV is on. • You may be corrected by plugging in . • Check the wall receptacle (or extension cord) to...
... no sound but the picture is "live" by consulting the following troubleshooting list. If you used yellow, red, and white cables to the TV is turned on the TV. Go to the wrong jacks. The screen is selected on the 3/4 switch on the back of your TV. • Check the antenna... TV can be blank. The sound is fine, but the TV is plugged in another channel. Other Information Chapter 5 31 TV Problems The TV won't turn on. • Make sure the TV is on. • You may be corrected by plugging in . • Check the wall receptacle (or extension cord) to...
User Guide & Warranty
Page 32
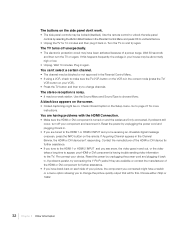
... to appear, your component and reconnect it back in the Channel Banner, the HDMI or DVI device isn't responding. Go to the TV. The TV turns off your HDMI or DVI component is having problems with the HDMI Connection. • Make sure the HDMI or DVI component is in . You can... blocked or not approved in the Parental Control Menu. • If using a VCR, check to make sure the TV/VCR button on the VCR is turned on and the cables are available or contact the manufacturer of the HDMI or DVI component for further assistance. • If you have black bars...
... to appear, your component and reconnect it back in the Channel Banner, the HDMI or DVI device isn't responding. Go to the TV. The TV turns off your HDMI or DVI component is having problems with the HDMI Connection. • Make sure the HDMI or DVI component is in . You can... blocked or not approved in the Parental Control Menu. • If using a VCR, check to make sure the TV/VCR button on the VCR is turned on and the cables are available or contact the manufacturer of the HDMI or DVI component for further assistance. • If you have black bars...

User Guide & Warranty
Page 33
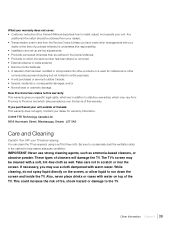
...The V-Chip won't let me watch a program, even though it on the Customer Support Menu at www.rca.com/television for about 5 minutes. Then plug in order to view movies with V-Chip/Parental Controls. •...the settings. After you block movie ratings, you must set NR to View Separately in the TV and turn it 's not rated as violent. • Maybe the movie was given an NR (Not Rated) status...rebooting your Warranty under How To Get Service. Keep your TV unplugged for updated FAQs or contact RCA Customer Support at the TV. • The batteries in the remote may not be aimed ...
...The V-Chip won't let me watch a program, even though it on the Customer Support Menu at www.rca.com/television for about 5 minutes. Then plug in order to view movies with V-Chip/Parental Controls. •...the settings. After you block movie ratings, you must set NR to View Separately in the TV and turn it 's not rated as violent. • Maybe the movie was given an NR (Not Rated) status...rebooting your Warranty under How To Get Service. Keep your TV unplugged for updated FAQs or contact RCA Customer Support at the TV. • The batteries in the remote may not be aimed ...
User Guide & Warranty
Page 39
... other products or is used for warranty information. ©2009 TTE Technology Canada Ltd. 6605 Hurontario Street, Mississauga, Ontario L5T 0A3 Care and Cleaning Caution: Turn OFF your unit. Be sure to occasionally dust the ventilation slots in the Owner's Manual; • Products on which take precedence over the terms of...
... other products or is used for warranty information. ©2009 TTE Technology Canada Ltd. 6605 Hurontario Street, Mississauga, Ontario L5T 0A3 Care and Cleaning Caution: Turn OFF your unit. Be sure to occasionally dust the ventilation slots in the Owner's Manual; • Products on which take precedence over the terms of...
User Guide & Warranty
Page 40
... instructions, may cause harmful interference to Part 15 of Dolby Laboratories. This equipment generates, uses, and can be determined by turning the equipment off and on, the user is encouraged to try to correct the interference by the U.S. For assistance, visit the... or television reception, which the receiver is no guarantee that to provide reasonable protection against harmful interference in accordance with Canadian ICES-003. RCA and associated marks are registered trademarks of the FCC Rules. used in a residential installation. Please do not send any products to TTE ...
... instructions, may cause harmful interference to Part 15 of Dolby Laboratories. This equipment generates, uses, and can be determined by turning the equipment off and on, the user is encouraged to try to correct the interference by the U.S. For assistance, visit the... or television reception, which the receiver is no guarantee that to provide reasonable protection against harmful interference in accordance with Canadian ICES-003. RCA and associated marks are registered trademarks of the FCC Rules. used in a residential installation. Please do not send any products to TTE ...


