User Manual
Page 8
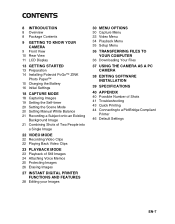
CONTENTS 8 INTRODUCTION 8 Overview 8 Package Contents 9 GETTING TO KNOW YOUR CAMERA 9 Front View 10 Rear View 11 LCD Display 13 GETTING STARTED 13 Preparation 14 Installing Polaroid PoGo™ ZINK Photo Paper™ 15 Charging the Battery 16 Initial Settings 18 CAPTURE MODE 18 Capturing Images 19 Setting the ...Playing Back Video Clips 23 PLAYBACK MODE 23 Playback of Still Images 24 Attaching Voice Memos 25 Protecting Images 26 Erasing Images 27 INSTANT DIGITAL PRINTER FUNCTIONS AND FEATURES 28 Editing your Images 30 MENU OPTIONS 30 Capture Menu 33 Video Menu 34 Playback Menu 35 Setup Menu ...
CONTENTS 8 INTRODUCTION 8 Overview 8 Package Contents 9 GETTING TO KNOW YOUR CAMERA 9 Front View 10 Rear View 11 LCD Display 13 GETTING STARTED 13 Preparation 14 Installing Polaroid PoGo™ ZINK Photo Paper™ 15 Charging the Battery 16 Initial Settings 18 CAPTURE MODE 18 Capturing Images 19 Setting the ...Playing Back Video Clips 23 PLAYBACK MODE 23 Playback of Still Images 24 Attaching Voice Memos 25 Protecting Images 26 Erasing Images 27 INSTANT DIGITAL PRINTER FUNCTIONS AND FEATURES 28 Editing your Images 30 MENU OPTIONS 30 Capture Menu 33 Video Menu 34 Playback Menu 35 Setup Menu ...
User Manual
Page 9
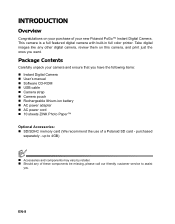
... of your purchase of a Polaroid SD card - EN-8 purchased separately - Take digital images like any of these components be missing, please call our friendly customer service to 4GB) „ Accessories and components may vary by retailer. „ Should any other digital camera, review them on your new Polaroid PoGo™ Instant Digital Camera. up to assist you...
... of your purchase of a Polaroid SD card - EN-8 purchased separately - Take digital images like any of these components be missing, please call our friendly customer service to 4GB) „ Accessories and components may vary by retailer. „ Should any other digital camera, review them on your new Polaroid PoGo™ Instant Digital Camera. up to assist you...

User Manual
Page 28
...print multiple, different images do the following: a. Press the OK button to start printing the selected image. „ After the printing process is complete, the camera returns to select the number of each. Press the PRINT button. 2. b. Use the e / f buttons to preview display. Select [Print] with the... the c / d buttons to the main Print menu. f. If you wish to the main Print menu. Press the OK button. EN-27 INSTANT DIGITAL PRINTER FUNCTIONS AND FEATURES 1. Select the image that you want to print with the e / f buttons, and press the OK button. „ By...
...print multiple, different images do the following: a. Press the OK button to start printing the selected image. „ After the printing process is complete, the camera returns to select the number of each. Press the PRINT button. 2. b. Use the e / f buttons to preview display. Select [Print] with the... the c / d buttons to the main Print menu. f. If you wish to the main Print menu. Press the OK button. EN-27 INSTANT DIGITAL PRINTER FUNCTIONS AND FEATURES 1. Select the image that you want to print with the e / f buttons, and press the OK button. „ By...
User Manual
Page 39
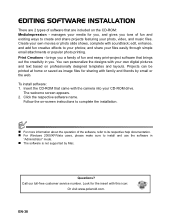
... Insert the CD-ROM that came with your media for the insert with this icon: Or visit www.polaroid.com. Call our toll-free customer service number. manages your own digital pictures and text based on professionally designed templates and layouts. EDITING SOFTWARE INSTALLATION There are 2 types of ... create and share projects featuring your photo, video, and music files. Create your CD-ROM drive. Projects can personalize the designs with the camera into your own movies or photo slide shows, complete with family and friends by Mac. Click the respective software name. Look for you,...
... Insert the CD-ROM that came with your media for the insert with this icon: Or visit www.polaroid.com. Call our toll-free customer service number. manages your own digital pictures and text based on professionally designed templates and layouts. EDITING SOFTWARE INSTALLATION There are 2 types of ... create and share projects featuring your photo, video, and music files. Create your CD-ROM drive. Projects can personalize the designs with the camera into your own movies or photo slide shows, complete with family and friends by Mac. Click the respective software name. Look for you,...
User Manual
Page 40
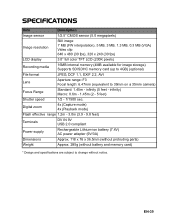
infinity) Macro: 0.6m - 1.45m (2 - 5 feet) Shutter speed 1/2 - 1/1500 sec. EN-39 Digital zoom 4x (Capture mode) 4x (Playback mode) Flash effective range 1.2m - 3.0m (3.9 - 9.8 feet) Terminals DV IN 9V USB 2.0 compliant Power supply Rechargeable Lithium-ion battery (7.... 2.2, AVI Lens Aperture range: F3 Focal length: 6.47mm (equivalent to change without battery and memory card) * Design and specifications are subject to 39mm on a 35mm camera) Focus Range Standard: 1.45m -
infinity) Macro: 0.6m - 1.45m (2 - 5 feet) Shutter speed 1/2 - 1/1500 sec. EN-39 Digital zoom 4x (Capture mode) 4x (Playback mode) Flash effective range 1.2m - 3.0m (3.9 - 9.8 feet) Terminals DV IN 9V USB 2.0 compliant Power supply Rechargeable Lithium-ion battery (7.... 2.2, AVI Lens Aperture range: F3 Focal length: 6.47mm (equivalent to change without battery and memory card) * Design and specifications are subject to 39mm on a 35mm camera) Focus Range Standard: 1.45m -

User Manual
Page 45
Connect the other end of the USB cable to print all images. Printing images When the camera is properly connected to start printing. 2. Select the item you want to configure with the c / d buttons, and press the OK button. „ [... to a PictBridge Compliant Printer If a printer that supports PictBridge is available, images can be printed by connecting the digital still camera directly to the printer 1. Connecting the camera to the PictBridge-compatible printer without using a computer. Select [PictBridge] with the c / d buttons, and press the OK button. „ [Single]:Select to ...
Connect the other end of the USB cable to print all images. Printing images When the camera is properly connected to start printing. 2. Select the item you want to configure with the c / d buttons, and press the OK button. „ [... to a PictBridge Compliant Printer If a printer that supports PictBridge is available, images can be printed by connecting the digital still camera directly to the printer 1. Connecting the camera to the PictBridge-compatible printer without using a computer. Select [PictBridge] with the c / d buttons, and press the OK button. „ [Single]:Select to ...


