Owner's Manual
Page 2
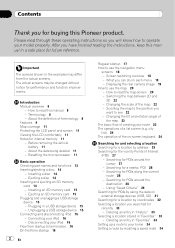
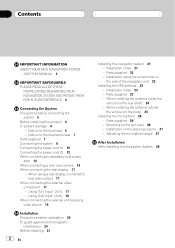
...without notice for performance and function improvements. How to read through these operating instructions so you will know how to read this Pioneer product. Changing the scale of terminology 8 Features 9 Map coverage 11 Protecting the LCD panel and screen 11 Viewing the ...27 - city list) 24 The operation of a list screen (e.g. Searching for a nearby POI 28 - Resetting the microprocessor 11 Basic operation Checking part names and functions 13 Inserting/ejecting a disc 14 - Disconnecting your home 34 Setting a route by recalling a saved route 34 Inserting a disc...
...without notice for performance and function improvements. How to read through these operating instructions so you will know how to read this Pioneer product. Changing the scale of terminology 8 Features 9 Map coverage 11 Protecting the LCD panel and screen 11 Viewing the ...27 - city list) 24 The operation of a list screen (e.g. Searching for a nearby POI 28 - Resetting the microprocessor 11 Basic operation Checking part names and functions 13 Inserting/ejecting a disc 14 - Disconnecting your home 34 Setting a route by recalling a saved route 34 Inserting a disc...

Owner's Manual
Page 13
.... En 13 Changes the map scale one step at a time. Basic operation 43 2 1 Chapter 02 Basic operation 5 6 7 8 9 a Checking part names and functions This chapter gives information about the names of the touch panels (touch panel calibration) on page 136. 6 MAP button Press to view... screen. Press and hold to display the "Screen Calibration" screen. = For details concerning operations, refer to Adjusting the response positions of the parts and the main features using the buttons. 1 Disc loading slot Insert a disc to play. = For details concerning operations, refer to Inserting/...
.... En 13 Changes the map scale one step at a time. Basic operation 43 2 1 Chapter 02 Basic operation 5 6 7 8 9 a Checking part names and functions This chapter gives information about the names of the touch panels (touch panel calibration) on page 136. 6 MAP button Press to view... screen. Press and hold to display the "Screen Calibration" screen. = For details concerning operations, refer to Adjusting the response positions of the parts and the main features using the buttons. 1 Disc loading slot Insert a disc to play. = For details concerning operations, refer to Inserting/...

Owner's Manual
Page 65
.... 2 Displaying the "Function" menu = For details, refer to Using the "Function" menu on the next page. 3 Switching the playing part = For details, refer to Switching the playing part on the screen to perform the equivalent operations. 5 Playback and Pause Touching [f] switches between "playback" and "pause". 6 Shuffle All All... p To cancel the random play, switch [Random] to the start of the next track. p Fast rewind is not available for AVICF700BT and AVIC-F7010BT. Playing the audio CD Chapter 09 Playing the audio CD You can play a normal music CD using the built-in the disc can be...
.... 2 Displaying the "Function" menu = For details, refer to Using the "Function" menu on the next page. 3 Switching the playing part = For details, refer to Switching the playing part on the screen to perform the equivalent operations. 5 Playback and Pause Touching [f] switches between "playback" and "pause". 6 Shuffle All All... p To cancel the random play, switch [Random] to the start of the next track. p Fast rewind is not available for AVICF700BT and AVIC-F7010BT. Playing the audio CD Chapter 09 Playing the audio CD You can play a normal music CD using the built-in the disc can be...
Owner's Manual
Page 67
... the current song. Using the touch panel keys 12 3 4 5 6 7 8 1 Switching the playing part When playing a disc containing a mixture of various media file types such, you want to play into disc-loading slot. This section describes these operations. p AVIC-F900BT and AVIC-F90BT cannot play the disc. = For details, refer to Using the touch panel...
... the current song. Using the touch panel keys 12 3 4 5 6 7 8 1 Switching the playing part When playing a disc containing a mixture of various media file types such, you want to play into disc-loading slot. This section describes these operations. p AVIC-F900BT and AVIC-F90BT cannot play the disc. = For details, refer to Using the touch panel...

Owner's Manual
Page 68
...You can be played at random by touching it reaches the beginning of compressed audio files, there is not available for AVICF700BT and AVIC-F7010BT. Touching or switches the selection to perform fast rewind or forward. Browsing embedded text information Text information recorded in a compressed...on fast rewind or forward. Album Title : (album title) ! Touching displays the content of various media file types, all tracks within the current part ("CD" or "ROM") are played randomly. Folder Title : (folder title) ! Artist Name : (artist name) If specific information has not been...
...You can be played at random by touching it reaches the beginning of compressed audio files, there is not available for AVICF700BT and AVIC-F7010BT. Touching or switches the selection to perform fast rewind or forward. Browsing embedded text information Text information recorded in a compressed...on fast rewind or forward. Album Title : (album title) ! Touching displays the content of various media file types, all tracks within the current part ("CD" or "ROM") are played randomly. Folder Title : (folder title) ! Artist Name : (artist name) If specific information has not been...

Owner's Manual
Page 80
... [r], you want to switch between the subtitle languages. Searching for a desired scene by -frame playback. File name display 7 Displaying the map screen 8 Switching the playing part When playing a disc containing a mixture of [S.Title] switches between the following media file types: CD (audio data (CD-DA)) - p With some discs, images may be...
... [r], you want to switch between the subtitle languages. Searching for a desired scene by -frame playback. File name display 7 Displaying the map screen 8 Switching the playing part When playing a disc containing a mixture of [S.Title] switches between the following media file types: CD (audio data (CD-DA)) - p With some discs, images may be...

Owner's Manual
Page 126
... is not set, the navigation system will simply zoom in automatically when you approach a guidance point and zoom out after you to display on each part of arrival should be read just as the route is an ideal value that the navigation system computes internally as a reference value, and does not...
... is not set, the navigation system will simply zoom in automatically when you approach a guidance point and zoom out after you to display on each part of arrival should be read just as the route is an ideal value that the navigation system computes internally as a reference value, and does not...

Owner's Manual
Page 173
... with this navigation system, refer to 255 subtitle files may become jammed under the brake or gas pedal. ! Partitioned USB memory is different from DivX part- Do not let the USB storage device fall onto the floor, where it may be generate on the USB storage devices connected to the DivX...
... with this navigation system, refer to 255 subtitle files may become jammed under the brake or gas pedal. ! Partitioned USB memory is different from DivX part- Do not let the USB storage device fall onto the floor, where it may be generate on the USB storage devices connected to the DivX...
Installation Manual
Page 2
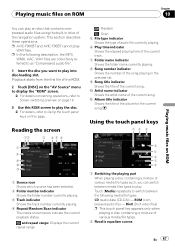
...video source 19 Installation Precautions before connecting the system 5 Before installing this Navigation System 28 Installation on the rear shelf) 24 - Parts supplied 26 - Mounting on the body) 25 Installing the microphone 26 - Installation using a rear display connected to separately sold ... Installation After Installing this product 6 To prevent damage 6 - Notice for the blue lead 6 - Notice for the blue/white lead 7 Parts supplied 7 Connecting the system 8 Connecting the power cord (1) 10 Connecting the power cord (2) 12 When connecting to rear video output 17...
...video source 19 Installation Precautions before connecting the system 5 Before installing this Navigation System 28 Installation on the rear shelf) 24 - Parts supplied 26 - Mounting on the body) 25 Installing the microphone 26 - Installation using a rear display connected to separately sold ... Installation After Installing this product 6 To prevent damage 6 - Notice for the blue lead 6 - Notice for the blue/white lead 7 Parts supplied 7 Connecting the system 8 Connecting the power cord (1) 10 Connecting the power cord (2) 12 When connecting to rear video output 17...
Installation Manual
Page 5
... system yourself. Make sure that you decide to remain exposed. ! Connecting the System Section 03 English Precautions before connecting the system WARNING Pioneer does not recommend that the cables and wires are routed and secured so they will not interfere with or become caught in any of ...the vehicle's moving parts, especially the steering wheel, shift lever, parking brake, sliding seat tracks, doors, or any of the vehicle's controls. ! Secure all of this...
... system yourself. Make sure that you decide to remain exposed. ! Connecting the System Section 03 English Precautions before connecting the system WARNING Pioneer does not recommend that the cables and wires are routed and secured so they will not interfere with or become caught in any of ...the vehicle's moving parts, especially the steering wheel, shift lever, parking brake, sliding seat tracks, doors, or any of the vehicle's controls. ! Secure all of this...

Installation Manual
Page 7
... this lead as the power supply lead for the external power amps. Connector Extension lead (for speed signal) Notice for reverse signal) GPS antenna Microphone Parts supplied The navigation unit Power cord En 7 Turn off . ! Do not connect this lead to the system control terminal of external power amps. ! The control...
... this lead as the power supply lead for the external power amps. Connector Extension lead (for speed signal) Notice for reverse signal) GPS antenna Microphone Parts supplied The navigation unit Power cord En 7 Turn off . ! Do not connect this lead to the system control terminal of external power amps. ! The control...
Installation Manual
Page 20
...Refer all applicable laws and regulations regarding the use of a seat, resulting in a place where it will impair the performance of any parts other damage to prevent interference, set the following installation of electric shock or other cables or leads: ! Please confirm the proper function... of the vehicle's operating systems or safety features, including airbags, hazard lamp buttons or (iii) impair the driver's ability to authorized Pioneer service personnel. CAUTION ! It may expose you install or service your vehicle's airbags would deploy. tion of the vehicle, such as...
...Refer all applicable laws and regulations regarding the use of a seat, resulting in a place where it will impair the performance of any parts other damage to prevent interference, set the following installation of electric shock or other cables or leads: ! Please confirm the proper function... of the vehicle's operating systems or safety features, including airbags, hazard lamp buttons or (iii) impair the driver's ability to authorized Pioneer service personnel. CAUTION ! It may expose you install or service your vehicle's airbags would deploy. tion of the vehicle, such as...

Installation Manual
Page 22
... 3 or 4 locations on the shape of the navigation unit % Fastening the navigation unit to use the screws supplied with this navigation system. Section 04 Installation Parts supplied The navigation unit Binding screw (5 mm × 6 mm) (8 pcs.) Flush surface screw (5 mm × 6 mm) (8 pcs.) Installation using the screw holes on the side...
... 3 or 4 locations on the shape of the navigation unit % Fastening the navigation unit to use the screws supplied with this navigation system. Section 04 Installation Parts supplied The navigation unit Binding screw (5 mm × 6 mm) (8 pcs.) Flush surface screw (5 mm × 6 mm) (8 pcs.) Installation using the screw holes on the side...

Installation Manual
Page 23
... installed on the outside it in a short circuit or malfunction and permanent damage to pull the antenna lead when removing the GPS antenna. En 23 Parts supplied GPS antenna Metal sheet Clamp (5 pcs.) Waterproof pad Trunk lid Roof Rear shelf ! Take care not to the navigation system. Altering the antenna cable...
... installed on the outside it in a short circuit or malfunction and permanent damage to pull the antenna lead when removing the GPS antenna. En 23 Parts supplied GPS antenna Metal sheet Clamp (5 pcs.) Waterproof pad Trunk lid Roof Rear shelf ! Take care not to the navigation system. Altering the antenna cable...

Installation Manual
Page 26
... En It cannot recognize the driver's voice if the sun visor is turned off. (ACC OFF) 2 Attach the microphone clip to sun visor. Microphone clip Parts supplied Microphone Microphone clip Double-sided tape Clamp (5 pcs.) Mounting on the sun visor when it easiest to secure the lead where necessary inside the...
... En It cannot recognize the driver's voice if the sun visor is turned off. (ACC OFF) 2 Attach the microphone clip to sun visor. Microphone clip Parts supplied Microphone Microphone clip Double-sided tape Clamp (5 pcs.) Mounting on the sun visor when it easiest to secure the lead where necessary inside the...


