Leaflet
Page 1
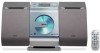
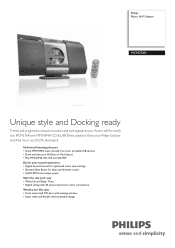
... music directly from your portable USB devices • Dock and play your GoGear or iPod players • Play MP3/WMA-CD, CD and CD-RW Enrich your sound experience • Digital Sound Control for optimized music style settings • Dynamic Bass Boost for deep and dramatic sound • 2x5W RMS total output power Start the day your way • Wake-Up and Sleep Timer • Digital tuning with 40 preset stations for extra convenience Watch your Philips GoGear and iPod music...
... music directly from your portable USB devices • Dock and play your GoGear or iPod players • Play MP3/WMA-CD, CD and CD-RW Enrich your sound experience • Digital Sound Control for optimized music style settings • Dynamic Bass Boost for deep and dramatic sound • 2x5W RMS total output power Start the day your way • Wake-Up and Sleep Timer • Digital tuning with 40 preset stations for extra convenience Watch your Philips GoGear and iPod music...

Leaflet
Page 2
.... Micro Hi-Fi System Highlights USB Direct for MP3/WMA music Digital Sound Control MCM276R/37 Dynamic Bass Boost Simply plug in your device to automatically adjust the sound balance and enhance the most out of your music by emphasizing the bass content of the music throughout the range of a button! from the device. Each mode uses graphic equalizing technology to the USB port on to boost bass levels, so you are playing. Ultimately, Digital Sound Control makes it...
.... Micro Hi-Fi System Highlights USB Direct for MP3/WMA music Digital Sound Control MCM276R/37 Dynamic Bass Boost Simply plug in your device to automatically adjust the sound balance and enhance the most out of your music by emphasizing the bass content of the music throughout the range of a button! from the device. Each mode uses graphic equalizing technology to the USB port on to boost bass levels, so you are playing. Ultimately, Digital Sound Control makes it...
Leaflet
Page 3
... Philips Electronics N.V. Micro Hi-Fi System Specifications MCM276R/37 Sound • Output Power: 10W Total Power • Output power (RMS): 2 x 5 W • Sound Enhancement: Dynamic Bass Boost, Digital Sound Control Loudspeakers • Main Speaker: 2 way, Bass Reflex Speaker System, Piezo tweeter, 4" woofer Audio Playback • Playback Media: CD, CD-R, CD-RW, MP3-CD, WMA-CD • Disc Playback Modes: 40-Track Programmable, Repeat/one/all/program, Shuffle Play • Loader Type: Front, Motorised • ID3-tag support • USB Direct Modes: Fast Backward/Fast Forward, Play...
... Philips Electronics N.V. Micro Hi-Fi System Specifications MCM276R/37 Sound • Output Power: 10W Total Power • Output power (RMS): 2 x 5 W • Sound Enhancement: Dynamic Bass Boost, Digital Sound Control Loudspeakers • Main Speaker: 2 way, Bass Reflex Speaker System, Piezo tweeter, 4" woofer Audio Playback • Playback Media: CD, CD-R, CD-RW, MP3-CD, WMA-CD • Disc Playback Modes: 40-Track Programmable, Repeat/one/all/program, Shuffle Play • Loader Type: Front, Motorised • ID3-tag support • USB Direct Modes: Fast Backward/Fast Forward, Play...
User manual
Page 8
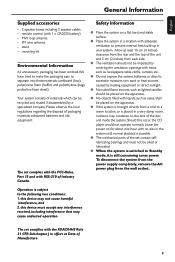
... Mounting stand onto the set Mounting MCM276R onto walls Rear connections 13-14 Speaker connections Antenna connections Connecting an additional appliance .......... 14-15 Connecting a USB device Connecting a docking cradle Using AC power 15 Preparations Using the remote control 16 Setting the clock 16 Basic Functions Switching on/off the set and selecting functions 17 Switching between Standby and ECO POWER mode 17 Auto-standby 17 Volume control 18 Volume adjustment MUTE Sound control 18 DSC DBB Displaying the clock 18 CD Discs for playback 19 Playing discs 19-20 Selecting and...
... Mounting stand onto the set Mounting MCM276R onto walls Rear connections 13-14 Speaker connections Antenna connections Connecting an additional appliance .......... 14-15 Connecting a USB device Connecting a docking cradle Using AC power 15 Preparations Using the remote control 16 Setting the clock 16 Basic Functions Switching on/off the set and selecting functions 17 Switching between Standby and ECO POWER mode 17 Auto-standby 17 Volume control 18 Volume adjustment MUTE Sound control 18 DSC DBB Displaying the clock 18 CD Discs for playback 19 Playing discs 19-20 Selecting and...
User manual
Page 9
... switched to Standby mode, it is still consuming some power. this device may condense on for about one hour with 1 x CR2025 battery) - FM wire antenna - Please observe the local regulations regarding the disposal of the disc unit inside the system. this occur, the CD player would not operate normally. Leave the power on the lens of packaging materials, exhausted batteries and old equipment. remote control (with no disc...
... switched to Standby mode, it is still consuming some power. this device may condense on for about one hour with 1 x CR2025 battery) - FM wire antenna - Please observe the local regulations regarding the disposal of the disc unit inside the system. this occur, the CD player would not operate normally. Leave the power on the lens of packaging materials, exhausted batteries and old equipment. remote control (with no disc...
User manual
Page 10
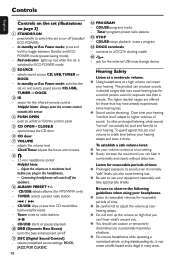
... headphone socket Helpful hints: - Tuner: tunes to a DC276 docking cradle % - selects predefined sound settings: ROCK, JAZZ, POP, CLASSIC 10 @ PROGRAM - This product can impair your equipment reasonably and take appropriate breaks. opens/closes the CD door 6 CD door 7 VOLUME - Connecting headphones will switch off ! connects to radio stations ÉÅ - Over time your hearing. CD/USB: starts or pauses playback 0 DBB (Dynamic Bass Boost) - turns the bass enhancement on/off the speakers. 9 ALBUM/ PRESET + /- - DSC (Digital Sound Control) - So...
... headphone socket Helpful hints: - Tuner: tunes to a DC276 docking cradle % - selects predefined sound settings: ROCK, JAZZ, POP, CLASSIC 10 @ PROGRAM - This product can impair your equipment reasonably and take appropriate breaks. opens/closes the CD door 6 CD door 7 VOLUME - Connecting headphones will switch off ! connects to radio stations ÉÅ - Over time your hearing. CD/USB: starts or pauses playback 0 DBB (Dynamic Bass Boost) - turns the bass enhancement on/off the speakers. 9 ALBUM/ PRESET + /- - DSC (Digital Sound Control) - So...

User manual
Page 11
... function on and selects TUNER source DOCK - turns the bass enhancement on or off @ PROGRAM - CD - adjusts the volume level - set time - selects continuous playback 0 DSC (Digital Sound Control) - press briefly to control by pressing one of the source select keys on and selects USB source. Clock: - First select the source you wish to switch the set on the remote control (for remote control: - In standby or Eco Power mode: switches the set on /off (standby/ ECO POWER); - displays the timer setting - switches the sound off - Controls English Remote control...
... function on and selects TUNER source DOCK - turns the bass enhancement on or off @ PROGRAM - CD - adjusts the volume level - set time - selects continuous playback 0 DSC (Digital Sound Control) - press briefly to control by pressing one of the source select keys on and selects USB source. Clock: - First select the source you wish to switch the set on the remote control (for remote control: - In standby or Eco Power mode: switches the set on /off (standby/ ECO POWER); - displays the timer setting - switches the sound off - Controls English Remote control...

User manual
Page 13
... portion of the black (or unmarked) speaker cable into the socket, then release the clip b. Install your set near the AC outlet and where the AC power plug can damage the set or the sound quality will be reached easily. Using other speakers can be negatively affected. ● Connect the cable of the left ) AC power cord Rear connections Warning: - Never make or change connections with the mains supply switched on. -
... portion of the black (or unmarked) speaker cable into the socket, then release the clip b. Install your set near the AC outlet and where the AC power plug can damage the set or the sound quality will be reached easily. Using other speakers can be negatively affected. ● Connect the cable of the left ) AC power cord Rear connections Warning: - Never make or change connections with the mains supply switched on. -
User manual
Page 14
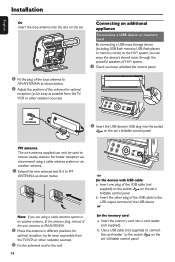
... the set 's foldable control panel FM antenna The wire antenna supplied can enjoy the device's stored music through the powerful speakers of Hi-Fi system. 1 Check you are using a cable antenna system or an outdoor antenna, fit the antenna plug, instead of the wire antenna, to FM ANTENNA . 2 Move the antenna in different positions for optimal reception (as far away as possible from the TV,VCR or other radiation sources) 3 Fix the antenna's end to the USB output...
... the set 's foldable control panel FM antenna The wire antenna supplied can enjoy the device's stored music through the powerful speakers of Hi-Fi system. 1 Check you are using a cable antenna system or an outdoor antenna, fit the antenna plug, instead of the wire antenna, to FM ANTENNA . 2 Move the antenna in different positions for optimal reception (as far away as possible from the TV,VCR or other radiation sources) 3 Fix the antenna's end to the USB output...
User manual
Page 15
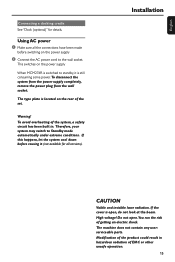
Using AC power 1 Make sure all versions). Therefore, your system may switch to the wall socket. Installation CAUTION Visible and invisible laser radiation. Warning! The type plate is located on the power supply 2 Connect the AC power cord to Standby mode automatically under extreme conditions. If the cover is still consuming some power. The machine does not contain any userserviceable parts. Do not open , do not look...
Using AC power 1 Make sure all versions). Therefore, your system may switch to the wall socket. Installation CAUTION Visible and invisible laser radiation. Warning! The type plate is located on the power supply 2 Connect the AC power cord to Standby mode automatically under extreme conditions. If the cover is still consuming some power. The machine does not contain any userserviceable parts. Do not open , do not look...
User manual
Page 16
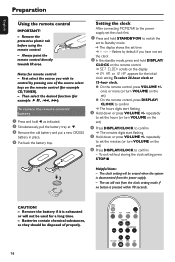
... turn VOLUME on the set ) 4 Press DISPLAY/CLOCK to confirm ➜ The hours digits start flashing 5 Hold down or press VOLUME +/- Always point the remote control directly towards IR area. Then select the desired function (for remote control: - To replace the remote controls' battery 1 Press and hold 1 as indicated. 2 Simultaneously, pull the battery tray at 4. 3 Remove the old battery and put a new CR2025 battery in place. 4 Put back the battery tray. 2 Setting the clock After connecting MCM276R to the power supply, set...
... turn VOLUME on the set ) 4 Press DISPLAY/CLOCK to confirm ➜ The hours digits start flashing 5 Hold down or press VOLUME +/- Always point the remote control directly towards IR area. Then select the desired function (for remote control: - To replace the remote controls' battery 1 Press and hold 1 as indicated. 2 Simultaneously, pull the battery tray at 4. 3 Remove the old battery and put a new CR2025 battery in place. 4 Put back the battery tray. 2 Setting the clock After connecting MCM276R to the power supply, set...
User manual
Page 17
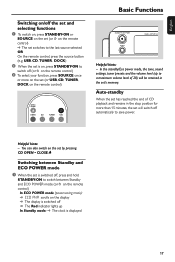
In the standby/Eco power mode, the tone, sound settings, tuner presets and the volume level (up In Standby mode: ➜ The clock is on, press STANDBY-ON to switch off (or y on the remote control) 3 To select your function, press SOURCE once or more than 15 minutes, the set will be retained in the set (or USB, CD, TUNER, DOCK on the remote control) / Basic Functions Helpful hints: - Auto-standby When the set has reached the end of...
In the standby/Eco power mode, the tone, sound settings, tuner presets and the volume level (up In Standby mode: ➜ The clock is on, press STANDBY-ON to switch off (or y on the remote control) 3 To select your function, press SOURCE once or more than 15 minutes, the set will be retained in the set (or USB, CD, TUNER, DOCK on the remote control) / Basic Functions Helpful hints: - Auto-standby When the set has reached the end of...

User manual
Page 18
... set or by pressing DISPLAY/ CLOCK. 18 adjust the volume controls; - When playing MP3 files, you can: - press MUTE again; - English Basic Functions Volume control Volume adjustment ● Adjust the volume by using the VOLUME rotary on the set . 1 Press MUTE on the remote control to select the desired sound setting: ROCK, JAZZ, POP, CLASSIC / MUTE You can temporarily switch off the sound ➜ MUTE appears. Notes: - change source DBB ● Press DBB (Dynamic Bass...
... set or by pressing DISPLAY/ CLOCK. 18 adjust the volume controls; - When playing MP3 files, you can: - press MUTE again; - English Basic Functions Volume control Volume adjustment ● Adjust the volume by using the VOLUME rotary on the set . 1 Press MUTE on the remote control to select the desired sound setting: ROCK, JAZZ, POP, CLASSIC / MUTE You can temporarily switch off the sound ➜ MUTE appears. Notes: - change source DBB ● Press DBB (Dynamic Bass...
User manual
Page 19
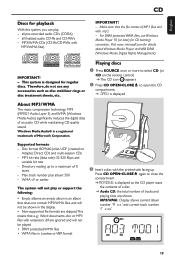
... the CD player scans the contents of a disc ➜ Audio CD: the total number of tracks and playing time are ignored and will not be played. • DRM protected WMA files • WMA files in the display. • Non-supported file formats are skipped.This means that the file names of an audio CD while maintaining CD quality sound. microsoft.com for playback With this system...
... the CD player scans the contents of a disc ➜ Audio CD: the total number of tracks and playing time are ignored and will not be played. • DRM protected WMA files • WMA files in the display. • Non-supported file formats are skipped.This means that the file names of an audio CD while maintaining CD quality sound. microsoft.com for playback With this system...

User manual
Page 27
... player you use) to the MCM276R Micro Hi-Fi System by matching colors before connecting the docking cable to the system. 2 Insert a dock adapter corresponding to the portable player you have powered on Philips GoGear before selecting DOCK source. ➜ On the display, "GoGear" is displayed if Philips GoGear is connected, or "iPod" is displayed if iPod is compatible. ● Make sure that you use. 2 1 2 1 Playing an iPod/GoGear portable player 1 Correctly dock your iPod portable player on the remote to select DOCK source. 3 Playback starts...
... player you use) to the MCM276R Micro Hi-Fi System by matching colors before connecting the docking cable to the system. 2 Insert a dock adapter corresponding to the portable player you have powered on Philips GoGear before selecting DOCK source. ➜ On the display, "GoGear" is displayed if Philips GoGear is connected, or "iPod" is displayed if iPod is compatible. ● Make sure that you use. 2 1 2 1 Playing an iPod/GoGear portable player 1 Correctly dock your iPod portable player on the remote to select DOCK source. 3 Playback starts...

User manual
Page 28
Make sure the clock is set is switched on - Activating and deactivating TIMER ● Press TIMER on the remote repeatedly to activate or deactivate the timer. ➜ If activated, the last set source and start flashing 6 Hold down or press VOLUME +/- no button is now set and activated ➜ At the set alarm time, the CD,TUNER or USB will switch off the set (or y on the remote control) Helpful hints: - repeatedly to set the hours (or turn VOLUME on the set) 7 Press TIMER to confirm...
Make sure the clock is set is switched on - Activating and deactivating TIMER ● Press TIMER on the remote repeatedly to activate or deactivate the timer. ➜ If activated, the last set source and start flashing 6 Hold down or press VOLUME +/- no button is now set and activated ➜ At the set alarm time, the CD,TUNER or USB will switch off the set (or y on the remote control) Helpful hints: - repeatedly to set the hours (or turn VOLUME on the set) 7 Press TIMER to confirm...

User manual
Page 30
... the Micro HiFi System and your dealer or Philips for repair. The system does not react when buttons ✔ Remove and reconnect the AC power plug and are reversed. ✔ Check the speaker connections and location. 30 Sound cannot be heard or is of titles exceeds 999 Radio reception is poor. ✔ If the signal is displayed. switch on the USB device are not displayed. ✔ Check if the number...
... the Micro HiFi System and your dealer or Philips for repair. The system does not react when buttons ✔ Remove and reconnect the AC power plug and are reversed. ✔ Check the speaker connections and location. 30 Sound cannot be heard or is of titles exceeds 999 Radio reception is poor. ✔ If the signal is displayed. switch on the USB device are not displayed. ✔ Check if the number...
User manual
Page 31
... its remote control. ✔ The buttons on MCM276R and its remote control can control playback of audio contents only.To navigate the menu, use the player. 31 The menu navigation or photo playback of the docked player cannot be stopped using the STOP 9 button on the timer. The STOP 9 and some buttons on the docked player. The Clock/Timer setting is not working. ✔ Select the source (CD or TUNER, for playback. ✔ The playback of the system...
... its remote control. ✔ The buttons on MCM276R and its remote control can control playback of audio contents only.To navigate the menu, use the player. 31 The menu navigation or photo playback of the docked player cannot be stopped using the STOP 9 button on the timer. The STOP 9 and some buttons on the docked player. The Clock/Timer setting is not working. ✔ Select the source (CD or TUNER, for playback. ✔ The playback of the system...

Quick start guide
Page 3
... start flashing 3 Hold down or press VOLUME +/- Press VOLUME +/- Remove the protective plastic tab before using the remote control Notes for the initial clock setting. repeatedly to set the hours 4 Press DISPLAY/CLOCK to confirm 5 Hold down or press VOLUME +/- Prepare Setting the clock 1 Press and hold STANDBY-ON y to switch the set to Standby mode ➜ The display shows the set time flashes by pressing one of the source select keys on the remote control) 2 Press CD OPEN•...
... start flashing 3 Hold down or press VOLUME +/- Press VOLUME +/- Remove the protective plastic tab before using the remote control Notes for the initial clock setting. repeatedly to set the hours 4 Press DISPLAY/CLOCK to confirm 5 Hold down or press VOLUME +/- Prepare Setting the clock 1 Press and hold STANDBY-ON y to switch the set to Standby mode ➜ The display shows the set time flashes by pressing one of the source select keys on the remote control) 2 Press CD OPEN•...
Quick start guide
Page 4
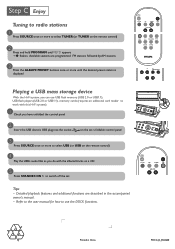
... PROGRAM until the desired preset station is displayed Playing a USB mass storage device With the Hi-Fi system, you have unfolded the control panel 2 Insert the USB device's USB plug into the socket on the set 's foldable control panel 3 Press SOURCE once or more to select TUNER (or TUNER on a CD 5 Press STANDBY-ON y to select USB (or USB on the remote control) 4 / Play the USB's audio files as you do with this Hi-Fi system). 1 Check you can use the DOCK...
... PROGRAM until the desired preset station is displayed Playing a USB mass storage device With the Hi-Fi system, you have unfolded the control panel 2 Insert the USB device's USB plug into the socket on the set 's foldable control panel 3 Press SOURCE once or more to select TUNER (or TUNER on a CD 5 Press STANDBY-ON y to select USB (or USB on the remote control) 4 / Play the USB's audio files as you do with this Hi-Fi system). 1 Check you can use the DOCK...


