
Leaflet
Page 1
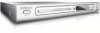
... analogue sound input Plays it all • Movies: DVD, DVD+R/RW, DVD-R/RW, VCD • Music: CD, CD-R/RW and MP3-CD • Photos: Picture CD (JPEG) Fits everywhere, goes anywhere • Compact design • Ultra-slim design Introducing the best value DVD-player. No complications! Philips DVD player DVD622 See, hear, play everything Does size matter?
... analogue sound input Plays it all • Movies: DVD, DVD+R/RW, DVD-R/RW, VCD • Music: CD, CD-R/RW and MP3-CD • Photos: Picture CD (JPEG) Fits everywhere, goes anywhere • Compact design • Ultra-slim design Introducing the best value DVD-player. No complications! Philips DVD player DVD622 See, hear, play everything Does size matter?
Leaflet
Page 2
... • Quick start guide • User Manual: English/ French/ Spanish • Warranty Card: North American version Progressive Scan doubles the vertical resolution of Koninklijke Philips Electronics N.V. DVD player Specifications DVD622/37 Highlights Picture/Display • Aspect ratio: 4:3, 16:9 • D/A converter: 10 bit, 54 MHz • Picture enhancement: Progressive Scan Sound • D/A converter: 192KHz...
... • Quick start guide • User Manual: English/ French/ Spanish • Warranty Card: North American version Progressive Scan doubles the vertical resolution of Koninklijke Philips Electronics N.V. DVD player Specifications DVD622/37 Highlights Picture/Display • Aspect ratio: 4:3, 16:9 • D/A converter: 10 bit, 54 MHz • Picture enhancement: Progressive Scan Sound • D/A converter: 192KHz...
User manual
Page 5
...provided by various disc manufacturers, your CDAudio disc retailer. IF THERE ARE QUESTIONS REGARDING YOUR TV SET COMPATIBILITY WITH THIS MODEL 525p AND 625p DVD PLAYER, PLEASE CONTACT OUR CUSTOMER SERVICE CENTER.' 01-36 DVD622_372 5 18/01/2005, 2:203A1M39 246 14872 ATENCIÓN El uso de ... no sean los aquí descritos puede ocasionar peligro de exposición a radiación. As DVD technology advances, these enhancements will become common and will be easy to www.philips.com/support for a free software upgrade. 'CONSUMERS SHOULD NOTE THAT NOT ALL HIGH DEFINITION TELEVISION SETS...
...provided by various disc manufacturers, your CDAudio disc retailer. IF THERE ARE QUESTIONS REGARDING YOUR TV SET COMPATIBILITY WITH THIS MODEL 525p AND 625p DVD PLAYER, PLEASE CONTACT OUR CUSTOMER SERVICE CENTER.' 01-36 DVD622_372 5 18/01/2005, 2:203A1M39 246 14872 ATENCIÓN El uso de ... no sean los aquí descritos puede ocasionar peligro de exposición a radiación. As DVD technology advances, these enhancements will become common and will be easy to www.philips.com/support for a free software upgrade. 'CONSUMERS SHOULD NOTE THAT NOT ALL HIGH DEFINITION TELEVISION SETS...

User manual
Page 6
... has been made easy to service this copyright protection technology must be recycled and reused if disassembled by Macrovision Corporation. Your DVD player consists of Digital Theater Systems, Inc. This product incorporates copyright protection technology that is prohibited. Reverse engineering or disassembly ...authorized by a specialised company. Laser safety This unit employs a laser. DVD VIDEO 622 Serial No LASER Type Wave length Output Power Beam divergence Semiconductor laser GaAlAs 650 nm (DVD) 780 nm (VCD/CD) 7 mW (DVD) 10 mW (VCD/CD) 60 degree 01-36 DVD622_372 6 18/01...
... has been made easy to service this copyright protection technology must be recycled and reused if disassembled by Macrovision Corporation. Your DVD player consists of Digital Theater Systems, Inc. This product incorporates copyright protection technology that is prohibited. Reverse engineering or disassembly ...authorized by a specialised company. Laser safety This unit employs a laser. DVD VIDEO 622 Serial No LASER Type Wave length Output Power Beam divergence Semiconductor laser GaAlAs 650 nm (DVD) 780 nm (VCD/CD) 7 mW (DVD) 10 mW (VCD/CD) 60 degree 01-36 DVD622_372 6 18/01...
User manual
Page 8
...your TV 17 Setting the TV Display 17 Step 3: Setting language preference 18 Setting the OSD Language 18 Setting the Audio, Subtitle and DVD menu language 18 Disc Operations Playable Discs 19 Region Codes 19 Playing discs 20 Using Disc Menu 20 Basic playback controls 21-23 Pausing ...playback 21 Selecting track/chapter 21 Zoom 21 Repeat 22 Repeat A-B 22 Slow Motion 23 Forward / Reverse Searching 23 Preview 23 Special DVD features 24 Selecting a Title 24 Camera Angle 24 Changing the Audio Language 24 Subtitles 24 Playing MP3/JPEG Picture CD 24-25 General Operation...
...your TV 17 Setting the TV Display 17 Step 3: Setting language preference 18 Setting the OSD Language 18 Setting the Audio, Subtitle and DVD menu language 18 Disc Operations Playable Discs 19 Region Codes 19 Playing discs 20 Using Disc Menu 20 Basic playback controls 21-23 Pausing ...playback 21 Selecting track/chapter 21 Zoom 21 Repeat 22 Repeat A-B 22 Slow Motion 23 Forward / Reverse Searching 23 Preview 23 Special DVD features 24 Selecting a Title 24 Camera Angle 24 Changing the Audio Language 24 Subtitles 24 Playing MP3/JPEG Picture CD 24-25 General Operation...

User manual
Page 9
...) of free space all around the player for adequate ventilation. 10 cm (4 inches) 10 cm (4 inches) PHILIPS 10 cm (4 inches) Care and safety information q Power consumption - q Do not block the vents - Do not operate the DVD Player in the warm environment until the moisture evaporates. To disconnect the system from the power...
...) of free space all around the player for adequate ventilation. 10 cm (4 inches) 10 cm (4 inches) PHILIPS 10 cm (4 inches) Care and safety information q Power consumption - q Do not block the vents - Do not operate the DVD Player in the warm environment until the moisture evaporates. To disconnect the system from the power...
User manual
Page 10
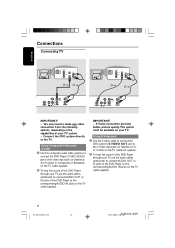
... to the corresponding AUDIO IN jacks on the TV (cable supplied). 10 01-36 DVD622_372 10 18/01/2005, 2:203A1M39 246 14871 Connect the DVD system directly to the corresponding AUDIO IN jacks on the TV (cable supplied). S-Video connection provides better picture quality.This option must be available on... the capabilities of your TV. Using Composite Video jacks (CVBS) 1 Use the composite video cable (yellow) to connect the DVD Player's CVBS (VIDEO) jack to the video input jack (or labeled as Y/C or S-VHS) on the TV (cable not supplied). 2 To hear the ...
... to the corresponding AUDIO IN jacks on the TV (cable supplied). 10 01-36 DVD622_372 10 18/01/2005, 2:203A1M39 246 14871 Connect the DVD system directly to the corresponding AUDIO IN jacks on the TV (cable supplied). S-Video connection provides better picture quality.This option must be available on... the capabilities of your TV. Using Composite Video jacks (CVBS) 1 Use the composite video cable (yellow) to connect the DVD Player's CVBS (VIDEO) jack to the video input jack (or labeled as Y/C or S-VHS) on the TV (cable not supplied). 2 To hear the ...

User manual
Page 11
... (or labeled as 75 ohm or RF In,) you will need an RF modulator in order to view the DVD playback on the TV (cable supplied). See your TV, use the audio cables (white/red) to connect AUDIO OUT (L/ R)...AUDIO IN jacks on the TV. Using an accessory RF modulator 1 Use the composite video cable (yellow) to connect the DVD Player's CVBS jack to the video input jack on your TV's RF jack. 01-36 DVD622_372 11 11 18/01/2005...IN V (Pr/Cr) S-VIDEO IN U (Pb/Cb) VIDEO IN Y AUDIO IN 2 Connections RF coaxial cable to TV 2 Back of this DVD Player through Component Video (Y Pb Pr) output.
... (or labeled as 75 ohm or RF In,) you will need an RF modulator in order to view the DVD playback on the TV (cable supplied). See your TV, use the audio cables (white/red) to connect AUDIO OUT (L/ R)...AUDIO IN jacks on the TV. Using an accessory RF modulator 1 Use the composite video cable (yellow) to connect the DVD Player's CVBS jack to the video input jack on your TV's RF jack. 01-36 DVD622_372 11 11 18/01/2005...IN V (Pr/Cr) S-VIDEO IN U (Pb/Cb) VIDEO IN Y AUDIO IN 2 Connections RF coaxial cable to TV 2 Back of this DVD Player through Component Video (Y Pb Pr) output.

User manual
Page 12
When no disc is connected properly, plug in the AC power cord to the power outlet. NDBY ON NO DISC DVD VIDEO / CD PLAYER STOP PLAY/PAUSE IR OPEN/CLOSE MIC LEVEL 12 01-36 DVD622_372 12 18/01/2005, 2:213A1M39 246 14871 Never make or ... or COMPONENT VIDEO IN) depending on the options available on your TV. 2 Use the audio cables (white/red) to connect AUDIO OUT (L/R) jacks of the DVD Player to the corresponding AUDIO IN jacks on . English Connections Connecting the power cord COMPONENT VIDEO IN S-VSID-VEIODEO IN IN AOUUDATIOUINDIO SVCA(PRr/TC...
When no disc is connected properly, plug in the AC power cord to the power outlet. NDBY ON NO DISC DVD VIDEO / CD PLAYER STOP PLAY/PAUSE IR OPEN/CLOSE MIC LEVEL 12 01-36 DVD622_372 12 18/01/2005, 2:213A1M39 246 14871 Never make or ... or COMPONENT VIDEO IN) depending on the options available on your TV. 2 Use the audio cables (white/red) to connect AUDIO OUT (L/R) jacks of the DVD Player to the corresponding AUDIO IN jacks on . English Connections Connecting the power cord COMPONENT VIDEO IN S-VSID-VEIODEO IN IN AOUUDATIOUINDIO SVCA(PRr/TC...
User manual
Page 13
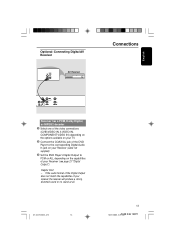
..., COMPONENT VIDEO IN) depending on the options available on your TV. 2 Connect the COAXIAL jack of the DVD Player to the corresponding Digital Audio In jack on your Receiver (cable not supplied). 3 Set the DVD Player's Digital Output to PCM or ALL depending on the capabilities of your Receiver (see page 27...
..., COMPONENT VIDEO IN) depending on the options available on your TV. 2 Connect the COAXIAL jack of the DVD Player to the corresponding Digital Audio In jack on your Receiver (cable not supplied). 3 Set the DVD Player's Digital Output to PCM or ALL depending on the capabilities of your Receiver (see page 27...
User manual
Page 14
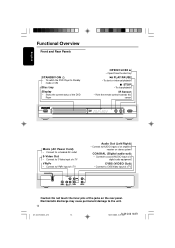
... input of a TV Caution: Do not touch the inner pins of a digital audio equipment CVBS (VIDEO Out) - To stop playback IR Sensor - To switch the DVD Player to S-Video input of the DVD Player OPEN/CLOSE / - Connect to Standby mode or ON Disc tray Display -
... input of a TV Caution: Do not touch the inner pins of a digital audio equipment CVBS (VIDEO Out) - To stop playback IR Sensor - To switch the DVD Player to S-Video input of the DVD Player OPEN/CLOSE / - Connect to Standby mode or ON Disc tray Display -
User manual
Page 15
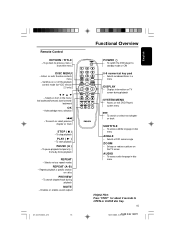
Switches on TV screen during playback MUTE - To start playback PAUSE ( ; ) - To switch the DVD player to previous menu / show title menu DISC MENU - To go back to standby mode or ON 0-9 numerical key pad - To stop playback PLAY ( B ) - Selects ... 18/01/2005, 2:213A1M39 246 14871 English To search chapter/track during playback SYSTEM MENU - To search or select next chapter or track SUBTITLE - Selects a DVD camera angle ZOOM - Selects an item in a menu DISPLAY - To pause playback temporarily / frame-by-frame playback REPEAT - To access subtitle language in disc menu...
Switches on TV screen during playback MUTE - To start playback PAUSE ( ; ) - To switch the DVD player to previous menu / show title menu DISC MENU - To go back to standby mode or ON 0-9 numerical key pad - To stop playback PLAY ( B ) - Selects ... 18/01/2005, 2:213A1M39 246 14871 English To search chapter/track during playback SYSTEM MENU - To search or select next chapter or track SUBTITLE - Selects a DVD camera angle ZOOM - Selects an item in a menu DISPLAY - To pause playback temporarily / frame-by-frame playback REPEAT - To access subtitle language in disc menu...

User manual
Page 16
... to interlaced mode (refer to your TV, then press the Channel down button repeatedly until you are between the Remote Control and the DVD Player while operating the DVD Player. English Getting Started Step 1: Inserting batteries into the Remote Control 3 1 2 1 Open the battery compartment. 2 Insert two ... (+-) inside the compartment. 3 Close the cover. You should be due to the equipment owner's manual for few seconds. ➜ The DVD blue background screen will appear on the front panel. 2 Do not put any objects between the lowest and highest channels and may be disposed...
... to interlaced mode (refer to your TV, then press the Channel down button repeatedly until you are between the Remote Control and the DVD Player while operating the DVD Player. English Getting Started Step 1: Inserting batteries into the Remote Control 3 1 2 1 Open the battery compartment. 2 Insert two ... (+-) inside the compartment. 3 Close the cover. You should be due to the equipment owner's manual for few seconds. ➜ The DVD blue background screen will appear on the front panel. 2 Do not put any objects between the lowest and highest channels and may be disposed...

User manual
Page 17
... the instructions shown on the TV to confirm the selection (if any). ➜ If a blank/distorted TV screen appears, wait for 15 seconds for a DVD disc to play on the disc. The format you have a widescreen TV. 6 Select an item and press OK. It will not affect the picture during... Rating TV Display TV Type Video Output Progressive 4:3 PanScan Multi NTSC PAL Multi Getting Started Setting the TV Display Set the aspect ratio of the DVD Player according to highlight one of the options below : 4:3 PANSCAN - The output format will be in PAL format. In order for auto recovery. 1 ...
... the instructions shown on the TV to confirm the selection (if any). ➜ If a blank/distorted TV screen appears, wait for 15 seconds for a DVD disc to play on the disc. The format you have a widescreen TV. 6 Select an item and press OK. It will not affect the picture during... Rating TV Display TV Type Video Output Progressive 4:3 PanScan Multi NTSC PAL Multi Getting Started Setting the TV Display Set the aspect ratio of the DVD Player according to highlight one of the options below : 4:3 PANSCAN - The output format will be in PAL format. In order for auto recovery. 1 ...

User manual
Page 18
... the OSD Language The On-screen language for you whenever you set it, regardless of various disc languages. Language Video Audio OSD Menu Subtitle Audio DVD Menu English Off English English Rating 1 Press SYSTEM MENU. 2 Press 2 to select {LANGUAGE}, then press OK. 3 Press 3 4 to ...highlight one of the options below at a time, then press OK. - 'Subtitle' (disc's subtitles) - 'Audio' (disc's soundtrack) - 'DVD Menu' (disc's menu) 4 Press 3 4 to the language for the system menu will remain as you load a disc. To remove the menu, press SYSTEM MENU. 01...
... the OSD Language The On-screen language for you whenever you set it, regardless of various disc languages. Language Video Audio OSD Menu Subtitle Audio DVD Menu English Off English English Rating 1 Press SYSTEM MENU. 2 Press 2 to select {LANGUAGE}, then press OK. 3 Press 3 4 to ...highlight one of the options below at a time, then press OK. - 'Subtitle' (disc's subtitles) - 'Audio' (disc's soundtrack) - 'DVD Menu' (disc's menu) 4 Press 3 4 to the language for the system menu will remain as you load a disc. To remove the menu, press SYSTEM MENU. 01...

User manual
Page 19
... - If you are having trouble playing a certain disc, remove the disc and try a different one. English Disc Operations IMPORTANT! - Playable Discs Your DVD Player will not play : - Video CDs (VCDs) - and Canada regions 1 U.K and Europe regions 2 Asia Pacific regions 3 Discs that can be ...may cause the disc player malfunction. Doing so may be unable to support the Region Management System. Digital Video Discs + Recordable [Rewritable] (DVD+R[W]) - Always refer to the type of disc or condition of the unit U.S.A. Region Region number of the recording. - It may be ...
... - If you are having trouble playing a certain disc, remove the disc and try a different one. English Disc Operations IMPORTANT! - Playable Discs Your DVD Player will not play : - Video CDs (VCDs) - and Canada regions 1 U.K and Europe regions 2 Asia Pacific regions 3 Discs that can be ...may cause the disc player malfunction. Doing so may be unable to support the Region Management System. Digital Video Discs + Recordable [Rewritable] (DVD+R[W]) - Always refer to the type of disc or condition of the unit U.S.A. Region Region number of the recording. - It may be ...
User manual
Page 20
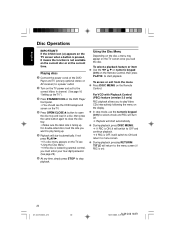
... 2 Turn on the TV power and set to the correct Video In channel. (See page 16 "Setting up the TV"). 3 Press STANDBY-ON on the DVD Player front panel. ➜ You should see "Using the Disc Menu". ➜ If the disc is locked by parental control, you to menu screen. English... Disc Operations IMPORTANT! Using the Disc Menu Depending on the disc, a menu may appear on the TV, see the DVD background screen on the Remote Control, then press PLAY B to play Video CDs interactively, following the menu on the Remote Control. If not press PLAY...
... 2 Turn on the TV power and set to the correct Video In channel. (See page 16 "Setting up the TV"). 3 Press STANDBY-ON on the DVD Player front panel. ➜ You should see "Using the Disc Menu". ➜ If the disc is locked by parental control, you to menu screen. English... Disc Operations IMPORTANT! Using the Disc Menu Depending on the disc, a menu may appear on the TV, see the DVD background screen on the Remote Control, then press PLAY B to play Video CDs interactively, following the menu on the Remote Control. If not press PLAY...
User manual
Page 21
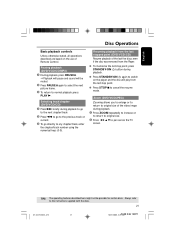
...or to return to original size of the video image during playback. q Press STANDBY-ON B again to pan across the TV screen. Pausing playback (DVD/VCD/CD/MP3) 1 During playback, press PAUSE ;. ➜ Playback will pause and sound will play from the Player. again to select the next... playback controls Unless otherwise stated, all operations described are based on the player and the disc will be possible for certain discs. Selecting track/chapter (DVD/VCD/CD) 1 Press T briefly during playback to go to the next chapter/track 2 Press S to go to the previous track or current. ...
...or to return to original size of the video image during playback. q Press STANDBY-ON B again to pan across the TV screen. Pausing playback (DVD/VCD/CD/MP3) 1 During playback, press PAUSE ;. ➜ Playback will pause and sound will play from the Player. again to select the next... playback controls Unless otherwise stated, all operations described are based on the player and the disc will be possible for certain discs. Selecting track/chapter (DVD/VCD/CD) 1 Press T briefly during playback to go to the next chapter/track 2 Press S to go to the previous track or current. ...
User manual
Page 22
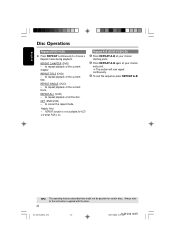
...of the current chapter. TIPS: The operating features described here might not be possible for VCD 2.0 when PCB is not available for certain discs. Repeat A-B (DVD/VCD/CD) 1 Press REPEAT A-B at your chosen starting point. 2 Press REPEAT A-B again at your chosen end point. ➜ The section will now ... REPEAT A-B. to the instructions supplied with the discs. 22 01-36 DVD622_372 22 18/01/2005, 2:213A1M39 246 14871 REPEAT CHAPTER (DVD) - OFF (DVD/VCD) - to choose a Repeat mode during playback. REPEAT function is on. Always refer to repeat playback of all the disc.
...of the current chapter. TIPS: The operating features described here might not be possible for VCD 2.0 when PCB is not available for certain discs. Repeat A-B (DVD/VCD/CD) 1 Press REPEAT A-B at your chosen starting point. 2 Press REPEAT A-B again at your chosen end point. ➜ The section will now ... REPEAT A-B. to the instructions supplied with the discs. 22 01-36 DVD622_372 22 18/01/2005, 2:213A1M39 246 14871 REPEAT CHAPTER (DVD) - OFF (DVD/VCD) - to choose a Repeat mode during playback. REPEAT function is on. Always refer to repeat playback of all the disc.
User manual
Page 23
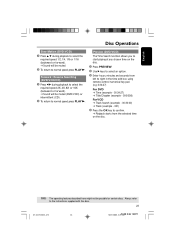
...). 2 To return to confirm. ➜ Playback starts from left to right in the time edit box using remote control numerical key pad. (e.g. 0:34:27) For DVD ➜ Time (example - 00:34:27) ➜ Title/Chapter (example - 000/008) For VCD ➜ Track Search (example - 00:30:00) ➜ Track (example... - 001) 4 Press the OK key to normal speed, press PLAY B. Preview (DVD/VCD) The Time Search function allows you to start playing at any chosen time on the disc. 1 Press PREVIEW. 2 Use 2 keys to select an option...
...). 2 To return to confirm. ➜ Playback starts from left to right in the time edit box using remote control numerical key pad. (e.g. 0:34:27) For DVD ➜ Time (example - 00:34:27) ➜ Title/Chapter (example - 000/008) For VCD ➜ Track Search (example - 00:30:00) ➜ Track (example... - 001) 4 Press the OK key to normal speed, press PLAY B. Preview (DVD/VCD) The Time Search function allows you to start playing at any chosen time on the disc. 1 Press PREVIEW. 2 Use 2 keys to select an option...


