
User Manual
Page 5
...-saving offers. Please contact customer service for all of the digital camera. Important Registering your remote control is expressed or implied. Complete and return your product you receive notification - Virgin Islands, contact Philips Customer Care Center at www.philips.com/support to ensure : Product Safety Notification By registering your Product Registration Card at...
...-saving offers. Please contact customer service for all of the digital camera. Important Registering your remote control is expressed or implied. Complete and return your product you receive notification - Virgin Islands, contact Philips Customer Care Center at www.philips.com/support to ensure : Product Safety Notification By registering your Product Registration Card at...

User Manual
Page 6
For Product recycling information, please visit www.recycle.philips.com End of life directives Philips pays a lot of batteries according to local regulations. 1.5. Your new Blu-ray Disc™ Player contains materials which can dismantle the ... DTS logos are trademarks or registered trademarks of your old Blu-ray Disc™ Player according to local regulations. All Rights Reserved. Supplied Accessories • Remote Control • Batteries (AAA, 1.5V x 2) • User Manual • Quick Start Guide • Registration card • Box-inserts • Audio / video cables 1.6. ...
For Product recycling information, please visit www.recycle.philips.com End of life directives Philips pays a lot of batteries according to local regulations. 1.5. Your new Blu-ray Disc™ Player contains materials which can dismantle the ... DTS logos are trademarks or registered trademarks of your old Blu-ray Disc™ Player according to local regulations. All Rights Reserved. Supplied Accessories • Remote Control • Batteries (AAA, 1.5V x 2) • User Manual • Quick Start Guide • Registration card • Box-inserts • Audio / video cables 1.6. ...
User Manual
Page 8
...Information 6 FEATURES 9 Features 9 Version Info 10 Symbols Used in this User Manual 10 FUNCTIONAL OVERVIEW 11 Front Panel 11 Rear Panel 11 Remote Control 12 Display Panel 14 Guide to On-Screen Display 14 CONNECTIONS 15 HDMI Video / Audio Connection 15 Standard Video + Standard Audio ...33 Switching Subtitles 33 Switching Audio Soundtrack 34 Switching Camera Angles 34 Black Level 35 Noise Reduction 35 Virtual Surround 35 Philips Wireless MediaConnect 36 NETWORK SERVICES 37 Before Using Network Services 37 Information on Network Services 37 PANDORA OPERATIONS 37 Activating ...
...Information 6 FEATURES 9 Features 9 Version Info 10 Symbols Used in this User Manual 10 FUNCTIONAL OVERVIEW 11 Front Panel 11 Rear Panel 11 Remote Control 12 Display Panel 14 Guide to On-Screen Display 14 CONNECTIONS 15 HDMI Video / Audio Connection 15 Standard Video + Standard Audio ...33 Switching Subtitles 33 Switching Audio Soundtrack 34 Switching Camera Angles 34 Black Level 35 Noise Reduction 35 Virtual Surround 35 Philips Wireless MediaConnect 36 NETWORK SERVICES 37 Before Using Network Services 37 Information on Network Services 37 PANDORA OPERATIONS 37 Activating ...
User Manual
Page 9
.../ MP3 / WMA / JPEG files. Enjoy your content on page 39. Easy and simple connection to your HDTV via HDMI Connect your BDP5506 to video upscaling. The high definition video output signal will be less jagged and more data than before thanks to your current audio-video ...collection. Refer to a 3D capable TV using a 3D compatible HDMI cable. To fully benefit from noise. Intuitive user interface and remote control The Philips logical user interface allows you to enjoy your HDTV with other multiple outputs, you can provide smooth movement during playback of film originated ...
.../ MP3 / WMA / JPEG files. Enjoy your content on page 39. Easy and simple connection to your HDTV via HDMI Connect your BDP5506 to video upscaling. The high definition video output signal will be less jagged and more data than before thanks to your current audio-video ...collection. Refer to a 3D capable TV using a 3D compatible HDMI cable. To fully benefit from noise. Intuitive user interface and remote control The Philips logical user interface allows you to enjoy your HDTV with other multiple outputs, you can provide smooth movement during playback of film originated ...

User Manual
Page 11
... the unit, you can control the unit from the AC outlet to another device with a LAN cable. 3. Infrared sensor window • Receives signals from your remote control so that you must unplug the AC power cord.) • Touch and hold for 10 seconds to shut down the unit. 2. PC, external HDD...
... the unit, you can control the unit from the AC outlet to another device with a LAN cable. 3. Infrared sensor window • Receives signals from your remote control so that you must unplug the AC power cord.) • Touch and hold for 10 seconds to shut down the unit. 2. PC, external HDD...

User Manual
Page 12
... button • Press to display the pop-up menu. A (open or close ) button* • Press to BD-video which supports the PiP (BONUSVIEW™) function). 3. Remote Control 1 2 29 3 28 4 5 6 27 7 8 9 26 10* 25 11 24 12 23 13 22 14 21 15* 16 17 20 18 19 * The... turn on a disc. 18. BONUSVIEW (PiP) button • Press to switch picture in the input field. 17. SUBTITLE button • Press to the Philips brand TV). 15. 3.3. TV VOL button • Press to adjust the TV volume (only applicable to select subtitles on the unit, or to display the...
... button • Press to display the pop-up menu. A (open or close ) button* • Press to BD-video which supports the PiP (BONUSVIEW™) function). 3. Remote Control 1 2 29 3 28 4 5 6 27 7 8 9 26 10* 25 11 24 12 23 13 22 14 21 15* 16 17 20 18 19 * The... turn on a disc. 18. BONUSVIEW (PiP) button • Press to switch picture in the input field. 17. SUBTITLE button • Press to the Philips brand TV). 15. 3.3. TV VOL button • Press to adjust the TV volume (only applicable to select subtitles on the unit, or to display the...

User Manual
Page 13
... When playback is in your country or area. • Do not recharge, short-circuit, heat, burn or disassemble batteries. Ⅲ Using the Remote Control Remote Control Usage Guidelines: • Make sure that apply in pause, press to the unit. • Replace the batteries when you notice a fall-off... • Press to select repeat mode. Ⅲ Installing the Batteries in pause mode, press to the Philips brand TV). 23. Avoid using a remote control from the unit are no obstacles between the remote control and the infrared sensor window on the infrared sensor window of the unit. •...
... When playback is in your country or area. • Do not recharge, short-circuit, heat, burn or disassemble batteries. Ⅲ Using the Remote Control Remote Control Usage Guidelines: • Make sure that apply in pause, press to the unit. • Replace the batteries when you notice a fall-off... • Press to select repeat mode. Ⅲ Installing the Batteries in pause mode, press to the Philips brand TV). 23. Avoid using a remote control from the unit are no obstacles between the remote control and the infrared sensor window on the infrared sensor window of the unit. •...
User Manual
Page 22
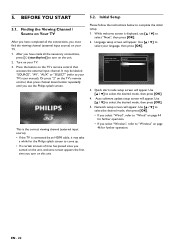
... then press [OK]. Auto software update setup screen will appear. After you have made all the connections, you turn on the TV's remote control, then press channel down button repeatedly until you have completed all the necessary connections, press [Q (standby/on)] to complete the initial ...select your TV's user manual). English Español Français 3. Network setup screen will appear. 5. Please select your language for the Philips splash screen to select "Next", then press [OK]. 2. This is the correct viewing channel (external input source). • If the TV ...
... then press [OK]. Auto software update setup screen will appear. After you have made all the connections, you turn on the TV's remote control, then press channel down button repeatedly until you have completed all the necessary connections, press [Q (standby/on)] to complete the initial ...select your TV's user manual). English Español Français 3. Network setup screen will appear. 5. Please select your language for the Philips splash screen to select "Next", then press [OK]. 2. This is the correct viewing channel (external input source). • If the TV ...
User Manual
Page 36
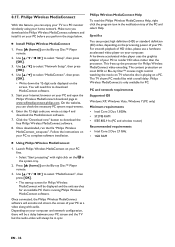
...)] on the Blu-ray Disc™ Player remote. 3. Use [K / L] to download the free Philips Wireless MediaConnect software. 8. Start your Internet browser on your PC to select "MediaConnect", then press [OK]. • The startup screen for an available PC that is running Philips Wireless MediaConnect software. Use [K / L /... click on your computer and network configuration, there will need this feature, you perform the steps below. Ⅲ Install Philips Wireless MediaConnect 1. Depending on the in the notification tray of your PC as a PC monitor wirelessly using your computer....
...)] on the Blu-ray Disc™ Player remote. 3. Use [K / L] to download the free Philips Wireless MediaConnect software. 8. Start your Internet browser on your PC to select "MediaConnect", then press [OK]. • The startup screen for an available PC that is running Philips Wireless MediaConnect software. Use [K / L /... click on your computer and network configuration, there will need this feature, you perform the steps below. Ⅲ Install Philips Wireless MediaConnect 1. Depending on the in the notification tray of your PC as a PC monitor wirelessly using your computer....

User Manual
Page 48
... inappropriate material. 1. Follow steps 1 to select "Parental Control", then press [OK]. Refer to select "Setup" in conjunction with following buttons of the remote control of this unit. ("One Touch Standby" can be turned off by setting it then turn off the power on page 43. 2. Use [K /...it turns off the power of network settings or Wi-Fi settings. 1. EasyLink Setup (home) A "Setup" A "EasyLink Setup" This unit supports Philips EasyLink, which is inserted in the setup menu. 12.5. When "EasyLink" setting is selected in the "Menu Language" in the unit) One Touch ...
... inappropriate material. 1. Follow steps 1 to select "Parental Control", then press [OK]. Refer to select "Setup" in conjunction with following buttons of the remote control of this unit. ("One Touch Standby" can be turned off by setting it then turn off the power on page 43. 2. Use [K /...it turns off the power of network settings or Wi-Fi settings. 1. EasyLink Setup (home) A "Setup" A "EasyLink Setup" This unit supports Philips EasyLink, which is inserted in the setup menu. 12.5. When "EasyLink" setting is selected in the "Menu Language" in the unit) One Touch ...
User Manual
Page 51
... video input. Assign the audio input of the TV screen. This unit supports following region codes. - DVD :"ALL" or "1" for BDP5506/F7 (USA / Canada) "ALL" or "4" for BDP5506/F8 (Mexico) For DVD-RW/-R, make sure they are not muted. Make sure that the disc is certified. EN - 51 EN 13...ISO9660 or JOLIET format. Cannot play back Windows Media™ Audio files from a disc. Cannot play back MP3 files from a disc. Point the remote control at the product. Insert the batteries with your 3D TV's user manual for 5 seconds to change the setting back to page 39.) Wear ...
... video input. Assign the audio input of the TV screen. This unit supports following region codes. - DVD :"ALL" or "1" for BDP5506/F7 (USA / Canada) "ALL" or "4" for BDP5506/F8 (Mexico) For DVD-RW/-R, make sure they are not muted. Make sure that the disc is certified. EN - 51 EN 13...ISO9660 or JOLIET format. Cannot play back Windows Media™ Audio files from a disc. Cannot play back MP3 files from a disc. Point the remote control at the product. Insert the batteries with your 3D TV's user manual for 5 seconds to change the setting back to page 39.) Wear ...


