Owner's Manual
Page 4
... the presser foot 2:11 USB ports 2:12 Connect machine to computer 2:12 5D™ Embroidery Software 2:13 Installing your machine 2:14 Buttons and icons 2:15 3 PFAFF® HD screen 3:1 Task bar 3:2 Use the task bar 3:3 Common icons 3:3 Selection menu...Option bar 4:4 Save options 4:4 Tie-off options 4:5 Speed control 4:6 Sewing programs 4:6 Balance 4:8 Mirroring 4:8 Zoom to update your software 2:13 Install hardware drivers and connect the embroidery machine 2:13 How to launch the programs 2:14 Embroidery Machine Communication module.... 2:14 ...
... the presser foot 2:11 USB ports 2:12 Connect machine to computer 2:12 5D™ Embroidery Software 2:13 Installing your machine 2:14 Buttons and icons 2:15 3 PFAFF® HD screen 3:1 Task bar 3:2 Use the task bar 3:3 Common icons 3:3 Selection menu...Option bar 4:4 Save options 4:4 Tie-off options 4:5 Speed control 4:6 Sewing programs 4:6 Balance 4:8 Mirroring 4:8 Zoom to update your software 2:13 Install hardware drivers and connect the embroidery machine 2:13 How to launch the programs 2:14 Embroidery Machine Communication module.... 2:14 ...
Owner's Manual
Page 32
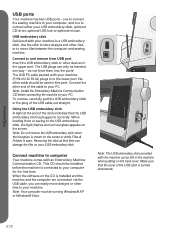
USB embroidery stick Delivered with an Embroidery Machine Communication CD. Connect to your machine. do not force them into the ports! When the software on the CD is installed and the machine and the computer are connected, via the USB cable, you can be left in the machine when ...
USB embroidery stick Delivered with an Embroidery Machine Communication CD. Connect to your machine. do not force them into the ports! When the software on the CD is installed and the machine and the computer are connected, via the USB cable, you can be left in the machine when ...

Owner's Manual
Page 33
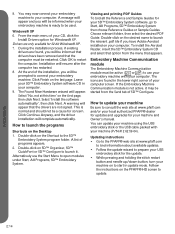
... with a user name that is an administrator on the CD. Under Send 1 or Send 2 select PFAFF® creative vision™. Click Install to customize 5D™ Software newsletters. Click Finish on your computer. 5D™ Organizer Find your computer. 2. Insert your Installation Code... worksheets of your CD, click the Install Drivers option for your machine type: PFAFF® creative vision™. Click the option to start automatically when starting Windows. Then add the PFAFF® creative vision™ from the Machine Manager in 5D™ Organizer. 5D™ QuickFont...
... with a user name that is an administrator on the CD. Under Send 1 or Send 2 select PFAFF® creative vision™. Click Install to customize 5D™ Software newsletters. Click Finish on your computer. 5D™ Organizer Find your computer. 2. Insert your Installation Code... worksheets of your CD, click the Install Drivers option for your machine type: PFAFF® creative vision™. Click the option to start automatically when starting Windows. Then add the PFAFF® creative vision™ from the Machine Manager in 5D™ Organizer. 5D™ QuickFont...
Owner's Manual
Page 34
...QuickFont or 5D™ ConÀgure to your computer. Double-click on your computer. The icons are found in your local authorized PFAFF® dealer for updates and upgrades for concern. During the installation process, if existing drivers are found , you have been removed ...174; XP 6. From the main menu of programs appears. 2. Drivers are not signed. Click OK to start in update mode. Select 'Install the software automatically', then click Next. A warning will complete automatically. This is not active, it . How to the 5D™ Embroidery System program folder. ...
...QuickFont or 5D™ ConÀgure to your computer. Double-click on your computer. The icons are found in your local authorized PFAFF® dealer for updates and upgrades for concern. During the installation process, if existing drivers are found , you have been removed ...174; XP 6. From the main menu of programs appears. 2. Drivers are not signed. Click OK to start in update mode. Select 'Install the software automatically', then click Next. A warning will complete automatically. This is not active, it . How to the 5D™ Embroidery System program folder. ...
Owner's Manual
Page 45
Touch the icon to any design using the 5D™ Organizer Software, included with the needle in the down position. Jump stitch trim commands can take up message appears. The presser foot will raise to do a defragmentation... features the automatic function Cut jump stitches. Hold the thread end when you start embroidering again, so that needs to Embroidery stitch-out. ABC 3:9 Pfaff HD screen When deselected, no automatic thread snips will save current state periodically while embroidering and also when you embroider. The defragmentation can easily remove...
Touch the icon to any design using the 5D™ Organizer Software, included with the needle in the down position. Jump stitch trim commands can take up message appears. The presser foot will raise to do a defragmentation... features the automatic function Cut jump stitches. Hold the thread end when you start embroidering again, so that needs to Embroidery stitch-out. ABC 3:9 Pfaff HD screen When deselected, no automatic thread snips will save current state periodically while embroidering and also when you embroider. The defragmentation can easily remove...
Owner's Manual
Page 49
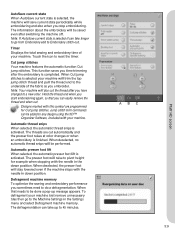
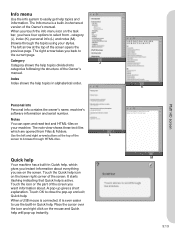
... Owner's manual. It starts Áashing indicating that Quick help topics and information. Personal info Personal info contains the owner's name, machine's software information and serial number. K M 3:13 Pfaff HD screen Info menu Use the info system to browse through the topics using your machine. Browse through HTML-Àles. Touch the...
... Owner's manual. It starts Áashing indicating that Quick help topics and information. Personal info Personal info contains the owner's name, machine's software information and serial number. K M 3:13 Pfaff HD screen Info menu Use the info system to browse through the topics using your machine. Browse through HTML-Àles. Touch the...
Owner's Manual
Page 105
.... Embroidery mode - When you touch OK, your resized design before embroidering on a project. In 5D™ software to resize very large and complex this case, you do not want to make the design local authorized PFAFF® dealer. Once you touch OK, • Designs can be Ànished. Start over and and...
.... Embroidery mode - When you touch OK, your resized design before embroidering on a project. In 5D™ software to resize very large and complex this case, you do not want to make the design local authorized PFAFF® dealer. Once you touch OK, • Designs can be Ànished. Start over and and...
Owner's Manual
Page 108
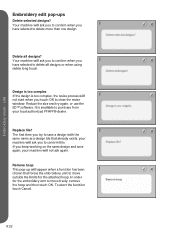
... to conÀrm when you have selected to purchase from your machine will not start when you try again, or use the 5D™ software. Your machine will ask you keep working on the same design and save a design with the same name as a design Àle that forces the... to move outside the limits for the embroidery arm to conÀrm this. Reduce the size and try to save again, your local authorized PFAFF® dealer. The Àrst time you touch OK to move freely, remove the hoop and then touch OK.
... to conÀrm when you have selected to purchase from your machine will not start when you try again, or use the 5D™ software. Your machine will ask you keep working on the same design and save a design with the same name as a design Àle that forces the... to move outside the limits for the embroidery arm to conÀrm this. Reduce the size and try to save again, your local authorized PFAFF® dealer. The Àrst time you touch OK to move freely, remove the hoop and then touch OK.

Owner's Manual
Page 135
...Copy a Àle or folder 10:6 Could not delete Àle or folder 10:7 Create a new folder 10:6 Create a sequence 5:3 creative vision™ Embroidery collection 7:3 Crosshair 9:3 Current position 9:7 Current stitch 9:4 Custom LED lights 2:3 Cut jump stitches 3:9 Cut position 9:7 Cut thread ... Àle or folder 10:6 Delete a letter 8:20 Delete all designs 8:22 11:5 Index Index 3-dimensional view 8:9, 9:6 5D™ Embroidery Software 2:13 5D™ Organizer 2:13 5D™ QuickFont 2:13 A Accessories 1:10 Accessory tray 1:9 Action indicator 2:15 Add a letter into a...
...Copy a Àle or folder 10:6 Could not delete Àle or folder 10:7 Create a new folder 10:6 Create a sequence 5:3 creative vision™ Embroidery collection 7:3 Crosshair 9:3 Current position 9:7 Current stitch 9:4 Custom LED lights 2:3 Cut jump stitches 3:9 Cut position 9:7 Cut thread ... Àle or folder 10:6 Delete a letter 8:20 Delete all designs 8:22 11:5 Index Index 3-dimensional view 8:9, 9:6 5D™ Embroidery Software 2:13 5D™ Organizer 2:13 5D™ QuickFont 2:13 A Accessories 1:10 Accessory tray 1:9 Action indicator 2:15 Add a letter into a...
Owner's Manual
Page 136
... Info menu 3:13 Insert a new stitch point 6:3 Insert a stitch or letter 5:3 Inserting the bobbin 2:8 Install hardware drivers and connect the embroidery machine 2:13 Installing your software 2:13 Intellectual Property 11:10 Invalid Àle type for this folder 10:8 L Language 3:12 List view 10:3 Load a design 8:2 Load a Àle 10:5 Load...
... Info menu 3:13 Insert a new stitch point 6:3 Insert a stitch or letter 5:3 Inserting the bobbin 2:8 Install hardware drivers and connect the embroidery machine 2:13 Installing your software 2:13 Intellectual Property 11:10 Invalid Àle type for this folder 10:8 L Language 3:12 List view 10:3 Load a design 8:2 Load a Àle 10:5 Load...


