
Operation Manual
Page 1
Digital Camera Operating Manual To ensure the best performance from your camera, please read the Operating Manual before using the camera.
Digital Camera Operating Manual To ensure the best performance from your camera, please read the Operating Manual before using the camera.
Operation Manual
Page 2
... according to connect the printer and digital camera directly, using the camera in the Copyright Act. You can be taken here also. Please read this manual are not PRINT Image Matching III compliant. Keep this PENTAX Digital Camera. Refer to their respective companies. ...Thank you for purchasing this manual safe, as there are cases where limitations are trademarks of Seiko Epson Corporation. Regarding trademarks • PENTAX and Optio are placed on page 1) for...
... according to connect the printer and digital camera directly, using the camera in the Copyright Act. You can be taken here also. Please read this manual are not PRINT Image Matching III compliant. Keep this PENTAX Digital Camera. Refer to their respective companies. ...Thank you for purchasing this manual safe, as there are cases where limitations are trademarks of Seiko Epson Corporation. Regarding trademarks • PENTAX and Optio are placed on page 1) for...

Operation Manual
Page 3
...exclusive use of small children. Warning This symbol indicates that violating this product. High voltages are present within the camera, and there is therefore a danger of electric shocks if the camera is accidentally swallowed. • Wrapping the strap of this item could cause equipment failure, a fire, or ...of the AC adapter. Continued use of an AC adapter other irregularity, stop using this product. When using the camera immediately, remove the batteries or unplug the AC adapter, and contact your nearest PENTAX Service Center. Please take the camera apart or remodel the...
...exclusive use of small children. Warning This symbol indicates that violating this product. High voltages are present within the camera, and there is therefore a danger of electric shocks if the camera is accidentally swallowed. • Wrapping the strap of this item could cause equipment failure, a fire, or ...of the AC adapter. Continued use of an AC adapter other irregularity, stop using this product. When using the camera immediately, remove the batteries or unplug the AC adapter, and contact your nearest PENTAX Service Center. Please take the camera apart or remodel the...

Operation Manual
Page 4
... to charge them or take the batteries apart. The batteries could explode or catch fire. Also, be recharged. In case of any leakage from the camera immediately if they may explode. • Do not charge any leakage from the batteries should come in the wrong orientation. Do not use , so... please take care, as there is a risk of the camera may cause a fire, rupture, leak or heat. • When replacing the batteries, do not combine different brands, types or capacities. Using some other than...
... to charge them or take the batteries apart. The batteries could explode or catch fire. Also, be recharged. In case of any leakage from the camera immediately if they may explode. • Do not charge any leakage from the batteries should come in the wrong orientation. Do not use , so... please take care, as there is a risk of the camera may cause a fire, rupture, leak or heat. • When replacing the batteries, do not combine different brands, types or capacities. Using some other than...

Operation Manual
Page 5
...alcohol or benzene. • Places of your data to a malfunction of high temperature and humidity should be guaranteed if recording, playback or transferring your camera or recording media (SD Memory Card), etc. • The lens on female connector body (with wet hands. About the AC Adapter Caution •...included in the package with organic solvents such as at a wedding or during storage. 3 If the AC plug cord becomes damaged, consult a PENTAX Service Center. • Do not short or touch the output terminals of hazards, use only CSA/UL Certified power supply cord set, cord is...
...alcohol or benzene. • Places of your data to a malfunction of high temperature and humidity should be guaranteed if recording, playback or transferring your camera or recording media (SD Memory Card), etc. • The lens on female connector body (with wet hands. About the AC Adapter Caution •...included in the package with organic solvents such as at a wedding or during storage. 3 If the AC plug cord becomes damaged, consult a PENTAX Service Center. • Do not short or touch the output terminals of hazards, use only CSA/UL Certified power supply cord set, cord is...

Operation Manual
Page 6
...be possible to rapid temperature changes, condensation may form on the camera. 4 Please manage your camera memory at your back pocket as this may damage the camera. Therefore put the camera in a bag or plastic bag, and take the camera out when the difference in order to maintain high performance. •... data recovery software. This could cause breakage or malfunction. • Be careful not to sit down with the camera in your own risk. • Please do not use the camera where it is subjected to the vibrations of a motorbike, car, ship, etc. • The temperature range ...
...be possible to rapid temperature changes, condensation may form on the camera. 4 Please manage your camera memory at your back pocket as this may damage the camera. Therefore put the camera in a bag or plastic bag, and take the camera out when the difference in order to maintain high performance. •... data recovery software. This could cause breakage or malfunction. • Be careful not to sit down with the camera in your own risk. • Please do not use the camera where it is subjected to the vibrations of a motorbike, car, ship, etc. • The temperature range ...
Operation Manual
Page 7
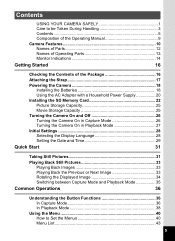
...Names of Operating Parts 13 Monitor Indications 14 Getting Started 16 Checking the Contents of the Package 16 Attaching the Strap 17 Powering the Camera 18 Installing the Batteries 18 Using the AC Adapter with a Household Power Supply 20 Installing the SD Memory Card 22 Picture Storage Capacity... 25 Movie Storage Capacity 25 Turning the Camera On and Off 26 Turning the Camera On in Capture Mode 26 Turning the Camera On in Playback Mode 27 Initial Settings 28 Selecting the Display Language 28 Setting the Date and...
...Names of Operating Parts 13 Monitor Indications 14 Getting Started 16 Checking the Contents of the Package 16 Attaching the Strap 17 Powering the Camera 18 Installing the Batteries 18 Using the AC Adapter with a Household Power Supply 20 Installing the SD Memory Card 22 Picture Storage Capacity... 25 Movie Storage Capacity 25 Turning the Camera On and Off 26 Turning the Camera On in Capture Mode 26 Turning the Camera On in Playback Mode 27 Initial Settings 28 Selecting the Display Language 28 Setting the Date and...
Operation Manual
Page 8
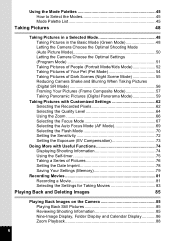
...Pet Mode 54 Taking Pictures of Dark Scenes (Night Scene Mode 55 Reducing Camera Shake and Blurring When Taking Pictures (Digital SR Mode 56 Framing Your Pictures (Frame Composite Mode 57 Taking Panoramic Pictures (Digital Panorama Mode 59 Taking Pictures with Customized Settings 62 Selecting the Recorded Pixels... Movie 81 Selecting the Settings for Taking Movies 83 Playing Back and Deleting Images 85 Playing Back Images on the Camera 85 Playing Back Still Pictures 85 Reviewing Shooting Information 85 Nine-Image Display, Folder Display and Calendar Display 86 Zoom Playback 88 6
...Pet Mode 54 Taking Pictures of Dark Scenes (Night Scene Mode 55 Reducing Camera Shake and Blurring When Taking Pictures (Digital SR Mode 56 Framing Your Pictures (Frame Composite Mode 57 Taking Panoramic Pictures (Digital Panorama Mode 59 Taking Pictures with Customized Settings 62 Selecting the Recorded Pixels... Movie 81 Selecting the Settings for Taking Movies 83 Playing Back and Deleting Images 85 Playing Back Images on the Camera 85 Playing Back Still Pictures 85 Reviewing Shooting Information 85 Nine-Image Display, Folder Display and Calendar Display 86 Zoom Playback 88 6
Operation Manual
Page 9
...100 Editing Images 100 Changing the Image Size and Quality (Resize 100 Cropping Images 102 Copying Images and Sound Files 103 Using the Digital Filter 105 Using the Brightness Filter 106 Adding a Frame (Frame Composite 107 Red-eye Compensation 109 Setting the Printing Service (DPOF ...110 Printing Single Images 110 Printing All Images 112 Printing Using PictBridge 113 Connecting the Camera to the Printer 113 Printing Single Images 114 Printing All Images 116 Printing Using the DPOF Settings 117 Disconnecting the Cable from ...
...100 Editing Images 100 Changing the Image Size and Quality (Resize 100 Cropping Images 102 Copying Images and Sound Files 103 Using the Digital Filter 105 Using the Brightness Filter 106 Adding a Frame (Frame Composite 107 Red-eye Compensation 109 Setting the Printing Service (DPOF ...110 Printing Single Images 110 Printing All Images 112 Printing Using PictBridge 113 Connecting the Camera to the Printer 113 Printing Single Images 114 Printing All Images 116 Printing Using the DPOF Settings 117 Disconnecting the Cable from ...

Operation Manual
Page 11
... This Operating Manual contains the following chapters. 1 Getting Started 1 This chapter explains what you need to do after purchasing the camera before you wish to the PC Connection Manual. indicates precautions to take pictures and play back sound files. 8 Settings 9 This... 1 indicates the reference page number for an explanation of capturing images and how to set the camera-related functions. 9 Appendix This section deals with a computer, refer to ACDSee for PENTAX, 7 refer to start taking pictures or playing back images straightaway. 3 Common Operations 3 This...
... This Operating Manual contains the following chapters. 1 Getting Started 1 This chapter explains what you need to do after purchasing the camera before you wish to the PC Connection Manual. indicates precautions to take pictures and play back sound files. 8 Settings 9 This... 1 indicates the reference page number for an explanation of capturing images and how to set the camera-related functions. 9 Appendix This section deals with a computer, refer to ACDSee for PENTAX, 7 refer to start taking pictures or playing back images straightaway. 3 Common Operations 3 This...
Operation Manual
Page 12
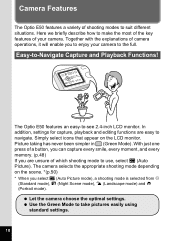
... navigate. Use the Green Mode to suit different situations. With just one press of which shooting mode to use, select b (Auto Picture). Camera Features The Optio E50 features a variety of your camera to the full. Here we briefly describe how to make the most of the key features of shooting modes to take pictures...
... navigate. Use the Green Mode to suit different situations. With just one press of which shooting mode to use, select b (Auto Picture). Camera Features The Optio E50 features a variety of your camera to the full. Here we briefly describe how to make the most of the key features of shooting modes to take pictures...

Operation Manual
Page 13
... you can enjoy printing out images directly from the camera with Adding a Frame to 3 pictures into a panoramic scene. (p.59) For decorating your pet, for example. (p.57) You can easily find the image you have taken. The Optio E50 lets you look back at home because operating the computer...Easily print out images without Using a Computer! Display Images and Sound Files in calendar format. Have Fun with a touch of a button. With the Optio E50, you can add a fancy frame when taking a picture of a child or your pictures with a frame. Taking panoramic pictures is also easy, as...
... you can enjoy printing out images directly from the camera with Adding a Frame to 3 pictures into a panoramic scene. (p.59) For decorating your pet, for example. (p.57) You can easily find the image you have taken. The Optio E50 lets you look back at home because operating the computer...Easily print out images without Using a Computer! Display Images and Sound Files in calendar format. Have Fun with a touch of a button. With the Optio E50, you can add a fancy frame when taking a picture of a child or your pictures with a frame. Taking panoramic pictures is also easy, as...

Operation Manual
Page 16
p.77) 4 Focus mode (p.67) 5 Camera shake icon (p.74) (appears only when the shutter release button is pressed halfway) 6 Digital zoom icon (p.66) 7 Memory status (p.26) + :Built-in memory (without card) a :SD Memory Card r :Card is pressed halfway) 14 6 3 Recorded pixels (p.62) 4 Quality level (p.64) 5 ...
p.77) 4 Focus mode (p.67) 5 Camera shake icon (p.74) (appears only when the shutter release button is pressed halfway) 6 Digital zoom icon (p.66) 7 Memory status (p.26) + :Built-in memory (without card) a :SD Memory Card r :Card is pressed halfway) 14 6 3 Recorded pixels (p.62) 4 Quality level (p.64) 5 ...

Operation Manual
Page 18
Getting Started Getting Started Checking the Contents of the Package Check that your camera comes complete with the items listed below. 1 Camera Optio E50 Strap O-ST62 (*) Software (CD-ROM) S-SW77 USB/AV cable I-UAV77 (*) Two AA alkaline batteries Operating Manual (this manual) / PC Connection Manual (CD-ROM) Quick Guide Items marked with an asterisk (*) are also available as optional accessories. For other optional accessories, refer to "Optional Accessories" (p.140). 16
Getting Started Getting Started Checking the Contents of the Package Check that your camera comes complete with the items listed below. 1 Camera Optio E50 Strap O-ST62 (*) Software (CD-ROM) S-SW77 USB/AV cable I-UAV77 (*) Two AA alkaline batteries Operating Manual (this manual) / PC Connection Manual (CD-ROM) Quick Guide Items marked with an asterisk (*) are also available as optional accessories. For other optional accessories, refer to "Optional Accessories" (p.140). 16

Operation Manual
Page 19
Getting Started Attaching the Strap Attach the strap (O-ST62) supplied with the camera. 1 2 1 1 Pass the narrow end of the strap through the strap lug. 2 Pass the other end of the strap through the loop and pull tight. 17
Getting Started Attaching the Strap Attach the strap (O-ST62) supplied with the camera. 1 2 1 1 Pass the narrow end of the strap through the strap lug. 2 Pass the other end of the strap through the loop and pull tight. 17

Operation Manual
Page 20
... the first time; The date and time may result. Slide the battery/card cover in the camera for a long time, they are reinserted and the camera is turned on again to use the camera for a long time, remove the batteries. The cover will automatically open the battery/card cover or remove ... not a malfunction. If the batteries are not rechargeable. • Do not open in the direction 2 when you do not intend to reset the camera. however this is turned on the batteries match the (+) and (-) symbols inside the battery compartment. 3 Close the battery/card cover and slide it in ...
... the first time; The date and time may result. Slide the battery/card cover in the camera for a long time, they are reinserted and the camera is turned on again to use the camera for a long time, remove the batteries. The cover will automatically open the battery/card cover or remove ... not a malfunction. If the batteries are not rechargeable. • Do not open in the direction 2 when you do not intend to reset the camera. however this is turned on the batteries match the (+) and (-) symbols inside the battery compartment. 3 Close the battery/card cover and slide it in ...

Operation Manual
Page 21
... Be sure to take spare batteries with the LCD monitor on the LCD monitor. Actual performance may be displayed correctly when using the camera in a cold region and keep the batteries warm by the w indicator on and fresh AA alkaline batteries inserted) 1 Image Storage ...*1 Playback Time*2 Approx. Screen Display w (green) x (green) y (yellow) z (red) [Battery depleted] Battery Status Adequate power remains. The camera will return to normal performance when the batteries reach room temperature. • Due to the result of in your pocket or inside your coat. Batteries...
... Be sure to take spare batteries with the LCD monitor on the LCD monitor. Actual performance may be displayed correctly when using the camera in a cold region and keep the batteries warm by the w indicator on and fresh AA alkaline batteries inserted) 1 Image Storage ...*1 Playback Time*2 Approx. Screen Display w (green) x (green) y (yellow) z (red) [Battery depleted] Battery Status Adequate power remains. The camera will return to normal performance when the batteries reach room temperature. • Due to the result of in your pocket or inside your coat. Batteries...

Operation Manual
Page 22
... the DC coupler into the power outlet. 20 Slide the battery/card cover in the opposite direction of the DC coupler. 2 Make sure that the camera is turned off and open in the direction 1. Slide the battery/card cover in the direction 2 when you intend to use the... camera for a long time or connect it to a computer. 1 Connect the DC terminal of the AC adapter to the AC adapter. 6 Plug the AC plug cord ...
... the DC coupler into the power outlet. 20 Slide the battery/card cover in the opposite direction of the DC coupler. 2 Make sure that the camera is turned off and open in the direction 1. Slide the battery/card cover in the direction 2 when you intend to use the... camera for a long time or connect it to a computer. 1 Connect the DC terminal of the AC adapter to the AC adapter. 6 Plug the AC plug cord ...

Operation Manual
Page 23
Be sure to read "USING YOUR CAMERA SAFELY" (p.1) and "About the AC Adapter" (p.3) before using the adapter. Getting Started 21 The data may become lost if either cord becomes disconnected while data ...; Be sure to read the operation manual accompanying the AC adapter kit K-AC62 before connecting or disconnecting the AC adapter. • Make sure that the camera is 1 being recorded. • Use the AC adapter with due care to avoid fire or electric shock. • Make sure that the AC plug cord...
Be sure to read "USING YOUR CAMERA SAFELY" (p.1) and "About the AC Adapter" (p.3) before using the adapter. Getting Started 21 The data may become lost if either cord becomes disconnected while data ...; Be sure to read the operation manual accompanying the AC adapter kit K-AC62 before connecting or disconnecting the AC adapter. • Make sure that the camera is 1 being recorded. • Use the AC adapter with due care to avoid fire or electric shock. • Make sure that the AC plug cord...

Operation Manual
Page 24
...Started Installing the SD Memory Card 1 SD Memory Card SD Memory Card socket This camera uses either an SD Memory Card or an SDHC Memory Card. (Both cards ...built-in memory if a card is not inserted. • Be sure to use this camera to format an SD Memory Card that the camera is unused or has been used on another location. 22 The still picture storage capacity varies ...Card and the selected number of a malfunction. Refer to access data in the built-in memory in another camera. Use a computer or other device to back up important data in the case of recorded pixels and quality level....
...Started Installing the SD Memory Card 1 SD Memory Card SD Memory Card socket This camera uses either an SD Memory Card or an SDHC Memory Card. (Both cards ...built-in memory if a card is not inserted. • Be sure to use this camera to format an SD Memory Card that the camera is unused or has been used on another location. 22 The still picture storage capacity varies ...Card and the selected number of a malfunction. Refer to access data in the built-in memory in another camera. Use a computer or other device to back up important data in the case of recorded pixels and quality level....


