
Operating Instructions
Page 25
...• • • • • If a camera configured for other cameras depend on network conditions, PC performance, the number of people accessing the cameras, and the type of cameras displayed, all images are required to enter a valid user name ...pan/tilt, etc.), those features are not available and their global IP addresses. 1.3 Viewing Multiple Camera Images L. Camera image (click an area of the camera image to use the click to center feature (see Page 15)*3, or use your mouse to access from that camera. The default settings for that camera. When a camera...
...• • • • • If a camera configured for other cameras depend on network conditions, PC performance, the number of people accessing the cameras, and the type of cameras displayed, all images are required to enter a valid user name ...pan/tilt, etc.), those features are not available and their global IP addresses. 1.3 Viewing Multiple Camera Images L. Camera image (click an area of the camera image to use the click to center feature (see Page 15)*3, or use your mouse to access from that camera. The default settings for that camera. When a camera...
Operating Instructions
Page 70
...If your router supports UPnP™, this can be turned off by default) or for information on setting port forwarding. 2. After you have registered with a Dynamic DNS service, configure the camera to the operating instructions included with your router for information on UPnP™... feature may be done automatically. Refer to use with a Dynamic DNS service. If your ISP has assigned you a dynamic global IP address, register with Panasonic Network Cameras. (For more information, refer to do the following. 1. We recommend using Viewnetcam.com, a Dynamic DNS service that service. ...
...If your router supports UPnP™, this can be turned off by default) or for information on setting port forwarding. 2. After you have registered with a Dynamic DNS service, configure the camera to the operating instructions included with your router for information on UPnP™... feature may be done automatically. Refer to use with a Dynamic DNS service. If your ISP has assigned you a dynamic global IP address, register with Panasonic Network Cameras. (For more information, refer to do the following. 1. We recommend using Viewnetcam.com, a Dynamic DNS service that service. ...

Operating Instructions
Page 83
... port number to the camera. • The default port number is 80, however, note that some ISPs do not allow access from Setup Program], select whether or not you are connecting multiple cameras and plan on the CD-ROM. 2. Enter the IP address to be assigned to each camera. 5.1.1 Network (IPv4) Settings [Static] 1. Under [Network Configuration from the...
... port number to the camera. • The default port number is 80, however, note that some ISPs do not allow access from Setup Program], select whether or not you are connecting multiple cameras and plan on the CD-ROM. 2. Enter the IP address to be assigned to each camera. 5.1.1 Network (IPv4) Settings [Static] 1. Under [Network Configuration from the...
Operating Instructions
Page 84
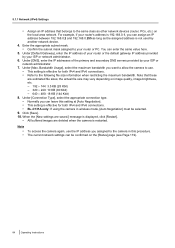
...connections. • BL-C131A only: If using the camera in wireless mode, [Auto Negotiation] must be confirmed on the local area network. Under [Max. Bandwidth Usage], select the maximum bandwidth you want to allow the camera to use the IP address you assigned to the...] page (see Page 119). 84 Operating Instructions For example, if your ISP or network administrator. 7. Under [DNS], enter the IP addresses of your router or the default gateway IP address provided by your router's address is 192.168.0.1, you can be selected. 9. Under [Connection Type], select the appropriate...
...connections. • BL-C131A only: If using the camera in wireless mode, [Auto Negotiation] must be confirmed on the local area network. Under [Max. Bandwidth Usage], select the maximum bandwidth you want to allow the camera to use the IP address you assigned to the...] page (see Page 119). 84 Operating Instructions For example, if your ISP or network administrator. 7. Under [DNS], enter the IP addresses of your router or the default gateway IP address provided by your router's address is 192.168.0.1, you can be selected. 9. Under [Connection Type], select the appropriate...
Operating Instructions
Page 86
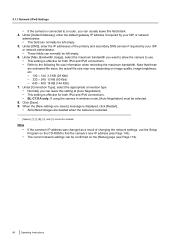
...both IPv4 and IPv6 connections. • BL-C131A only: If using the camera in wireless mode, [Auto Negotiation] must be selected. 8. the actual file size may vary depending on the CD-ROM to find the camera's new IP address (see Page 119). 86 Operating Instructions Note...8226; If the camera's IP address was changed as a result of the primary and secondary DNS servers if required by your ISP or network administrator. • These fields can normally be left empty. 6. Under [Default Gateway], enter the default gateway IP address if required by your ISP or network administrator. •...
...both IPv4 and IPv6 connections. • BL-C131A only: If using the camera in wireless mode, [Auto Negotiation] must be selected. 8. the actual file size may vary depending on the CD-ROM to find the camera's new IP address (see Page 119). 86 Operating Instructions Note...8226; If the camera's IP address was changed as a result of the primary and secondary DNS servers if required by your ISP or network administrator. • These fields can normally be left empty. 6. Under [Default Gateway], enter the default gateway IP address if required by your ISP or network administrator. •...
Operating Instructions
Page 126
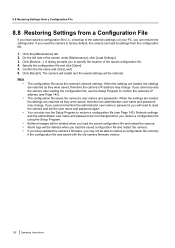
...camera to confirm the camera's IP address (see Page 143). Click the [Maintenance] tab. 2. On the left side of the saved configuration file. 4. Click [Browse...]. If you restore a configuration file using the Setup Program. You can also use the Setup Program to factory default, the camera ... may not be deleted when you load the saved configuration file and restart the camera. Note • • • • • • The configuration file saves the camera's network settings. When the settings are loaded, the settings are restored as they were ...
...camera to confirm the camera's IP address (see Page 143). Click the [Maintenance] tab. 2. On the left side of the saved configuration file. 4. Click [Browse...]. If you restore a configuration file using the Setup Program. You can also use the Setup Program to factory default, the camera ... may not be deleted when you load the saved configuration file and restart the camera. Note • • • • • • The configuration file saves the camera's network settings. When the settings are loaded, the settings are restored as they were ...

Operating Instructions
Page 127
...IP address, subnet mask etc.) The network connection mode changes to the [Setup Guide]. When the camera is reset, the following information will be deleted: - Click [Execute]. • The indicator blinks orange, and then turns off the camera. Note • • • • Do not turn off the camera while the camera...clock will not be reset, but the time format will be set to their factory default settings. 1. 8.9 Resetting the Camera 8.9 Resetting the Camera You can reset all of the camera's default settings. Change the setting if necessary (see Page 95). On the left side ...
...IP address, subnet mask etc.) The network connection mode changes to the [Setup Guide]. When the camera is reset, the following information will be deleted: - Click [Execute]. • The indicator blinks orange, and then turns off the camera. Note • • • • Do not turn off the camera while the camera...clock will not be reset, but the time format will be set to their factory default settings. 1. 8.9 Resetting the Camera 8.9 Resetting the Camera You can reset all of the camera's default settings. Change the setting if necessary (see Page 95). On the left side ...

Operating Instructions
Page 134
...Default Gateway], enter the IP address of the primary and secondary DNS servers provided by your ISP or network administrator about which port numbers are estimated file sizes; When the [New settings are saved.] message is 80, however, note that these are available for both IPv4 and IPv6 connections. • BL-C131A...Kbit) - 320 ´ 240: 10 KB (80 Kbit) - 640 ´ 480: 18 KB (144 Kbit) 6. Enter the IP address to be assigned to the camera. • Ask your ISP. 5. Bandwidth Usage], select the maximum bandwidth you can leave this setting at [Auto Negotiation]. • This...
...Default Gateway], enter the IP address of the primary and secondary DNS servers provided by your ISP or network administrator about which port numbers are estimated file sizes; When the [New settings are saved.] message is 80, however, note that these are available for both IPv4 and IPv6 connections. • BL-C131A...Kbit) - 320 ´ 240: 10 KB (80 Kbit) - 640 ´ 480: 18 KB (144 Kbit) 6. Enter the IP address to be assigned to the camera. • Ask your ISP. 5. Bandwidth Usage], select the maximum bandwidth you can leave this setting at [Auto Negotiation]. • This...

Operating Instructions
Page 140
... page if necessary (see Page 94). You can create a shortcut to use this feature. This feature is enabled for the camera by default. When using Windows XP (Service Pack 2) [Start]®([Settings])®[Control Panel]®[Add or Remove Programs]® [Add/Remove.../Remove Windows Components]®Select [Networking Services]® [Details]®Check [UPnP User Interface]®[OK]®[Next]®Complete 140 Operating Instructions In order to the camera in your computer's [My Network Places] folder that will be automatically updated even if the camera's IP address changes.
... page if necessary (see Page 94). You can create a shortcut to use this feature. This feature is enabled for the camera by default. When using Windows XP (Service Pack 2) [Start]®([Settings])®[Control Panel]®[Add or Remove Programs]® [Add/Remove.../Remove Windows Components]®Select [Networking Services]® [Details]®Check [UPnP User Interface]®[OK]®[Next]®Complete 140 Operating Instructions In order to the camera in your computer's [My Network Places] folder that will be automatically updated even if the camera's IP address changes.
Operating Instructions
Page 143
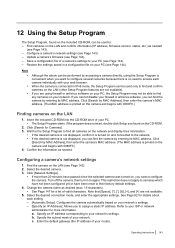
... PC, the Setup Program may not be performed by MAC Address], then enter the camera's MAC address. (The MAC address is connected in a configuration file on your network. Specify an IP address corresponding to assign a static IP address. Specify the subnet mask of your router). Enter the default gateway (the IP address of a camera's settings to : - Save a configuration file of your PC. •...
... PC, the Setup Program may not be performed by MAC Address], then enter the camera's MAC address. (The MAC address is connected in a configuration file on your network. Specify an IP address corresponding to assign a static IP address. Specify the subnet mask of your router). Enter the default gateway (the IP address of a camera's settings to : - Save a configuration file of your PC. •...
Operating Instructions
Page 144
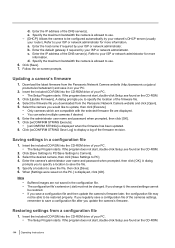
...your PC. 2. Restoring settings from the Panasonic Network Camera website and click [Open]. 5. e. a. c. d. Click [Save]. 7. Download the latest firmware from the Panasonic Network Camera website (http://panasonic.co.jp/pcc/ products/en/netwkcam/) ...network administrator for more information. Saving settings in the configuration file. If the program does not start , double-click Setup.exe found on the CD-ROM. 3. Follow the on the CD-ROM. 2. Click [Update Firmware]. Enter the camera's administrator user name and password when prompted, then click [OK]. d. Enter the IP address...
...your PC. 2. Restoring settings from the Panasonic Network Camera website and click [Open]. 5. e. a. c. d. Click [Save]. 7. Download the latest firmware from the Panasonic Network Camera website (http://panasonic.co.jp/pcc/ products/en/netwkcam/) ...network administrator for more information. Saving settings in the configuration file. If the program does not start , double-click Setup.exe found on the CD-ROM. 3. Follow the on the CD-ROM. 2. Click [Update Firmware]. Enter the camera's administrator user name and password when prompted, then click [OK]. d. Enter the IP address...

Operating Instructions
Page 149
... 110 are not available - - 0-63 characters - - - 13.4 Default Setting List xxOLD SPxEx C 13.4 Default Setting List Basic Items Default Network Connection Mode Automatic Setup Allow Access from the Internet No (Automatic Setup only) Network Configuration from Setup Enable Program (Static/DHCP only) Port No. 80 (Static/DHCP only) IP address (Static only) 192.168.0.253 Subnet Mask...
... 110 are not available - - 0-63 characters - - - 13.4 Default Setting List xxOLD SPxEx C 13.4 Default Setting List Basic Items Default Network Connection Mode Automatic Setup Allow Access from the Internet No (Automatic Setup only) Network Configuration from Setup Enable Program (Static/DHCP only) Port No. 80 (Static/DHCP only) IP address (Static only) 192.168.0.253 Subnet Mask...

Operating Instructions
Page 151
... Operation Time Indicator Control Privacy Mode 13.4 Default Setting List Items Default Notes Single Camera Image Resolution 320 ´ 240 - Overwrite Notify - - Trigger Timer - Indicator Control Privacy Button Privacy Mode Turn indicator on Checked - Language English - Display IP Address or Host Name Port No. Multi Camera Image Quality Standard - Single Camera Refresh Interval Motion - Operation Time Always...
... Operation Time Indicator Control Privacy Mode 13.4 Default Setting List Items Default Notes Single Camera Image Resolution 320 ´ 240 - Overwrite Notify - - Trigger Timer - Indicator Control Privacy Button Privacy Mode Turn indicator on Checked - Language English - Display IP Address or Host Name Port No. Multi Camera Image Quality Standard - Single Camera Refresh Interval Motion - Operation Time Always...


