Owner Manual
Page 4
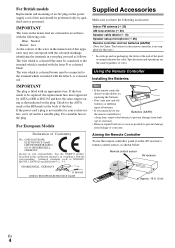
...with the coloured markings identifying the terminals in own responsibility, that indicated on the plug. For European Models Declaration of Conformity We, ONKYO EUROPE ELECTRONICS GmbH LIEGNITZERSTRASSE 6, 82194 GROEBENZELL, GERMANY declare in your socket outlets, cut it at the end of the product name ...of an AC plug on the power supply cord of this unit.) * In catalogs and on packaging, the letter at the AV receiver's remote control sensor, as EN60065, EN55013, EN55020 and EN61000-3-2, -3-3. IMPORTANT The wires in compliance with the letter N or coloured black. Specifications ...
...with the coloured markings identifying the terminals in own responsibility, that indicated on the plug. For European Models Declaration of Conformity We, ONKYO EUROPE ELECTRONICS GmbH LIEGNITZERSTRASSE 6, 82194 GROEBENZELL, GERMANY declare in your socket outlets, cut it at the end of the product name ...of an AC plug on the power supply cord of this unit.) * In catalogs and on packaging, the letter at the AV receiver's remote control sensor, as EN60065, EN55013, EN55020 and EN61000-3-2, -3-3. IMPORTANT The wires in compliance with the letter N or coloured black. Specifications ...
Owner Manual
Page 5
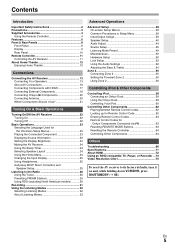
... 59 Controlling Your iPod 60 Controlling Other Components 62 Preprogrammed Remote Control Codes 62 Looking up for Remote Control Code 62 Entering Remote Control Codes 63 Remote Control Codes for Onkyo Components Connected via V 63 Resetting REMOTE MODE Buttons 64 Resetting the Remote Controller 64 Controlling Other Components 64 Others Troubleshooting 66 Specifications 71 About HDMI 72...
... 59 Controlling Your iPod 60 Controlling Other Components 62 Preprogrammed Remote Control Codes 62 Looking up for Remote Control Code 62 Entering Remote Control Codes 63 Remote Control Codes for Onkyo Components Connected via V 63 Resetting REMOTE MODE Buttons 64 Resetting the Remote Controller 64 Controlling Other Components 64 Others Troubleshooting 66 Specifications 71 About HDMI 72...
Owner Manual
Page 6
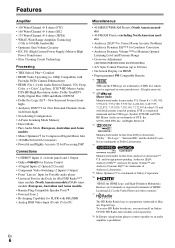
...-bit D/A Converters • Powerful and Highly Accurate 32-bit Processing DSP Connections • 6 HDMI*6 Inputs (1 on front panel) and 1 Output • Onkyo Q for System Control • 4 Digital Inputs (2 Optical/2 Coaxial) • Component Video Switching (2 Inputs/1 Output) • Front "Line in" Input ...200 Hz) • A/V Sync Control Function (up to 200 ms) • On-Screen Display via HDMI • Preprogrammed V-Compatible Remote *1 THX and the THX logo are trademarks or registered trademarks of HDMI Licensing LLC in some jurisdictions. and worldwide patents issued & pending....
...-bit D/A Converters • Powerful and Highly Accurate 32-bit Processing DSP Connections • 6 HDMI*6 Inputs (1 on front panel) and 1 Output • Onkyo Q for System Control • 4 Digital Inputs (2 Optical/2 Coaxial) • Component Video Switching (2 Inputs/1 Output) • Front "Line in" Input ...200 Hz) • A/V Sync Control Function (up to 200 ms) • On-Screen Display via HDMI • Preprogrammed V-Compatible Remote *1 THX and the THX logo are trademarks or registered trademarks of HDMI Licensing LLC in some jurisdictions. and worldwide patents issued & pending....

Owner Manual
Page 8
... (European, Australian and Asian models) (➔ 29) B ON/STANDBY button (➔ 22) C STANDBY indicator (➔ 22) D HDMI THRU indicator (➔ 52) E ZONE 2 indicator (➔ 56) F Remote control sensor (➔ 4) G ZONE 2, OFF, ZONE 2 LEVEL/TONE LEVEL and TONE buttons (➔ 54, 56 to 57) H Display (➔ 9) I JK LMN O P Q RS European, Australian and...
... (European, Australian and Asian models) (➔ 29) B ON/STANDBY button (➔ 22) C STANDBY indicator (➔ 22) D HDMI THRU indicator (➔ 52) E ZONE 2 indicator (➔ 56) F Remote control sensor (➔ 4) G ZONE 2, OFF, ZONE 2 LEVEL/TONE LEVEL and TONE buttons (➔ 54, 56 to 57) H Display (➔ 9) I JK LMN O P Q RS European, Australian and...
Owner Manual
Page 10
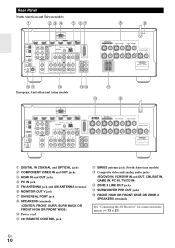
... and AM ANTENNA terminal G MONITOR OUT V jack H UNIVERSAL PORT jack I SPEAKERS terminals (CENTER, FRONT, SURR, SURR BACK OR FRONT HIGH OR FRONT WIDE) J Power cord K V REMOTE CONTROL jack L SIRIUS antenna jack (North American models) M Composite video and analog audio jacks (BD/DVD IN, VCR/DVR IN and OUT, CBL/SAT IN...
... and AM ANTENNA terminal G MONITOR OUT V jack H UNIVERSAL PORT jack I SPEAKERS terminals (CENTER, FRONT, SURR, SURR BACK OR FRONT HIGH OR FRONT WIDE) J Power cord K V REMOTE CONTROL jack L SIRIUS antenna jack (North American models) M Composite video and analog audio jacks (BD/DVD IN, VCR/DVR IN and OUT, CBL/SAT IN...

Owner Manual
Page 11
...RECEIVER). B Arrow R/X buttons (➔ 28) C D.TUN button (➔ 28) N D DISPLAY button E CH +/- B ON/STANDBY button (➔ 22) K C REMOTE MODE/INPUT SELECTOR buttons (➔ 23) E D SP LAYOUT button (➔ 24) E Arrow R/X/F/S and ENTER buttons *1 F SETUP button (➔ 38) G LISTENING ...) H DIMMER button (➔ 23) L I You can select AM or FM by pressing TUNER repeatedly. Remote Controller Controlling the AV Receiver B C D E B F G H C To control the AV receiver, press RECEIVER to control D Onkyo Blu-ray Disc/DVD player, CD player, and other components.
...RECEIVER). B Arrow R/X buttons (➔ 28) C D.TUN button (➔ 28) N D DISPLAY button E CH +/- B ON/STANDBY button (➔ 22) K C REMOTE MODE/INPUT SELECTOR buttons (➔ 23) E D SP LAYOUT button (➔ 24) E Arrow R/X/F/S and ENTER buttons *1 F SETUP button (➔ 38) G LISTENING ...) H DIMMER button (➔ 23) L I You can select AM or FM by pressing TUNER repeatedly. Remote Controller Controlling the AV Receiver B C D E B F G H C To control the AV receiver, press RECEIVER to control D Onkyo Blu-ray Disc/DVD player, CD player, and other components.

Owner Manual
Page 20
... and position the antenna to the AV receiver. The other V-capable Onkyo components, pointing the remote controller at the AV receiver's remote control sensor instead of the component. Insert wire. With V (Remote Interactive), you can use the following special functions: ■ System ... cables, and power cords. IN L R TV/CD REMOTE CONTROL IN L R BD/DVD e.g., CD player e.g., DVD player R L ANALOG AUDIO OUT R L ANALOG AUDIO OUT Connecting Antenna This section explains how to the manuals supplied with Onkyo players (DVD, CD, etc.). • Some components have...
... and position the antenna to the AV receiver. The other V-capable Onkyo components, pointing the remote controller at the AV receiver's remote control sensor instead of the component. Insert wire. With V (Remote Interactive), you can use the following special functions: ■ System ... cables, and power cords. IN L R TV/CD REMOTE CONTROL IN L R BD/DVD e.g., CD player e.g., DVD player R L ANALOG AUDIO OUT R L ANALOG AUDIO OUT Connecting Antenna This section explains how to the manuals supplied with Onkyo players (DVD, CD, etc.). • Some components have...

Owner Manual
Page 22
Turning Off Press ON/STANDBY on the remote controller. To prevent any loud surprises when you turn on the AV receiver, always turn down the volume before you turn it off . or Press RECEIVER followed by ON/STANDBY on the front panel or the remote controller. The AV receiver will enter Standby mode. En 22 Turning On/Off the AV Receiver ON/STANDBY STANDBY indicator ON/STANDBY RECEIVER Front panel Remote controller Turning On Press ON/STANDBY on , the display lights, and the STANDBY indicator goes off . The AV receiver comes on the front panel.
Turning Off Press ON/STANDBY on the remote controller. To prevent any loud surprises when you turn on the AV receiver, always turn down the volume before you turn it off . or Press RECEIVER followed by ON/STANDBY on the front panel or the remote controller. The AV receiver will enter Standby mode. En 22 Turning On/Off the AV Receiver ON/STANDBY STANDBY indicator ON/STANDBY RECEIVER Front panel Remote controller Turning On Press ON/STANDBY on , the display lights, and the STANDBY indicator goes off . The AV receiver comes on the front panel.
Owner Manual
Page 23
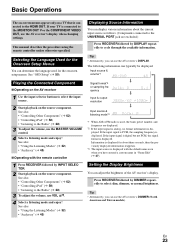
If your TV is connected to the HDMI OUT. This manual describes the procedure using the remote controller unless otherwise specified. Tip • Alternatively, you have entered a custom name in "Name Edit" (➔ 47). See also: • "... Displaying Source Information You can display various information about three seconds, then the previously displayed information reappears. *3 The input source is displayed with the remote controller 1 Press RECEIVER followed by INPUT SELECTOR. 2 Start playback on the source component. Input source & volume*1 Playing the Connected Component ■...
If your TV is connected to the HDMI OUT. This manual describes the procedure using the remote controller unless otherwise specified. Tip • Alternatively, you have entered a custom name in "Name Edit" (➔ 47). See also: • "... Displaying Source Information You can display various information about three seconds, then the previously displayed information reappears. *3 The input source is displayed with the remote controller 1 Press RECEIVER followed by INPUT SELECTOR. 2 Start playback on the source component. Input source & volume*1 Playing the Connected Component ■...
Owner Manual
Page 24
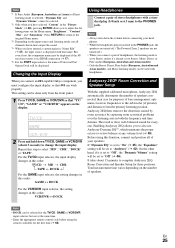
... Powered Zone 2 is used menus without having to frequently used , the setting cannot be set the AV receiver to select the desired input source. The remote controller's VIDEO acts as follows: the name of input selectors, input assignments, and radio information, and ARC function setting. Press ENTER to select the required...
... Powered Zone 2 is used menus without having to frequently used , the setting cannot be set the AV receiver to select the desired input source. The remote controller's VIDEO acts as follows: the name of input selectors, input assignments, and radio information, and ARC function setting. Press ENTER to select the required...
Owner Manual
Page 25
"Brightness", "Contrast", "Hue", and "Saturation". Changing the Input Display When you connect an V-capable Onkyo component, you must configure the input display so that V can be done only from the primary listening position. For the TV/CD input selector, the .... *4 When you to also use Audyssey Dynamic EQ™, which maintains the proper octave-to-octave balance at the same time. • Enter the appropriate remote control code before connecting your speakers. → → Note *1 If Pure Audio (European, Australian and Asian) or Direct listening mode is selected, "Dynamic EQ" and...
"Brightness", "Contrast", "Hue", and "Saturation". Changing the Input Display When you connect an V-capable Onkyo component, you must configure the input display so that V can be done only from the primary listening position. For the TV/CD input selector, the .... *4 When you to also use Audyssey Dynamic EQ™, which maintains the proper octave-to-octave balance at the same time. • Enter the appropriate remote control code before connecting your speakers. → → Note *1 If Pure Audio (European, Australian and Asian) or Direct listening mode is selected, "Dynamic EQ" and...

Owner Manual
Page 28
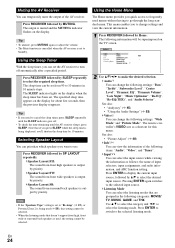
... goes off on the display, as presets for quick selection. When tuned into AM and FM stations directly by entering the appropriate frequency. 1 On the remote controller, press TUNER repeatedly to enter the frequency of the radio station. In this case, switch to manual tuning mode and listen to the station...
... goes off on the display, as presets for quick selection. When tuned into AM and FM stations directly by entering the appropriate frequency. 1 On the remote controller, press TUNER repeatedly to enter the frequency of the radio station. In this case, switch to manual tuning mode and listen to the station...

Owner Manual
Page 29
The preset number flashes. 3 While the preset number is flashing (about 8 seconds), use the remote controller's number buttons to store the station or channel. The station or channel is deleted and its number disappears from an RDS station is ... station that 's broadcasting text information, the text can be displayed. Note • In some cases, the text characters displayed on the AV receiver, or the remote controller's CH +/-. When tuned to an RDS station that 's broadcasting PS information, the station's name will be displayed. Selecting Presets To select a preset, use ...
The preset number flashes. 3 While the preset number is flashing (about 8 seconds), use the remote controller's number buttons to store the station or channel. The station or channel is deleted and its number disappears from an RDS station is ... station that 's broadcasting text information, the text can be displayed. Note • In some cases, the text characters displayed on the AV receiver, or the remote controller's CH +/-. When tuned to an RDS station that 's broadcasting PS information, the station's name will be displayed. Selecting Presets To select a preset, use ...

Owner Manual
Page 38
... can also be performed on the AV receiver by SETUP. Advanced Setup On-screen Setup Menus Common Procedures in the Display. Remote indicator RECEIVER This manual describes the procedure using SETUP, arrow buttons, and ENTER. • During Audyssey 2EQ® Room ...Speaker Distance 4. Audyssey DSX 5. Source Setup 1. Carry out the settings by using the on-screen display. 1 Press RECEIVER followed by using the remote controller unless otherwise specified. Speaker Setup 3. HDMI Input 3. Volume Setup 2. Level Calibration 5. Press SETUP to the HDMI OUT. Theater-Dimensional 6....
... can also be performed on the AV receiver by SETUP. Advanced Setup On-screen Setup Menus Common Procedures in the Display. Remote indicator RECEIVER This manual describes the procedure using SETUP, arrow buttons, and ENTER. • During Audyssey 2EQ® Room ...Speaker Distance 4. Audyssey DSX 5. Source Setup 1. Carry out the settings by using the on-screen display. 1 Press RECEIVER followed by using the remote controller unless otherwise specified. Speaker Setup 3. HDMI Input 3. Volume Setup 2. Level Calibration 5. Press SETUP to the HDMI OUT. Theater-Dimensional 6....

Owner Manual
Page 47
... Sync delay time is enabled (➔ 51) and your TV or display supports HDMI Lip Sync, the displayed delay time will be performed on the remote controller by applying a delay to the audio signal. Shift*1: Switches the displayed character. (Left)/ (Right): Selected when the cursor is complete. OK:... FM, and then select the preset (➔ 47). • You cannot enter a custom name for easy identification. If it will appear on the remote controller, you can delete all characters in 10 ms steps. Tip *1 You can enter a custom name for each input selector individually. Name Edit You...
... Sync delay time is enabled (➔ 51) and your TV or display supports HDMI Lip Sync, the displayed delay time will be performed on the remote controller by applying a delay to the audio signal. Shift*1: Switches the displayed character. (Left)/ (Right): Selected when the cursor is complete. OK:... FM, and then select the preset (➔ 47). • You cannot enter a custom name for easy identification. If it will appear on the remote controller, you can delete all characters in 10 ms steps. Tip *1 You can enter a custom name for each input selector individually. Name Edit You...

Owner Manual
Page 49
... listening modes that can be used with each input source that seated iPod) to the UNIVERSAL PORT jack, you can reduce noise appearing on the remote controller by setting "Film Mode" yourself. En 49 "0" is the strongest red. ■ Saturation*1*2 ` -50 to 0 to +50 With this setting, you can also be...
... listening modes that can be used with each input source that seated iPod) to the UNIVERSAL PORT jack, you can reduce noise appearing on the remote controller by setting "Film Mode" yourself. En 49 "0" is the strongest red. ■ Saturation*1*2 ` -50 to 0 to +50 With this setting, you can also be...
Owner Manual
Page 50
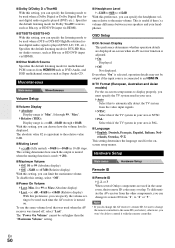
... receiver is -2dB, -81dB through 99, "Max". ` Relative (THX): Display range is turned on. Hardware Setup Main menu Hardware Setup Remote ID ■ Remote ID ` 1, 2, or 3 When several Onkyo components are displayed on -screen setup menus to display properly, you must specify the TV system used in your area. ` Auto: Select... NTSC: Select this if the TV system in your area is NTSC. ` PAL: Select this if the TV system in the same room, their remote ID codes may not be output if the input source is connected to an HDMI IN. ■ TV Format (European, Australian and Asian models) For...
... receiver is -2dB, -81dB through 99, "Max". ` Relative (THX): Display range is turned on. Hardware Setup Main menu Hardware Setup Remote ID ■ Remote ID ` 1, 2, or 3 When several Onkyo components are displayed on -screen setup menus to display properly, you must specify the TV system used in your area. ` Auto: Select... NTSC: Select this if the TV system in your area is NTSC. ` PAL: Select this if the TV system in the same room, their remote ID codes may not be output if the input source is connected to an HDMI IN. ■ TV Format (European, Australian and Asian models) For...
Owner Manual
Page 51
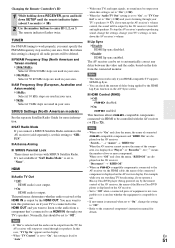
...→ "RIHD Off" • When an Q-compatible component is changed, all radio presets will output no sound may want to listen to "Off". Changing the Remote Controller's ID 1 While holding down RECEIVER, press and hold down the AV receiver's volume. ■ Lip Sync ` Disable: HDMI lip sync disabled. ` Enable...TV Out ` Off: HDMI audio is not output. ` On: HDMI audio is output by the AV receiver's front left and right speakers. The remote indicator flashes twice. This preference determines whether audio received at the HDMI IN is output. In this case, "TV Sp On" appears on the ...
...→ "RIHD Off" • When an Q-compatible component is changed, all radio presets will output no sound may want to listen to "Off". Changing the Remote Controller's ID 1 While holding down RECEIVER, press and hold down the AV receiver's volume. ■ Lip Sync ` Disable: HDMI lip sync disabled. ` Enable...TV Out ` Off: HDMI audio is not output. ` On: HDMI audio is output by the AV receiver's front left and right speakers. The remote indicator flashes twice. This preference determines whether audio received at the HDMI IN is output. In this case, "TV Sp On" appears on the ...

Owner Manual
Page 54
... present, the corresponding analog input is used instead. ` PCM: Only 2-channel PCM format input signals will be sent to the "Audio Selector" setting. on the remote controller by using the Home menu (➔ 24). Setting the Incoming Digital Signal (Fixed Mode) By pressing ENTER while selecting "HDMI", "COAX", "OPT" in "Tone...
... present, the corresponding analog input is used instead. ` PCM: Only 2-channel PCM format input signals will be sent to the "Audio Selector" setting. on the remote controller by using the Home menu (➔ 24). Setting the Incoming Digital Signal (Fixed Mode) By pressing ENTER while selecting "HDMI", "COAX", "OPT" in "Tone...

Owner Manual
Page 57
...different AM or FM radio stations for your Zone 2 speakers are output by an input selector button. Muting Zone 2 ■ Operating with the Remote Controller ON/STANDBY ZONE2 Input selector buttons MUTING VOLR/X 1 Press ZONE2 and then press ON/STANDBY. Tip • To unmute, press ZONE2 ... sources are unavailable. • While Zone 2 is being used in Zone 2, use its volume control to adjust the volume. Controlling Zone 2 with the remote controller Press ZONE2 followed by MUTING again. Zone 2 turns on , V functions will be heard in each room. 3 To turn off Zone 2, press ...
...different AM or FM radio stations for your Zone 2 speakers are output by an input selector button. Muting Zone 2 ■ Operating with the Remote Controller ON/STANDBY ZONE2 Input selector buttons MUTING VOLR/X 1 Press ZONE2 and then press ON/STANDBY. Tip • To unmute, press ZONE2 ... sources are unavailable. • While Zone 2 is being used in Zone 2, use its volume control to adjust the volume. Controlling Zone 2 with the remote controller Press ZONE2 followed by MUTING again. Zone 2 turns on , V functions will be heard in each room. 3 To turn off Zone 2, press ...


