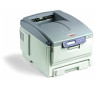
C5500n Image Drum - Oki
C5500n Image Drum
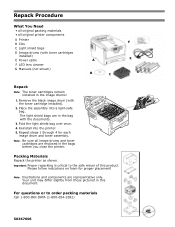
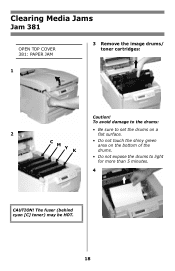
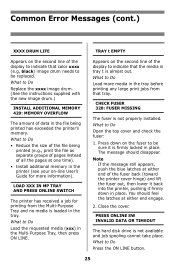
Related Manual Pages


Similar Questions


Related Terms
The following terms were also used when searching for C5500n Image Drum - Oki:- oki data c5500n mac os x.8
- okidata c5500n driver
- okidata c5500n color laser printer
- okidata c5500n cartridges
- okidata c5500n black drum
- okidata c5500n belt
- okidata c5500n
- okidata c5500 toner
- okidata c5500 drum
- okidata c5500
- oki data c5500n toner
- okidata c5500n driver install
- oki data c5500n mac os x 8
- oki data c5500n mac driver
- oki data c5500n fuser
- oki data c5500n drivers
- oki data c5500n driver
- oki data c5500n digital color led printer
- oki data c5500n
- oki c5500n printer driver
- oki c5500n printer
- okidata c5500n manual
- okidata duplex unit for c5500n printer
- okidata c5500n troubleshooting
- okidata c5500n transfer belt
- okidata c5500n toner reset
- okidata c5500n toner cartridges
- okidata c5500n toner
- okidata c5500n replacing drum
- okidata c5500n printer
- okidata c5500n paper tray
- okidata c5500n new printer
- oki c5500n driver
- okidata c5500n laser printer
- okidata c5500n k drum
- okidata c5500n fuser
- okidata c5500n drums
- okidata c5500n drum
- okidata c5500n drivers windows 7
- okidata c5500n drivers
- okidata c5500n driver windows 8
- okidata c5500n driver windows 7
- c5500n driver windows 7
- c5500n mac os x 8
- c5500n mac driver
- c5500n led replacement
- c5500n image drum
- c5500n fuser
- c5500n firmware
- c5500n fatal error 175
- c5500n drum reset
- c5500n drum
- c5500n drivers
- c5500n mac os x.8
- c5500n driver mac
- c5500n driver
- c5500n digital color printer
- c5500n digital color led printer
- c5500n default password
- c5500n c toner empty
- c5500n belt
- c5500n 380 error
- c5500n - c5800ldn driver install windows 7
- c5500n printer
- oki c5500n color laser printer
- oki c5500n
- hp c5500n
- c5500n troubleshooting
- c5500n toner sensor error
- c5500n toner reset
- c5500n toner
- c5500n review
- c5500n reset drum counter
- c5500n reset
- c5500n
- c5500n okidata printer cartridges
- c5500n okidata
- c5500n oki toner
- c5500n oki printer drivers
- c5500n oki printer
- c5500n oki driver
- c5500n oki
- c5500n manual
- c5500n magenta toner