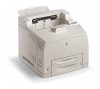
Warranty, Regulatory and Safety Information: English
Page 4
...amperes required by qualified Oki Data technicians. If you put anything on something unsteady, it . Do not put it on it or place it where it . • Be certain that the total of the U.S. The label on the back of the printer. As with all equipment... outlet. Do not use your local power company. • Your printer has a grounded, three-prong plug as a radiator or heat register). Safety Notes Your Oki printer has been carefully designed to defeat the grounding. • Install the printer near an easily accessed power outlet. • Avoid damaging the power...
OKI B6200 & B6300 Warranty, Regulatory, and Safety Information: Multilingual
Page 4
...conforms to have the outlet replaced. If you are using an extension cord or power strip with the printer, make sure that the total of the amperes required by qualified Oki Data technicians. If the plug does not fit, the outlet may expose you put it on the ...operation. The Center for : - Safety Information Your Oki printer has been carefully designed to give you put the printer in any kind of enclosure, make sure the enclosure is properly ventilated. • Do not use an adapter to defeat the grounding. • Install the printer near a heat source (such as a radiator or...
B6200/6300 Series Setup Guide - English
Page 4
... Software Kit, Hard Disk, Compact Flash Disk, or Additional Memory 26 Preparing the printer 26 Closing the printer 27 Installing a Network Software Kit 28 Installing a Hard Disk 30 Installing a Compact Flash Disk 32 Installing Additional Memory 34 Installing the Drum-Toner Cartridge 35 Connecting an interface cable 38 Connecting the power cord 39 Loading paper 40 The...
B6200/6300 Series Setup Guide - English
Page 5
... options 52 To print a job using the optional duplex unit 52 To Load the Manuals 52 Macintosh - OS 9.1 51 Install the Driver 51 Create the Desktop Printer for a Network 54 Activate the Duplex Unit and Additional Options . . . . 54 To print a Job Using the ... 64 Oki Data Americas Service Centers 66 CONTENTS > 5 Setting printer configurations via a Web page 47 Using Online Help 47 Installing the printer driver 48 Microsoft Windows Systems 48 Install the PCL6 Emulation Driver 48 Print a Test Page 49 To Install the PostScript Driver as Well 49 Install Printer Software Utilities...
B6200/6300 Series Setup Guide - English
Page 6
...up, install and operate your printer. 6 > INTRODUCTION INTRODUCTION WELCOME Thank you are based on the CD-ROM supplied with the basics of how to operate your computer and, if required, network environment. This guide assumes that you for choosing an Oki B6200/B6300 Series printer. This... guide is a guide to use the printer correctly and effectively, please read this guide before using the printer. This User's Guide and other important user documents including the ...
B6200/6300 Series Setup Guide - English
Page 9
... Information booklet supplied with consumables weighs 20.4kg (45lb) (B6200) or 22.6kg (50lb) (B6300). INSTALLATION AND RELOCATION PROCEDURE > 9 The specifications that apply to your printer depend on each other than these recessed areas. • When lifting the printer, maintain proper lifting posture to prevent injuries. • Other safety information is contained in either...
B6200/6300 Series Setup Guide - English
Page 10
...Face Up (Rear) Tray (B6300 only) • Power cord(s) • Unpacking instructions and Quick Setup Guide • Safety and Warranty Booklet • CD-ROM The CD-ROM contains printer drivers, software and documentation designed to install the unit. 10 > INSTALLATION AND RELOCATION PROCEDURE CHECKING THE ... or damaged, contact your dealer. Oki has provided an interface, under MS Windows, to assist you fully utilize your printer as a standard configuration, refer to "Installing the optional accessories" on page 15 to help you in the printer packaging. NOTE Retain the packaging material...
B6200/6300 Series Setup Guide - English
Page 11
... in the 550-sheet paper tray. Indicates the level of the control buttons, indicators and display. Holds 250 sheets (B6200) or 550 sheets (B6300) of paper. For connecting the duplex unit (option). For connecting a parallel cable. Pull this tray out to print on and off. For .... For connecting the power cord. For connecting the network cable when using the printer as a network printer. (The Network Software Kit option needs to have been installed to "The Control Panel and Menu system" on page 43. INSTALLATION AND RELOCATION PROCEDURE > 11 Provide ventilation for the interior of the...
B6200/6300 Series Setup Guide - English
Page 12
... and rear panels. SPACE REQUIREMENTS The printer has ventilation holes on a level and sturdy surface that can withstand the machine weight - 20.4 kg (45lb) (B6200) or 22.6 kg (50lb) (B6300). A poorly ventilated machine can result in a hot, humid, dusty or poorly ventilated environment. Ensure that the installation location meets the following diagram shows...
B6200/6300 Series Setup Guide - English
Page 13
... humidity/ temperature to the direct draft of a cold room or moving the printer from a location with image transfer. Rapid heating of air-conditioning or heating. • Temperature range 10 - 32 °C (50 - 89 °F), humidity range 15 - 85% (no condensation). INSTALLATION AND RELOCATION PROCEDURE > 13 Humidity should be 70% or below at...
B6200/6300 Series Setup Guide - English
Page 14
Push up (rear) tray into the holes at the back of the printer (1), and lower the tray into position (2). 2. Affix the label provided to the back of the face up the rear output tray lever as shown in the diagram (1) and pull out the extension tray (2). 3. NOTE A face up (rear) tray can install the face up (rear) tray on the B6300 only. 1. Insert the right and left tabs of the printer. 14 > INSTALLATION AND RELOCATION PROCEDURE INSTALLING THE FACE UP (REAR) TRAY You can be installed on this printer if required.
B6200/6300 Series Setup Guide - English
Page 15
... options. WARNING! An unauthorized modification can cause electric shock. Connecting cables or options to the Online Help for the printer driver. Ensure the printer is in use, you have purchased any optional accessories, install them before setting the drum-toner cartridge and before connecting any parts. CAUTION! Never open or remove machine covers...
B6200/6300 Series Setup Guide - English
Page 16
This section explains how to this printer. Ensure that you have all of universal tray (550-sheet) option to install two trays as an example. 1. INSTALLING A UNIVERSAL TRAY You can install up to two levels of the following items: • Tray module and paper tray • Fasteners (four pieces) 16 > INSTALLATION AND RELOCATION PROCEDURE
B6200/6300 Series Setup Guide - English
Page 19
6. Align the corners of the printer and the tray modules, and lower the printer gently so that the guide pins at the four corners of the tray modules fit into the holes at the base plate of the printer. 7. INSTALLATION AND RELOCATION PROCEDURE > 19 CAUTION! Lift up the printer by holding the recessed areas. 8. Pull the paper trays out of the printer. Otherwise, interior parts of the tray modules may be lowered gently. The printer must be damaged.
B6200/6300 Series Setup Guide - English
Page 20
NOTE For details on how to load paper, refer to "Loading paper" on page 40. 20 > INSTALLATION AND RELOCATION PROCEDURE Insert the fasteners provided into the printer. Push both trays completely into the two locations inside and the two locations at the back of the printer. Insert the fasteners securely. 10. 9.
B6200/6300 Series Setup Guide - English
Page 21
... remove it when the duplex unit has been installed. 1. Next, remove the connector cap at the back of the printer, and then align the top part of the printer. INSTALLING THE DUPLEX UNIT You can install a duplex unit option on page 14 before installing the duplex unit and refit it by pushing ...the two tabs as shown in "Installing the Face Up (Rear) Tray" on this printer. Remove the duplex unit cover by ...
B6200/6300 Series Setup Guide - English
Page 23
NOTE When the duplex unit is installed, lift the lever on top of the left corner at the back of the unit and open the unit, then open the cover (2). INSTALLATION AND RELOCATION PROCEDURE > 23 Lift the second lever on the top left side cover of the printer (1), and open the cover as shown in the diagram. INSTALLING THE OFFSET CATCH TRAY You can be installed on the B6300 only. 1. NOTE An offset catch tray can install an offset catch tray option on this printer.
B6200/6300 Series Setup Guide - English
Page 24
Loosen the right and left tabs of the offset catch tray into the holes at both ends of the bottom of the offset catch tray. 24 > INSTALLATION AND RELOCATION PROCEDURE Secure the screws at the top of the printer (1) and lower it slowly onto the top of the paper exit. 3. Insert the right and left thumbscrews as shown in the diagram to uninstall the top cover of the printer (2). 4. 2.
B6200/6300 Series Setup Guide - English
Page 25
If you install the face up (rear) tray on heavy weight papers. Printing while the tray is folded up the stopper when printing on the printer, affix the label provided to open the tray when using the printer. 8. Flip up may cause a paper jam. CAUTION! 5. Close the cover. 6. Be sure to the back of the offset catch tray. 7. INSTALLATION AND RELOCATION PROCEDURE > 25 Pull out the extension tray.
B6200/6300 Series Setup Guide - English
Page 28
.... 1. Gently insert the network software kit into the slot, and press firmly at the top corner of the network software kit. Refer to "Preparing the printer" on this option may initialize the settings of the slot. 4. Never touch the connectors of the card then at the bottom corner. 28...