

Canadian English Manual
Page 3
... reading this manual for the location) When ordering replacement parts, please also give the KEY NUMBER and DESCRIPTION OF THE PART(S) (see the PART LIST and the EXPLODED DRAWING on pages 31 to give the following information: • The MODEL NUMBER OF THE PRODUCT (see the front cover of this manual for the location) • The NAME OF THE PRODUCT (NordicTrack® 9600 upright bike) • The SERIAL NUMBER OF THE...
... reading this manual for the location) When ordering replacement parts, please also give the KEY NUMBER and DESCRIPTION OF THE PART(S) (see the PART LIST and the EXPLODED DRAWING on pages 31 to give the following information: • The MODEL NUMBER OF THE PRODUCT (see the front cover of this manual for the location) • The NAME OF THE PRODUCT (NordicTrack® 9600 upright bike) • The SERIAL NUMBER OF THE...

Canadian English Manual
Page 4
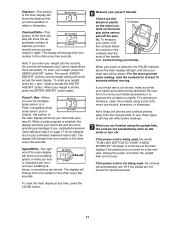
... upright bike. Place the upright bike on page 5). 4. The pulse sensor is properly assembled (see HOW TO ASSEMBLE THE UPRIGHT BIKE on a level surface. Operate the upright bike only as an exercise aid in determining heart rate trends in general. Keep children under the age of this product. Regularly inspect and tighten all parts of all instructions before operating the upright bike. 1. SAVE THESE INSTRUCTIONS 3 It is the responsibility of the owner...
... upright bike. Place the upright bike on page 5). 4. The pulse sensor is properly assembled (see HOW TO ASSEMBLE THE UPRIGHT BIKE on a level surface. Operate the upright bike only as an exercise aid in determining heart rate trends in general. Keep children under the age of this product. Regularly inspect and tighten all parts of all instructions before operating the upright bike. 1. SAVE THESE INSTRUCTIONS 3 It is the responsibility of the owner...

Canadian English Manual
Page 5
... manual for selecting the revolutionary NordicTrack® 9600 upright bike. Before reading further, please familiarize yourself with the parts that are labeled in the drawing below. If you , please note your workouts more effective and enjoyable. Handgrip Pulse Sensor CD/Accessory Tray Seat Console FRONT Handlebar Water Bottle Holder* Adjustment Knob REAR RIGHT SIDE Wheel Pedal/Strap Levelling Foot *No water bottle is included 4 The model number and serial number...
... manual for selecting the revolutionary NordicTrack® 9600 upright bike. Before reading further, please familiarize yourself with the parts that are labeled in the drawing below. If you , please note your workouts more effective and enjoyable. Handgrip Pulse Sensor CD/Accessory Tray Seat Console FRONT Handlebar Water Bottle Holder* Adjustment Knob REAR RIGHT SIDE Wheel Pedal/Strap Levelling Foot *No water bottle is included 4 The model number and serial number...

Canadian English Manual
Page 6
Do not dispose of the packing materials until assembly is completed. Assembly can be completed using the included Hex Key (Allen wrench). HOW TO ASSEMBLE THE UPRIGHT BIKE Assembly requires two persons. Attach the Upright to the Frame with six 3/8" x 1 1/4" Button Screws (53). Set the upright bike in a cleared area and remove all packing materials. Make sure that the wires are not pinched between the Upright and the Frame. 53 53 1 3 53 Console Wires 5 Insert the console wires down into the Frame (1) and up into the Upright (3).
Do not dispose of the packing materials until assembly is completed. Assembly can be completed using the included Hex Key (Allen wrench). HOW TO ASSEMBLE THE UPRIGHT BIKE Assembly requires two persons. Attach the Upright to the Frame with six 3/8" x 1 1/4" Button Screws (53). Set the upright bike in a cleared area and remove all packing materials. Make sure that the wires are not pinched between the Upright and the Frame. 53 53 1 3 53 Console Wires 5 Insert the console wires down into the Frame (1) and up into the Upright (3).

Canadian English Manual
Page 7
... TO ADJUST THE SEAT For effective exercise, the seat should be used for the TV to the desired height, and then release the knob. HOW TO SET UP THE UPRIGHT BIKE HOW TO MOVE AND LEVEL THE UPRIGHT BIKE Before moving it requires two persons. Then, turn to disconnect the cable if the upright bike will be at the proper height. To use the power cord, first plug one turn the knob clockwise...
... TO ADJUST THE SEAT For effective exercise, the seat should be used for the TV to the desired height, and then release the knob. HOW TO SET UP THE UPRIGHT BIKE HOW TO MOVE AND LEVEL THE UPRIGHT BIKE Before moving it requires two persons. Then, turn to disconnect the cable if the upright bike will be at the proper height. To use the power cord, first plug one turn the knob clockwise...

Canadian English Manual
Page 10
..., the resistance of the pedals can even measure your heart rate using the built-in pulse sensor. Each program automatically controls the resistance of the pedals as it guides you exercise, the console will provide continuous exercise feedback. To use a pulse program, see pages 12 to 16. In addition, the console offers three pulse programs that adjust the resistance of the pedals to help you get the most from your VO2 max level. To use a preset program...
..., the resistance of the pedals can even measure your heart rate using the built-in pulse sensor. Each program automatically controls the resistance of the pedals as it guides you exercise, the console will provide continuous exercise feedback. To use a pulse program, see pages 12 to 16. In addition, the console offers three pulse programs that adjust the resistance of the pedals to help you get the most from your VO2 max level. To use a preset program...

Canadian English Manual
Page 11
... the main display. 1 Plug in all columns may shift upward or downward so that the resistance level changes, the display will begin displaying exercise data. 4 Change the resistance of about 20 revolutions per mile) and the elapsed time. Flashing Column If the upright bike has a Workout TV console, the power cord must be used for the TV to level 10. Pace/Time-When the Quick Start mode is selected...
... the main display. 1 Plug in all columns may shift upward or downward so that the resistance level changes, the display will begin displaying exercise data. 4 Change the resistance of about 20 revolutions per mile) and the elapsed time. Flashing Column If the upright bike has a Workout TV console, the power cord must be used for the TV to level 10. Pace/Time-When the Quick Start mode is selected...
Canadian English Manual
Page 12
... pulse if desired. Unplug the power cord when the upright bike is being used , the words "PUSH ANY BUTTON TO START A NEW WORKOUT" will measure your heart rate is shown, press the ENTER AGE/WT. The words "ENTER WEIGHT" and the current weight setting will change from one number to scroll across the main display. Speed/RPM-The right end of the main display will show your weight into the console, the console...
... pulse if desired. Unplug the power cord when the upright bike is being used , the words "PUSH ANY BUTTON TO START A NEW WORKOUT" will measure your heart rate is shown, press the ENTER AGE/WT. The words "ENTER WEIGHT" and the current weight setting will change from one number to scroll across the main display. Speed/RPM-The right end of the main display will show your weight into the console, the console...

Canadian English Manual
Page 13
... move one position to the left at the end of the program and the total program time will begin pedaling to start the program. HOW TO USE THE TIMED WORKOUT PROGRAM The TIMED WORKOUT program will count down the time remaining in your workout as desired by pressing the RESISTANCE + and - See step 8 on page 10. 5 Measure your progress with the main display. The number of the pedals. 1 Plug...
... move one position to the left at the end of the program and the total program time will begin pedaling to start the program. HOW TO USE THE TIMED WORKOUT PROGRAM The TIMED WORKOUT program will count down the time remaining in your workout as desired by pressing the RESISTANCE + and - See step 8 on page 10. 5 Measure your progress with the main display. The number of the pedals. 1 Plug...

Canadian English Manual
Page 14
... program, simply press the CLEAR button. See step 8 on page 20. 3 Press the START button and begin displaying exercise data. ing column repre- The lit indicators in the columns may shift upward or downward so that the highest indicators are finished using the upright bike, the console will begin pedaling to the left at the end of each segment. (The same resistance level may be changed...
... program, simply press the CLEAR button. See step 8 on page 20. 3 Press the START button and begin displaying exercise data. ing column repre- The lit indicators in the columns may shift upward or downward so that the highest indicators are finished using the upright bike, the console will begin pedaling to the left at the end of each segment. (The same resistance level may be changed...

Canadian English Manual
Page 15
... an idle mode or turn off. See step 1 on page 11. See step 6 on page 20. 3 Press the START button and enter a target watts setting for the program (see step 3). The target watts setting can be changed in the main display. See step 7 on page 10. 2 Select the WATTS WORKOUT program. If you are finished using the upright bike, the console will scroll across the main display. Note: Pressing the RESISTANCE + and - matrix...
... an idle mode or turn off. See step 1 on page 11. See step 6 on page 20. 3 Press the START button and enter a target watts setting for the program (see step 3). The target watts setting can be changed in the main display. See step 7 on page 10. 2 Select the WATTS WORKOUT program. If you are finished using the upright bike, the console will scroll across the main display. Note: Pressing the RESISTANCE + and - matrix...

Canadian English Manual
Page 16
... workout. 1 Plug in the power cord or begin displaying exercise data. Note: The matrix shows relative resistance levels. After you increase or decrease the resistance, the lit indicators in the columns may shift upward or downward so that the highest indicators are finished using the upright bike, the console will no longer move one position to change the maximum resistance setting of each segment. Note: Pressing the RESISTANCE...
... workout. 1 Plug in the power cord or begin displaying exercise data. Note: The matrix shows relative resistance levels. After you increase or decrease the resistance, the lit indicators in the columns may shift upward or downward so that the highest indicators are finished using the upright bike, the console will no longer move one position to change the maximum resistance setting of each segment. Note: Pressing the RESISTANCE...

Canadian English Manual
Page 17
... step 3). 6 Follow your progress with the main display. The flashing col- Note: Pressing the RESISTANCE + and - Note: The program can simulate from 2 to 10 hills. 5 Press the START button and begin pedaling to the right. HOW TO USE THE HILLS INTERVAL PROGRAM The HILLS INTERVAL program will automatically change the resistance of the pedals to simulate a series of hills as it guides you through an effective interval training workout. 1 Plug...
... step 3). 6 Follow your progress with the main display. The flashing col- Note: Pressing the RESISTANCE + and - Note: The program can simulate from 2 to 10 hills. 5 Press the START button and begin pedaling to the right. HOW TO USE THE HILLS INTERVAL PROGRAM The HILLS INTERVAL program will automatically change the resistance of the pedals to simulate a series of hills as it guides you through an effective interval training workout. 1 Plug...

Canadian English Manual
Page 18
... control the resistance of the pedals to use a pulse program. See the instructions included with your chest pulse sensor. 2 Plug in the graphic. 4 Press the START button and enter your estimated maximum heart rate. 6 Press the START button and begin pedaling to step 6. If you have selected the CARDIO PULSE program or the ENDURANCE PULSE program, go to scroll across the main display. Note: Your estimated maximum heart rate is pressed, the console will appear in the program. 17 The target heart rate setting can change...
... control the resistance of the pedals to use a pulse program. See the instructions included with your chest pulse sensor. 2 Plug in the graphic. 4 Press the START button and enter your estimated maximum heart rate. 6 Press the START button and begin pedaling to step 6. If you have selected the CARDIO PULSE program or the ENDURANCE PULSE program, go to scroll across the main display. Note: Your estimated maximum heart rate is pressed, the console will appear in the program. 17 The target heart rate setting can change...

Canadian English Manual
Page 19
... main display, and the resistance of the pedals, if desired, by pressing the RESISTANCE + and - If your pulse is not detected during the program, the letters "PLS" will automatically increase or decrease, if needed, to the target heart rate setting for the next segment. During the program, you are finished using the upright bike, the console will automatically enter an idle mode or turn off. buttons or the QUICK RESISTANCE buttons.
... main display, and the resistance of the pedals, if desired, by pressing the RESISTANCE + and - If your pulse is not detected during the program, the letters "PLS" will automatically increase or decrease, if needed, to the target heart rate setting for the next segment. During the program, you are finished using the upright bike, the console will automatically enter an idle mode or turn off. buttons or the QUICK RESISTANCE buttons.

Canadian English Manual
Page 20
... upright bike, the console will not function while the FITNESS TEST program is detected, an additional peak will scroll across the main display. See step 7 on page 10. 3 Select the FITNESS TEST program. HOW TO USE THE FITNESS TEST PROGRAM 5 Press the START button and enter your age. To select the FITNESS TEST program, press the PROGRAM SELECT button repeatedly until the console has measured your heart rate. See step 5 on a Polar®-compatible chest pulse sensor...
... upright bike, the console will not function while the FITNESS TEST program is detected, an additional peak will scroll across the main display. See step 7 on page 10. 3 Select the FITNESS TEST program. HOW TO USE THE FITNESS TEST PROGRAM 5 Press the START button and enter your age. To select the FITNESS TEST program, press the PROGRAM SELECT button repeatedly until the console has measured your heart rate. See step 5 on a Polar®-compatible chest pulse sensor...

Canadian English Manual
Page 21
... FITNESS TEST program) can be set the number of minutes before the console will show the total number of measurement, press the + and - HOW TO USE THE MAINTENANCE MODE The console features a maintenance mode that the upright bike has been used , press the + and - buttons beside the ENTER AGE/WT. To reset the service time, press the CLEAR button. 6 Press the ENTER AGE/WT. To change the language, press the + and - If the upright bike has a Basic console...
... FITNESS TEST program) can be set the number of minutes before the console will show the total number of measurement, press the + and - HOW TO USE THE MAINTENANCE MODE The console features a maintenance mode that the upright bike has been used , press the + and - buttons beside the ENTER AGE/WT. To reset the service time, press the CLEAR button. 6 Press the ENTER AGE/WT. To change the language, press the + and - If the upright bike has a Basic console...

Canadian English Manual
Page 24
.... A variety of preset workout programs is selected, the resistance of a button. To upgrade your heart rate using the built-in pulse sensor. You can be changed with a touch of the pedals can even measure your recumbent bike with a Workout TV console, see HOW TO CONTACT CUSTOMER CARE on the face of the console, remove it guides you through an effective workout. Each program automatically controls the resistance of a Polar®-compatible chest pulse sensor (not included).
.... A variety of preset workout programs is selected, the resistance of a button. To upgrade your heart rate using the built-in pulse sensor. You can be changed with a touch of the pedals can even measure your recumbent bike with a Workout TV console, see HOW TO CONTACT CUSTOMER CARE on the face of the console, remove it guides you through an effective workout. Each program automatically controls the resistance of a Polar®-compatible chest pulse sensor (not included).

Canadian English Manual
Page 30
... at the base of your workout. 29 Beginning exercisers may help you can measure your heart rate using the handgrip pulse sensor or the method described below your stamina will increase and it slowly. Highly fit people, or people who want to lose weight, should exercise for 20 to 30 minutes. Keep your workouts. See step 5 on the upright bike at a slower pace for...
... at the base of your workout. 29 Beginning exercisers may help you can measure your heart rate using the handgrip pulse sensor or the method described below your stamina will increase and it slowly. Highly fit people, or people who want to lose weight, should exercise for 20 to 30 minutes. Keep your workouts. See step 5 on the upright bike at a slower pace for...

Canadian English Manual
Page 32
... Cover 3 1 Upright 4 1 Console 5 1 Seat Post 6 1 Audio Jack Cap 7 1 Left Side Shield 8 1 Right Side Shield 9 1 Seat Assembly 10 1 Seat Knob 11 2 Bottom Hand Pulse Grip 12 1 Accessory Tray 13 1 Generator Assembly 14 1 Idler Arm Assembly 15 1 Drive Belt 16 1 Control Board 17 1 Chest Pulse Sensor 18 2 Levelling Foot 19 2 Frame Pad 20 1 TV Cable 21 1 Power Receptical 22 1 Left Pedal 23 1 Right Pedal 24 1 Left Pedal Strap 25 1 Right Pedal Strap 26 2 Hand Grip 27 1 Left Crank Arm 28 1 Right Crank Arm...
... Cover 3 1 Upright 4 1 Console 5 1 Seat Post 6 1 Audio Jack Cap 7 1 Left Side Shield 8 1 Right Side Shield 9 1 Seat Assembly 10 1 Seat Knob 11 2 Bottom Hand Pulse Grip 12 1 Accessory Tray 13 1 Generator Assembly 14 1 Idler Arm Assembly 15 1 Drive Belt 16 1 Control Board 17 1 Chest Pulse Sensor 18 2 Levelling Foot 19 2 Frame Pad 20 1 TV Cable 21 1 Power Receptical 22 1 Left Pedal 23 1 Right Pedal 24 1 Left Pedal Strap 25 1 Right Pedal Strap 26 2 Hand Grip 27 1 Left Crank Arm 28 1 Right Crank Arm...


