
English Manual
Page 2
... YOU BEGIN 7 PART IDENTIFICATION CHART 8 ASSEMBLY 9 THE CHEST HEART RATE MONITOR 14 HOW TO USE THE ELLIPTICAL 15 FCC INFORMATION 32 MAINTENANCE AND TROUBLESHOOTING 33 EXERCISE GUIDELINES 35 PART LIST 36 EXPLODED DRAWING 38 ORDERING REPLACEMENT PARTS Back Cover LIMITED WARRANTY Back Cover WARNING DECAL PLACEMENT This drawing shows the location(s) of Bluetooth SIG, Inc. Note: The decal(s) may not be shown at actual size. and are trademarks of this manual and request a free replacement decal. The...
... YOU BEGIN 7 PART IDENTIFICATION CHART 8 ASSEMBLY 9 THE CHEST HEART RATE MONITOR 14 HOW TO USE THE ELLIPTICAL 15 FCC INFORMATION 32 MAINTENANCE AND TROUBLESHOOTING 33 EXERCISE GUIDELINES 35 PART LIST 36 EXPLODED DRAWING 38 ORDERING REPLACEMENT PARTS Back Cover LIMITED WARRANTY Back Cover WARNING DECAL PLACEMENT This drawing shows the location(s) of Bluetooth SIG, Inc. Note: The decal(s) may not be shown at actual size. and are trademarks of this manual and request a free replacement decal. The...
English Manual
Page 3
... procedures in this product. 1. When connecting the power cord (see page 15), plug the power cord into a grounded circuit. 2. Keep the power cord away from moisture and dust. DANGER: 13. Always unplug the power cord and switch the power switch to persons, read all warnings on a level surface, with pre-existing health problems. 3. The heart rate monitor is not working properly. The elliptical should be used . To protect the floor or...
... procedures in this product. 1. When connecting the power cord (see page 15), plug the power cord into a grounded circuit. 2. Keep the power cord away from moisture and dust. DANGER: 13. Always unplug the power cord and switch the power switch to persons, read all warnings on a level surface, with pre-existing health problems. 3. The heart rate monitor is not working properly. The elliptical should be used . To protect the floor or...
English Manual
Page 7
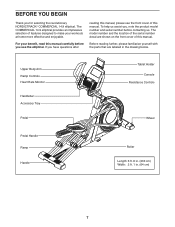
... product model number and serial number before you use the elliptical. To help us . BEFORE YOU BEGIN Thank you have questions after reading this manual, please see the front cover of this manual. Upper Body Arm Ramp Controls Heart Rate Monitor Handlebar Accessory Tray Pedal Tablet Holder Console Resistance Controls Wheel Pedal Handle Ramp Handle Roller Length: 6 ft. 8 in. (203 cm) Width: 2 ft. 1 in the drawing below. For your workouts at home more...
... product model number and serial number before you use the elliptical. To help us . BEFORE YOU BEGIN Thank you have questions after reading this manual, please see the front cover of this manual. Upper Body Arm Ramp Controls Heart Rate Monitor Handlebar Accessory Tray Pedal Tablet Holder Console Resistance Controls Wheel Pedal Handle Ramp Handle Roller Length: 6 ft. 8 in. (203 cm) Width: 2 ft. 1 in the drawing below. For your workouts at home more...
English Manual
Page 9
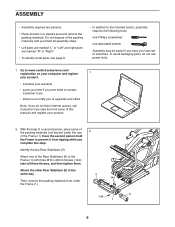
... following tools: one Phillips screwdriver one of this step. Attach the other Rear Stabilizer (5) in a cleared area and remove the packing materials. Identify the two Rear Stabilizers (5). ASSEMBLY • Assembly requires two persons. • Place all three Screws, and then tighten them. Attach one adjustable wrench Assembly may be easier if you do not use power tools. 1. Have the second person hold the Frame...
... following tools: one Phillips screwdriver one of this step. Attach the other Rear Stabilizer (5) in a cleared area and remove the packing materials. Identify the two Rear Stabilizers (5). ASSEMBLY • Assembly requires two persons. • Place all three Screws, and then tighten them. Attach one adjustable wrench Assembly may be easier if you do not use power tools. 1. Have the second person hold the Frame...
English Manual
Page 14
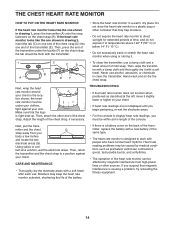
... transmitter and the chest strap to work with people who have normal heart rhythms. Heart rate reading problems may be affected by magnetic interference from your chest in drawing 1, press the transmitter (A) onto the snap fasteners on the chest strap (B). Do not store the heart rate monitor in a warm, dry place. the heart rate monitor must be within arm's length of the console. • If there is a battery cover on the...
... transmitter and the chest strap to work with people who have normal heart rhythms. Heart rate reading problems may be affected by magnetic interference from your chest in drawing 1, press the transmitter (A) onto the snap fasteners on the chest strap (B). Do not store the heart rate monitor in a warm, dry place. the heart rate monitor must be within arm's length of the console. • If there is a battery cover on the...

English Manual
Page 15
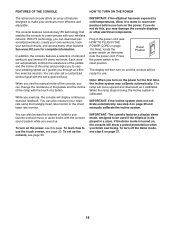
... a plug with all local codes and ordinances. Plug the power cord into an adjustment hole beneath the pedal. HOW TO ADJUST THE POSITIONS OF THE PEDALS Each pedal can be connected with a metal screw to reduce the risk of electric shock. Grounded Outlet Grounding Pin A temporary adapter may be used only until a properly grounded outlet can be used to connect the power cord to determine whether the outlet box cover...
... a plug with all local codes and ordinances. Plug the power cord into an adjustment hole beneath the pedal. HOW TO ADJUST THE POSITIONS OF THE PEDALS Each pedal can be connected with a metal screw to reduce the risk of electric shock. Grounded Outlet Grounding Pin A temporary adapter may be used only until a properly grounded outlet can be used to connect the power cord to determine whether the outlet box cover...
English Manual
Page 19
... TO PLUG IN THE POWER CORD on the power. Press the power switch to be ready for complete information. Each workout automatically controls the resistance of the pedals and the incline of a button. You can also set up the console, see step 4 on page 27. 19 To learn how to vary your heart rate using the handgrip heart rate monitor or the chest heart rate monitor. While you exercise. To turn off the demo mode, see this , you to use . To set a customized workout...
... TO PLUG IN THE POWER CORD on the power. Press the power switch to be ready for complete information. Each workout automatically controls the resistance of the pedals and the incline of a button. You can also set up the console, see step 4 on page 27. 19 To learn how to vary your heart rate using the handgrip heart rate monitor or the chest heart rate monitor. While you exercise. To turn off the demo mode, see this , you to use . To set a customized workout...
English Manual
Page 20
... the iFit button. You can display speed and distance in a workout. To view more characters, touch the Alt button. To return to move certain images on the screen, remove the plastic. Press the back button to return to view the keyboard. To use the maintenance mode, see page 27. However, you must be connected to other tablets. Note: In order to access the Internet, download iFit workouts, and use a capital...
... the iFit button. You can display speed and distance in a workout. To view more characters, touch the Alt button. To return to move certain images on the screen, remove the plastic. Press the back button to return to view the keyboard. To use the maintenance mode, see page 27. However, you must be connected to other tablets. Note: In order to access the Internet, download iFit workouts, and use a capital...
English Manual
Page 22
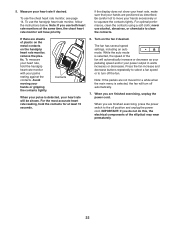
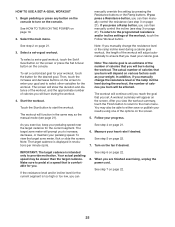
.... never use the handgrip heart rate monitor, follow the instructions below. If there are not moved for at the same time, the chest heart rate monitor will turn off position and unplug the power cord. For the most accurate heart rate reading, hold the handgrip heart rate monitor with your palms resting against the contacts. To use both heart rate monitors at least 15 seconds. 6. Press the fan increase and decrease buttons repeatedly to...
.... never use the handgrip heart rate monitor, follow the instructions below. If there are not moved for at the same time, the chest heart rate monitor will turn off position and unplug the power cord. For the most accurate heart rate reading, hold the handgrip heart rate monitor with your palms resting against the contacts. To use both heart rate monitors at least 15 seconds. 6. Press the fan increase and decrease buttons repeatedly to...

English Manual
Page 23
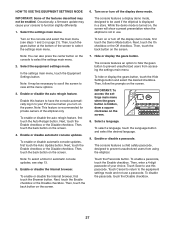
... will show the approximate number of the screen. Select the desired workout category from the workouts menu and then select the desired workout. One resistance level, one ramp incline level, and one target cadence (speed) are programmed for you exercise, keep your pedaling speed. Your actual pedaling speed may be slower than the target cadence. Begin pedaling or press any button on the console to turn on the screen to...
... will show the approximate number of the screen. Select the desired workout category from the workouts menu and then select the desired workout. One resistance level, one ramp incline level, and one target cadence (speed) are programmed for you exercise, keep your pedaling speed. Your actual pedaling speed may be slower than the target cadence. Begin pedaling or press any button on the console to turn on the screen to...
English Manual
Page 24
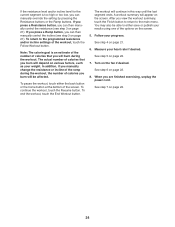
... press a Ramp button, you can then manually control the incline (see step 3 on page 22. 8. In addition, if you manually change the resistance or incline of the ramp during the workout. After you are finished exercising, unplug the power cord. You may also be affected. Measure your progress. See step 6 on page 21). When you view the workout summary, touch the Finish button to return to the programmed resistance...
... press a Ramp button, you can then manually control the incline (see step 3 on page 22. 8. In addition, if you manually change the resistance or incline of the ramp during the workout. After you are finished exercising, unplug the power cord. You may also be affected. Measure your progress. See step 6 on page 21). When you view the workout summary, touch the Finish button to return to the programmed resistance...
English Manual
Page 25
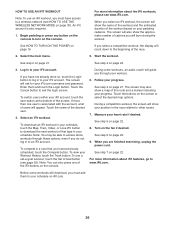
... manually change the resistance level or the ramp incline level during a calorie goal workout, the length of calories that you meet your results using one of calories you burn will adjust automatically to turn on page 19. 2. After you are finished exercising, unplug the power cord. Measure your progress. Begin pedaling or press any button on the console to ensure that you set -a-goal workout, touch the Set...
... manually change the resistance level or the ramp incline level during a calorie goal workout, the length of calories that you meet your results using one of calories you burn will adjust automatically to turn on page 19. 2. After you are finished exercising, unplug the power cord. Measure your progress. Begin pedaling or press any button on the console to ensure that you set -a-goal workout, touch the Set...
English Manual
Page 26
... of the workout based on the console. Start the workout. See step 4 on page 22. An iFit account is associated with the account, a list of users will count down to your schedule, touch the Map, Train, Video, or Lose Wt. If you are finished exercising, unplug the power cord. To switch users within your schedule. During some workouts will burn during the workout. Measure your workout. 6. To view...
... of the workout based on the console. Start the workout. See step 4 on page 22. An iFit account is associated with the account, a list of users will count down to your schedule, touch the Map, Train, Video, or Lose Wt. If you are finished exercising, unplug the power cord. To switch users within your schedule. During some workouts will burn during the workout. Measure your workout. 6. To view...
English Manual
Page 27
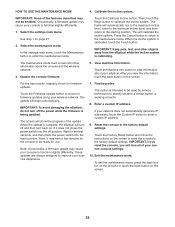
... elliptical is turned on the screen. 4. Next, touch the Enable checkbox or the Disable checkbox. The console features a display demo mode, designed to the equipment settings mode and not use this feature to have the console automatically log in to your iFit account when you turn off the display demo mode, first touch the Demo Mode button. While the demo mode is not in a store. To hide or display the gears button...
... elliptical is turned on the screen. 4. Next, touch the Enable checkbox or the Disable checkbox. The console features a display demo mode, designed to the equipment settings mode and not use this feature to have the console automatically log in to your iFit account when you turn off the display demo mode, first touch the Demo Mode button. While the demo mode is not in a store. To hide or display the gears button...
English Manual
Page 29
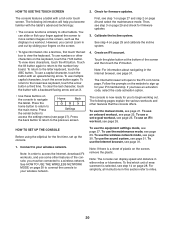
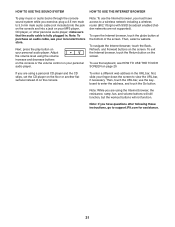
... complete, the elliptical will show information about your exercise experience. 4. When the incline system is calibrating. 5. Find keycodes. If your wireless network. Exit the maintenance mode. Touch the Firmware Update button to check for firmware updates using your network does not automatically generate IP addresses, touch the Custom IP button to enter a custom IP address. 9. If it does not, press the power switch into the reset position. Then...
... complete, the elliptical will show information about your exercise experience. 4. When the incline system is calibrating. 5. Find keycodes. If your wireless network. Exit the maintenance mode. Touch the Firmware Update button to check for firmware updates using your network does not automatically generate IP addresses, touch the Custom IP button to enter a custom IP address. 9. If it does not, press the power switch into the reset position. Then...
English Manual
Page 31
... after following these instructions, go to a wireless network including a wireless router (802.11b/g/n) with SSID broadcast enabled (hidden networks are not supported). Note: If you exercise, plug a 3.5 mm male to enter the address, and touch the Go button. Note: To use the keyboard to 3.5 mm male audio cable (not included) into the jack on the console and into a jack...
... after following these instructions, go to a wireless network including a wireless router (802.11b/g/n) with SSID broadcast enabled (hidden networks are not supported). Note: If you exercise, plug a 3.5 mm male to enter the address, and touch the Go button. Note: To use the keyboard to 3.5 mm male audio cable (not included) into the jack on the console and into a jack...
English Manual
Page 33
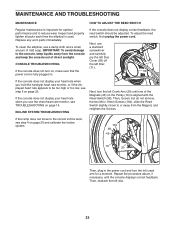
... too low, see step 4 on page 29 and calibrate the incline system. 104 38 43 19 20 Then, plug in the power cord and turn on the Pulley (19) is aligned with the Reed Switch (38). If the ramp does not move to be adjusted. Inspect and properly tighten all parts each time the elliptical is used. MAINTENANCE AND TROUBLESHOOTING MAINTENANCE HOW TO ADJUST THE REED SWITCH Regular maintenance is important for a moment...
... too low, see step 4 on page 29 and calibrate the incline system. 104 38 43 19 20 Then, plug in the power cord and turn on the Pulley (19) is aligned with the Reed Switch (38). If the ramp does not move to be adjusted. Inspect and properly tighten all parts each time the elliptical is used. MAINTENANCE AND TROUBLESHOOTING MAINTENANCE HOW TO ADJUST THE REED SWITCH Regular maintenance is important for a moment...
English Manual
Page 35
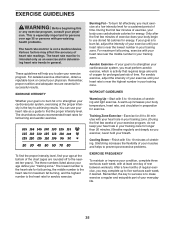
... may affect the accuracy of your exercise until your heart rate is intended only as a guide to burn fat, adjust the intensity of heart rate readings. WORKOUT GUIDELINES Warming Up-Start with your heart rate near the lowest number in preparation for a sustained period of your muscles and helps to five workouts each week, with pre-existing health problems. The heart rate monitor is especially important for persons...
... may affect the accuracy of your exercise until your heart rate is intended only as a guide to burn fat, adjust the intensity of heart rate readings. WORKOUT GUIDELINES Warming Up-Start with your heart rate near the lowest number in preparation for a sustained period of your muscles and helps to five workouts each week, with pre-existing health problems. The heart rate monitor is especially important for persons...

English Manual
Page 36
... Frame Rear Stabilizer Cover Ramp Upright Rear Stabilizer Right Front Stabilizer Console Front Stabilizer Cover Left Front Stabilizer Ramp Cover Track Left Roller Arm Lift Motor Left Pedal Control Board Power Switch Power Cord Grommet Crank Pulley Crank Arm Pedal Arm Cap Idler M12 Nut Right Pulse Grip/Wire Resistance Motor Lower Saddle Bracket Lift Frame Bushing Eddy Mechanism Left Pedal Handle Medium Bushing Lift Frame Axle Left Pulse Grip/Wire Small Snap Ring Wheel Bolt Set Right Upper Body Leg Accessory Tray Reed Switch/Wire Clamp Bearing...
... Frame Rear Stabilizer Cover Ramp Upright Rear Stabilizer Right Front Stabilizer Console Front Stabilizer Cover Left Front Stabilizer Ramp Cover Track Left Roller Arm Lift Motor Left Pedal Control Board Power Switch Power Cord Grommet Crank Pulley Crank Arm Pedal Arm Cap Idler M12 Nut Right Pulse Grip/Wire Resistance Motor Lower Saddle Bracket Lift Frame Bushing Eddy Mechanism Left Pedal Handle Medium Bushing Lift Frame Axle Left Pulse Grip/Wire Small Snap Ring Wheel Bolt Set Right Upper Body Leg Accessory Tray Reed Switch/Wire Clamp Bearing...
English Manual
Page 40
...; the model number and serial number of the product (see the front cover of this manual) • the name of the product (see the front cover of this manual) • the key number and description of the replacement part(s) (see the PART LIST and the EXPLODED DRAWING near the end of this warranty is shipped to a service center, freight charges to the customer. ICON Health & Fitness, Inc. (ICON) warrants this...
...; the model number and serial number of the product (see the front cover of this manual) • the name of the product (see the front cover of this manual) • the key number and description of the replacement part(s) (see the PART LIST and the EXPLODED DRAWING near the end of this warranty is shipped to a service center, freight charges to the customer. ICON Health & Fitness, Inc. (ICON) warrants this...


