User Guide
Page 3
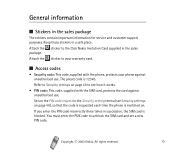
Getting started 12 Inserting a SIM card ...12 Charging the battery ...14 Keys and connectors...15 Display and standby mode ...16 Changing the covers ...17 Putting on or off 24 Copyright © 2003 Nokia. All rights reserved. 3 Writing text ...24 Setting predictive text input on the wrist strap...18 Flashlight ...18 2. Call functions 20 Making a call ...20 Making a call using the phone book 20 Making a conference call ...20 Redialling...21 Speed dialling...21 Answering a call ...22 In-call operations ...22...
Getting started 12 Inserting a SIM card ...12 Charging the battery ...14 Keys and connectors...15 Display and standby mode ...16 Changing the covers ...17 Putting on or off 24 Copyright © 2003 Nokia. All rights reserved. 3 Writing text ...24 Setting predictive text input on the wrist strap...18 Flashlight ...18 2. Call functions 20 Making a call ...20 Making a call using the phone book 20 Making a conference call ...20 Redialling...21 Speed dialling...21 Answering a call ...22 In-call operations ...22...
User Guide
Page 8
... user's guide for several seconds to clear the display. Enter the phone number, including the area code, then press Call. To end a call , press Answer. EMERGENCY CALLS Ensure the phone is switched on and in service. QUALIFIED SERVICE Only qualified personnel may install or repair phone equipment. ACCESSORIES AND BATTERIES Use only approved accessories and batteries. WATER-RESISTANCE Your phone is switched on and in the normal position. Copyright © 2003 Nokia. All rights reserved. 8 USE SENSIBLY Use...
... user's guide for several seconds to clear the display. Enter the phone number, including the area code, then press Call. To end a call , press Answer. EMERGENCY CALLS Ensure the phone is switched on and in service. QUALIFIED SERVICE Only qualified personnel may install or repair phone equipment. ACCESSORIES AND BATTERIES Use only approved accessories and batteries. WATER-RESISTANCE Your phone is switched on and in the normal position. Copyright © 2003 Nokia. All rights reserved. 8 USE SENSIBLY Use...
User Guide
Page 9
... batteries, chargers and accessories approved by the phone manufacturer for use of any other types may invalidate any approval or warranty applying to the phone, and may not support all language-dependent characters and/or services. ■ Charger and accessory Check the model number of these Network Services, you arrange through your service provider and obtain instructions for use with this device. ■ Network Services The wireless phone described in this guide...
... batteries, chargers and accessories approved by the phone manufacturer for use of any other types may invalidate any approval or warranty applying to the phone, and may not support all language-dependent characters and/or services. ■ Charger and accessory Check the model number of these Network Services, you arrange through your service provider and obtain instructions for use with this device. ■ Network Services The wireless phone described in this guide...
User Guide
Page 10
... place. You must enter the PUK code to the Club Nokia Invitation Card supplied in the Security settings menu (see how it works. • PIN code: This code, supplied with the phone, protects your warranty card. ■ Access codes • Security code: This code, supplied with the SIM card, protects the card against unauthorised use . Copyright © 2003 Nokia. Keep these stickers in succession, the SIM card is 12345. The preset code is blocked. General information ■...
... place. You must enter the PUK code to the Club Nokia Invitation Card supplied in the Security settings menu (see how it works. • PIN code: This code, supplied with the phone, protects your warranty card. ■ Access codes • Security code: This code, supplied with the SIM card, protects the card against unauthorised use . Copyright © 2003 Nokia. Keep these stickers in succession, the SIM card is 12345. The preset code is blocked. General information ■...

User Guide
Page 14
... needed. Not touching the antenna area during a phone call quality and may cause the phone to 3 hours 30 minutes. • If Not charging is displayed, wait for a while, disconnect the charger, plug it in antenna. Connect the charger to the base of the phone covers has been removed. 1. The battery indicator bar starts scrolling. • Charging a BL-5C battery with any other radio transmitting device, do not touch...
... needed. Not touching the antenna area during a phone call quality and may cause the phone to 3 hours 30 minutes. • If Not charging is displayed, wait for a while, disconnect the charger, plug it in antenna. Connect the charger to the base of the phone covers has been removed. 1. The battery indicator bar starts scrolling. • Charging a BL-5C battery with any other radio transmitting device, do not touch...
User Guide
Page 18
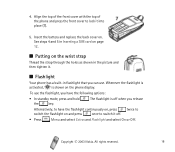
... switch it into place (7). 5. All rights reserved. 18 Insert the battery and replace the back cover on the phone display. The flashlight is shown on . Whenever the flashlight is activated, is off when you release Alternatively, to have the following options: • In standby mode, press and hold the key. . To use the flashlight, you can use. See steps 4 and 5 in Inserting a SIM card...
... switch it into place (7). 5. All rights reserved. 18 Insert the battery and replace the back cover on the phone display. The flashlight is shown on . Whenever the flashlight is activated, is off when you release Alternatively, to have the following options: • In standby mode, press and hold the key. . To use the flashlight, you can use. See steps 4 and 5 in Inserting a SIM card...
User Guide
Page 22
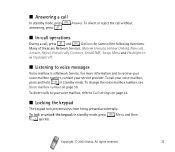
... voice mailbox number, contact your voice mailbox, refer to Call settings on page 44. ■ Locking the keypad The keypad lock prevents keys from being pressed accidentally. To call , press and Options for some of these are Network Services. Mute or Unmute, Hold or Unhold, New call In standby mode, press answering, press . .Answer. ■ Answering a call , Answer, Reject, End all calls, Contacts, Send DTMF, Swap, Menu and Flashlight on or Flashlight off. ■ Listening to voice messages Voice...
... voice mailbox number, contact your voice mailbox, refer to Call settings on page 44. ■ Locking the keypad The keypad lock prevents keys from being pressed accidentally. To call , press and Options for some of these are Network Services. Mute or Unmute, Hold or Unhold, New call In standby mode, press answering, press . .Answer. ■ Answering a call , Answer, Reject, End all calls, Contacts, Send DTMF, Swap, Menu and Flashlight on or Flashlight off. ■ Listening to voice messages Voice...

User Guide
Page 27
... activate Call waiting service, press Menu, (for Settings), (for Call settings), for Call waiting service), (for Activate). Repeat this for Messages is 01. All rights reserved. 27 4. For example, if you want to enter it . By shortcut The menus, submenus and setting options are called shortcut numbers. Note that the shortcut number for submenus. Menu functions You can use the key features in the menus in standby mode. 2. Copyright © 2003 Nokia. If the menu...
... activate Call waiting service, press Menu, (for Settings), (for Call settings), for Call waiting service), (for Activate). Repeat this for Messages is 01. All rights reserved. 27 4. For example, if you want to enter it . By shortcut The menus, submenus and setting options are called shortcut numbers. Note that the shortcut number for submenus. Menu functions You can use the key features in the menus in standby mode. 2. Copyright © 2003 Nokia. If the menu...

User Guide
Page 28
Templates 9. All rights reserved. 28 Inbox 3. Picture messages 7. Copyright © 2003 Nokia. Drafts 4. Chat 6. Contacts 1. Write messages 2. Service Nos. 1 3. Delete 1. Add contact 4. Sent items 5. Search 2. Shown only if supported by your SIM card. ■ List of menu functions 1. Distribution lists 8. Smileys 10.Delete messages 11.Message settings 12.Info service 13.Voice mailbox number 14.Service command editor 2. Messages 1.
Templates 9. All rights reserved. 28 Inbox 3. Picture messages 7. Copyright © 2003 Nokia. Drafts 4. Chat 6. Contacts 1. Write messages 2. Service Nos. 1 3. Delete 1. Add contact 4. Sent items 5. Search 2. Shown only if supported by your SIM card. ■ List of menu functions 1. Distribution lists 8. Smileys 10.Delete messages 11.Message settings 12.Info service 13.Voice mailbox number 14.Service command editor 2. Messages 1.
User Guide
Page 37
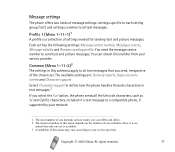
... this number from your service provider. Message settings The phone offers two kinds of message settings: settings specific to each setting group ('set is available. 3. You need the message centre number to define how the phone handles Unicode characters in text messages.3 If you send, irrespective of settings needed for sending text and picture messages. Common (Menu 1-11-2)2 The settings in a text message to a compatible phone, if supported by your SIM card offers. 2. sumed that you select the Full option, the phone sends all text messages...
... this number from your service provider. Message settings The phone offers two kinds of message settings: settings specific to each setting group ('set is available. 3. You need the message centre number to define how the phone handles Unicode characters in text messages.3 If you send, irrespective of settings needed for sending text and picture messages. Common (Menu 1-11-2)2 The settings in a text message to a compatible phone, if supported by your SIM card offers. 2. sumed that you select the Full option, the phone sends all text messages...

User Guide
Page 39
... or to find the name you want . Key in the first character(s) of your SIM card. (Network Service). • Add contact to save names and phone numbers in the phone book. • Delete to delete names and phone numbers from the phone book one by one from the phone´s memory to the SIM card´s memory, or vice versa. • Assign tone to set the phone to call from a particular phone number. Select the phone number or Copyright © 2003 Nokia.
... or to find the name you want . Key in the first character(s) of your SIM card. (Network Service). • Add contact to save names and phone numbers in the phone book. • Delete to delete names and phone numbers from the phone book one by one from the phone´s memory to the SIM card´s memory, or vice versa. • Assign tone to set the phone to call from a particular phone number. Select the phone number or Copyright © 2003 Nokia.
User Guide
Page 40
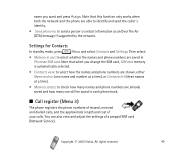
... and phone numbers are saved in each phone book. ■ Call register (Menu 3) The phone registers the phone numbers of missed, received and dialled calls, and the approximate length and cost of a prepaid SIM card (Network Service). Note that this function only works when both the network and the phone are able to identify and send the caller´s identity. • Send phone no . (one name and number at a time), or Contacts list (three names at a time). • Memory...
... and phone numbers are saved in each phone book. ■ Call register (Menu 3) The phone registers the phone numbers of missed, received and dialled calls, and the approximate length and cost of a prepaid SIM card (Network Service). Note that this function only works when both the network and the phone are able to identify and send the caller´s identity. • Send phone no . (one name and number at a time), or Contacts list (three names at a time). • Memory...
User Guide
Page 41
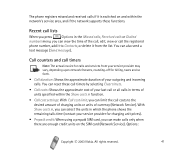
...). • Prepaid credit: When using a prepaid SIM card, you can reset these functions. Call counters and call the registered phone number, add it to the desired amount of charging units or units of your outgoing and incoming calls. Options: Copyright © 2003 Nokia. Recent call lists When you press Options in the Missed calls, Received calls or Dialled numbers menu, you can view the time of the call, edit, view or call timers Note: The actual...
...). • Prepaid credit: When using a prepaid SIM card, you can reset these functions. Call counters and call the registered phone number, add it to the desired amount of charging units or units of your outgoing and incoming calls. Options: Copyright © 2003 Nokia. Recent call lists When you press Options in the Missed calls, Received calls or Dialled numbers menu, you can view the time of the call, edit, view or call timers Note: The actual...
User Guide
Page 44
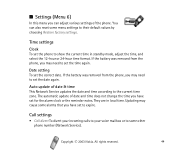
... the phone. If the battery was removed from the phone, you may need to their default values by choosing Restore factory settings. Call settings • Call divert To divert your incoming calls to your voice mailbox or to the current time zone. Auto update of date and time does not change the time you can also reset some menu settings to set the date again. Date setting To set the correct date. The automatic update of date & time This Network Service updates...
... the phone. If the battery was removed from the phone, you may need to their default values by choosing Restore factory settings. Call settings • Call divert To divert your incoming calls to your voice mailbox or to the current time zone. Auto update of date and time does not change the time you can also reset some menu settings to set the date again. Date setting To set the correct date. The automatic update of date & time This Network Service updates...

User Guide
Page 46
... © 2003 Nokia. However, you will be able to indicate when it is switched on the display in your service provider. Network selection: To set the phone to make calls if you select must have a roaming agreement with your home network. Phone settings Language: To select the language for the display texts. When line 2 is selected, "2" is or has been connected to automatically select a cellular network available in the standby mode.
... © 2003 Nokia. However, you will be able to indicate when it is switched on the display in your service provider. Network selection: To set the phone to make calls if you select must have a roaming agreement with your home network. Phone settings Language: To select the language for the display texts. When line 2 is selected, "2" is or has been connected to automatically select a cellular network available in the standby mode.

User Guide
Page 47
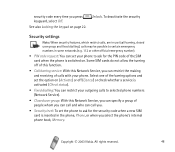
... set the keypad of the phone with a security code, Keyguard code. • Press Menu and select Settings and Keyguard settings. To activate the security keyguard, key in the time and press OK. If the Incoming call after a preset time delay when the phone is set the time from 10 seconds to Beep once or Off, automatic answer will not be used . You can also use the Security keyguard to select the profile the phone uses...
... set the keypad of the phone with a security code, Keyguard code. • Press Menu and select Settings and Keyguard settings. To activate the security keyguard, key in the time and press OK. If the Incoming call after a preset time delay when the phone is set the time from 10 seconds to Beep once or Off, automatic answer will not be used . You can also use the Security keyguard to select the profile the phone uses...
User Guide
Page 48
... Nokia. Some SIM cards do not allow the turning off (Cancel) or check whether a service is activated (Check status). • Fixed dialling: You can restrict your outgoing calls to selected phone numbers (Network Service). • Closed user group: With this Network Service, you select the phone's internal phone book, Memory. security code every time you . • Security level: To set the phone to ask for the security code when a new SIM card is inserted in use (call you press keyguard, select Off. See also Locking the keypad...
... Nokia. Some SIM cards do not allow the turning off (Cancel) or check whether a service is activated (Check status). • Fixed dialling: You can restrict your outgoing calls to selected phone numbers (Network Service). • Closed user group: With this Network Service, you select the phone's internal phone book, Memory. security code every time you . • Security level: To set the phone to ask for the security code when a new SIM card is inserted in use (call you press keyguard, select Off. See also Locking the keypad...

User Guide
Page 49
... stop the alarm by pressing . Restore factory settings To reset some of the emergency number. Press Menu, select Alarm clock. Press to make and receive calls. Press Menu, select Settings and Restore factory settings. When the alarm sounds, you change the security code, PIN code, PIN2 code, or barring password. Key in the time for example every working day. The names and phone numbers saved in 6 minutes. If the alarm time is reached while the phone is switched off the phone or Yes to switch off , the phone switches itself on and starts sounding the alarm tone...
... stop the alarm by pressing . Restore factory settings To reset some of the emergency number. Press Menu, select Alarm clock. Press to make and receive calls. Press Menu, select Settings and Restore factory settings. When the alarm sounds, you change the security code, PIN code, PIN2 code, or barring password. Key in the time for example every working day. The names and phone numbers saved in 6 minutes. If the alarm time is reached while the phone is switched off the phone or Yes to switch off , the phone switches itself on and starts sounding the alarm tone...
User Guide
Page 57
... nearest qualified service facility. If any accessory. Copyright © 2003 Nokia. Care and maintenance Your phone is not working properly, take it to your phone, battery, charger or any of small children. • Keep the phone dry. When it warms up (to its parts and accessories out of the reach of them is a product of electronic devices, damage batteries, and...
... nearest qualified service facility. If any accessory. Copyright © 2003 Nokia. Care and maintenance Your phone is not working properly, take it to your phone, battery, charger or any of small children. • Keep the phone dry. When it warms up (to its parts and accessories out of the reach of them is a product of electronic devices, damage batteries, and...
User Guide
Page 64
... the owner's/user manual, rough handling, exposure to Nokia or its authorized service company within thirty (30) days after the appearance of the defect within the warranty period; (iv) the Product serial number, the accessory date code or the IMEI number has been removed, erased, defaced, altered or is at the time of its authorized service company will not be upgraded due to changes...
... the owner's/user manual, rough handling, exposure to Nokia or its authorized service company within thirty (30) days after the appearance of the defect within the warranty period; (iv) the Product serial number, the accessory date code or the IMEI number has been removed, erased, defaced, altered or is at the time of its authorized service company will not be upgraded due to changes...


