
Reference Manual
Page 1
DIGITAL CAMERA Reference Manual • Read this manual thoroughly before using the camera. • To ensure proper use of the camera, be sure to read "For Your Safety" (page viii). • After reading this manual, keep it in a readily accessible place for future reference.
DIGITAL CAMERA Reference Manual • Read this manual thoroughly before using the camera. • To ensure proper use of the camera, be sure to read "For Your Safety" (page viii). • After reading this manual, keep it in a readily accessible place for future reference.

Reference Manual
Page 2
..., or Computer 100 Using the Menu...110 Technical Notes...172 Common Topics For Your Safety What SnapBridge Tips for Setting Can Do for You Exposure Manual Focus Functions of any page.
..., or Computer 100 Using the Menu...110 Technical Notes...172 Common Topics For Your Safety What SnapBridge Tips for Setting Can Do for You Exposure Manual Focus Functions of any page.

Reference Manual
Page 5
...icon marks other pages containing relevant information. • SD, SDHC, and SDXC memory cards are referred to as "memory cards" in this manual. • The setting at the time of buttons or messages displayed on a computer screen appear in the lower right of each page to... using the camera. Introduction Read This First Thank you for purchasing the Nikon COOLPIX B700 digital camera. Symbols and Conventions Used in This Manual • Tap or click (Aii). • Symbols in bold. • In this manual, images are sometimes omitted from screen display samples so that should be ...
...icon marks other pages containing relevant information. • SD, SDHC, and SDXC memory cards are referred to as "memory cards" in this manual. • The setting at the time of buttons or messages displayed on a computer screen appear in the lower right of each page to... using the camera. Introduction Read This First Thank you for purchasing the Nikon COOLPIX B700 digital camera. Symbols and Conventions Used in This Manual • Tap or click (Aii). • Symbols in bold. • In this manual, images are sometimes omitted from screen display samples so that should be ...
Reference Manual
Page 7
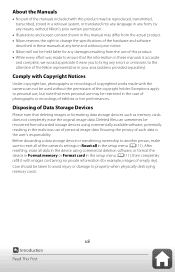
...; No part of the manuals included with this product may be reproduced, transmitted, transcribed, stored in a retrieval system, or translated into any language in any form, by any means, without Nikon's prior written permission. • Illustrations and screen content shown in this product. &#... the device using commercially available software, potentially resulting in the malicious use of the copyright holder. Disposing of the Nikon representative in these manuals at any time and without the permission of personal image data. Comply with images containing no private information (for...
...; No part of the manuals included with this product may be reproduced, transmitted, transcribed, stored in a retrieval system, or translated into any language in any form, by any means, without Nikon's prior written permission. • Illustrations and screen content shown in this product. &#... the device using commercially available software, potentially resulting in the malicious use of the copyright holder. Disposing of the Nikon representative in these manuals at any time and without the permission of personal image data. Comply with images containing no private information (for...

Reference Manual
Page 11
... Quick Topic Search ...ii Main Topics...ii Common Topics ...ii For Smart Device Users ...iii Introduction ...v Read This First ...v Symbols and Conventions Used in This Manual v Information and Precautions ...vi For Your Safety ...viii Parts of the Camera ...1 The Camera Body...2 Principle Functions of the Controls 4 The Monitor/Viewfinder...7 Switching the...
... Quick Topic Search ...ii Main Topics...ii Common Topics ...ii For Smart Device Users ...iii Introduction ...v Read This First ...v Symbols and Conventions Used in This Manual v Information and Precautions ...vi For Your Safety ...viii Parts of the Camera ...1 The Camera Body...2 Principle Functions of the Controls 4 The Monitor/Viewfinder...7 Switching the...

Reference Manual
Page 12
... Setting Shooting Functions with the Multi Selector 55 Flash Mode...56 Self-timer ...59 Smile Timer (Shooting Smiling Faces Automatically 60 Focus Mode ...61 Using Manual Focus ...63 Exposure Compensation (Adjusting Brightness 65 Using the w1 (Function 1)/w2 (Function 2) Buttons 66 Using the Zoom...67 Focusing...69 The Shutter-release Button...
... Setting Shooting Functions with the Multi Selector 55 Flash Mode...56 Self-timer ...59 Smile Timer (Shooting Smiling Faces Automatically 60 Focus Mode ...61 Using Manual Focus ...63 Exposure Compensation (Adjusting Brightness 65 Using the w1 (Function 1)/w2 (Function 2) Buttons 66 Using the Zoom...67 Focusing...69 The Shutter-release Button...

Reference Manual
Page 19
... selector (multi selector 55, 111 18 Tripod socket 19 Battery-chamber/memory card slot cover 15 * Also referred to as the "multi selector" in this manual. 3 Parts of the Camera The Camera Body
... selector (multi selector 55, 111 18 Tripod socket 19 Battery-chamber/memory card slot cover 15 * Also referred to as the "multi selector" in this manual. 3 Parts of the Camera The Camera Body

Reference Manual
Page 20
... focus mode is set to shooting mode. 4 Parts of the Camera Principle Functions of the Controls Principle Functions of view temporarily. For playback Return to E (manual focus), adjust the focus. When the button is pressed halfway: Set focus and exposure. p (Snap-back) zoom button Side zoom control Shutter-release button For...
... focus mode is set to shooting mode. 4 Parts of the Camera Principle Functions of the Controls Principle Functions of view temporarily. For playback Return to E (manual focus), adjust the focus. When the button is pressed halfway: Set focus and exposure. p (Snap-back) zoom button Side zoom control Shutter-release button For...

Reference Manual
Page 26
1/250 F5.6 49 50 51 52 53 54 1/250 F5.6 10m 0s 9999 55 56 1/250 F5.6 57 10m 0s 9999 Focus area (target finding AF) 49 69, 137 Focus area (center/manual) 50 35, 47, 72, 136 Focus area (face detection, pet 51 detection 40, 60, 70, 136 Focus area (subject tracking) 52 137, 138 53 Spot metering area 129 54 Center-weighted area 129 55 View/hide histograms 160 Framing border (Moon or Bird56 watching scene mode, or snap-back zoom 41, 68 57 View/hide framing grid 160 10 Parts of the Camera The Monitor/Viewfinder
1/250 F5.6 49 50 51 52 53 54 1/250 F5.6 10m 0s 9999 55 56 1/250 F5.6 57 10m 0s 9999 Focus area (target finding AF) 49 69, 137 Focus area (center/manual) 50 35, 47, 72, 136 Focus area (face detection, pet 51 detection 40, 60, 70, 136 Focus area (subject tracking) 52 137, 138 53 Spot metering area 129 54 Center-weighted area 129 55 View/hide histograms 160 Framing border (Moon or Bird56 watching scene mode, or snap-back zoom 41, 68 57 View/hide framing grid 160 10 Parts of the Camera The Monitor/Viewfinder

Reference Manual
Page 34
To skip this manual may differ from the Network menu, press MENU. Later Set 18 Getting Started Camera Setup Cancel Use SnapBridge to send photos to select and adjust ...
To skip this manual may differ from the Network menu, press MENU. Later Set 18 Getting Started Camera Setup Cancel Use SnapBridge to send photos to select and adjust ...

Reference Manual
Page 36
... displayed. • When a constant connection between the camera and smart device is established, the dialog at any time using SnapBridge. If you select No, set manually. 1 Turn the camera on using the Language option in the setup menu (A111). Cancel 20 Getting Started Camera Setup SnapBridge will be displayed. Press Language...
... displayed. • When a constant connection between the camera and smart device is established, the dialog at any time using SnapBridge. If you select No, set manually. 1 Turn the camera on using the Language option in the setup menu (A111). Cancel 20 Getting Started Camera Setup SnapBridge will be displayed. Press Language...

Reference Manual
Page 58
... every 10 shots taken, one composite image with trails overlapped from turning off during shooting. 42 Shooting Features Scene Mode (Shooting Suited to B (infinity) or m (manual focus) is selected, select n Nightscape + light trails or W Star trails. If you have obtained the desired trails, end shooting. y M m Multiple exp. When 50 shots are...
... every 10 shots taken, one composite image with trails overlapped from turning off during shooting. 42 Shooting Features Scene Mode (Shooting Suited to B (infinity) or m (manual focus) is selected, select n Nightscape + light trails or W Star trails. If you have obtained the desired trails, end shooting. y M m Multiple exp. When 50 shots are...

Reference Manual
Page 65
... using Toggle Av/Tv selection in the setup menu (A111). k Shutter-priority auto Rotate the command dial to set it until the A is in effect. m Manual Set both the shutter speed and f-number. l Aperture-priority auto Rotate the multi selector to the shooting conditions. Rotate the multi selector to set exposure...
... using Toggle Av/Tv selection in the setup menu (A111). k Shutter-priority auto Rotate the command dial to set it until the A is in effect. m Manual Set both the shutter speed and f-number. l Aperture-priority auto Rotate the multi selector to the shooting conditions. Rotate the multi selector to set exposure...

Reference Manual
Page 69
... M to retrieve the settings saved in Save user settings. • Frame the subject and shoot with j (programmed auto), k (shutter-priority auto), l (aperture-priority auto), or m (manual) can be saved in M. M (User Settings) Mode Setting combinations that are frequently used for shooting with these settings, or change the settings as required.
... M to retrieve the settings saved in Save user settings. • Frame the subject and shoot with j (programmed auto), k (shutter-priority auto), l (aperture-priority auto), or m (manual) can be saved in M. M (User Settings) Mode Setting combinations that are frequently used for shooting with these settings, or change the settings as required.

Reference Manual
Page 71
..., Time-lapse movie (night sky or star trails), or Superlapse movie. • o Exposure compensation You can be set . Setting Shooting Functions with the Multi Selector E (manual focus) can be set when the shooting mode is j, k, l, m, or M, or when the scene mode is raised, the flash mode can be set according to...
..., Time-lapse movie (night sky or star trails), or Superlapse movie. • o Exposure compensation You can be set . Setting Shooting Functions with the Multi Selector E (manual focus) can be set when the shooting mode is j, k, l, m, or M, or when the scene mode is raised, the flash mode can be set according to...

Reference Manual
Page 78
C Focus Mode Setting • The setting may not be able to focus on the zoom position. E Manual focus The focus can focus varies depending on nearby objects. The closest distance at which the camera can be available with some shooting modes. • ...
C Focus Mode Setting • The setting may not be able to focus on the zoom position. E Manual focus The focus can focus varies depending on nearby objects. The closest distance at which the camera can be available with some shooting modes. • ...

Reference Manual
Page 79
... to adjust the focus while checking the enlarged view. 5 • An enlarged view of the center area of the picture. The manual focus can be operated after the camera focuses with autofocus. • Focusing is assisted by rotating the multi selector slowly or rotating the... 0s 1400 63 Shooting Features Focus Mode Lighten, Time-lapse movie (night sky or star trails), or Superlapse movie. 1 Press the multi selector I (p), select E (manual focus), and then press the k button. Press J to switch the view between 2× 3 2 0.3m and 4×. 1 0 • Rotate the multi selector...
... to adjust the focus while checking the enlarged view. 5 • An enlarged view of the center area of the picture. The manual focus can be operated after the camera focuses with autofocus. • Focusing is assisted by rotating the multi selector slowly or rotating the... 0s 1400 63 Shooting Features Focus Mode Lighten, Time-lapse movie (night sky or star trails), or Superlapse movie. 1 Press the multi selector I (p), select E (manual focus), and then press the k button. Press J to switch the view between 2× 3 2 0.3m and 4×. 1 0 • Rotate the multi selector...

Reference Manual
Page 80
... when the gauge is in focus, check the image after shooting. • Set Assign side zoom control (A117) in the setup menu to Manual focus to be in focus can disable the peaking display using the side zoom control instead of the image in step 2 serve as a guideline ...for the distance to set the level low for high contrast subjects, and high for the gauge on the f-number and zoom position. C E (Manual Focus) • The digits displayed for low contrast subjects. • Peaking highlights high contrast areas of the multi selector in step 2. Under some shooting ...
... when the gauge is in focus, check the image after shooting. • Set Assign side zoom control (A117) in the setup menu to Manual focus to be in focus can disable the peaking display using the side zoom control instead of the image in step 2 serve as a guideline ...for the distance to set the level low for high contrast subjects, and high for the gauge on the f-number and zoom position. C E (Manual Focus) • The digits displayed for low contrast subjects. • Peaking highlights high contrast areas of the multi selector in step 2. Under some shooting ...

Reference Manual
Page 81
... number of tones in the following shooting modes: - Guide Exposure compensation Histogram C Exposure Compensation Value • If the setting is applied in time-lapse movie - m (manual) mode (A49) • When the exposure compensation is set while using exposure compensation and shooting without pressing the k button. Lighten, or Night sky (150 minutes...
... number of tones in the following shooting modes: - Guide Exposure compensation Histogram C Exposure Compensation Value • If the setting is applied in time-lapse movie - m (manual) mode (A49) • When the exposure compensation is set while using exposure compensation and shooting without pressing the k button. Lighten, or Night sky (150 minutes...

Reference Manual
Page 87
... as expected in the following situations. The camera can also focus using Continuous (A130) or Exposure bracketing (A135)). Subjects Not Suitable for images captured using manual focus (A62, 63). 71 Shooting Features Focusing the subject is inside a cage) • Subjects with repeating patterns (window blinds, buildings with multiple rows of shooting...
... as expected in the following situations. The camera can also focus using Continuous (A130) or Exposure bracketing (A135)). Subjects Not Suitable for images captured using manual focus (A62, 63). 71 Shooting Features Focusing the subject is inside a cage) • Subjects with repeating patterns (window blinds, buildings with multiple rows of shooting...


