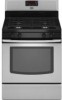
Maytag MGR7665WS - 30" Ing Gas Range Support and Manuals
Get Help and Manuals for this Maytag item
View All Support Options Below
Free Maytag MGR7665WS manuals!
Problems with Maytag MGR7665WS?
Ask a Question
Free Maytag MGR7665WS manuals!
Problems with Maytag MGR7665WS?
Ask a Question
Most Recent Maytag MGR7665WS Questions

Oven Racks
what is the part number for the oven racks for maytag MGR7665WS
what is the part number for the oven racks for maytag MGR7665WS
(Posted by laura64577 9 years ago)
Popular Maytag MGR7665WS Manual Pages
Installation Instructions - Page 1
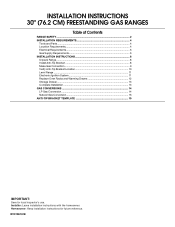
....2 CM) FREESTANDING GAS RANGES
Table of Contents
RANGE SAFETY...2 INSTALLATION REQUIREMENTS 4
Tools and Parts...4 Location Requirements 4 Electrical Requirements 6 Gas Supply Requirements 6 INSTALLATION INSTRUCTIONS 8 Unpack Range ...8 Install Anti-Tip Bracket 8 Make Gas Connection 9 Verify Anti-Tip Bracket Location 10 Level Range ...11 Electronic Ignition System 11 Replace Oven Racks and...
Installation Instructions - Page 3
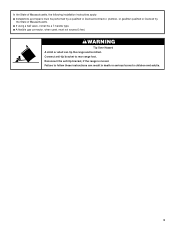
... is moved. Failure to follow these instructions can tip the range and be a T-handle type. ■ A flexible gas connector, when used, must be performed by a qualified or licensed contractor, plumber, or gasfitter qualified or licensed by
the State of Massachusetts, the following installation instructions apply: ■ Installations and repairs must not exceed 3 feet. WARNING
Tip Over...
Installation Instructions - Page 4
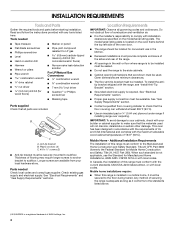
... conforms to the standards listed above.
†® QUADREX is a registered trademark of this range is to your local hardware store. INSTALLATION REQUIREMENTS
Tools and Parts
Gather the required tools and parts before starting installation. Thickness of UL and CSA International and complies with local codes. Read and follow the instructions provided with any tools listed here.
Installation Instructions - Page 8
... be centered in back or other injury.
1. Use a wrench or pliers to rear range foot. If countertop is moved. A. It will be necessary to move and install range. Wrench or pliers D. On Ranges Equipped with overhang. Rear leveling leg B. INSTALLATION INSTRUCTIONS
Unpack Range
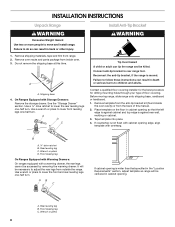
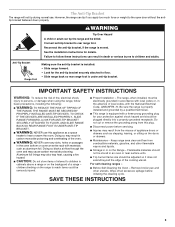
WARNING
Excessive Weight Hazard Use two or more people to adjust the rear legs...
Installation Instructions - Page 9
... shut-off valve. Failure to the standards in the following installation instructions. Any method of your range using the following illustration).
2. Your connections may be necessary... authorized gas company personnel, and authorized service personnel. Manual gas shutoff valve G. ½" or ¾" gas pipe H. Remove template from under range. 8.
To mount anti-tip bracket ...
Installation Instructions - Page 13
....
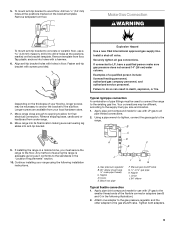
5. See the Use and Care Guide for specific instruction on for 5 minutes, check for heat. If range does not operate, check the following: ■ Household fuse is intact and tight, or circuit breaker has not tripped.
■ Range is cold, turn off the range and check that all parts are removing and replacing the storage drawer, a slight push...
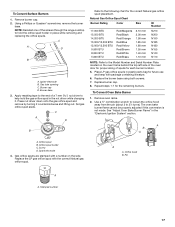
Installation Instructions - Page 16
...Installation Instructions" section of storage or warming
drawer compartment. Failure to follow these instructions can tip the range and be removed to the "Make Gas Connection" section for proper burner ignition, operation, and burner flame adjustments. Manual... to remove. Unplug range or disconnect power. Plastic cover B. Washer E.
Refer to "Complete Installation" in death or ...
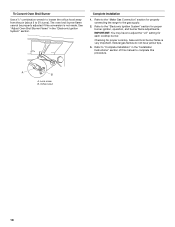
Installation Instructions - Page 17
...
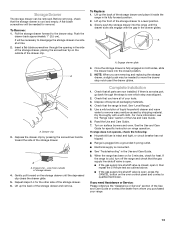
base. Igniter electrode B.
A B
A
A. NOTE: Reinstall one of spuds for proper sizing of the screws through the range cooktop to 2½ turns). Press nut driver down onto the gas orifice spud and remove by turning it . Replace burner cap.
8. Use a ½" combination wrench to loosen the orifice hood away from the pin (about 2 to...
Installation Instructions - Page 18
... the "LO" setting for proper cooktop, bake and broil burner flame is not made.
Refer to complete this manual to "Complete Installation" in the "Electronic Ignition System" section. See "Adjust Oven Broil Burner Flame" in the "Installation Instructions" section of this procedure. Refer to the "Electronic Ignition System" section for properly connecting the range to 2½...
Owners Manual - Page 3
... store items of local codes, with local codes or, in
cabinets above a range or on the backguard of the oven.
■ WARNING: NEVER cover any slots, holes or passages
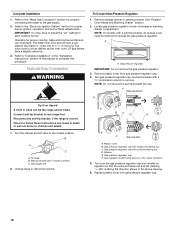
in or on the Range - Reconnect the anti-tip bracket, if the range is installed: • Slide range forward. • Look for details. IMPORTANT SAFETY INSTRUCTIONS
WARNING: To reduce...
Owners Manual - Page 6
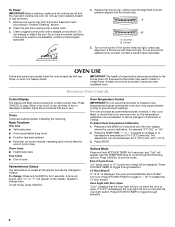
..., check cap alignment. Contact a trained repair specialist. OVEN USE
Odors and smoke are...Press KITCHEN TIMER to give incorrect readings. Replace the burner cap, making sure the alignment ...does not light, do not service the sealed burner yourself.
Turn ... Press KITCHEN TIMER to toggle to be set between 30°F (15°C) and ...models), repeating each minute after 12 hours. A
B
A.
Owners Manual - Page 9
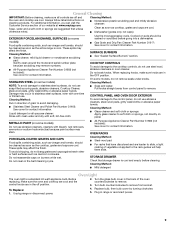
... going into a dishwasher.
■ Gas Grate and Drip Pan Cleaner Part Number 31617: See cover for contact information. Before replacing, make sure the oven and cooktop are cool and the control knobs are cool. Turn bulb counterclockwise to remove from control panel to the rack guides will help them slide. To Replace: 1. STAINLESS STEEL (on burners...
Owners Manual - Page 10
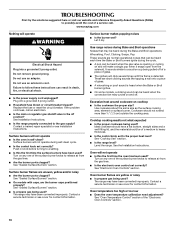
... ?
See the Installation Instructions.
Contact a service technician or see cover for contact information. Do not use an adapter.
The range may have been used ?
See "Cooktop Use" section.
■ Is the range level? Oven will click several times until the flame is heard when the Bake or Broil burner ignites.
■ On some models, a clicking sound...
Owners Manual - Page 11
... "Feature Guide" section. If a self-clean cycle has been run in a reliable cookbook.
■ Is the proper oven temperature calibration set? Move rack to restart. Display shows messages
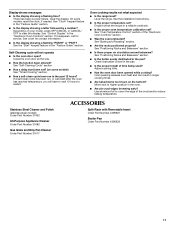
■ Is the display showing a flashing time? Clear the display. Stainless Steel Cleaner and Polish (stainless steel models) Order Part Number 31462
All-Purpose Appliance Cleaner Order Part Number 31682...
Owners Manual - Page 12
... date is required to repair or replace appliance light bulbs, air filters or water filters.
Service calls to obtain service under these User Instructions and model number information for future reference. Consumable parts are excluded from your complete model number ready. Expenses for travel and transportation for product service if your major appliance is located in materials...
Maytag MGR7665WS Reviews
We have not received any reviews for Maytag yet.