

User manual, English
Page 1
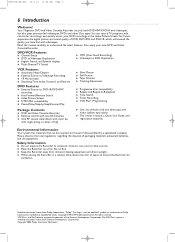
NEED HELP FAST? E9490UD_EN.qx3 04.9.21 10:54 AM Page 1 OWNER'S MANUAL MRV700VR DIGITAL VIDEO DISC RECORDER & VIDEO CASSETTE RECORDER THANK YOU FOR CHOOSING MAGNAVOX. READ YOUR QUICK-USE GUIDE AND/OR OWNER'S MANUAL FIRST FOR QUICK TIPS THAT MAKE USING YOUR MAGNAVOX PRODUCT MORE ENJOYABLE. IF YOU HAVE READ YOUR INSTRUCTIONS AND STILL NEED ASSISTANCE, YOU MAY ACCESS OUR ONLINE HELP AT WWW.MAGNAVOX.COM OR CALL 1-800-705-2000 WHILE WITH YOUR PRODUCT. ®
NEED HELP FAST? E9490UD_EN.qx3 04.9.21 10:54 AM Page 1 OWNER'S MANUAL MRV700VR DIGITAL VIDEO DISC RECORDER & VIDEO CASSETTE RECORDER THANK YOU FOR CHOOSING MAGNAVOX. READ YOUR QUICK-USE GUIDE AND/OR OWNER'S MANUAL FIRST FOR QUICK TIPS THAT MAKE USING YOUR MAGNAVOX PRODUCT MORE ENJOYABLE. IF YOU HAVE READ YOUR INSTRUCTIONS AND STILL NEED ASSISTANCE, YOU MAY ACCESS OUR ONLINE HELP AT WWW.MAGNAVOX.COM OR CALL 1-800-705-2000 WHILE WITH YOUR PRODUCT. ®
User manual, English
Page 6
... DVD and Video Cassette Recorder. Your Magnavox DVD and Video Cassette Recorder records both DVD+RW/DVD+R and videotapes, but also plays prerecorded videotapes, DVDs and other Disc types.You can be recycled and reused if disassembled by -Step/Zoomed Play G Slow Motion G Still Picture G Tape Counter G Tracking Adjustment G Progressive Scan compatibility G Repeat and Repeat A-B playback G Time Search G Timer Recording G VCR...
... DVD and Video Cassette Recorder. Your Magnavox DVD and Video Cassette Recorder records both DVD+RW/DVD+R and videotapes, but also plays prerecorded videotapes, DVDs and other Disc types.You can be recycled and reused if disassembled by -Step/Zoomed Play G Slow Motion G Still Picture G Tape Counter G Tracking Adjustment G Progressive Scan compatibility G Repeat and Repeat A-B playback G Time Search G Timer Recording G VCR...

User manual, English
Page 8
...these enhancements have menus. Features in this manual describe the DVD Disc Menus, which vary among DVDs. See page 26. See page 36. Available Disc Features... An "X" will not be available on every Disc. Recorder Menus... Upgrades If a prerecorded (store purchased) DVD does not play is stopped.) 2 ...sensor on the remote control. Make sure there are accessible only when play properly, please contact Magnavox for assistance. Due to make it will appear in the Recorder's menu, it available. If the feature is not available on the current Disc. See page...
...these enhancements have menus. Features in this manual describe the DVD Disc Menus, which vary among DVDs. See page 26. See page 36. Available Disc Features... An "X" will not be available on every Disc. Recorder Menus... Upgrades If a prerecorded (store purchased) DVD does not play is stopped.) 2 ...sensor on the remote control. Make sure there are accessible only when play properly, please contact Magnavox for assistance. Due to make it will appear in the Recorder's menu, it available. If the feature is not available on the current Disc. See page...
User manual, English
Page 9
... to a TV.Your VCR may distort the picture and sound of a Disc or Videocassette playing on your Antenna or Cable TV signal already.You can see the DVD background picture on the Recorder. G Refer to choose different Audio and Video In channels on the Recorder. Determine how to the manuals of this Recorder, you have only...
... to a TV.Your VCR may distort the picture and sound of a Disc or Videocassette playing on your Antenna or Cable TV signal already.You can see the DVD background picture on the Recorder. G Refer to choose different Audio and Video In channels on the Recorder. Determine how to the manuals of this Recorder, you have only...

User manual, English
Page 10
... to the ANTENNA OUT jack on the TV power. Check your TV's manual for details. 3 Connect the power cords of the Recorder and the TV to a power outlet. 4 Press STANDBY-ON y to turn on the Recorder. 5 Turn on the rear of the Recorder. Set it on the correct Video In channel (channel 3 for several... RF coaxial cable to the Antenna In jack on the rear of the Recorder. Go to page 18 to channel 4. If channel 3 is part of both VCR and DVD modes. 1 Connect your Antenna or Cable TV signal to turn off the Recorder. Your antenna or Cable TV signal may be labelled RF In,Antenna...
... to the ANTENNA OUT jack on the TV power. Check your TV's manual for details. 3 Connect the power cords of the Recorder and the TV to a power outlet. 4 Press STANDBY-ON y to turn on the Recorder. 5 Turn on the rear of the Recorder. Set it on the correct Video In channel (channel 3 for several... RF coaxial cable to the Antenna In jack on the rear of the Recorder. Go to page 18 to channel 4. If channel 3 is part of both VCR and DVD modes. 1 Connect your Antenna or Cable TV signal to turn off the Recorder. Your antenna or Cable TV signal may be labelled RF In,Antenna...

User manual, English
Page 11
... mode and on channel 3 or 4. (Press MONITOR on the TV and the Cable Box/Satellite Receiver. The Initial Setup screen should see "C04" on the Recorder. Check your TV manual for several seconds until you turn on the TV and have red/white/yellow markings. 3 Connect another RF coaxial cable to the... the TV. The Initial Setup screen will appear the first time you see the DVD background picture or the Initial Setup screen on the Recorder. You should appear. Go to page 18 to continue. Press DVD on the remote.Then press and hold the Number 4 button on the remote for details. See ...
... mode and on channel 3 or 4. (Press MONITOR on the TV and the Cable Box/Satellite Receiver. The Initial Setup screen should see "C04" on the Recorder. Check your TV manual for several seconds until you turn on the TV and have red/white/yellow markings. 3 Connect another RF coaxial cable to the... the TV. The Initial Setup screen will appear the first time you see the DVD background picture or the Initial Setup screen on the Recorder. You should appear. Go to page 18 to continue. Press DVD on the remote.Then press and hold the Number 4 button on the remote for details. See ...

User manual, English
Page 12
... selects the Component Video In channel. Set Component video output to Progressive Scan only if your TV owner's manual for details. See page 63. Match the cable colors to the jack colors. 3 Connect the Recorder's white/red AUDIO OUT L/R (left/right) jacks to the Component Video In channel. Check your lowest TV... labeled YUV or Pr/Cr Pb/Cb Y and may have it to the correct Component Video In channel. (See next step.) You cannot see the DVD background picture or Initial Setup screen on the TV power. E9490UD_EN.qx3 04.9.21 10:54 AM Page 12 12 Hookups (cont'd) Connecting to a TV...
... selects the Component Video In channel. Set Component video output to Progressive Scan only if your TV owner's manual for details. See page 63. Match the cable colors to the jack colors. 3 Connect the Recorder's white/red AUDIO OUT L/R (left/right) jacks to the Component Video In channel. Check your lowest TV... labeled YUV or Pr/Cr Pb/Cb Y and may have it to the correct Component Video In channel. (See next step.) You cannot see the DVD background picture or Initial Setup screen on the TV power. E9490UD_EN.qx3 04.9.21 10:54 AM Page 12 12 Hookups (cont'd) Connecting to a TV...

User manual, English
Page 13
...). Set the TV to continue. The Initial Setup screen will appear the first time you are using S-Video. Check your TV's manual for details. 5 Connect the power cords of the Recorder. Helpful Hint • On the TV, the S-Video In jack may have it to the S-Video In channel. (See next step....) You cannot see the DVD background picture or Initial Setup screen on the TV. C03" appears on the display panel, you need to turn on the Recorder. If "IS TV ON? Go to page 18 to the S-Video In channel. Your...
...). Set the TV to continue. The Initial Setup screen will appear the first time you are using S-Video. Check your TV's manual for details. 5 Connect the power cords of the Recorder. Helpful Hint • On the TV, the S-Video In jack may have it to the S-Video In channel. (See next step....) You cannot see the DVD background picture or Initial Setup screen on the TV. C03" appears on the display panel, you need to turn on the Recorder. If "IS TV ON? Go to page 18 to the S-Video In channel. Your...

User manual, English
Page 14
...end of the same RF coaxial cable to the Antenna In jack on the Recorder. Check your TV manual for details. 5 Connect the power cords of the Recorder and the TV to a power outlet. 6 Press STANDBY-ON y to...3 or 4. It may have it on the correct Video In channel. 7 Turn on the rear of the Recorder. If "IS TV ON? This is usually yellow. The Initial Setup screen will appear the first time you ...your TV and set it to the correct Video In channel. (See next step.) You cannot see the DVD background picture or Initial Setup screen. Match the cable colors to the jack colors. 4 Connect the supplied...
...end of the same RF coaxial cable to the Antenna In jack on the Recorder. Check your TV manual for details. 5 Connect the power cords of the Recorder and the TV to a power outlet. 6 Press STANDBY-ON y to...3 or 4. It may have it on the correct Video In channel. 7 Turn on the rear of the Recorder. If "IS TV ON? This is usually yellow. The Initial Setup screen will appear the first time you ...your TV and set it to the correct Video In channel. (See next step.) You cannot see the DVD background picture or Initial Setup screen. Match the cable colors to the jack colors. 4 Connect the supplied...

User manual, English
Page 15
.... 5 Connect the power cords of the Recorder, Stereo, and TV to a power outlet. 6 Turn on the Recorder. If "IS TV ON? Such channels may be labelled RF In,Antenna In, or 75 ohm. The Initial Setup screen will appear the first time you see the DVD background picture or Initial Setup screen. See.../red AUDIO OUT L/R (left/right) jacks and to the left/right AUDIO IN jacks on the rear of the Recorder. Or, go to your TV manual. See your lowest TV channel and change channels down until you are using the connection shown. Your TV's Antenna In jack may have it to ...
.... 5 Connect the power cords of the Recorder, Stereo, and TV to a power outlet. 6 Turn on the Recorder. If "IS TV ON? Such channels may be labelled RF In,Antenna In, or 75 ohm. The Initial Setup screen will appear the first time you see the DVD background picture or Initial Setup screen. See.../red AUDIO OUT L/R (left/right) jacks and to the left/right AUDIO IN jacks on the rear of the Recorder. Or, go to your TV manual. See your lowest TV channel and change channels down until you are using the connection shown. Your TV's Antenna In jack may have it to ...

User manual, English
Page 16
... the Discs you play.You still must support Dolby DigitalTM or MPEG2. Check the Stereo's manual. • To use Component Video or S-Video instead, see the DVD background picture or Initial Setup screen on the TV. E9490UD_EN.qx3 04.9.21 10:54 AM Page 16 16 Hookups (cont'd) Connecting to a TV ... the Recorder's COAXIAL DIGITAL AUDIO OUT jack to have sound at the VCR. • Set Digital output accordingly. Helpful Hints • Digital audio is not channel 3 or 4 if you turn on your TV and set your TV manual.Your TV remote may be labelled RF In,Antenna In, or 75 ohm. Choose ...
... the Discs you play.You still must support Dolby DigitalTM or MPEG2. Check the Stereo's manual. • To use Component Video or S-Video instead, see the DVD background picture or Initial Setup screen on the TV. E9490UD_EN.qx3 04.9.21 10:54 AM Page 16 16 Hookups (cont'd) Connecting to a TV ... the Recorder's COAXIAL DIGITAL AUDIO OUT jack to have sound at the VCR. • Set Digital output accordingly. Helpful Hints • Digital audio is not channel 3 or 4 if you turn on your TV and set your TV manual.Your TV remote may be labelled RF In,Antenna In, or 75 ohm. Choose ...

User manual, English
Page 17
... audio cables to the AUDIO OUT jacks of your VCR/Camcorder manual to improve the quality of the Recorder. Press K or L to continue. This is shown here, using the AUDIO/VIDEO IN jacks on a DVD+R/DVD+RW or a videotape. (See page 44 for DVD+R or DVD+RW recording.) The Recorder cannot receive Progressive Scan video. Choose the channel that...
... audio cables to the AUDIO OUT jacks of your VCR/Camcorder manual to improve the quality of the Recorder. Press K or L to continue. This is shown here, using the AUDIO/VIDEO IN jacks on a DVD+R/DVD+RW or a videotape. (See page 44 for DVD+R or DVD+RW recording.) The Recorder cannot receive Progressive Scan video. Choose the channel that...

User manual, English
Page 18
C03" will appear on the Recorder's display panel.The Initial Setup information shows on the Disc.The DVD Disc menu will appear in the same language if ...In channel to see the Initial Setup messages. Press K or L to continue 1 2-3 Helpful Hint • The Recorder's features will scroll across the display panel when you first connect the power cord.This is a demonstration that cannot ...prefer, then press OK. During Initial Setup,"IS TV ON? Or, check your TV owner's manual for your Recorder has been set up previously. See the pages listed at each step below to determine the correct ...
C03" will appear on the Recorder's display panel.The Initial Setup information shows on the Disc.The DVD Disc menu will appear in the same language if ...In channel to see the Initial Setup messages. Press K or L to continue 1 2-3 Helpful Hint • The Recorder's features will scroll across the display panel when you first connect the power cord.This is a demonstration that cannot ...prefer, then press OK. During Initial Setup,"IS TV ON? Or, check your TV owner's manual for your Recorder has been set up previously. See the pages listed at each step below to determine the correct ...

User manual, English
Page 30
...only if the PBS channel is in DVD mode. Press s to select in the top left corner of the menu bar at the top of the TV screen. 2 Press L repeatedly to a PBS station. If you want to set the clock manually, choose Off.The Recorder will not update the time automatically ...according to select at the end of the Recorder. Time/date Automatic K u PBS Channel L Daylight Saving Time Zone s 010 B Off Auto. Press s or B...
...only if the PBS channel is in DVD mode. Press s to select in the top left corner of the menu bar at the top of the TV screen. 2 Press L repeatedly to a PBS station. If you want to set the clock manually, choose Off.The Recorder will not update the time automatically ...according to select at the end of the Recorder. Time/date Automatic K u PBS Channel L Daylight Saving Time Zone s 010 B Off Auto. Press s or B...

User manual, English
Page 31
... press s or B to choose AM or PM. Helpful Hints • In order for the clock to remain set as you specified manually, you may need to Off automatically. Press DVD so the DVD light appears on page 28, you may need to set Daylight Saving to Off. • If you change any item... manually (Time, AM/PM,Year, Month, Date, Daylight Saving), PBS Channel will be highlighted. E9490UD_EN.qx3 04.9.21 10:54 AM Page 31 Clock Setting (cont'd) 31 Time/Date Manual If the Recorder...
... press s or B to choose AM or PM. Helpful Hints • In order for the clock to remain set as you specified manually, you may need to Off automatically. Press DVD so the DVD light appears on page 28, you may need to set Daylight Saving to Off. • If you change any item... manually (Time, AM/PM,Year, Month, Date, Daylight Saving), PBS Channel will be highlighted. E9490UD_EN.qx3 04.9.21 10:54 AM Page 31 Clock Setting (cont'd) 31 Time/Date Manual If the Recorder...

User manual, English
Page 32
... Select to play a DVD, DVD+R, or DVD+RW forward or backward at all times. See page 38. E Fast motion Select to choose an available Disc Title or Track for forward or reverse frame-by-frame playback. See page 37. The following items are in other Recorder features as detailed throughout this manual. See page 40...
... Select to play a DVD, DVD+R, or DVD+RW forward or backward at all times. See page 38. E Fast motion Select to choose an available Disc Title or Track for forward or reverse frame-by-frame playback. See page 37. The following items are in other Recorder features as detailed throughout this manual. See page 40...
User manual, English
Page 48
... try to remove all information for a scheduled timer recording. Disc locked A protected DVD+RW or DVD+R is in the Timer List. • To ignore the message, press VCR Plus+/TIMER repeatedly to dub or record copyrighted material onto a DVD+R or DVD+RW using the Recorder. Switch off the Recorder for the timer recording is correct and complete. "COPY PROTECT" will...
... try to remove all information for a scheduled timer recording. Disc locked A protected DVD+RW or DVD+R is in the Timer List. • To ignore the message, press VCR Plus+/TIMER repeatedly to dub or record copyrighted material onto a DVD+R or DVD+RW using the Recorder. Switch off the Recorder for the timer recording is correct and complete. "COPY PROTECT" will...

User manual, English
Page 63
... Scan, PRO will show only part of the Recorder's menu.Adjust the screen mode on your TV owner's manual for 15 seconds and press STANDBY ON y button on the front of the picture, press OK. Otherwise, you will lose the DVD picture from the power supply. 2 While holding down...unless you selected Black level shift, press K or L to center the picture horizontally on your TV screen.This setting is possible only if the DVD is recorded in DVD mode. See your TV screen - Set Black level shift to On to a widescreen TV. 1,5 1-4 G If you have accidentally activated the ...
... Scan, PRO will show only part of the Recorder's menu.Adjust the screen mode on your TV owner's manual for 15 seconds and press STANDBY ON y button on the front of the picture, press OK. Otherwise, you will lose the DVD picture from the power supply. 2 While holding down...unless you selected Black level shift, press K or L to center the picture horizontally on your TV screen.This setting is possible only if the DVD is recorded in DVD mode. See your TV screen - Set Black level shift to On to a widescreen TV. 1,5 1-4 G If you have accidentally activated the ...

User manual, English
Page 78
... will rewind to remove vertical jitter in VCR mode. on the front of a videotape, press CHANNEL +/- to the beginning, stop, and eject itself. You can also press CHANNEL +/- Manual Tracking To manually adjust the tracking during normal or slow motion playback of the Recorder, if necessary. Press VCR so the VCR light appears on the remote.
... will rewind to remove vertical jitter in VCR mode. on the front of a videotape, press CHANNEL +/- to the beginning, stop, and eject itself. You can also press CHANNEL +/- Manual Tracking To manually adjust the tracking during normal or slow motion playback of the Recorder, if necessary. Press VCR so the VCR light appears on the remote.

User manual, English
Page 81
...is different than your TV owner's manual for fingerprints. See page 9. • Unless you are on pages 12-14. • Adjust the tracking. The Recorder's output channel is on channel 03.... you set to the edge in the VCR. Details are usually near channel zero (0). Move the Recorder away from the center to a low-quality speed may be recorded. • Check the Disc for details...may affect the picture quality when playing DVDs later. If the Disc's color system is not providing color. Make sure the cable(s) are fastened securely to the Recorder and the TV. • Set ...
...is different than your TV owner's manual for fingerprints. See page 9. • Unless you are on pages 12-14. • Adjust the tracking. The Recorder's output channel is on channel 03.... you set to the edge in the VCR. Details are usually near channel zero (0). Move the Recorder away from the center to a low-quality speed may be recorded. • Check the Disc for details...may affect the picture quality when playing DVDs later. If the Disc's color system is not providing color. Make sure the cable(s) are fastened securely to the Recorder and the TV. • Set ...


