

User Guide
Page 3
... locate your ideal products from the user's manual, please contact your place of power unit capacity for IT buyers. Smartphone Application MSI+ is a smart web gadget that works as a shopping navigator and provides specs comparison for DIY users. Visit the MSI website for further guidance. Alternatively, please try the following help resources for technical guide, BIOS updates, driver updates, and other information: http://www.msi.com/support...
... locate your ideal products from the user's manual, please contact your place of power unit capacity for IT buyers. Smartphone Application MSI+ is a smart web gadget that works as a shopping navigator and provides specs comparison for DIY users. Visit the MSI website for further guidance. Alternatively, please try the following help resources for technical guide, BIOS updates, driver updates, and other information: http://www.msi.com/support...
User Guide
Page 18
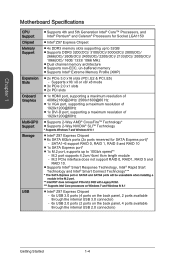
... in the M.2 port. ** Intel RST does not support PCIe M.2 SSD with Legacy ROM. *** Supports Intel Core processors on Windows 7 and Windows 8/ 8.1 ■■Intel® Z97 Express Chipset -- 6x USB 3.0 ports (4 ports on the back panel, 2 ports available through the internal USB 3.0 connector) -- 6x USB 2.0 ports (2 ports on the back panel, 4 ports available through the internal USB 2.0 connectors) Getting Started 1-4 Chapter 1 Motherboard Specifications CPU Support Chipset Memory Support Expansion Slots Onboard Graphics Multi-GPU Support Storage USB ■■Supports 4th and 5th...
... in the M.2 port. ** Intel RST does not support PCIe M.2 SSD with Legacy ROM. *** Supports Intel Core processors on Windows 7 and Windows 8/ 8.1 ■■Intel® Z97 Express Chipset -- 6x USB 3.0 ports (4 ports on the back panel, 2 ports available through the internal USB 3.0 connector) -- 6x USB 2.0 ports (2 ports on the back panel, 4 ports available through the internal USB 2.0 connectors) Getting Started 1-4 Chapter 1 Motherboard Specifications CPU Support Chipset Memory Support Expansion Slots Onboard Graphics Multi-GPU Support Storage USB ■■Supports 4th and 5th...
User Guide
Page 31
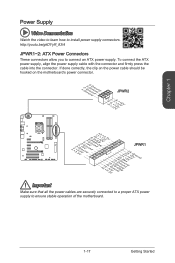
...+2ds2n5.+3dV2.5+4V5.GVrJoPunWd R1 Important Make sure that all the power cables are securely connected to a proper ATX power supply to ensure stable operation of the motherboard. 1-17 Getting Started To connect the ATX power supply, align the power supply cable with the connector and firmly press the cable into the connector. If done correctly, the clip on the power cable should be /gkDYyR_83I4 JPWR1~2: ATX Power Connectors These connectors allow you to install power supply connectors.
...+2ds2n5.+3dV2.5+4V5.GVrJoPunWd R1 Important Make sure that all the power cables are securely connected to a proper ATX power supply to ensure stable operation of the motherboard. 1-17 Getting Started To connect the ATX power supply, align the power supply cable with the connector and firmly press the cable into the connector. If done correctly, the clip on the power cable should be /gkDYyR_83I4 JPWR1~2: ATX Power Connectors These connectors allow you to install power supply connectors.

User Guide
Page 35
...SATA_EXP1: SATA Express Connector The SATA Express, a new high performance storage interface, supports to connect 1 SATA Express device with Legacy ROM. • M.2 PCIe interface does not support RAID 0, RAID1, RAID 5 and RAID 10. • Always turn off the power supply and unplug the power cord from the power outlet before installing or removing the M.2 module. M2_1: M.2 Connector The M.2 port supports either M.2 SATA 6Gb/s module or M.2 PCIe module. SATA Express Port Important The SATA Express port will be unavailable when installing a module in -1 connector by a SATA Express cable.
...SATA_EXP1: SATA Express Connector The SATA Express, a new high performance storage interface, supports to connect 1 SATA Express device with Legacy ROM. • M.2 PCIe interface does not support RAID 0, RAID1, RAID 5 and RAID 10. • Always turn off the power supply and unplug the power cord from the power outlet before installing or removing the M.2 module. M2_1: M.2 Connector The M.2 port supports either M.2 SATA 6Gb/s module or M.2 PCIe module. SATA Express Port Important The SATA Express port will be unavailable when installing a module in -1 connector by a SATA Express cable.
User Guide
Page 65
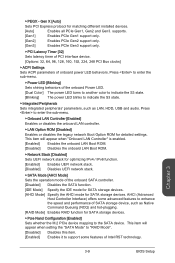
.... [Enabled] Enables UEFI network stack. [Disabled] Disables UEFI network stack. ▶▶SATA Mode [AHCI Mode] Sets the operation mode of SATA storage device, such as LAN, HDD, USB and audio. Gen X [Auto] Sets PCI Express protocol for SATA storage devices. Press to enter the sub-menu. ▶▶Onboard LAN Controller [Enabled] Enables or disables the onboard LAN controller. ▶▶LAN Option ROM [Disabled] Enables or disables the legacy network Boot Option ROM for SATA storage devices. ▶▶Pcie Nand Configuration [Enabled] Sets whether the M.2 PCIe...
.... [Enabled] Enables UEFI network stack. [Disabled] Disables UEFI network stack. ▶▶SATA Mode [AHCI Mode] Sets the operation mode of SATA storage device, such as LAN, HDD, USB and audio. Gen X [Auto] Sets PCI Express protocol for SATA storage devices. Press to enter the sub-menu. ▶▶Onboard LAN Controller [Enabled] Enables or disables the onboard LAN controller. ▶▶LAN Option ROM [Disabled] Enables or disables the legacy network Boot Option ROM for SATA storage devices. ▶▶Pcie Nand Configuration [Enabled] Sets whether the M.2 PCIe...

User Guide
Page 66
... the "SATA Mode" set to the onboard graphics. [Options: 32M, 64M, 128M, 256M, 512M, 1024M] ▶▶IGD Multi-Monitor [Disabled] Enables or disables the multi-screen output from sleep mode quickly. Chapter 3 BOIS Setup 3-10 This item defines the exact memory size shared to [AHCI]/ [RAID]. [Enabled] Enables hot plug support for the SATA ports. [Disabled] Disables hot plug support for the SATA ports. ▶▶HD Audio Controller [Enabled] Enables or disables the onboard High Definition Audio controller. ▶▶HPET [Enabled] Enables or disables the HPET (High Precision...
... the "SATA Mode" set to the onboard graphics. [Options: 32M, 64M, 128M, 256M, 512M, 1024M] ▶▶IGD Multi-Monitor [Disabled] Enables or disables the multi-screen output from sleep mode quickly. Chapter 3 BOIS Setup 3-10 This item defines the exact memory size shared to [AHCI]/ [RAID]. [Enabled] Enables hot plug support for the SATA ports. [Disabled] Disables hot plug support for the SATA ports. ▶▶HD Audio Controller [Enabled] Enables or disables the onboard High Definition Audio controller. ▶▶HPET [Enabled] Enables or disables the HPET (High Precision...
User Guide
Page 67
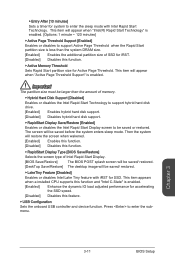
... DRAM size. [Enabled] Enables the additional partition size of SSD for iRST. [Disabled] Disables this feature. ▶▶USB Configuration Sets the onboard USB controller and device function. Then the system will restore the screen when wakened. [Enabled] Enables this function. [Disabled] Disables this function. ▶▶RapidStart Display Type [BIOS Save/Restore] Selects the screen type of memory. ▶▶Hybrid Hard Disk Support [Disabled] Enables or disables the Intel Rapid Start Technology to support hybrid hard disk drive. [Enabled] Enables hybrid hard disk...
... DRAM size. [Enabled] Enables the additional partition size of SSD for iRST. [Disabled] Disables this feature. ▶▶USB Configuration Sets the onboard USB controller and device function. Then the system will restore the screen when wakened. [Enabled] Enables this function. [Disabled] Disables this function. ▶▶RapidStart Display Type [BIOS Save/Restore] Selects the screen type of memory. ▶▶Hybrid Hard Disk Support [Disabled] Enables or disables the Intel Rapid Start Technology to support hybrid hard disk drive. [Enabled] Enables hybrid hard disk...
User Guide
Page 69
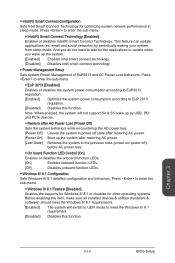
...Note: When enabled, the system will switch to UEFI mode to enter the sub-menu. ▶▶Intel(R) Smart Connect Technology [Enabled] Enables or disables Intel(R) Smart Connect Technology. ▶▶Intel(R) Smart Connect Configuration Sets Intel Smart Connect Technology for other operating systems. Before enabling this item, make sure all installed devices & utilities (hardware & software) should meet the Windows 8/ 8.1 requirements. [Enabled] The system will not support S4 & S5 wake up by periodically waking your system from sleep mode. This feature can update applications (ex...
...Note: When enabled, the system will switch to UEFI mode to enter the sub-menu. ▶▶Intel(R) Smart Connect Technology [Enabled] Enables or disables Intel(R) Smart Connect Technology. ▶▶Intel(R) Smart Connect Configuration Sets Intel Smart Connect Technology for other operating systems. Before enabling this item, make sure all installed devices & utilities (hardware & software) should meet the Windows 8/ 8.1 requirements. [Enabled] The system will not support S4 & S5 wake up by periodically waking your system from sleep mode. This feature can update applications (ex...

User Guide
Page 70
... boot keys be loaded. Important If you want to enter BIOS with enabled "MSI Fast Boot" mode or enabled "Fast Boot" mode, you to set the secure boot settings. [Disabled] Disables this function. ▶▶Secure Boot Mode [Standard] Selects the secure boot mode. Press to click the "GO2BIOS" tab on MSI Fast Boot utility screen or press the "GO2BIOS" button (optional) on the motherboard. This sub-menu will be disabled and fixed. [Disabled] Disables MSI Fast Boot. ▶▶Fast Boot [Disabled] Enables or disables the Windows 8/ 8.1 fast boot...
... boot keys be loaded. Important If you want to enter BIOS with enabled "MSI Fast Boot" mode or enabled "Fast Boot" mode, you to set the secure boot settings. [Disabled] Disables this function. ▶▶Secure Boot Mode [Standard] Selects the secure boot mode. Press to click the "GO2BIOS" tab on MSI Fast Boot utility screen or press the "GO2BIOS" button (optional) on the motherboard. This sub-menu will be disabled and fixed. [Disabled] Disables MSI Fast Boot. ▶▶Fast Boot [Disabled] Enables or disables the Windows 8/ 8.1 fast boot...

User Guide
Page 73
... installed boot-able devices will be a boot device to start booting. ▶▶Trusted Computing Sets TPM (Trusted Platform Module) function. ▶▶TPM SUPPORT [Disabled] Enables or disables the TPM function to build the endorsement key for accessing the system. ▶▶Chassis Intrusion Configuration Press to [Enabled] later. [Options: Disabled, Enabled, Reset] Save & Exit ▶▶Discard Changes and Exit Exit BIOS setup without saving any change. Once the chassis is used to restore/ load all changes...
... installed boot-able devices will be a boot device to start booting. ▶▶Trusted Computing Sets TPM (Trusted Platform Module) function. ▶▶TPM SUPPORT [Disabled] Enables or disables the TPM function to build the endorsement key for accessing the system. ▶▶Chassis Intrusion Configuration Press to [Enabled] later. [Options: Disabled, Enabled, Reset] Save & Exit ▶▶Discard Changes and Exit Exit BIOS setup without saving any change. Once the chassis is used to restore/ load all changes...
User Guide
Page 75
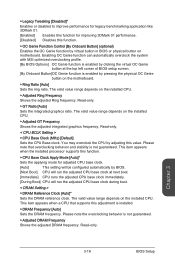
... integrated graphics frequency. Read-only. < CPU BCLK Setting > ▶▶CPU Base Clock (MHz) [Default] Sets the CPU Base clock. The valid value range depends on motherboard. Read-only. ▶▶GT Ratio [Auto] Sets the integrated graphics ratio. ▶▶Legacy Tweaking [Disabled]* Enables or disabled to improve performance for legacy benchmarking application like 3DMark 01. [Enabled] Enables this function for adjusted CPU base clock. [Auto] This setting will be configured automatically by BIOS. [Next Boot] CPU will...
... integrated graphics frequency. Read-only. < CPU BCLK Setting > ▶▶CPU Base Clock (MHz) [Default] Sets the CPU Base clock. The valid value range depends on motherboard. Read-only. ▶▶GT Ratio [Auto] Sets the integrated graphics ratio. ▶▶Legacy Tweaking [Disabled]* Enables or disabled to improve performance for legacy benchmarking application like 3DMark 01. [Enabled] Enables this function for adjusted CPU base clock. [Auto] This setting will be configured automatically by BIOS. [Next Boot] CPU will...

User Guide
Page 76
... default settings. (Refer to the Clear CMOS jumper/ button section to clear the CMOS data, and enter the BIOS to load the default settings.) ▶▶DRAM Training Configuration* Press to enter the sub-menu. User can set to "Auto", BIOS will optimize the CPU PWM phase automatically. [Auto] This setting will configure this sub-menu. ▶▶DRAM Timing Mode [Auto] Selects the memory timing mode. [Auto] DRAM timings will be initialed and trained every booting. < Voltage Setting > ▶▶DigitALL Power Press to enter the sub-menu...
... default settings. (Refer to the Clear CMOS jumper/ button section to clear the CMOS data, and enter the BIOS to load the default settings.) ▶▶DRAM Training Configuration* Press to enter the sub-menu. User can set to "Auto", BIOS will optimize the CPU PWM phase automatically. [Auto] This setting will configure this sub-menu. ▶▶DRAM Timing Mode [Auto] Selects the memory timing mode. [Auto] DRAM timings will be initialed and trained every booting. < Voltage Setting > ▶▶DigitALL Power Press to enter the sub-menu...

User Guide
Page 77
...-temperature protection. [Enabled] The CPU frequency may damage the system. ▶▶CPU Over Current Protection [Auto] Sets the current limit for Imon current. Higher voltage provides less protection and may be configured automatically by BIOS. [Quarter] Sets the Imon current into quarter. [Half] Sets the Imon current into half. [Disabled] Sets the default values for CPU over -current protection. [Disabled] Disables this function. ▶▶CPU Switching Frequency [Auto] Sets the PWM working speed...
...-temperature protection. [Enabled] The CPU frequency may damage the system. ▶▶CPU Over Current Protection [Auto] Sets the current limit for Imon current. Higher voltage provides less protection and may be configured automatically by BIOS. [Quarter] Sets the Imon current into quarter. [Half] Sets the Imon current into half. [Disabled] Sets the default values for CPU over -current protection. [Disabled] Disables this function. ▶▶CPU Switching Frequency [Auto] Sets the PWM working speed...
User Guide
Page 78
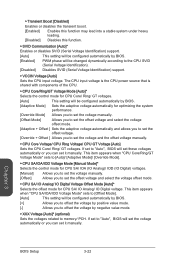
... loading. [Disabled] Disables this function. ▶▶SVID Communication [Auto]* Enables or disables SVID (Serial Voltage Identification) support. [Auto] This setting will be configured automatically by BIOS. [Enabled] PWM phase will be configured automatically by BIOS. [+] Allows you to offset the voltage by positive value mode. [-] Allows you to offset the voltage by BIOS. [Adaptive Mode] Sets the adaptive voltage automatically for CPU SA/ IO Analog/ IO Digital voltage. If set it manually. The CPU input voltage is the CPU power...
... loading. [Disabled] Disables this function. ▶▶SVID Communication [Auto]* Enables or disables SVID (Serial Voltage Identification) support. [Auto] This setting will be configured automatically by BIOS. [Enabled] PWM phase will be configured automatically by BIOS. [+] Allows you to offset the voltage by positive value mode. [-] Allows you to offset the voltage by BIOS. [Adaptive Mode] Sets the adaptive voltage automatically for CPU SA/ IO Analog/ IO Digital voltage. If set it manually. The CPU input voltage is the CPU power...
User Guide
Page 79
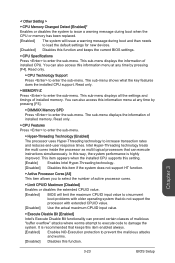
...;▶CPU Technology Support Press to increase transaction rates and reduces end-user response times. The sub-menu shows what the key features does the installed CPU support. This sub-menu displays all the settings and timings of installed memory. Read only. ▶▶CPU Features Press to enter the sub-menu. ▶▶Hyper-Threading Technology [Enabled] The processor uses Hyper-Threading technology to enter the sub-menu. It is highly improved. This sub-menu displays...
...;▶CPU Technology Support Press to increase transaction rates and reduces end-user response times. The sub-menu shows what the key features does the installed CPU support. This sub-menu displays all the settings and timings of installed memory. Read only. ▶▶CPU Features Press to enter the sub-menu. ▶▶Hyper-Threading Technology [Enabled] The processor uses Hyper-Threading technology to enter the sub-menu. It is highly improved. This sub-menu displays...

User Guide
Page 80
... [Enabled] Enables Intel AES support. [Disabled] Disables Intel AES support. ▶▶Intel Adaptive Thermal Monitor [Enabled] Enables or disables the Intel adaptive thermal monitor function to the specific application. [Disabled] Enables the requested cache line only. ▶▶CPU AES Instructions [Enabled] Enables or disables the CPU AES (Advanced Encryption Standard-New Instructions) support. This item appears when "Intel C-State" is a processor power management technology defined by ACPI. [Auto] This setting will be configured automatically by BIOS. [Enabled] Detects...
... [Enabled] Enables Intel AES support. [Disabled] Disables Intel AES support. ▶▶Intel Adaptive Thermal Monitor [Enabled] Enables or disables the Intel adaptive thermal monitor function to the specific application. [Disabled] Enables the requested cache line only. ▶▶CPU AES Instructions [Enabled] Enables or disables the CPU AES (Advanced Encryption Standard-New Instructions) support. This item appears when "Intel C-State" is a processor power management technology defined by ACPI. [Auto] This setting will be configured automatically by BIOS. [Enabled] Detects...

User Guide
Page 81
... value to adjust CPU voltage and core frequency dynamically. However, the default usually works best. Chapter 3 3-25 BIOS Setup This item will automatically reduce the core frequency for accelerating the SSD speed. [Disabled] Disables this function and "Intel C-State" is set to [Simple]. [Enabled] Enables the EIST to improve DMI margins. This item appears when a installed CPU supports this feature. ▶▶EIST [Enabled] Enables or disables the Enhanced Intel® SpeedStep Technology.
... value to adjust CPU voltage and core frequency dynamically. However, the default usually works best. Chapter 3 3-25 BIOS Setup This item will automatically reduce the core frequency for accelerating the SSD speed. [Disabled] Disables this function and "Intel C-State" is set to [Simple]. [Enabled] Enables the EIST to improve DMI margins. This item appears when a installed CPU supports this feature. ▶▶EIST [Enabled] Enables or disables the Enhanced Intel® SpeedStep Technology.

User Guide
Page 82
... BIOS file inside USB flash disk (FAT/ FAT32 format only). ▶▶BIOS Boot Function [Disabled] Enables or disables the system to boot form USB flash disk with BIOS file. [Enabled] Enables the system to boot from the BIOS within USB flash disk. [Disabled] Enables the system to boot from the BIOS within ROM on motherboard. *This may cause system unstable, MSI recommend it only for power users. ▶▶Select one file to update BIOS and ME Selects a BIOS file, includes the ME management settings, in the USB flash disk...
... BIOS file inside USB flash disk (FAT/ FAT32 format only). ▶▶BIOS Boot Function [Disabled] Enables or disables the system to boot form USB flash disk with BIOS file. [Enabled] Enables the system to boot from the BIOS within USB flash disk. [Disabled] Enables the system to boot from the BIOS within ROM on motherboard. *This may cause system unstable, MSI recommend it only for power users. ▶▶Select one file to update BIOS and ME Selects a BIOS file, includes the ME management settings, in the USB flash disk...

User Guide
Page 93
.... Appendix B Using Intel Rapid Storage Technology Option ROM The Intel Rapid Storage Technology Option ROM should be integrated with the system BIOS on all motherboards with a newly-built system or if you need to enable the RAID function in system boot-up, during the POST (Power-On Self Test). Physical Disks: Port Device Model 1 XXXXXXXXXXXXX 2 XXXXXXXXXXXXX Serial # XXXXXXXXXXXXX XXXXXXXXXXXXX Size XXX.XGB XXX.XGB Type/Status(Vol ID) Non-RAID Disk Non-RAID Disk Press to enter the...
.... Appendix B Using Intel Rapid Storage Technology Option ROM The Intel Rapid Storage Technology Option ROM should be integrated with the system BIOS on all motherboards with a newly-built system or if you need to enable the RAID function in system boot-up, during the POST (Power-On Self Test). Physical Disks: Port Device Model 1 XXXXXXXXXXXXX 2 XXXXXXXXXXXXX Serial # XXXXXXXXXXXXX XXXXXXXXXXXXX Size XXX.XGB XXX.XGB Type/Status(Vol ID) Non-RAID Disk Non-RAID Disk Press to enter the...
User Guide
Page 102
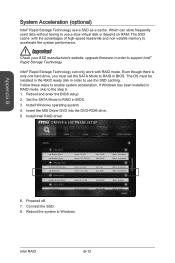
... frequently used data without having to use a slow virtual disk or depend on RAM. Important Check your SSD manufacturer's website, upgrade firmware in order to use the SSD caching. Follow these steps to support Intel® Rapid Storage Technology. Install Windows operating system. 4. Insert the MSI Driver DVD into the DVD-ROM drive. 5. Powered off. 7. Connect the SSD. 8. Which can only work with the advantages of high-speed read/write and non-volatile memory to...
... frequently used data without having to use a slow virtual disk or depend on RAM. Important Check your SSD manufacturer's website, upgrade firmware in order to use the SSD caching. Follow these steps to support Intel® Rapid Storage Technology. Install Windows operating system. 4. Insert the MSI Driver DVD into the DVD-ROM drive. 5. Powered off. 7. Connect the SSD. 8. Which can only work with the advantages of high-speed read/write and non-volatile memory to...


