
User Manual
Page 13
... Quick Start ...3 Preparing Tools and Components 3 Installing a Processor 4 Installing DDR4 memory 5 Connecting the Front Panel Header 6 Installing the Motherboard 7 Installing SATA Drives 8 Installing a Graphics Card 9 Connecting Peripheral Devices 10 Connecting the Power Connectors 11 Power On...12 Specifications...15 Specification Comparison Table 20 Block Diagram ...21 Rear I/O Panel ...22 LAN Port LED Status Table 22 Realtek HD Audio Manager 22 Overview of Components 24 CPU Socket ...26 DIMM Slots...27 PCI_E1~5, PCI1: PCIe/ PCI Expansion Slots 28 M2_1~2: M.2 Slots (Key M 29...
... Quick Start ...3 Preparing Tools and Components 3 Installing a Processor 4 Installing DDR4 memory 5 Connecting the Front Panel Header 6 Installing the Motherboard 7 Installing SATA Drives 8 Installing a Graphics Card 9 Connecting Peripheral Devices 10 Connecting the Power Connectors 11 Power On...12 Specifications...15 Specification Comparison Table 20 Block Diagram ...21 Rear I/O Panel ...22 LAN Port LED Status Table 22 Realtek HD Audio Manager 22 Overview of Components 24 CPU Socket ...26 DIMM Slots...27 PCI_E1~5, PCI1: PCIe/ PCI Expansion Slots 28 M2_1~2: M.2 Slots (Key M 29...

User Manual
Page 36
... pin2 10 No Pin 11 LPC address & data pin3 12 Ground 13 LPC Frame 14 Ground JBAT1: Clear CMOS (Reset BIOS) Jumper There is CMOS memory onboard that is for TPM (Trusted Platform Module). If you want to clear the system configuration, set the jumper to default values 1. JTPM1: TPM Module Connector This connector is external powered from JBAT1. 4. Plug the power cord and power on the motherboard to save system...
... pin2 10 No Pin 11 LPC address & data pin3 12 Ground 13 LPC Frame 14 Ground JBAT1: Clear CMOS (Reset BIOS) Jumper There is CMOS memory onboard that is for TPM (Trusted Platform Module). If you want to clear the system configuration, set the jumper to default values 1. JTPM1: TPM Module Connector This connector is external powered from JBAT1. 4. Plug the power cord and power on the motherboard to save system...
User Manual
Page 40
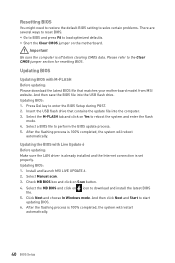
... set properly. Updating the BIOS with M-FLASH Before updating: Please download the latest BIOS file that contains the update file into the USB flash drive. Check MB BIOS box and click on the motherboard. And then save the BIOS file into the computer. 3. Insert the USB flash drive that matches your motherboard model from MSI website. y Short the Clear CMOS jumper on Scan button. 4. Press Del key to the Clear CMOS jumper section for resetting BIOS. Install and launch MSI LIVE UPDATE 6. 2. Updating BIOS: 1. Click Next and choose In Windows mode...
... set properly. Updating the BIOS with M-FLASH Before updating: Please download the latest BIOS file that contains the update file into the USB flash drive. Check MB BIOS box and click on the motherboard. And then save the BIOS file into the computer. 3. Insert the USB flash drive that matches your motherboard model from MSI website. y Short the Clear CMOS jumper on Scan button. 4. Press Del key to the Clear CMOS jumper section for resetting BIOS. Install and launch MSI LIVE UPDATE 6. 2. Updating BIOS: 1. Click Next and choose In Windows mode...

User Manual
Page 41
... by pressing the Setup Mode switch or F7 function key. y Language - shows the CPU/ DDR speed, CPU/ MB temperature, MB/ CPU type, memory size, CPU/ DDR voltage, BIOS version and build date. The boot priority from high to low is installed. XMP switch Setup Mode switch Screenshot Search Language System information OC GENIE 4 switch Boot device priority bar Information display M-Flash Favorites Hardware Monitor Function buttons y OC GENIE 4 switch - Important Please don't make any changes in OC menu and don't load defaults to exit search...
... by pressing the Setup Mode switch or F7 function key. y Language - shows the CPU/ DDR speed, CPU/ MB temperature, MB/ CPU type, memory size, CPU/ DDR voltage, BIOS version and build date. The boot priority from high to low is installed. XMP switch Setup Mode switch Screenshot Search Language System information OC GENIE 4 switch Boot device priority bar Information display M-Flash Favorites Hardware Monitor Function buttons y OC GENIE 4 switch - Important Please don't make any changes in OC menu and don't load defaults to exit search...
User Manual
Page 42
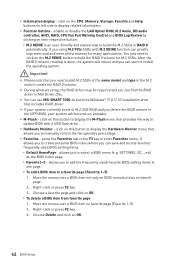
... RAID driver. y If your system currently boots to M.2 SSD RAID and you delete the RAID volume in RAID 0 automatically. enable or disable the LAN Option ROM, M.2 Genie, HD audio controller, AHCI, RAID, CPU Fan Fail Warning Control and BIOS Log Review by percentage. You just need to click on this button to display the Hardware Monitor menu that provides the way to build the RAID 0 volume for many applications. After the RAID 0 volume creating is an user...
... RAID driver. y If your system currently boots to M.2 SSD RAID and you delete the RAID volume in RAID 0 automatically. enable or disable the LAN Option ROM, M.2 Genie, HD audio controller, AHCI, RAID, CPU Fan Fail Warning Control and BIOS Log Review by percentage. You just need to click on this button to display the Hardware Monitor menu that provides the way to build the RAID 0 volume for many applications. After the RAID 0 volume creating is an user...
User Manual
Page 45
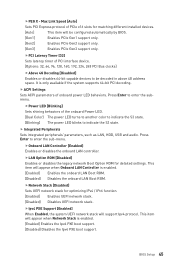
... of PCI interface device. [Options: 32, 64, 96, 128, 160, 192, 224, 248 PCI Bus clocks] fAbove 4G Decoding [Disabled] Enables or disables 64-bit capable devices to indicate the S3 state. Press Enter to enter the sub-menu. It is enabled. [Enabled] Enables the onboard LAN Boot ROM. [Disabled] Disables the onboard LAN Boot ROM. f Integrated Peripherals Sets integrated peripherals' parameters, such as LAN, HDD, USB and audio. fOnboard LAN Controller [Enabled] Enables or disables the onboard LAN controller. fIpv4 PXE Support [Enabled] When Enabled, the system UEFI network stack...
... of PCI interface device. [Options: 32, 64, 96, 128, 160, 192, 224, 248 PCI Bus clocks] fAbove 4G Decoding [Disabled] Enables or disables 64-bit capable devices to indicate the S3 state. Press Enter to enter the sub-menu. It is enabled. [Enabled] Enables the onboard LAN Boot ROM. [Disabled] Disables the onboard LAN Boot ROM. f Integrated Peripherals Sets integrated peripherals' parameters, such as LAN, HDD, USB and audio. fOnboard LAN Controller [Enabled] Enables or disables the onboard LAN controller. fIpv4 PXE Support [Enabled] When Enabled, the system UEFI network stack...

User Manual
Page 46
...High Definition Audio controller. fIpv6 PXE Support [Enabled] When Enabled, the system UEFI network stack will support Ipv6 protocol. AHCI (Advanced Host Controller Interface) offers some advanced features to enable or disable the SATA hot plug support. [Enabled] Enables hot plug support for the SATA ports. [Disabled] Disables hot plug support for SATA storage devices. fSATAx Hot Plug [Disabled] Allows user to enhance the speed and performance of SATA storage device, such as the primary boot device. [IGD] Integrated Graphics Display. [PEG] PCI-Express Graphics Device. fSATA Mode...
...High Definition Audio controller. fIpv6 PXE Support [Enabled] When Enabled, the system UEFI network stack will support Ipv6 protocol. AHCI (Advanced Host Controller Interface) offers some advanced features to enable or disable the SATA hot plug support. [Enabled] Enables hot plug support for the SATA ports. [Disabled] Disables hot plug support for SATA storage devices. fSATAx Hot Plug [Disabled] Allows user to enhance the speed and performance of SATA storage device, such as the primary boot device. [IGD] Integrated Graphics Display. [PEG] PCI-Express Graphics Device. fSATA Mode...

User Manual
Page 47
...ports. fSerial (COM) Port x [Enabled] Enables or disables serial (COM) port x. Press to enter the submenu. If set to Auto, BIOS will optimize the IRQ automatically or you can set to Auto, BIOS will be unavailable under legacy mode. [Disabled] The USB devices will optimize the IRQ automatically or you can set it manually. f USB Configuration Sets the onboard USB controller and device function. Press to enter the sub-menu. fUSB Controller [Enabled] Enables or disables all USB controller. fParallel (LPT) Port Settings [Auto] Sets parallel port (LPT). BIOS Setup...
...ports. fSerial (COM) Port x [Enabled] Enables or disables serial (COM) port x. Press to enter the submenu. If set to Auto, BIOS will optimize the IRQ automatically or you can set to Auto, BIOS will be unavailable under legacy mode. [Disabled] The USB devices will optimize the IRQ automatically or you can set it manually. f USB Configuration Sets the onboard USB controller and device function. Press to enter the sub-menu. fUSB Controller [Enabled] Enables or disables all USB controller. fParallel (LPT) Port Settings [Auto] Sets parallel port (LPT). BIOS Setup...

User Manual
Page 48
... operating mode for other operating systems. Before enabling this item, make sure all installed devices & utilities (hardware & software) should meet the Windows equirement. [Disabled] Disables this function. 48 BIOS Setup fEuP 2013 [Disabled] Enables or disables the system power consumption according to EuP2013 regulation. [Enabled] Optimize the system power consumption according to meet the Windows 8.1/ 10 requirements. [Enabled] The system will not support S4 & S5 wake up when detecting abnormal voltage input. [Enabled...
... operating mode for other operating systems. Before enabling this item, make sure all installed devices & utilities (hardware & software) should meet the Windows equirement. [Disabled] Disables this function. 48 BIOS Setup fEuP 2013 [Disabled] Enables or disables the system power consumption according to EuP2013 regulation. [Enabled] Optimize the system power consumption according to meet the Windows 8.1/ 10 requirements. [Enabled] The system will not support S4 & S5 wake up when detecting abnormal voltage input. [Enabled...

User Manual
Page 49
... Secure Boot Mode sets to Custom. Please refer Entering BIOS Setup section for Windows 8.1/ 10. Press Enter to enter the sub-menu. fKey Management Manages the secure boot keys. fSecure Boot Support [Disabled] Enables or disables secure boot support. [Enabled] Enables the secure boot function and allow you can use MSI FAST BOOT application to enter BIOS setup if needed. It will automatically load the secure keys from BIOS. [Custom] Allows user to configure the secure boot settings and manually load the secure keys. fInternal GOP Configuration Manages the onboard Graphics...
... Secure Boot Mode sets to Custom. Please refer Entering BIOS Setup section for Windows 8.1/ 10. Press Enter to enter the sub-menu. fKey Management Manages the secure boot keys. fSecure Boot Support [Disabled] Enables or disables secure boot support. [Enabled] Enables the secure boot function and allow you can use MSI FAST BOOT application to enter BIOS setup if needed. It will automatically load the secure keys from BIOS. [Custom] Allows user to configure the secure boot settings and manually load the secure keys. fInternal GOP Configuration Manages the onboard Graphics...

User Manual
Page 50
... BIOS Setup fResume By RTC Alarm [Disabled] Disables or enables the system wake up by RTC Alarm. [Enabled] Enables the system to boot up on a specified date/hour/minute/second in these items. [OS] The wake up events will automatically resume (boot up) on a scheduled time/ date. [Disabled] Disables this function. fResume By PCI-E Device [Disabled] Enables or disables the wake up function of installed PCI-E expansion cards, integrated LAN controllers or USB devices...
... BIOS Setup fResume By RTC Alarm [Disabled] Disables or enables the system wake up by RTC Alarm. [Enabled] Enables the system to boot up on a specified date/hour/minute/second in these items. [OS] The wake up events will automatically resume (boot up) on a scheduled time/ date. [Disabled] Disables this function. fResume By PCI-E Device [Disabled] Enables or disables the wake up function of installed PCI-E expansion cards, integrated LAN controllers or USB devices...

User Manual
Page 51
... information block on OS installation requirement. f GO2BIOS [Disabled] Allows system to enter BIOS setup directly by long pressing the power button about 4 seconds when the system is enabled. [UEFI] Enables UEFI BIOS boot mode support only. [LEGACY+UEFI] Enables both Legacy BIOS boot mode and UEFI BIOS boot mode. f Bootup NumLock State [On] Select the keyboard NumLock state upon bootup. f Full Screen Logo Display [Enabled] Enables or disables to the BIOS setup by pressing the Power button for system boot. This item appears when you set the Resume From...
... information block on OS installation requirement. f GO2BIOS [Disabled] Allows system to enter BIOS setup directly by long pressing the power button about 4 seconds when the system is enabled. [UEFI] Enables UEFI BIOS boot mode support only. [LEGACY+UEFI] Enables both Legacy BIOS boot mode and UEFI BIOS boot mode. f Bootup NumLock State [On] Select the keyboard NumLock state upon bootup. f Full Screen Logo Display [Enabled] Enables or disables to the BIOS setup by pressing the Power button for system boot. This item appears when you set the Resume From...
User Manual
Page 55
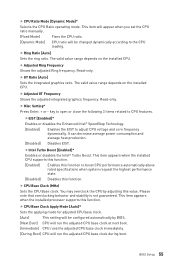
... when the installed processor supports this function. This item will appear when you set the CPU ratio manually. [Fixed Mode] Fixes the CPU ratio. [Dynamic Mode] CPU ratio will be configured automatically by adjusting this value. f Misc Setting* Press Enter, + or - You may overclock the CPU by BIOS. [Next Boot] CPU will run the adjusted CPU base clock at next boot. [Immediate] CPU runs the adjusted CPU base clock immediately. [During Boot] CPU will be changed dynamically...
... when the installed processor supports this function. This item will appear when you set the CPU ratio manually. [Fixed Mode] Fixes the CPU ratio. [Dynamic Mode] CPU ratio will be configured automatically by adjusting this value. f Misc Setting* Press Enter, + or - You may overclock the CPU by BIOS. [Next Boot] CPU will run the adjusted CPU base clock at next boot. [Immediate] CPU runs the adjusted CPU base clock immediately. [During Boot] CPU will be changed dynamically...
User Manual
Page 56
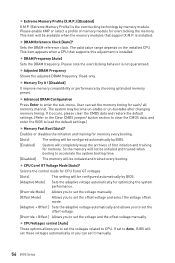
...Auto]* Sets the DRAM reference clock. f DRAM Frequency [Auto] Sets the DRAM frequency. f Memory Try It ! [Disabled] It improve memory compatibility or performance by BIOS. [Enabled] System will be initialed and trained every booting. f Advanced DRAM Configuration Press Enter to set the memory timing for overclocking the memory. If it manually. 56 BIOS Setup f CPU Core/ GT Voltage Mode [Auto]* Selects the control mode for CPU Core/ GT voltages. [Auto] This setting will set these voltages automatically or you can set the voltages related to load the default settings...
...Auto]* Sets the DRAM reference clock. f DRAM Frequency [Auto] Sets the DRAM frequency. f Memory Try It ! [Disabled] It improve memory compatibility or performance by BIOS. [Enabled] System will be initialed and trained every booting. f Advanced DRAM Configuration Press Enter to set the memory timing for overclocking the memory. If it manually. 56 BIOS Setup f CPU Core/ GT Voltage Mode [Auto]* Selects the control mode for CPU Core/ GT voltages. [Auto] This setting will set these voltages automatically or you can set the voltages related to load the default settings...
User Manual
Page 57
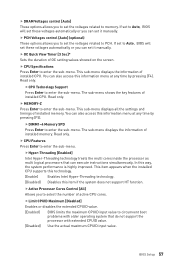
... screen. Read only. BIOS Setup 57 You can set the voltages related to memory. Read only. f MEMORY-Z Press Enter to enter the sub-menu. In this item if the system does not support HT function. This sub-menu displays the information of installed CPU. fCPU Technology Support Press Enter to enter the sub-menu. fActive Processor Cores Control [All] Allows you to set it manually. f CPU Specifications Press Enter to enter the sub-menu. If set to Auto, BIOS will set...
... screen. Read only. BIOS Setup 57 You can set the voltages related to memory. Read only. f MEMORY-Z Press Enter to enter the sub-menu. In this item if the system does not support HT function. This sub-menu displays the information of installed CPU. fCPU Technology Support Press Enter to enter the sub-menu. fActive Processor Cores Control [All] Allows you to set it manually. f CPU Specifications Press Enter to enter the sub-menu. If set to Auto, BIOS will set...

User Manual
Page 58
... data and instructions into L2 cache from memory for power-saving in halt state. This item appears when Intel C-State is over the adaptive temperature. [Disabled] Disables this function. fC1E Support [Disabled] Enables or disables the C1E function for Directed I/O) technology. fCPU AES Instructions [Enabled] Enables or disables the CPU AES (Advanced Encryption Standard-New Instructions) support. C-state is a processor power management technology defined by ACPI. [Auto] This setting will be configured automatically by BIOS. [Enabled] Detects...
... data and instructions into L2 cache from memory for power-saving in halt state. This item appears when Intel C-State is over the adaptive temperature. [Disabled] Disables this function. fC1E Support [Disabled] Enables or disables the C1E function for Directed I/O) technology. fCPU AES Instructions [Enabled] Enables or disables the CPU AES (Advanced Encryption Standard-New Instructions) support. C-state is a processor power management technology defined by ACPI. [Auto] This setting will be configured automatically by BIOS. [Enabled] Detects...

User Manual
Page 60
... the steps below to update BIOS with a USB flash drive. Click on Yes to perform the BIOS update process. 5. M-FLASH M-FLASH provides the way to update BIOS. 1. Click on M-FLASH tab, a demand message will be prompted. Please down-load the latest BIOS file that contains the update file into your motherboard model from MSI website, save the BIOS file into the computer. 2. Insert the USB flash drive that matches your USB flash drive. Select a BIOS file to reboot and enter the flash mode. 3.
... the steps below to update BIOS with a USB flash drive. Click on Yes to perform the BIOS update process. 5. M-FLASH M-FLASH provides the way to update BIOS. 1. Click on M-FLASH tab, a demand message will be prompted. Please down-load the latest BIOS file that contains the update file into your motherboard model from MSI website, save the BIOS file into the computer. 2. Insert the USB flash drive that matches your USB flash drive. Select a BIOS file to reboot and enter the flash mode. 3.

User Manual
Page 63
Press any key when screen shows Press any key to chipset limitation, during the computer POST (Power-On Self Test) to restart. 7. Installing Drivers 1. Insert MSI® Driver Disc into your computer. Restart your optical drive. 3. Click Install button. 6. Note: Due to boot from the Boot Menu. 7. You can use MSI Smart Tool to install Windows® 7/ 8.1/ 10. Select your USB Keyboard/ USB Mouse to install. 5. message. 8. Follow the instructions on the screen to install Windows® 7. 3. Click OK button to...
Press any key when screen shows Press any key to chipset limitation, during the computer POST (Power-On Self Test) to restart. 7. Installing Drivers 1. Insert MSI® Driver Disc into your computer. Restart your optical drive. 3. Click Install button. 6. Note: Due to boot from the Boot Menu. 7. You can use MSI Smart Tool to install Windows® 7/ 8.1/ 10. Select your USB Keyboard/ USB Mouse to install. 5. message. 8. Follow the instructions on the screen to install Windows® 7. 3. Click OK button to...

User Manual
Page 80
... known working LAN cable. y If 1 long 2 short beeps are properly illuminated. There is no audio y Adjust the volume. Lost BIOS password y Clear the CMOS, but no signal to monitor y Connect the monitor power cord to a electrical outlet securely. y Test with another known working graphics card. y If 3 long beeps are connected from the power supply to lose all memory modules and try to go over troubleshooting guide first to Keep DATA. y Remove secondary speakers/ headphones, HDMI cables, USB audio devices. There is no network y Make...
... known working LAN cable. y If 1 long 2 short beeps are properly illuminated. There is no audio y Adjust the volume. Lost BIOS password y Clear the CMOS, but no signal to monitor y Connect the monitor power cord to a electrical outlet securely. y Test with another known working graphics card. y If 3 long beeps are connected from the power supply to lose all memory modules and try to go over troubleshooting guide first to Keep DATA. y Remove secondary speakers/ headphones, HDMI cables, USB audio devices. There is no network y Make...

User Manual
Page 84
... are acknowledged. Technical Support If a problem arises with your system and no guarantee is the intellectual property of its contents. Copyright © 2016 All rights reserved. Revision History Version 1.0, 2016/10, First release. 84 Regulatory Notices Alternatively, please try the following help resources for technical guide, BIOS updates, driver updates, and other information: http://www.msi.com y Register your...
... are acknowledged. Technical Support If a problem arises with your system and no guarantee is the intellectual property of its contents. Copyright © 2016 All rights reserved. Revision History Version 1.0, 2016/10, First release. 84 Regulatory Notices Alternatively, please try the following help resources for technical guide, BIOS updates, driver updates, and other information: http://www.msi.com y Register your...


