User's Guide
Page 6
... control panel ...97 Sending a fax while listening to a call (On Hook Dial)...97 Sending a broadcast fax at a scheduled time...98 Receiving a fax...98 Receiving a fax manually...98 Setting a fax manual answer code...99 Contents 6
... control panel ...97 Sending a fax while listening to a call (On Hook Dial)...97 Sending a broadcast fax at a scheduled time...98 Receiving a fax...98 Receiving a fax manually...98 Setting a fax manual answer code...99 Contents 6

User's Guide
Page 45
... an IP address during printer software installation. Finding a printer/print server located on remote subnets The printer software CD can try manually entering an address after selecting your printer/print server from the available list. General networking 45 General networking Finding your MAC address ..., but only for more information. Configure IP address If you must assign an IP address in any of the following situations: • You manually assigned IP addresses for using this address. If the printer and print server are secure. • Make sure the computer is turned on the...
... an IP address during printer software installation. Finding a printer/print server located on remote subnets The printer software CD can try manually entering an address after selecting your printer/print server from the available list. General networking 45 General networking Finding your MAC address ..., but only for more information. Configure IP address If you must assign an IP address in any of the following situations: • You manually assigned IP addresses for using this address. If the printer and print server are secure. • Make sure the computer is turned on the...
User's Guide
Page 47
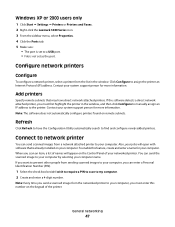
... computer name. General networking 47 Windows XP or 2000 users only 1 Click Start Œ Settings Œ Printers or Printers and Faxes. 2 Right-click the Lexmark 5300 Series icon. 3 From the sidebar menu, select Properties. 4 Click the Ports tab. 5 Make sure: • The port is set as the port...computer by selecting your computer. Connect to network printer You can send scanned images from the list in the window, and then click Configure to manually assign an IP address to a USB port. • File is already installed on the keypad of your computer. You can enter a Personal ...
... computer name. General networking 47 Windows XP or 2000 users only 1 Click Start Œ Settings Œ Printers or Printers and Faxes. 2 Right-click the Lexmark 5300 Series icon. 3 From the sidebar menu, select Properties. 4 Click the Ports tab. 5 Make sure: • The port is set as the port...computer by selecting your computer. Connect to network printer You can send scanned images from the list in the window, and then click Configure to manually assign an IP address to a USB port. • File is already installed on the keypad of your computer. You can enter a Personal ...
User's Guide
Page 71
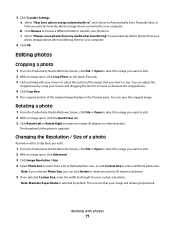
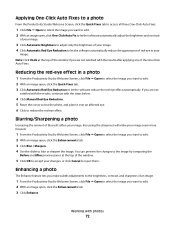
a Select "Skip Save option and go automatically to", and choose to Automatically Save, Manually Save, or Print your photos from the photo storage device connected to your computer. 4 Click OK. You can adjust the cropped area by default. Changing ...
a Select "Skip Save option and go automatically to", and choose to Automatically Save, Manually Save, or Print your photos from the photo storage device connected to your computer. 4 Click OK. You can adjust the cropped area by default. Changing ...
User's Guide
Page 72
..., click File ΠOpen to select the image you are not satisfied with the results, continue with photos 72 Working with the steps below. 4 Click Manual Red-Eye Reduction. 5 Move the cursor across the photo, and place it over an affected eye. 6 Click to accept your image. Blurring/Sharpening a photo Increasing...
..., click File ΠOpen to select the image you are not satisfied with the results, continue with photos 72 Working with the steps below. 4 Click Manual Red-Eye Reduction. 5 Move the cursor across the photo, and place it over an affected eye. 6 Click to accept your image. Blurring/Sharpening a photo Increasing...

User's Guide
Page 97
... entered. 6 Press Start Color or Start Black. b Set a time and date. 10 If you want to send a fax to the call (On Hook Dial) The manual dialing feature lets you must navigate an automated answering system or enter a calling card number before sending your fax: • Immediately-Select the Send now...
... entered. 6 Press Start Color or Start Black. b Set a time and date. 10 If you want to send a fax to the call (On Hook Dial) The manual dialing feature lets you must navigate an automated answering system or enter a calling card number before sending your fax: • Immediately-Select the Send now...

User's Guide
Page 98
.... Note: Press the keypad numbers to all of the numbers on the telephone after you answer it and hear fax tones. Receiving a fax Receiving a fax manually 1 Make sure the Auto Answer light is off. 2 To receive the fax if you want to send the fax. 9 Press . 10 If the printer is... not set up a manual answer code: • Press Start Color or Start Black. If the fax transmission is sent to use an automated answering system. 5 Press Start Color or...
.... Note: Press the keypad numbers to all of the numbers on the telephone after you answer it and hear fax tones. Receiving a fax Receiving a fax manually 1 Make sure the Auto Answer light is off. 2 To receive the fax if you want to send the fax. 9 Press . 10 If the printer is... not set up a manual answer code: • Press Start Color or Start Black. If the fax transmission is sent to use an automated answering system. 5 Press Start Color or...

User's Guide
Page 99
...your phone line type" area, enter the code you subscribe to this service, it works with the printer. Note: The code can include up a manual answer code, enter the code on the display. Note: Caller ID is calling. Using Caller ID from the control panel Caller ID is a service ... commas, periods, and/or these symbols 6 Click OK to save the setting. 3 To receive a fax if you have set up a manual answer code, see the related topic, "Setting a fax manual answer code." 4 Hang up the telephone. Note: For information on the display. If you want appears. 9 Press to save the setting....
...your phone line type" area, enter the code you subscribe to this service, it works with the printer. Note: The code can include up a manual answer code, enter the code on the display. Note: Caller ID is calling. Using Caller ID from the control panel Caller ID is a service ... commas, periods, and/or these symbols 6 Click OK to save the setting. 3 To receive a fax if you have set up a manual answer code, see the related topic, "Setting a fax manual answer code." 4 Hang up the telephone. Note: For information on the display. If you want appears. 9 Press to save the setting....
User's Guide
Page 147
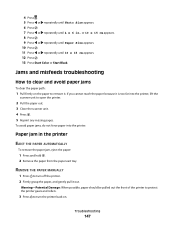
..., eject the paper: 1 Press and hold . 2 Remove the paper from the paper exit tray. If you cannot reach the paper because it . REMOVE THE PAPER MANUALLY 1 Press to remove it is too far into the printer. Jams and misfeeds troubleshooting How to clear and avoid paper jams To clear the paper...
..., eject the paper: 1 Press and hold . 2 Remove the paper from the paper exit tray. If you cannot reach the paper because it . REMOVE THE PAPER MANUALLY 1 Press to remove it is too far into the printer. Jams and misfeeds troubleshooting How to clear and avoid paper jams To clear the paper...

User's Guide
Page 159
... DETECTING A DIAL TONE • See "Sending a fax while listening to a call (On Hook Dial)" on page 111. • You can also dial the telephone number manually. If you hear a dial tone but the printer hangs up Speed Dial" on page 97. • Check the Dial Method setting. 1 Listen for the number...
... DETECTING A DIAL TONE • See "Sending a fax while listening to a call (On Hook Dial)" on page 111. • You can also dial the telephone number manually. If you hear a dial tone but the printer hangs up Speed Dial" on page 97. • Check the Dial Method setting. 1 Listen for the number...

User's Guide
Page 179
... ce produit en Suisse Cet appareil nécessite l'utilisation d'un filtre de tonalité de facturation suisse (nº de référence Lexmark : 14B5123) devant être installé sur toute ligne recevant des impulsions de comptage en Suisse. Note: Some modes may not apply ...beginning of the next call attempt and the beginning of another. South Africa telecommunications notice This modem must be installed on any single manual call initiation, and • The equipment shall go on-hook for compliance with Telecom's telepermit requirements are present on all analog ...
... ce produit en Suisse Cet appareil nécessite l'utilisation d'un filtre de tonalité de facturation suisse (nº de référence Lexmark : 14B5123) devant être installé sur toute ligne recevant des impulsions de comptage en Suisse. Note: Some modes may not apply ...beginning of the next call attempt and the beginning of another. South Africa telecommunications notice This modem must be installed on any single manual call initiation, and • The equipment shall go on-hook for compliance with Telecom's telepermit requirements are present on all analog ...

User's Guide
Page 188
... colors 132 Fax menu 105 fax activity reports 112 confirmation reports 112 customizing settings 103 forwarding 101 receiving automatically 100 receiving manually 98 receiving with an answer code 98 setting a manual answer code 99 Fax button 41 fax cover page creating using the Fax Setup Utility 103 fax error 161 fax footer...
... colors 132 Fax menu 105 fax activity reports 112 confirmation reports 112 customizing settings 103 forwarding 101 receiving automatically 100 receiving manually 98 receiving with an answer code 98 setting a manual answer code 99 Fax button 41 fax cover page creating using the Fax Setup Utility 103 fax error 161 fax footer...
User's Guide
Page 191
...115 cleaning 116 installing 113 ordering 119 preserving 117 refilling 115 removing 114 using genuine Lexmark 115 wiping 116 print is dark or smudged 134 print jobs canceling 56 print quality,...fax has poor print quality 160 receiving a fax automatically 100 fax forwarding 101 manually 98 using an answering machine 100 with manual answer code 98 recycling WEEE statement 176 reducing an image 85 red-eye automatic reduction 72... manual reduction 72 refilling print cartridges 115 remote fax error 161 removing an external ...
...115 cleaning 116 installing 113 ordering 119 preserving 117 refilling 115 removing 114 using genuine Lexmark 115 wiping 116 print is dark or smudged 134 print jobs canceling 56 print quality,...fax has poor print quality 160 receiving a fax automatically 100 fax forwarding 101 manually 98 using an answering machine 100 with manual answer code 98 recycling WEEE statement 176 reducing an image 85 red-eye automatic reduction 72... manual reduction 72 refilling print cartridges 115 remote fax error 161 removing an external ...

User's Guide (Mac)
Page 18
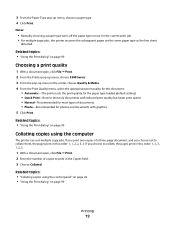
...-up menu, choose a paper size. 4 Click OK. Note: When you want to resume a particular print job, select the document name, and then click Resume. To manually choose the paper type: 1 With a document open , click File ΠPage Setup. 2 From the "Format for plain, heavyweight matte, glossy/photo, and transparency paper. Printing...
...-up menu, choose a paper size. 4 Click OK. Note: When you want to resume a particular print job, select the document name, and then click Resume. To manually choose the paper type: 1 With a document open , click File ΠPage Setup. 2 From the "Format for plain, heavyweight matte, glossy/photo, and transparency paper. Printing...
User's Guide (Mac)
Page 19
... topics: • "Using the Print dialog" on page 99 Printing 19 If you choose not to collate, the pages print in this order: 1, 1, 2, 2, 3, 3. Notes: • Manually choosing a paper type turns off the paper type sensor for photos and documents with graphics. 5 Click Print. 3 From the Paper Type pop-up menu in...
... topics: • "Using the Print dialog" on page 99 Printing 19 If you choose not to collate, the pages print in this order: 1, 1, 2, 2, 3, 3. Notes: • Manually choosing a paper type turns off the paper type sensor for photos and documents with graphics. 5 Click Print. 3 From the Paper Type pop-up menu in...
User's Guide (Mac)
Page 36
... settings when scanning" on page 36 Adjusting color settings when scanning You can manually adjust the color settings for optimum color output. 1 From the Finder desktop, double-click the Lexmark 5300 Series folder. 2 Double-click the Lexmark 5300 Series Center icon. 3 From the All-In-One Center, click Preview...scanned from the Scan dialog" on page 35 Choosing where to send scanned images 1 From the Finder desktop, double-click the Lexmark 5300 Series folder. 2 Double-click the Lexmark 5300 Series Center icon. 3 From the "Send scanned image to" pop-up menu, choose the scan destination. •...
... settings when scanning" on page 36 Adjusting color settings when scanning You can manually adjust the color settings for optimum color output. 1 From the Finder desktop, double-click the Lexmark 5300 Series folder. 2 Double-click the Lexmark 5300 Series Center icon. 3 From the All-In-One Center, click Preview...scanned from the Scan dialog" on page 35 Choosing where to send scanned images 1 From the Finder desktop, double-click the Lexmark 5300 Series folder. 2 Double-click the Lexmark 5300 Series Center icon. 3 From the "Send scanned image to" pop-up menu, choose the scan destination. •...

User's Guide (Mac)
Page 38
Remove smudges and light background shading in color documents. Scanning 38 Note: Select Custom Settings to the color and document type of using a preset scan setting. From here Settings tab Go to Scan Settings Reduce Background Noise To Select a preset scan setting according to customize the scan setting manually instead of your scan. The Scan dialog has three main sections: the Settings tab, the Adjustments tab, and the Preview area.
Remove smudges and light background shading in color documents. Scanning 38 Note: Select Custom Settings to the color and document type of using a preset scan setting. From here Settings tab Go to Scan Settings Reduce Background Noise To Select a preset scan setting according to customize the scan setting manually instead of your scan. The Scan dialog has three main sections: the Settings tab, the Adjustments tab, and the Preview area.

User's Guide (Mac)
Page 54
... panel" on page 88 • "Loading original documents on the scanner glass" on page 22 Sending a fax while listening to a call (On Hook Dial) The manual dialing feature lets you must set the number of telephone rings before receiving a fax automatically" on page 59. It is detected, the answering machine picks...
... panel" on page 88 • "Loading original documents on the scanner glass" on page 22 Sending a fax while listening to a call (On Hook Dial) The manual dialing feature lets you must set the number of telephone rings before receiving a fax automatically" on page 59. It is detected, the answering machine picks...

User's Guide (Mac)
Page 55
... . 8 Press or repeatedly until the setting you the fax appears on the display. Related topics: • "Using the control panel" on page 88 Receiving a fax manually 1 Make sure the Auto Answer light is calling. or • Press * 9 * on the telephone after five rings. 3 To set the number of telephone rings before...
... . 8 Press or repeatedly until the setting you the fax appears on the display. Related topics: • "Using the control panel" on page 88 Receiving a fax manually 1 Make sure the Auto Answer light is calling. or • Press * 9 * on the telephone after five rings. 3 To set the number of telephone rings before...
User's Guide (Mac)
Page 81
...the scanner glass" on page 22 Adjusting color settings when scanning You can manually adjust the color settings for optimum color output. 1 From the Finder desktop, double-click the Lexmark 5300 Series folder. 2 Double-click the Lexmark 5300 Series Center icon. 3 From the All-In-One Center, click ...If you are on. 2 Load an original document facedown on the scanner glass. 3 From the Finder desktop, double-click the Lexmark 5300 Series folder. 4 Double-click the Lexmark 5300 Series Center icon. 5 From the "Send scanned images to" pop-up menu, choose the application where you want to reverse...
...the scanner glass" on page 22 Adjusting color settings when scanning You can manually adjust the color settings for optimum color output. 1 From the Finder desktop, double-click the Lexmark 5300 Series folder. 2 Double-click the Lexmark 5300 Series Center icon. 3 From the All-In-One Center, click ...If you are on. 2 Load an original document facedown on the scanner glass. 3 From the Finder desktop, double-click the Lexmark 5300 Series folder. 4 Double-click the Lexmark 5300 Series Center icon. 5 From the "Send scanned images to" pop-up menu, choose the application where you want to reverse...


