Getting Started
Page 28
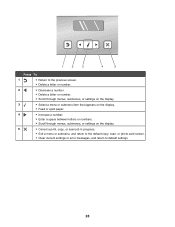
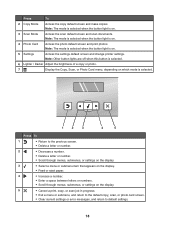
... scan job in progress. • Exit a menu or submenu, and return to the default copy, scan, or photo card screen. • Clear current settings or error messages, and return to default settings. 28
... scan job in progress. • Exit a menu or submenu, and return to the default copy, scan, or photo card screen. • Clear current settings or error messages, and return to default settings. 28
Getting Started
Page 49
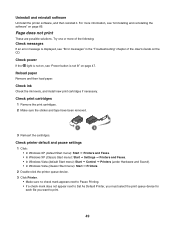
... sticker and tape have been removed. 1 2 3 Reinsert the cartridges. For more of the following: Check messages If an error message is not lit" on page 66. Try one or more information, see "Error messages" in the "Troubleshooting" chapter of the User's Guide on the CD. Check printer default and pause settings 1 Click...
... sticker and tape have been removed. 1 2 3 Reinsert the cartridges. For more of the following: Check messages If an error message is not lit" on page 66. Try one or more information, see "Error messages" in the "Troubleshooting" chapter of the User's Guide on the CD. Check printer default and pause settings 1 Click...
Getting Started
Page 50
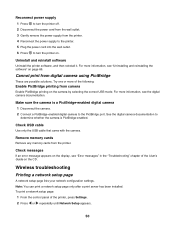
... 1 Disconnect the camera. 2 Connect a PictBridge-enabled digital camera to determine whether the camera is PictBridge-enabled. Check messages If an error message appears on the CD. Try one or more information, see "Error messages" in the "Troubleshooting" chapter of the printer, press Settings. 2 Press or repeatedly until Network Setup appears. 50 For...
... 1 Disconnect the camera. 2 Connect a PictBridge-enabled digital camera to determine whether the camera is PictBridge-enabled. Check messages If an error message appears on the CD. Try one or more information, see "Error messages" in the "Troubleshooting" chapter of the printer, press Settings. 2 Press or repeatedly until Network Setup appears. 50 For...
Getting Started
Page 66
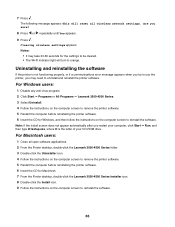
...of your computer, click Start Œ Run, and then type D:\setup.exe, where D is not functioning properly, or if a communications error message appears when you try to use the printer, you may take 30-60 seconds for the settings to be cleared. • The Wi...users: 1 Close all wireless network settings. For Windows users: 1 Disable any anti-virus program. 2 Click Start Œ Programs or All Programs Œ Lexmark 3500-4500 Series. 3 Select Uninstall. 4 Follow the instructions on the computer screen to remove the printer software. 5 Restart the computer before reinstalling the printer ...
...of your computer, click Start Œ Run, and then type D:\setup.exe, where D is not functioning properly, or if a communications error message appears when you try to use the printer, you may take 30-60 seconds for the settings to be cleared. • The Wi...users: 1 Close all wireless network settings. For Windows users: 1 Disable any anti-virus program. 2 Click Start Œ Programs or All Programs Œ Lexmark 3500-4500 Series. 3 Select Uninstall. 4 Follow the instructions on the computer screen to remove the printer software. 5 Restart the computer before reinstalling the printer ...
Getting Started
Page 72
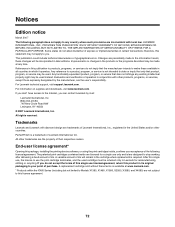
.... This publication could include technical inaccuracies or typographical errors. Bldg 004-2/CSC 740 New Circle Road NW Lexington, KY 40550 © 2007 Lexmark International, Inc. All rights reserved. A variable amount of ink will be made to Lexmark for a single use the print cartridge terminates, ...must be used. Evaluation and verification of operation in its original packaging to Models X1380, X1480, X1580, X2580, X3580, and X4580) are the user's responsibility. PerfectFinish is a trademark of the following paragraph does not apply to any country where such provisions ...
.... This publication could include technical inaccuracies or typographical errors. Bldg 004-2/CSC 740 New Circle Road NW Lexington, KY 40550 © 2007 Lexmark International, Inc. All rights reserved. A variable amount of ink will be made to Lexmark for a single use the print cartridge terminates, ...must be used. Evaluation and verification of operation in its original packaging to Models X1380, X1480, X1580, X2580, X3580, and X4580) are the user's responsibility. PerfectFinish is a trademark of the following paragraph does not apply to any country where such provisions ...
User's Guide
Page 6
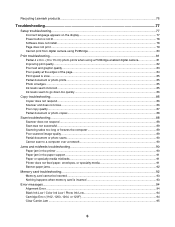
Recycling Lexmark products...76 Troubleshooting...77 Setup troubleshooting...77 Incorrect language appears on the display 77 Power button is not lit ...78 Software does not install ...78 ... specialty media 91 Banner paper jams ...92 Memory card troubleshooting...92 Memory card cannot be inserted ...93 Nothing happens when memory card is inserted 93 Error messages...94 Alignment Error...94 Black Ink Low / Color Ink Low / Photo Ink Low 94 Cartridge...
Recycling Lexmark products...76 Troubleshooting...77 Setup troubleshooting...77 Incorrect language appears on the display 77 Power button is not lit ...78 Software does not install ...78 ... specialty media 91 Banner paper jams ...92 Memory card troubleshooting...92 Memory card cannot be inserted ...93 Nothing happens when memory card is inserted 93 Error messages...94 Alignment Error...94 Black Ink Low / Color Ink Low / Photo Ink Low 94 Cartridge...
User's Guide
Page 7
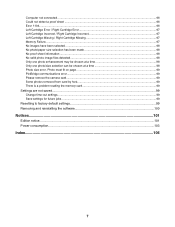
Computer not connected ...96 Could not detect a proof sheet ...96 Error 1104...96 Left Cartridge Error / Right Cartridge Error 97 Left Cartridge Incorrect / Right Cartridge Incorrect 97 Left Cartridge Missing / Right Cartridge Missing 97 Memory Failure...97 No images have been selected ...98 No... photo enhancement may be chosen at a time 98 Only one photo/size selection can be chosen at a time 98 Photo size error. Photo must fit on page...99 PictBridge communications error...99 Please remove the camera card...99 Some photos removed from card by host 99 There is a problem reading the memory...
Computer not connected ...96 Could not detect a proof sheet ...96 Error 1104...96 Left Cartridge Error / Right Cartridge Error 97 Left Cartridge Incorrect / Right Cartridge Incorrect 97 Left Cartridge Missing / Right Cartridge Missing 97 Memory Failure...97 No images have been selected ...98 No... photo enhancement may be chosen at a time 98 Only one photo/size selection can be chosen at a time 98 Photo size error. Photo must fit on page...99 PictBridge communications error...99 Please remove the camera card...99 Some photos removed from card by host 99 There is a problem reading the memory...
User's Guide
Page 18
... scan job in progress. • Exit a menu or submenu, and return to the default copy, scan, or photo card screen. • Clear current settings or error messages, and return to the previous screen. • Delete a letter or number. 2 • Decrease a number. • Delete a letter or number. • Scroll through menus, submenus...
... scan job in progress. • Exit a menu or submenu, and return to the default copy, scan, or photo card screen. • Clear current settings or error messages, and return to the previous screen. • Delete a letter or number. 2 • Decrease a number. • Delete a letter or number. • Scroll through menus, submenus...
User's Guide
Page 53
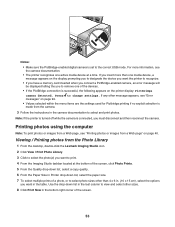
...menu items are the settings used for Pictbridge printing if no explicit selection is made from the Photo Library 1 From the desktop, double-click the Lexmark Imaging Studio icon. 2 Click View / Print Photo Library. 3 Click to select the photo(s) you to select photo sizes other message appears, see... cm), select the options you want the printer to recognize. • If you have a memory card inserted when you connect a PictBridge-enabled camera, an error message will be displayed telling the you want to select and print photos. For more than 4 x 6 in the table. Notes: • Make sure ...
...menu items are the settings used for Pictbridge printing if no explicit selection is made from the Photo Library 1 From the desktop, double-click the Lexmark Imaging Studio icon. 2 Click View / Print Photo Library. 3 Click to select the photo(s) you to select photo sizes other message appears, see... cm), select the options you want the printer to recognize. • If you have a memory card inserted when you connect a PictBridge-enabled camera, an error message will be displayed telling the you want to select and print photos. For more than 4 x 6 in the table. Notes: • Make sure ...
User's Guide
Page 77
..." on page 86 • "Scan troubleshooting" on page 88 • "Jams and misfeeds troubleshooting" on page 90 • "Memory card troubleshooting" on page 92 • "Error messages" on page 94 • "Resetting to save .
..." on page 86 • "Scan troubleshooting" on page 88 • "Jams and misfeeds troubleshooting" on page 90 • "Memory card troubleshooting" on page 92 • "Error messages" on page 94 • "Resetting to save .
User's Guide
Page 79
... load paper. In Windows XP, click Start to reinstall the software. For more of the following: Check messages If an error message is displayed, see "Power button is not on, see "Error messages" on the computer screen to access the My Computer icon. 4 Double-click the CD-ROM drive icon. 5 If necessary...
... load paper. In Windows XP, click Start to reinstall the software. For more of the following: Check messages If an error message is displayed, see "Power button is not on, see "Error messages" on the computer screen to access the My Computer icon. 4 Double-click the CD-ROM drive icon. 5 If necessary...
User's Guide
Page 81
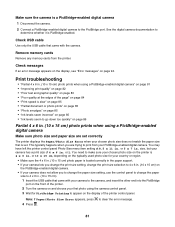
... 83 • "Poor quality at 8.5 x 11 in. See the digital camera documentation to the PictBridge port. Check messages If an error message appears on the display, see "Error messages" on the printer is set. Remove memory cards Remove any memory cards from your chosen photo size does not match the... printer. 2 Turn the camera on and choose your camera does not allow you are set correctly The printer displays the Paper/Photo Size Error when your PictBridge-enabled digital camera. You may have left the printer control panel Photo Size menu item setting at the edges of the ...
... 83 • "Poor quality at 8.5 x 11 in. See the digital camera documentation to the PictBridge port. Check messages If an error message appears on the display, see "Error messages" on the printer is set. Remove memory cards Remove any memory cards from your chosen photo size does not match the... printer. 2 Turn the camera on and choose your camera does not allow you are set correctly The printer displays the Paper/Photo Size Error when your PictBridge-enabled digital camera. You may have left the printer control panel Photo Size menu item setting at the edges of the ...
User's Guide
Page 86
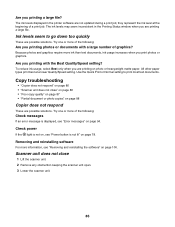
Ink levels seem to print most text documents. Because photos and graphics require more of the following : Check messages If an error message is not lit" on page 78. Check power If the light is not on, see "Power button is displayed, see "Removing and reinstalling the... These are not updated during a print job; To reduce ink usage, select Best only when you printing a large file? Try one or more information, see "Error messages" on page 94. Are you are printing on photo or heavyweight matte paper. The ink levels displayed in the Printing Status window when you...
Ink levels seem to print most text documents. Because photos and graphics require more of the following : Check messages If an error message is not lit" on page 78. Check power If the light is not on, see "Power button is displayed, see "Removing and reinstalling the... These are not updated during a print job; To reduce ink usage, select Best only when you printing a large file? Try one or more information, see "Error messages" on page 94. Are you are printing on photo or heavyweight matte paper. The ink levels displayed in the Printing Status window when you...

User's Guide
Page 87
... • Unexpected characters • White lines in the upper left corner. 87 Adjust the brightness of the following: Check messages If an error message is loaded facedown on the scanner glass in print These are copying or scanning from photo or glossy paper, a magazine, or a newspaper, see... "Error messages" on the scanner glass. 2 From the control panel, press Copy Mode. 3 Press Lighter/Darker. 4 Press or repeatedly to improve print ...
... • Unexpected characters • White lines in the upper left corner. 87 Adjust the brightness of the following: Check messages If an error message is loaded facedown on the scanner glass in print These are copying or scanning from photo or glossy paper, a magazine, or a newspaper, see... "Error messages" on the scanner glass. 2 From the control panel, press Copy Mode. 3 Press Lighter/Darker. 4 Press or repeatedly to improve print ...
User's Guide
Page 88
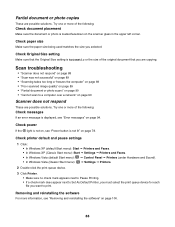
... is not lit" on the scanner glass in the upper left corner. Try one or more of the following : Check messages If an error message is displayed, see "Error messages" on page 90 • "Cannot scan to print. Try one or more information, see "Power button is loaded facedown on page 78...
... is not lit" on the scanner glass in the upper left corner. Try one or more of the following : Check messages If an error message is displayed, see "Error messages" on page 90 • "Cannot scan to print. Try one or more information, see "Power button is loaded facedown on page 78...

User's Guide
Page 89
Try one or more information, see "Error messages" on the scanner glass. 2 From the desktop, double-click the Lexmark Imaging Studio icon. 3 From the left pane of the scan 1 Load an original document facedown on page 94. Poor scanned image quality These are possible ... end of the USB cable into the USB port of the following : Check messages If an error message is displayed, see "Removing and reinstalling the software" on the scanner glass. 2 From the desktop, double-click the Lexmark Imaging Studio icon. 3 From the left pane of the Welcome screen, click Scan. 89 Scan...
Try one or more information, see "Error messages" on the scanner glass. 2 From the desktop, double-click the Lexmark Imaging Studio icon. 3 From the left pane of the scan 1 Load an original document facedown on page 94. Poor scanned image quality These are possible ... end of the USB cable into the USB port of the following : Check messages If an error message is displayed, see "Removing and reinstalling the software" on the scanner glass. 2 From the desktop, double-click the Lexmark Imaging Studio icon. 3 From the left pane of the Welcome screen, click Scan. 89 Scan...
User's Guide
Page 94
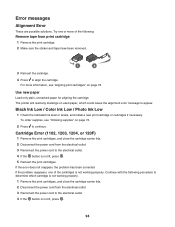
...1 Check the indicated ink level or levels, and install a new print cartridge or cartridges if necessary. If the error does not reappear, the problem has been corrected. Cartridge Error (1102, 1203, 1204, or 120F) 1 Remove the print cartridges, and close the cartridge carrier lids. 2 ...removed. 1 2 3 Reinsert the cartridge. 4 Press to appear. Try one of the following procedure to determine which could cause the alignment error message to align the cartridge. To order supplies, see "Aligning print cartridges" on page 72. If the problem reappears, one or more information...
...1 Check the indicated ink level or levels, and install a new print cartridge or cartridges if necessary. If the error does not reappear, the problem has been corrected. Cartridge Error (1102, 1203, 1204, or 120F) 1 Remove the print cartridges, and close the cartridge carrier lids. 2 ...removed. 1 2 3 Reinsert the cartridge. 4 Press to appear. Try one of the following procedure to determine which could cause the alignment error message to align the cartridge. To order supplies, see "Aligning print cartridges" on page 72. If the problem reappears, one or more information...
User's Guide
Page 95
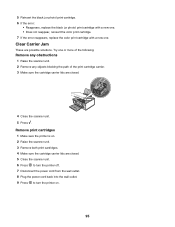
...; Reappears, replace the black (or photo) print cartridge with a new one. • Does not reappear, reinsert the color print cartridge. 7 If the error reappears, replace the color print cartridge with a new one or more of the following: Remove any obstructions 1 Raise the scanner unit. 2 Remove any objects blocking ...
...; Reappears, replace the black (or photo) print cartridge with a new one. • Does not reappear, reinsert the color print cartridge. 7 If the error reappears, replace the color print cartridge with a new one or more of the following: Remove any obstructions 1 Raise the scanner unit. 2 Remove any objects blocking ...
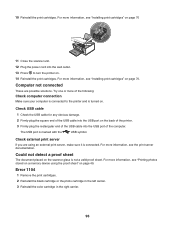
User's Guide
Page 96
... printer. 3 Firmly plug the rectangular end of the USB cable into the USB port on page 49. The USB port is not a valid proof sheet. Error 1104 1 Remove the print cartridges. 2 Reinstall the black cartridge or the photo cartridge in the left carrier. 3 Reinstall the color cartridge in the right carrier...
... printer. 3 Firmly plug the rectangular end of the USB cable into the USB port on page 49. The USB port is not a valid proof sheet. Error 1104 1 Remove the print cartridges. 2 Reinstall the black cartridge or the photo cartridge in the left carrier. 3 Reinstall the color cartridge in the right carrier...
User's Guide
Page 97
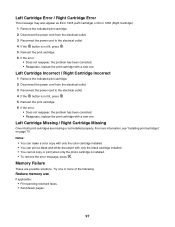
...cartridges are possible solutions. Memory Failure These are missing or not installed properly. Left Cartridge Error / Right Cartridge Error This message may also appear as Error 1205 (Left Cartridge) or Error 1206 (Right Cartridge). 1 Remove the indicated print cartridge. 2 Disconnect the power cord ...from the electrical outlet. 3 Reconnect the power cord to the electrical outlet. 4 If the button is installed. • To remove the error message, press . Try one . Left Cartridge Incorrect / Right Cartridge Incorrect 1 Remove the indicated print cartridge. 2 Disconnect the power cord ...
...cartridges are possible solutions. Memory Failure These are missing or not installed properly. Left Cartridge Error / Right Cartridge Error This message may also appear as Error 1205 (Left Cartridge) or Error 1206 (Right Cartridge). 1 Remove the indicated print cartridge. 2 Disconnect the power cord ...from the electrical outlet. 3 Reconnect the power cord to the electrical outlet. 4 If the button is installed. • To remove the error message, press . Try one . Left Cartridge Incorrect / Right Cartridge Incorrect 1 Remove the indicated print cartridge. 2 Disconnect the power cord ...


