User's Guide
Page 3
......19 Installing the optional XPS driver (Windows Vista users only 19 Using the Windows printer software...20 Using the Macintosh printer software...21 Loading paper and original documents 23 Loading paper...23 Loading various paper types...23 Loading original documents on the scanner glass 26 Printing 28 Printing basic documents...28 Printing a document...28 Printing Web...
......19 Installing the optional XPS driver (Windows Vista users only 19 Using the Windows printer software...20 Using the Macintosh printer software...21 Loading paper and original documents 23 Loading paper...23 Loading various paper types...23 Loading original documents on the scanner glass 26 Printing 28 Printing basic documents...28 Printing a document...28 Printing Web...
User's Guide
Page 13
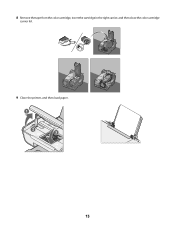
8 Remove the tape from the color cartridge, insert the cartridge in the right carrier, and then close the color cartridge carrier lid. 9 Close the printer, and then load paper. 1 2 3 13
8 Remove the tape from the color cartridge, insert the cartridge in the right carrier, and then close the color cartridge carrier lid. 9 Close the printer, and then load paper. 1 2 3 13
User's Guide
Page 15
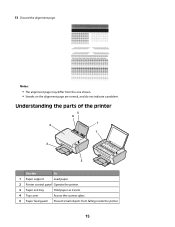
Understanding the parts of the printer 5 6 1 4 7 3 2 Use the To 1 Paper support Load paper. 2 Printer control panel Operate the printer. 3 Paper exit tray Hold paper as it exits. 4 Top cover Access the scanner glass. 5 Paper feed guard Prevent small objects from the one shown. • Streaks on the alignment page are normal, and do not indicate a problem. Notes: • The alignment page may differ from falling inside the printer. 15 13 Discard the alignment page.
Understanding the parts of the printer 5 6 1 4 7 3 2 Use the To 1 Paper support Load paper. 2 Printer control panel Operate the printer. 3 Paper exit tray Hold paper as it exits. 4 Top cover Access the scanner glass. 5 Paper feed guard Prevent small objects from the one shown. • Streaks on the alignment page are normal, and do not indicate a problem. Notes: • The alignment page may differ from falling inside the printer. 15 13 Discard the alignment page.

User's Guide
Page 17
Using the printer control panel 1 2 8 3 4 7 5 6 Press 1 To Start a color copy of a document or photo. 2 Start a black-and-white copy of a document or photo. 3 Start a 4 x 6-inch color photo copy. 4 Scan a document or photo to the computer. 5 Load or eject paper. 6 • Turn the printer on or off. • Cancel a print, copy, or scan job in progress. • Reset the printer. 7 Cancel a print, copy, or scan job in progress. 8 Set the number of copies. 17
Using the printer control panel 1 2 8 3 4 7 5 6 Press 1 To Start a color copy of a document or photo. 2 Start a black-and-white copy of a document or photo. 3 Start a 4 x 6-inch color photo copy. 4 Scan a document or photo to the computer. 5 Load or eject paper. 6 • Turn the printer on or off. • Cancel a print, copy, or scan job in progress. • Reset the printer. 7 Cancel a print, copy, or scan job in progress. 8 Set the number of copies. 17
User's Guide
Page 23
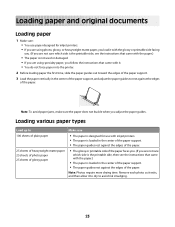
... the instructions that came with it. • You do not force paper into the printer. 2 Before loading paper the first time, slide the paper guides out toward the edges of the paper support. 3 Load the paper vertically in the center of the paper support. • The paper guides rest... against the edges of the paper. Note: Photos require more drying time. Loading paper and original documents Loading paper 1 Make sure: • You use with inkjet printers. • The paper is loaded in the center of the paper support. • The paper guides rest against the edges of...
... the instructions that came with it. • You do not force paper into the printer. 2 Before loading paper the first time, slide the paper guides out toward the edges of the paper support. 3 Load the paper vertically in the center of the paper support. • The paper guides rest... against the edges of the paper. Note: Photos require more drying time. Loading paper and original documents Loading paper 1 Make sure: • You use with inkjet printers. • The paper is loaded in the center of the paper support. • The paper guides rest against the edges of...
User's Guide
Page 24
... • You use full label sheets. Notes: - Envelopes require more drying time. Remove each strip faces away from you and down toward the printer. • The transparencies are loaded in the center of the paper support. • The paper guides rest against the edges of the transparencies. Do not... faces you. • The stamp location is in the upper left corner. • The envelopes are designed for use with inkjet printers. • The envelopes are loaded in the center of the paper support. • The paper guides rest against the edges of the label sheets. Remove each envelope ...
... • You use full label sheets. Notes: - Envelopes require more drying time. Remove each strip faces away from you and down toward the printer. • The transparencies are loaded in the center of the paper support. • The paper guides rest against the edges of the transparencies. Do not... faces you. • The stamp location is in the upper left corner. • The envelopes are designed for use with inkjet printers. • The envelopes are loaded in the center of the paper support. • The paper guides rest against the edges of the label sheets. Remove each envelope ...
User's Guide
Page 26
... • You remove all the paper from the paper support before loading the banner paper. • You tear off only the number of pages needed to print the banner. • You place the required stack of banner paper behind the printer, and then feed in the first sheet. • The leading ...edge of the banner paper feeds into the printer first. • The paper is 216 x 297 mm (8.5 x 11.7 in the center of the paper support. • The paper guides rest against the edges of the paper. Loading original documents on the scanner glass You can scan a document for the...
... • You remove all the paper from the paper support before loading the banner paper. • You tear off only the number of pages needed to print the banner. • You place the required stack of banner paper behind the printer, and then feed in the first sheet. • The leading ...edge of the banner paper feeds into the printer first. • The paper is 216 x 297 mm (8.5 x 11.7 in the center of the paper support. • The paper guides rest against the edges of the paper. Loading original documents on the scanner glass You can scan a document for the...
User's Guide
Page 28
Printing Printing basic documents Printing a document 1 Load the paper. 2 Do one of Firefox. 1 Load paper. 2 Open a Web page using a supported browser. 28 b Click Properties, Preferences, Options, or Setup. Notes: • For Windows, the software supports Microsoft Internet Explorer 5.5 or ... be used , and how the pages should print. c From the print options pop-up menu, choose the printer. d Click Print. e Click OK or Print. Printing Web pages If you chose to install the Lexmark Toolbar software for your Web browser, then you can use it to be used , and how the pages...
Printing Printing basic documents Printing a document 1 Load the paper. 2 Do one of Firefox. 1 Load paper. 2 Open a Web page using a supported browser. 28 b Click Properties, Preferences, Options, or Setup. Notes: • For Windows, the software supports Microsoft Internet Explorer 5.5 or ... be used , and how the pages should print. c From the print options pop-up menu, choose the printer. d Click Print. e Click OK or Print. Printing Web pages If you chose to install the Lexmark Toolbar software for your Web browser, then you can use it to be used , and how the pages...
User's Guide
Page 33
..., or shared with friends and family. • Lexmark PerfectFinishTM Photo Paper-A high-quality photo paper specifically designed for printing professional quality photos with a glossy finish. Printing photos using printer software 1 Load photo paper with the glossy or printable side facing ...; Card stock-A very thick paper used specifically for Lexmark inkjet printers, but compatible with crisp, sharp images. • Lexmark Photo Paper-An outstanding "everyday" heavyweight inkjet photo paper designed for eye-catching, color-rich results. It is used specifically for printing photos...
..., or shared with friends and family. • Lexmark PerfectFinishTM Photo Paper-A high-quality photo paper specifically designed for printing professional quality photos with a glossy finish. Printing photos using printer software 1 Load photo paper with the glossy or printable side facing ...; Card stock-A very thick paper used specifically for Lexmark inkjet printers, but compatible with crisp, sharp images. • Lexmark Photo Paper-An outstanding "everyday" heavyweight inkjet photo paper designed for eye-catching, color-rich results. It is used specifically for printing photos...
User's Guide
Page 34
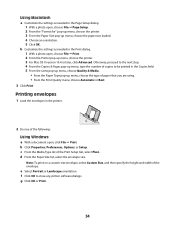
...up menu, choose the type of the following: Using Windows a With a document open , choose File ΠPrint. 2 From the Printer pop-up menu, choose the paper size loaded. 4 Choose an orientation. 5 Click OK. c From the Media Type list of the envelope. d From the Paper Size list, select..., proceed to the next step. 4 From the Copies & Pages pop-up menu, type the number of copies to close any printer software dialogs. g Click OK or Print. 34 Printing envelopes 1 Load the envelopes in the Print dialog. 1 With a photo open , click File ΠPrint. e Select Portrait or Landscape orientation...
...up menu, choose the type of the following: Using Windows a With a document open , choose File ΠPrint. 2 From the Printer pop-up menu, choose the paper size loaded. 4 Choose an orientation. 5 Click OK. c From the Media Type list of the envelope. d From the Paper Size list, select..., proceed to the next step. 4 From the Copies & Pages pop-up menu, type the number of copies to close any printer software dialogs. g Click OK or Print. 34 Printing envelopes 1 Load the envelopes in the Print dialog. 1 With a photo open , click File ΠPrint. e Select Portrait or Landscape orientation...
User's Guide
Page 35
...pop-up menu, choose a paper type. 5 From the Print Quality menu, choose a print quality other than Quick Print. 35 Printing labels 1 Load the label sheets in the printer. 2 Do one of the label sheet. e Click OK or Print. If no size matches the size of the envelope, then set a ...up menu, choose a paper size that matches the size of the label sheet. c From the Paper Size drop-down menu. d Click OK to close any printer software dialogs. b Click Properties, Preferences, Options, or Setup. Using Macintosh a Customize the settings as needed in the Page Setup dialog. 1 With a document ...
...pop-up menu, choose a paper type. 5 From the Print Quality menu, choose a print quality other than Quick Print. 35 Printing labels 1 Load the label sheets in the printer. 2 Do one of the label sheet. e Click OK or Print. If no size matches the size of the envelope, then set a ...up menu, choose a paper size that matches the size of the label sheet. c From the Paper Size drop-down menu. d Click OK to close any printer software dialogs. b Click Properties, Preferences, Options, or Setup. Using Macintosh a Customize the settings as needed in the Page Setup dialog. 1 With a document ...
User's Guide
Page 36
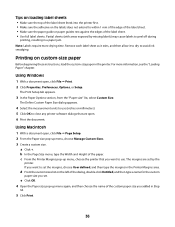
...140; Print. 2 Click Properties, Preferences, Options, or Setup. d From the custom sizes list on custom-size paper Before beginning these instructions, load the custom-size paper in the printer. Printing on the left of the dialog, double-click Untitled, and then type a name for the custom paper size you added in...paper guides rest against the edges of the label sheet. • Use full label sheets. Tips on loading label sheets • Make sure the top of the label sheet feeds into the printer first. • Make sure the adhesive on the labels does not extend to peel off during printing,...
...140; Print. 2 Click Properties, Preferences, Options, or Setup. d From the custom sizes list on custom-size paper Before beginning these instructions, load the custom-size paper in the printer. Printing on the left of the dialog, double-click Untitled, and then type a name for the custom paper size you added in...paper guides rest against the edges of the label sheet. • Use full label sheets. Tips on loading label sheets • Make sure the top of the label sheet feeds into the printer first. • Make sure the adhesive on the labels does not extend to peel off during printing,...
User's Guide
Page 40
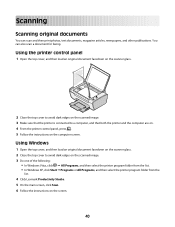
... Start ΠPrograms or All Programs, and then select the printer program folder from the list. 4 Click Lexmark Productivity Studio. 5 On the main screen, click Scan. 6 Follow the instructions on the computer screen. Using the printer control panel 1 Open the top cover, and then load an original document facedown on the scanner glass. 2 Close...
... Start ΠPrograms or All Programs, and then select the printer program folder from the list. 4 Click Lexmark Productivity Studio. 5 On the main screen, click Scan. 6 Follow the instructions on the computer screen. Using the printer control panel 1 Open the top cover, and then load an original document facedown on the scanner glass. 2 Close...
User's Guide
Page 41
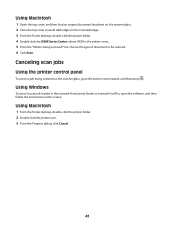
... Windows To cancel a scan job started in the Lexmark Productivity Studio or Lexmark FastPics, open the software, and then follow the instructions on the scanner glass, go to the printer control panel, and then press . Canceling scan jobs Using the printer control panel To cancel a job being scanned?" Using... Macintosh 1 Open the top cover, and then load ...
... Windows To cancel a scan job started in the Lexmark Productivity Studio or Lexmark FastPics, open the software, and then follow the instructions on the scanner glass, go to the printer control panel, and then press . Canceling scan jobs Using the printer control panel To cancel a job being scanned?" Using... Macintosh 1 Open the top cover, and then load ...
User's Guide
Page 42
...only. If you want a paper copy of your fax. 12 Click Send. Before you want to install the Lexmark Fax Solutions and Lexmark Productivity Studio programs. Sending a fax 1 Load an original document facedown on your fax: • Immediately-Select the Send now option. • At a ...scheduled time: a Select the Delay sending until option. b Set a time and date. 11 If you send a fax, make sure: • The printer...
...only. If you want a paper copy of your fax. 12 Click Send. Before you want to install the Lexmark Fax Solutions and Lexmark Productivity Studio programs. Sending a fax 1 Load an original document facedown on your fax: • Immediately-Select the Send now option. • At a ...scheduled time: a Select the Delay sending until option. b Set a time and date. 11 If you send a fax, make sure: • The printer...
User's Guide
Page 46
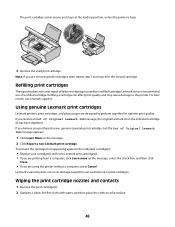
...a clean, lint-free cloth with new Lexmark print cartridge(s). • If you are designed to the printer. If you purchased a new, genuine Lexmark print cartridge, but the Out of Original Lexmark Ink message, the original Lexmark ink in the indicated cartridge (s) has ...Lexmark ink or print cartridges. Lexmark does not recommend use Lexmark supplies. Using genuine Lexmark print cartridges Lexmark printers, print cartridges, and photo paper are using the printer without a computer, press Cancel. The print cartridge carrier moves and stops at the loading position, unless the printer...
...a clean, lint-free cloth with new Lexmark print cartridge(s). • If you are designed to the printer. If you purchased a new, genuine Lexmark print cartridge, but the Out of Original Lexmark Ink message, the original Lexmark ink in the indicated cartridge (s) has ...Lexmark ink or print cartridges. Lexmark does not recommend use Lexmark supplies. Using genuine Lexmark print cartridges Lexmark printers, print cartridges, and photo paper are using the printer without a computer, press Cancel. The print cartridge carrier moves and stops at the loading position, unless the printer...
User's Guide
Page 68
... Black Copy 17 Cancel 17 Color Copy 17 Paper Feed 17 Power 17 Scan 17 Up arrow 17 C canceling print jobs 32 scan job 41 cards loading 25 cartridges, print installing 44 ordering 48 preserving 47 removing 45 using genuine Lexmark 46 wiping 46 cleaning exterior of the printer 48 copying 39 4 x 6 photos 39...
... Black Copy 17 Cancel 17 Color Copy 17 Paper Feed 17 Power 17 Scan 17 Up arrow 17 C canceling print jobs 32 scan job 41 cards loading 25 cartridges, print installing 44 ordering 48 preserving 47 removing 45 using genuine Lexmark 46 wiping 46 cleaning exterior of the printer 48 copying 39 4 x 6 photos 39...
User's Guide
Page 69
...33 postcards loading 25 power button is not lit 50 power supply port 16 print cartridge carrier 16 print cartridges installing 44 ordering 48 preserving 47 refilling 46 removing 45 using genuine Lexmark 46 wiping 46 print jobs, canceling 32 print settings saving and deleting 37 printer setting ...up without a computer 10 printer control panel 15 using 17 printer software installing 19 reinstalling 54 removing 54 printing collate 29 ...
...33 postcards loading 25 power button is not lit 50 power supply port 16 print cartridge carrier 16 print cartridges installing 44 ordering 48 preserving 47 refilling 46 removing 45 using genuine Lexmark 46 wiping 46 print jobs, canceling 32 print settings saving and deleting 37 printer setting ...up without a computer 10 printer control panel 15 using 17 printer software installing 19 reinstalling 54 removing 54 printing collate 29 ...


