
User's Guide
Page 2
... accessible. Do not set up this product or the manufacturer's authorized replacement power supply and power supply cord. Lexmark is not responsible for the use of other than those described in the user documentation, to a professional service ...product or make sure to keep your product supports Macintosh, see the Mac Help installed with the use of specific Lexmark components. CAUTION-POTENTIAL INJURY: When closing the scanner unit, make any electrical or cabling connections, such as the ..., tested, and approved to meet strict global safety standards with the printer software.
... accessible. Do not set up this product or the manufacturer's authorized replacement power supply and power supply cord. Lexmark is not responsible for the use of other than those described in the user documentation, to a professional service ...product or make sure to keep your product supports Macintosh, see the Mac Help installed with the use of specific Lexmark components. CAUTION-POTENTIAL INJURY: When closing the scanner unit, make any electrical or cabling connections, such as the ..., tested, and approved to meet strict global safety standards with the printer software.
User's Guide
Page 3
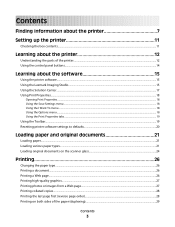
......11 Learning about the printer 12 Understanding the parts of the printer...12 Using the control panel buttons...14 Learning about the software 15 Using the printer software...15 Using the Lexmark Imaging Studio...15 Using the Solution Center...17 Using Print Properties...18 Opening Print Properties ...18 Using the Save Settings menu...
......11 Learning about the printer 12 Understanding the parts of the printer...12 Using the control panel buttons...14 Learning about the software 15 Using the printer software...15 Using the Lexmark Imaging Studio...15 Using the Solution Center...17 Using Print Properties...18 Opening Print Properties ...18 Using the Save Settings menu...
User's Guide
Page 5
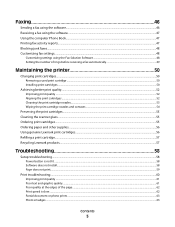
...Phone Book...47 Printing fax activity reports...47 Blocking junk faxes...48 Customizing fax settings...48 Customizing settings using the Fax Solution Software ...48 Setting the number of rings before receiving a fax automatically 49 Maintaining the printer 50 Changing print cartridges...50 Removing...cartridges...55 Ordering paper and other supplies...56 Using genuine Lexmark print cartridges...56 Refilling a print cartridge...57 Recycling Lexmark products...57 Troubleshooting 58 Setup troubleshooting...58 Power button is not lit ...58 Software does not install...58 Page does not print...59 ...
...Phone Book...47 Printing fax activity reports...47 Blocking junk faxes...48 Customizing fax settings...48 Customizing settings using the Fax Solution Software ...48 Setting the number of rings before receiving a fax automatically 49 Maintaining the printer 50 Changing print cartridges...50 Removing...cartridges...55 Ordering paper and other supplies...56 Using genuine Lexmark print cartridges...56 Refilling a print cartridge...57 Recycling Lexmark products...57 Troubleshooting 58 Setup troubleshooting...58 Power button is not lit ...58 Software does not install...58 Page does not print...59 ...
User's Guide
Page 6
... feed paper, envelopes, or specialty media 69 Banner paper jams ...69 Blinking lights on the control panel...70 Error messages...71 Removing and reinstalling the software...72 Notices 73 Edition notice...73 Power consumption...79 Index 81 Contents 6
... feed paper, envelopes, or specialty media 69 Banner paper jams ...69 Blinking lights on the control panel...70 Error messages...71 Removing and reinstalling the software...72 Notices 73 Edition notice...73 Power consumption...79 Index 81 Contents 6
User's Guide
Page 7
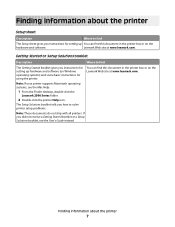
.... If you instructions for setting up hardware and software (on Windows operating systems) and some basic instructions for setting up You can find this document in the printer box or on the Lexmark Web site at www.lexmark.com. You can find The Getting Started booklet gives...Series folder. 2 Double-click the printer Help icon. The Setup Solutions booklet tells you instructions for using the printer. Lexmark Web site at www.lexmark.com. Getting Started or Setup Solutions booklet Description Where to solve printer setup problems. Note: These documents do not ship...
.... If you instructions for setting up hardware and software (on Windows operating systems) and some basic instructions for setting up You can find this document in the printer box or on the Lexmark Web site at www.lexmark.com. You can find The Getting Started booklet gives...Series folder. 2 Double-click the printer Help icon. The Setup Solutions booklet tells you instructions for using the printer. Lexmark Web site at www.lexmark.com. Getting Started or Setup Solutions booklet Description Where to solve printer setup problems. Note: These documents do not ship...
User's Guide
Page 8
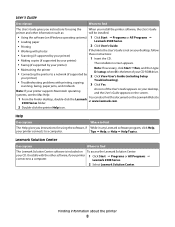
...: An icon of your CD. Finding information about the printer 8 Lexmark Solution Center Description Where to find The Lexmark Solution Center software is the letter of the User's Guide appears on To access the Lexmark Solution Center: your CD-ROM drive. 2 Click View User's Guide... User's Guide Description Where to find The User's Guide gives you instructions for using the When you instructions for using the software, if While in any Lexmark software program, click Help, your printer connects to a computer. Note: If necessary, click Start ΠRun, and then ...
...: An icon of your CD. Finding information about the printer 8 Lexmark Solution Center Description Where to find The Lexmark Solution Center software is the letter of the User's Guide appears on To access the Lexmark Solution Center: your CD-ROM drive. 2 Click View User's Guide... User's Guide Description Where to find The User's Guide gives you instructions for using the When you instructions for using the software, if While in any Lexmark software program, click Help, your printer connects to a computer. Note: If necessary, click Start ΠRun, and then ...
User's Guide
Page 11
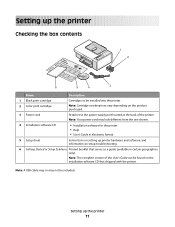
... may look different from the one shown. 4 Installation software CD • Installation software for the printer • Help • User's Guide in certain geographies only). Setting up printer hardware and software, and information on setup troubleshooting. 6 Getting Started or... 1 Black print cartridge Cartridges to be installed into the printer. 2 Color print cartridge Note: Cartridge combinations vary depending on the installation software CD that serves as a guide (available in electronic format 5 Setup sheet Instructions on setting up the printer 11 Note: Your power...
... may look different from the one shown. 4 Installation software CD • Installation software for the printer • Help • User's Guide in certain geographies only). Setting up printer hardware and software, and information on setup troubleshooting. 6 Getting Started or... 1 Black print cartridge Cartridges to be installed into the printer. 2 Color print cartridge Note: Cartridge combinations vary depending on the installation software CD that serves as a guide (available in electronic format 5 Setup sheet Instructions on setting up the printer 11 Note: Your power...
User's Guide
Page 15
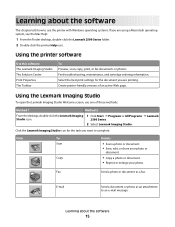
... your photo or document. • Copy a photo or document. • Reprint or enlarge your photo. Using the printer software Use this software The Lexmark Imaging Studio The Solution Center Print Properties The Toolbar To Preview, scan, copy, print, or fax documents or photos. Using the...If you are printing. Find troubleshooting, maintenance, and cartridge ordering information. Click the Lexmark Imaging Studio icon for the document you want to an e-mail message. Learning about the software 15 Select the best print settings for the task you are using a Macintosh operating...
... your photo or document. • Copy a photo or document. • Reprint or enlarge your photo. Using the printer software Use this software The Lexmark Imaging Studio The Solution Center Print Properties The Toolbar To Preview, scan, copy, print, or fax documents or photos. Using the...If you are printing. Find troubleshooting, maintenance, and cartridge ordering information. Click the Lexmark Imaging Studio icon for the document you want to an e-mail message. Learning about the software 15 Select the best print settings for the task you are using a Macintosh operating...
User's Guide
Page 16
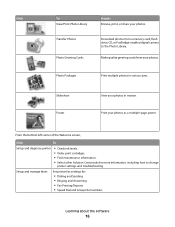
... Center tabs for : • Dialing and Sending • Ringing and Answering • Fax Printing/Reports • Speed Dial and Group Dial numbers Learning about the software 16 Slideshow Poster View your photos. Download photos from your photos in various sizes. Make quality greeting cards from a memory card, flash drive, CD, or...
... Center tabs for : • Dialing and Sending • Ringing and Answering • Fax Printing/Reports • Speed Dial and Group Dial numbers Learning about the software 16 Slideshow Poster View your photos. Download photos from your photos in various sizes. Make quality greeting cards from a memory card, flash drive, CD, or...
User's Guide
Page 17
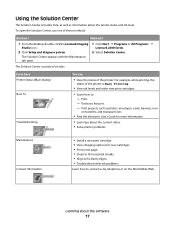
... You can • View the status of these methods: Method 1 Method 2 1 From the desktop, double-click the Lexmark Imaging Studio icon. 2 Click Setup and diagnose printer. 1 Click Start Œ Programs or All Programs Œ Lexmark 2500 Series. 2 Select Solution Center. Using the Solution Center The Solution Center provides help, as well as... status and ink level. Use basic features. - on transfers, and transparencies. • Find the electronic User's Guide for more information. • Learn tips about the software 17 To open .
... You can • View the status of these methods: Method 1 Method 2 1 From the desktop, double-click the Lexmark Imaging Studio icon. 2 Click Setup and diagnose printer. 1 Click Start Œ Programs or All Programs Œ Lexmark 2500 Series. 2 Select Solution Center. Using the Solution Center The Solution Center provides help, as well as... status and ink level. Use basic features. - on transfers, and transparencies. • Find the electronic User's Guide for more information. • Learn tips about the software 17 To open .
User's Guide
Page 18
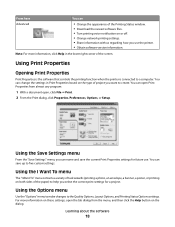
... corner of the screen. From here Advanced You can • Change the appearance of the Printing Status window. • Download the newest software files. • Turn printing voice notification on both sides of the paper) to help you select the correct print settings for future use...can name and save up to five custom settings. Using the Options menu Use the "Options" menu to make changes to a computer. Learning about the software 18 Note: For more information on these settings, open , click File Œ Print. 2 From the Print dialog, click Properties, Preferences, Options, ...
... corner of the screen. From here Advanced You can • Change the appearance of the Printing Status window. • Download the newest software files. • Turn printing voice notification on both sides of the paper) to help you select the correct print settings for future use...can name and save up to five custom settings. Using the Options menu Use the "Options" menu to make changes to a computer. Learning about the software 18 Note: For more information on these settings, open , click File Œ Print. 2 From the Print dialog, click Properties, Preferences, Options, ...
User's Guide
Page 19
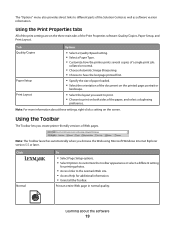
... sides of the print settings are on the printed page: portrait or landscape. • Select the layout you want to print. • Choose to the Lexmark Web site. • Access Help for printing photos. • Access links to print on the screen. Tab Quality/Copies Paper Setup Print Layout Options •...; Specify the size of paper loaded. • Select the orientation of the document on the three main tabs of the Solution Center as well as software version information. The "Options" menu also provides direct links to different parts of the Print Properties...
... sides of the print settings are on the printed page: portrait or landscape. • Select the layout you want to print. • Choose to the Lexmark Web site. • Access Help for printing photos. • Access links to print on the screen. Tab Quality/Copies Paper Setup Print Layout Options •...; Specify the size of paper loaded. • Select the orientation of the document on the three main tabs of the Solution Center as well as software version information. The "Options" menu also provides direct links to different parts of the Print Properties...
User's Guide
Page 20
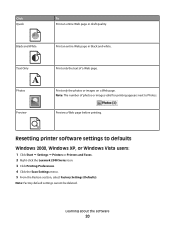
... Windows 2000, Windows XP, or Windows Vista users: 1 Click Start ΠSettings ΠPrinters or Printers and Faxes. 2 Right-click the Lexmark 2500 Series icon. 3 Click Printing Preferences. 4 Click the Save Settings menu. 5 From the Restore section, select Factory Settings (Defaults). Note: The... of a Web page. Note: Factory default settings cannot be deleted. Preview a Web page before printing. Resetting printer software settings to Photos. Learning about the software 20 Print only the photos or images on a Web page. Black and White Print an entire Web page in draft...
... Windows 2000, Windows XP, or Windows Vista users: 1 Click Start ΠSettings ΠPrinters or Printers and Faxes. 2 Right-click the Lexmark 2500 Series icon. 3 Click Printing Preferences. 4 Click the Save Settings menu. 5 From the Restore section, select Factory Settings (Defaults). Note: The... of a Web page. Note: Factory default settings cannot be deleted. Preview a Web page before printing. Resetting printer software settings to Photos. Learning about the software 20 Print only the photos or images on a Web page. Black and White Print an entire Web page in draft...

User's Guide
Page 29
... Printing is selected. 5 Select a binding edge of paper. Note: Do not force the transparencies into the printer. Printing envelopes 1 Load envelopes. 2 From the software application, click File Œ Print. 3 Click Properties, Preferences, Options, or Setup. 4 From the "I Want To" menu, click Print on both sides of... sheet of Side Flip or Top Flip. 6 Make sure Print Instruction Page to Assist in Reloading is selected. 7 Click OK to close any printer software dialogs that are open . 7 Print the document. 5 Click OK. 6 Click OK or Print. Notes: • The instruction sheet for two-...
... Printing is selected. 5 Select a binding edge of paper. Note: Do not force the transparencies into the printer. Printing envelopes 1 Load envelopes. 2 From the software application, click File Œ Print. 3 Click Properties, Preferences, Options, or Setup. 4 From the "I Want To" menu, click Print on both sides of... sheet of Side Flip or Top Flip. 6 Make sure Print Instruction Page to Assist in Reloading is selected. 7 Click OK to close any printer software dialogs that are open . 7 Print the document. 5 Click OK. 6 Click OK or Print. Notes: • The instruction sheet for two-...

User's Guide
Page 30
..., remove each card as it exits, and let it dry before stacking. Printing cards 1 Load greeting cards, index cards, or postcards. 2 From the software application, click File Œ Print. 3 Click Properties, Preferences, Options, or Setup. 4 Select a Quality/Speed setting. Notes: • To avoid paper... not force iron-on transfers. Notes: • Most envelopes use landscape orientation. • Make sure the same orientation is also selected in the software application. 7 Click OK. 8 Click OK. 9 Click OK or Print. Select Photo for photos and greeting cards and Normal for other types of...
..., remove each card as it exits, and let it dry before stacking. Printing cards 1 Load greeting cards, index cards, or postcards. 2 From the software application, click File Œ Print. 3 Click Properties, Preferences, Options, or Setup. 4 Select a Quality/Speed setting. Notes: • To avoid paper... not force iron-on transfers. Notes: • Most envelopes use landscape orientation. • Make sure the same orientation is also selected in the software application. 7 Click OK. 8 Click OK. 9 Click OK or Print. Select Photo for photos and greeting cards and Normal for other types of...

User's Guide
Page 45
Customizing scan settings using the computer 1 From the desktop, double-click the Lexmark Imaging Studio icon. 2 Click Scan. 3 Click Custom Settings. 4 Change the settings as needed. Size • You can select the area to move Scanning 45 Convert... the program further down in the Scan Application list 1 From the desktop, double-click the Lexmark Imaging Studio icon. 2 Click View / Print Photo Library. 3 From the program taskbar at the bottom of the screen, click Other Software. 4 Click Modify Application Order. 5 Select a program from the drop-down list. Setting Options Color ...
Customizing scan settings using the computer 1 From the desktop, double-click the Lexmark Imaging Studio icon. 2 Click Scan. 3 Click Custom Settings. 4 Change the settings as needed. Size • You can select the area to move Scanning 45 Convert... the program further down in the Scan Application list 1 From the desktop, double-click the Lexmark Imaging Studio icon. 2 Click View / Print Photo Library. 3 From the program taskbar at the bottom of the screen, click Other Software. 4 Click Modify Application Order. 5 Select a program from the drop-down list. Setting Options Color ...
User's Guide
Page 46
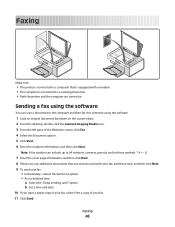
...the recipient information, and then click Next. Note: A fax number can scan a document to the computer and then fax it to someone using the software You can include up to send with a modem. • The computer is equipped with your fax, add these symbols 7 Enter the cover page ...information, and then click Next. 8 If there are turned on the scanner glass. 2 From the desktop, double-click the Lexmark Imaging Studio icon. 3 From the left pane of your fax: • Immediately-Select the Send now option. • At a scheduled time: a Select...
...the recipient information, and then click Next. Note: A fax number can scan a document to the computer and then fax it to someone using the software You can include up to send with a modem. • The computer is equipped with your fax, add these symbols 7 Enter the cover page ...information, and then click Next. 8 If there are turned on the scanner glass. 2 From the desktop, double-click the Lexmark Imaging Studio icon. 3 From the left pane of your fax: • Immediately-Select the Send now option. • At a scheduled time: a Select...
User's Guide
Page 47
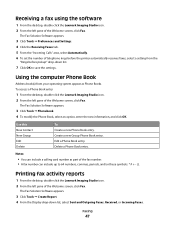
... number. • A fax number can include a calling card number as Phone Books. Delete a Phone Book entry. Edit a Phone Book entry. The Fax Solution Software appears. 3 Click Tools Œ Create Report. 4 From the Display drop-down list. 7 Click OK to 64 numbers, commas, periods, and/or these symbols ... the number of telephone rings before pickup" drop-down list, select Sent and Outgoing Faxes, Received, or Incoming Faxes. Receiving a fax using the software 1 From the desktop, double-click the Lexmark Imaging Studio icon. 2 From the left pane of the Welcome screen, click Fax.
... number. • A fax number can include a calling card number as Phone Books. Delete a Phone Book entry. Edit a Phone Book entry. The Fax Solution Software appears. 3 Click Tools Œ Create Report. 4 From the Display drop-down list. 7 Click OK to 64 numbers, commas, periods, and/or these symbols ... the number of telephone rings before pickup" drop-down list, select Sent and Outgoing Faxes, Received, or Incoming Faxes. Receiving a fax using the software 1 From the desktop, double-click the Lexmark Imaging Studio icon. 2 From the left pane of the Welcome screen, click Fax.

User's Guide
Page 48
.... Faxing 48 Customizing fax settings Customizing settings using the Fax Solution Software You can block faxes from specific phone numbers: a Click Manage Block List. Blocking junk faxes 1 From the desktop, double-click the Lexmark Imaging Studio icon. 2 From the left pane of the fax.... • A fax number can include up to assign the current modem exclusively for Lexmark Fax Center. • Select Modem Speaker options. • Change dialing properties. b Click New. The Fax Solution Software appears. 3 Click Tools Œ Preferences and Settings. 4 Click the Receiving Faxes tab...
.... Faxing 48 Customizing fax settings Customizing settings using the Fax Solution Software You can block faxes from specific phone numbers: a Click Manage Block List. Blocking junk faxes 1 From the desktop, double-click the Lexmark Imaging Studio icon. 2 From the left pane of the fax.... • A fax number can include up to assign the current modem exclusively for Lexmark Fax Center. • Select Modem Speaker options. • Change dialing properties. b Click New. The Fax Solution Software appears. 3 Click Tools Œ Preferences and Settings. 4 Click the Receiving Faxes tab...

User's Guide
Page 49
... faxes before deleting them. • Choose a default phone book. 5 Click OK after you finish customizing the settings. 6 Close the Fax Solution Software. Setting the number of rings before pickup" drop-down list, select the setting you want . 7 Click OK. Faxing 49 The Fax Solution... Faxes tab. 5 From the "Incoming Calls" area, select Automatically. 6 From the "Rings before receiving a fax automatically 1 From the desktop, double-click the Lexmark Imaging Studio icon. 2 From the left pane of times you want the machine to redial and the time between those attempts if the fax cannot...
... faxes before deleting them. • Choose a default phone book. 5 Click OK after you finish customizing the settings. 6 Close the Fax Solution Software. Setting the number of rings before pickup" drop-down list, select the setting you want . 7 Click OK. Faxing 49 The Fax Solution... Faxes tab. 5 From the "Incoming Calls" area, select Automatically. 6 From the "Rings before receiving a fax automatically 1 From the desktop, double-click the Lexmark Imaging Studio icon. 2 From the left pane of times you want the machine to redial and the time between those attempts if the fax cannot...


