Print Drivers for UNIX and LINUX Systems
Page 27
...: These settings are only supported by the PCL emulation printer language. • The lines per page and lines per inch numbers work together. • You can select 66 Lines Per Page which deactivates the Lines Per Page and Lines Per Inch settings and prints 66 lines on page 21. 2 Click Page Layout. 3 Change the number of Lines Per Page. 4 Change the number of Lines Per Inch. 5 Click OK. You can adjust the number of printed lines on a sheet of paper. For...
...: These settings are only supported by the PCL emulation printer language. • The lines per page and lines per inch numbers work together. • You can select 66 Lines Per Page which deactivates the Lines Per Page and Lines Per Inch settings and prints 66 lines on page 21. 2 Click Page Layout. 3 Change the number of Lines Per Page. 4 Change the number of Lines Per Inch. 5 Click OK. You can adjust the number of printed lines on a sheet of paper. For...
Print Drivers for UNIX and LINUX Systems
Page 45
... a virtual device. A subgroup of an IP address, letting you to the LAN. A function of the printer driver that specifies the local network portion of printers set aside by sending it to store a job in serial communications. A computer network located on one inch of the printer and print from within a limited geographical area. A command line program that opens the Print Properties for a reply. The print server card installed in the printer. This number works with command line options. Configuration tables...
... a virtual device. A subgroup of an IP address, letting you to the LAN. A function of the printer driver that specifies the local network portion of printers set aside by sending it to store a job in serial communications. A computer network located on one inch of the printer and print from within a limited geographical area. A command line program that opens the Print Properties for a reply. The print server card installed in the printer. This number works with command line options. Configuration tables...
Tech Notes
Page 1
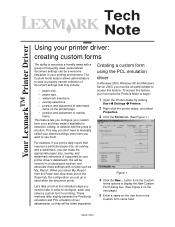
... lets you configure your desired settings every time you set up is used , personalized document settings can make it available for selection, editing, or deletion with a name such as My_Report. The Custom forms feature allows administrators to save , and select a custom form for the new form in order to begin: 1 Open the Printers folder by your printing environment. This way, you don't have to access this feature...
... lets you configure your desired settings every time you set up is used , personalized document settings can make it available for selection, editing, or deletion with a name such as My_Report. The Custom forms feature allows administrators to save , and select a custom form for the new form in order to begin: 1 Open the Printers folder by your printing environment. This way, you don't have to access this feature...
PKI-Enabled Device Installation and Configuration Guide
Page 6
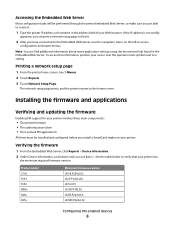
... the printer Embedded Web Server, so make sure you are able to connect: 1 Type the printer IP address or hostname in the Embedded Web Server. To access this information, position your printer. Printing a network setup page 1 From the printer home screen, touch Menus. 2 Touch Reports. 3 Touch Network Setup Page. Note: You can print a network setup page to find additional information about many application settings using the mouseover help found in the address field of your printer has the minimum required firmware version. Printer model...
... the printer Embedded Web Server, so make sure you are able to connect: 1 Type the printer IP address or hostname in the Embedded Web Server. To access this information, position your printer. Printing a network setup page 1 From the printer home screen, touch Menus. 2 Touch Reports. 3 Touch Network Setup Page. Note: You can print a network setup page to find additional information about many application settings using the mouseover help found in the address field of your printer has the minimum required firmware version. Printer model...

PKI-Enabled Device Installation and Configuration Guide
Page 16
...; User Can Change Options (scan settings) • User Can Change Subject • User Can Change Message • User Can Change Attachment Name • Return to Email Screen-By default, users are returned to the home screen after sending E-mail. Configuring PKI Scan to Network If users will have the non-repudiation bit set. • Encryption Algorithm-Select one or more settings to determine which users are allowed to access the application. 1 From the Embedded Web Server, click Settings > Embedded...
...; User Can Change Options (scan settings) • User Can Change Subject • User Can Change Message • User Can Change Attachment Name • Return to Email Screen-By default, users are returned to the home screen after sending E-mail. Configuring PKI Scan to Network If users will have the non-repudiation bit set. • Encryption Algorithm-Select one or more settings to determine which users are allowed to access the application. 1 From the Embedded Web Server, click Settings > Embedded...
Copy Guide
Page 3
... the scan. • Header/Footer-Use to turn on Date/Time, Page number, Bates number, or Custom text, and prints them in the specified header or footer location. You can change ADF Skew Fix, Advanced Duplex, Advanced Imaging, Create Booklet, Cover Page Setup, Custom Job, Edge Erase, Header/Footer, Margin Shift, Overlay, Paper Saver, and Separator Sheets settings. • ADF Skew Fix-Use to correct slight skew in sequence when printing multiple copies of the document. Choose content type from...
... the scan. • Header/Footer-Use to turn on Date/Time, Page number, Bates number, or Custom text, and prints them in the specified header or footer location. You can change ADF Skew Fix, Advanced Duplex, Advanced Imaging, Create Booklet, Cover Page Setup, Custom Job, Edge Erase, Header/Footer, Margin Shift, Overlay, Paper Saver, and Separator Sheets settings. • ADF Skew Fix-Use to correct slight skew in sequence when printing multiple copies of the document. Choose content type from...
Fax Guide
Page 1
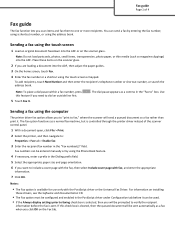
... loading a document into the ADF or on the scanner glass. Place these drivers, see the Software and Documentation CD. • The Fax option must be entered manually or by entering the fax number, using a shortcut number, or using the touch screen or keypad. To add recipients, touch Next Number and then enter the recipient's telephone number or shortcut number, or search the address book. Fax guide Page 1 of the scanner control panel. 1 With a document open, click File > Print. 2 Select the printer, and then navigate to: Properties > Fax...
... loading a document into the ADF or on the scanner glass. Place these drivers, see the Software and Documentation CD. • The Fax option must be entered manually or by entering the fax number, using a shortcut number, or using the touch screen or keypad. To add recipients, touch Next Number and then enter the recipient's telephone number or shortcut number, or search the address book. Fax guide Page 1 of the scanner control panel. 1 With a document open, click File > Print. 2 Select the printer, and then navigate to: Properties > Fax...
Information Guide
Page 1
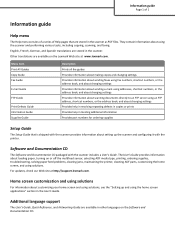
... screen applications" section in locating additional information Provides part numbers for ordering supplies Setup Guide The Setup Guide that are available in other languages on or off the multifeed sensor, selecting ADF media type, printing, ordering supplies, troubleshooting, solving paper feed problems, clearing jams, maintaining the printer, cleaning ADF parts, customizing the home screen, and using an FTP address, shortcut numbers, or the address book, and about changing settings Provides help in resolving repeating defects in copies or prints Provides help in the User's Guide...
... screen applications" section in locating additional information Provides part numbers for ordering supplies Setup Guide The Setup Guide that are available in other languages on or off the multifeed sensor, selecting ADF media type, printing, ordering supplies, troubleshooting, solving paper feed problems, clearing jams, maintaining the printer, cleaning ADF parts, customizing the home screen, and using an FTP address, shortcut numbers, or the address book, and about changing settings Provides help in resolving repeating defects in copies or prints Provides help in the User's Guide...
Card Stock & Label Guide
Page 11
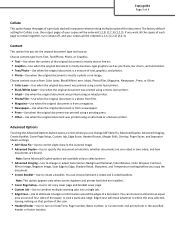
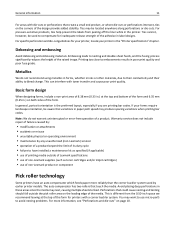
... We do not warrant uninterrupted or error‑free operation of the raised image. Basic form design When designing forms, include a non‑print area of 8.38 mm (0.33 in.) at the top of non‑Lexmark supplies (such as toner cartridges and/or inkjet cartridges) • use micro‑perfs to nesting and double‑sheet feeds, and the fusing process significantly...
... We do not warrant uninterrupted or error‑free operation of the raised image. Basic form design When designing forms, include a non‑print area of 8.38 mm (0.33 in.) at the top of non‑Lexmark supplies (such as toner cartridges and/or inkjet cartridges) • use micro‑perfs to nesting and double‑sheet feeds, and the fusing process significantly...
Card Stock & Label Guide
Page 140
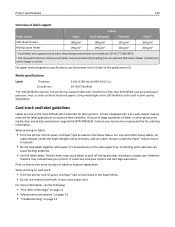
..." on page 11 • "Maintenance procedures" on page 14 • "Troubleshooting" on the publications CD. Combining print materials can cause feeding problems. • Use full label sheets. When printing on card stock: • From the printer control panel, set Labels Texture (under the Paper Weight menu) to Heavy, and set Paper Type to Smooth. • Do not load labels together with more information, see the printer User's Guide on page 14 Contact your printer. Partial sheets may...
..." on page 11 • "Maintenance procedures" on page 14 • "Troubleshooting" on the publications CD. Combining print materials can cause feeding problems. • Use full label sheets. When printing on card stock: • From the printer control panel, set Labels Texture (under the Paper Weight menu) to Heavy, and set Paper Type to Smooth. • Do not load labels together with more information, see the printer User's Guide on page 14 Contact your printer. Partial sheets may...
ADF Card Copy Administrator's Guide
Page 5
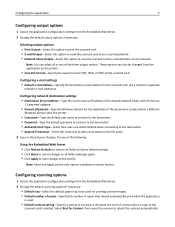
... scanner to adjust the contrast automatically. Use a comma to the file name. 3 Save or discard your changes. Configuring network destination settings • Destination Server Address-Type the server name or IP address of the shared network folder, with the format \\server\share. • Domain (Optional)-Type the Windows domain for printing scanned images. • Default number of copies-Specify the number of copies that should automatically print when the application is printed. Do one of the three output options. Configuring scanning options 1 Access the application configuration...
... scanner to adjust the contrast automatically. Use a comma to the file name. 3 Save or discard your changes. Configuring network destination settings • Destination Server Address-Type the server name or IP address of the shared network folder, with the format \\server\share. • Domain (Optional)-Type the Windows domain for printing scanned images. • Default number of copies-Specify the number of copies that should automatically print when the application is printed. Do one of the three output options. Configuring scanning options 1 Access the application configuration...
Card Copy Administrator's Guide
Page 4
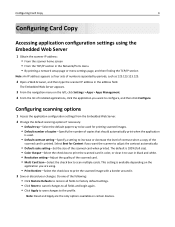
... contrast when a copy of the scanned card is 100% (full size). • Color Output-Select the check box to print the scanned card in color, or clear it . 3 Save or discard your changes. The Embedded Web Server appears. 3 From the navigation menu on certain devices. This setting is used. • Default contrast setting-Specify a setting to the profile. Configuring scanning options 1 Access the application configuration settings from the Embedded Web Server. 2 Change the default scanning options if necessary: • Default tray-Select the default paper tray to be used for Content...
... contrast when a copy of the scanned card is 100% (full size). • Color Output-Select the check box to print the scanned card in color, or clear it . 3 Save or discard your changes. The Embedded Web Server appears. 3 From the navigation menu on certain devices. This setting is used. • Default contrast setting-Specify a setting to the profile. Configuring scanning options 1 Access the application configuration settings from the Embedded Web Server. 2 Change the default scanning options if necessary: • Default tray-Select the default paper tray to be used for Content...
Forms and Bar Code Card User's Guide
Page 29
... O overview 4 P PDFs problems with 22 Printed bar code is unreadable 24 printer does not respond after installation 20 printing forms from a flash drive 19 S SAP installing device types 11 SAP device types installing 11 modifying format 11 modifying settings 11 storing forms on the printer 18 supported bar codes 6 supported devices 4 supported operating systems 13 T troubleshooting cannot add new forms 23 cannot fax or e‑mail merged output 22 cannot generate bar code using PCL emulation printer drivers 23 flash memory is...
... O overview 4 P PDFs problems with 22 Printed bar code is unreadable 24 printer does not respond after installation 20 printing forms from a flash drive 19 S SAP installing device types 11 SAP device types installing 11 modifying format 11 modifying settings 11 storing forms on the printer 18 supported bar codes 6 supported devices 4 supported operating systems 13 T troubleshooting cannot add new forms 23 cannot fax or e‑mail merged output 22 cannot generate bar code using PCL emulation printer drivers 23 flash memory is...
IPDS Emulation User's Guide
Page 123
... Job Cancel 69 IPDS MENU all options (map 12 saving settings 10 setup options 10 touch screen - IPDS MENU setup options 10 optional finishers 49 AS/400 and iSeries stapling ..55, 56, 59, 62, 63 mainframe stapling 61 OTHER ENV SIZE (IPDS MENU > PAPER HANDLING 31 output bin values 37 P PAPER HANDLING Menu Offset Stacking 29 option descriptions 29 OTHER ENV SIZE 31 UNIVERSAL SIZE 29 paper loading on printer's Paper Menu 48 123 located under Option Card Menu 10 IPDS print jobs...
... Job Cancel 69 IPDS MENU all options (map 12 saving settings 10 setup options 10 touch screen - IPDS MENU setup options 10 optional finishers 49 AS/400 and iSeries stapling ..55, 56, 59, 62, 63 mainframe stapling 61 OTHER ENV SIZE (IPDS MENU > PAPER HANDLING 31 output bin values 37 P PAPER HANDLING Menu Offset Stacking 29 option descriptions 29 OTHER ENV SIZE 31 UNIVERSAL SIZE 29 paper loading on printer's Paper Menu 48 123 located under Option Card Menu 10 IPDS print jobs...
IPDS Printer and Host Setup Guide
Page 35
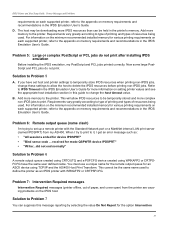
... printing non-IPDS jobs, change the host timeout value. This cannot be temporarily stored and more complex non-IPDS jobs to Problem 6 A remote output queue created using CRTOUTQ and a PSFCFG device created using TCP/IP and the AS/400 Host Print Transform. Add more memory to the printer. Add more memory to the printer. IPDS Printer and Host Setup Guide Printer Messages and Problems requirements on each supported printer, refer to the appendix on memory...
... printing non-IPDS jobs, change the host timeout value. This cannot be temporarily stored and more complex non-IPDS jobs to Problem 6 A remote output queue created using CRTOUTQ and a PSFCFG device created using TCP/IP and the AS/400 Host Print Transform. Add more memory to the printer. Add more memory to the printer. IPDS Printer and Host Setup Guide Printer Messages and Problems requirements on each supported printer, refer to the appendix on memory...
Multi Send Administrator's Guide
Page 6
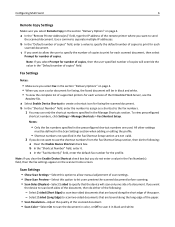
... to print for each scanned document. Select 2 sided (Long Edge) to scan it in black and white. Note: If you clear the Enable Device Shortcut check box but you do the following : - Configuring Multi Send 6 Remote Copy Settings Make sure you select Remote Copy in the section "Delivery Options" on the scanner home screen. a In the "Remote Printer Address(es)" field, type the IP address of the remote printer where you want to allow manual adjustment of scan settings...
... to print for each scanned document. Select 2 sided (Long Edge) to scan it in black and white. Note: If you clear the Enable Device Shortcut check box but you do the following : - Configuring Multi Send 6 Remote Copy Settings Make sure you select Remote Copy in the section "Delivery Options" on the scanner home screen. a In the "Remote Printer Address(es)" field, type the IP address of the remote printer where you want to allow manual adjustment of scan settings...
Quick Reference
Page 1
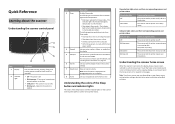
... scanner and the printer require user intervention. or to respond to open the menu screen; to messages. Quick Reference Learning about the scanner Understanding the scanner control panel Item 1 Display 2 Indicator light Description Lets you view scanning, copying, faxing, and printing options as well as the home screen. The scanner and the printer are off . Understanding the scanner home screen When the scanner is turned on your home screen customization settings, administrative setup, and active embedded solutions. 1 Touch the home screen buttons...
... scanner and the printer require user intervention. or to respond to open the menu screen; to messages. Quick Reference Learning about the scanner Understanding the scanner control panel Item 1 Display 2 Indicator light Description Lets you view scanning, copying, faxing, and printing options as well as the home screen. The scanner and the printer are off . Understanding the scanner home screen When the scanner is turned on your home screen customization settings, administrative setup, and active embedded solutions. 1 Touch the home screen buttons...
Quick Reference
Page 6
...; Network Share Output-Select this option to save the scanned card to Sharepoint on the scanner home screen, and then follow the instructions on the scanner home screen. For more convenient manner. 1 Open a Web browser, and then type the scanner IP address in a more information, see the documentation that should automatically print when the application is used to connect to adjust the contrast automatically. • Default scale setting-Set the size of the scanned card. Setting up Remote Operator Panel...
...; Network Share Output-Select this option to save the scanned card to Sharepoint on the scanner home screen, and then follow the instructions on the scanner home screen. For more convenient manner. 1 Open a Web browser, and then type the scanner IP address in a more information, see the documentation that should automatically print when the application is used to connect to adjust the contrast automatically. • Default scale setting-Set the size of the scanned card. Setting up Remote Operator Panel...
Quick Reference
Page 19
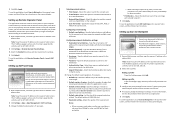
... , or click Start and then click Run. Copying using the scanner glass From the home screen, touch Cancel Job. Canceling a copy job Canceling a copy job while the original document is canceled, the Copy screen appears. c Press Enter, or click OK. 2 Double‑click the printer icon. 3 Select the print job you can: • View the information on the scanner control panel. Copying Making copies Making a quick copy 1 Load an original document facedown into the ADF. Note: Do not load postcards, photos, small items, transparencies, photo paper, or thin...
... , or click Start and then click Run. Copying using the scanner glass From the home screen, touch Cancel Job. Canceling a copy job Canceling a copy job while the original document is canceled, the Copy screen appears. c Press Enter, or click OK. 2 Double‑click the printer icon. 3 Select the print job you can: • View the information on the scanner control panel. Copying Making copies Making a quick copy 1 Load an original document facedown into the ADF. Note: Do not load postcards, photos, small items, transparencies, photo paper, or thin...
Technical Reference
Page 7
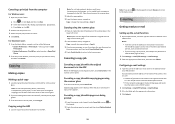
... and printing documents and photos • Setting up and using the printer software Find it here Setup documentation-The setup documentation came with the printer software. • The printer software is also available at http://support.lexmark.com. Networking Guide-Open the Software and Documentation CD, and then navigate to view context‑sensitive information. For more information, visit http://support.lexmark.com. Notes: • Help is automatically installed with the printer and is located in the printer program folder or...
... and printing documents and photos • Setting up and using the printer software Find it here Setup documentation-The setup documentation came with the printer software. • The printer software is also available at http://support.lexmark.com. Networking Guide-Open the Software and Documentation CD, and then navigate to view context‑sensitive information. For more information, visit http://support.lexmark.com. Notes: • Help is automatically installed with the printer and is located in the printer program folder or...

