Setup Guide
Page 7
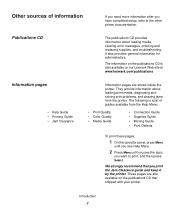
... 2 It also provides general information for administrators. The following is also available on the publications CD that you print the Jam Clearance guide and keep it by the printer. Publications CD The publications CD provides information about loading print media, diagnosing and...that shipped with your printer. Information pages • Help Guide • Printing Guide • Jam Clearance Information pages are also available on our Lexmark Web site at www.lexmark.com/publications. These pages are stored inside the printer. Other sources of guides available from the...
... 2 It also provides general information for administrators. The following is also available on the publications CD that you print the Jam Clearance guide and keep it by the printer. Publications CD The publications CD provides information about loading print media, diagnosing and...that shipped with your printer. Information pages • Help Guide • Printing Guide • Jam Clearance Information pages are also available on our Lexmark Web site at www.lexmark.com/publications. These pages are stored inside the printer. Other sources of guides available from the...
Setup Guide
Page 8
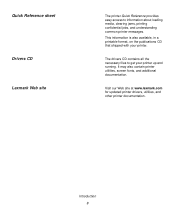
...additional documentation. Visit our Web site at www.lexmark.com for updated printer drivers, utilities, and other printer documentation. The drivers CD contains all the necessary files to information about loading media, clearing jams, printing confidential jobs, and understanding common printer ...messages. Quick Reference sheet Drivers CD Lexmark Web site The printer Quick Reference provides easy access to get your printer. ...
...additional documentation. Visit our Web site at www.lexmark.com for updated printer drivers, utilities, and other printer documentation. The drivers CD contains all the necessary files to information about loading media, clearing jams, printing confidential jobs, and understanding common printer ...messages. Quick Reference sheet Drivers CD Lexmark Web site The printer Quick Reference provides easy access to get your printer. ...

Setup Guide
Page 24
Set up the redrive assembly and close duplex rear door. If necessary, use a flathead screwdriver to collapse them . 7 Push each green thumbscrew gently toward the printer to tighten the screws. Then, push the thumbscrews firmly toward the printer as you turn it fully. 6 Pull the two green thumbscrews out to extend them . Note: Failure to tighten it clockwise to collapse the green thumbscrews can cause jams. 8 Push up the optional duplex unit 19
Set up the redrive assembly and close duplex rear door. If necessary, use a flathead screwdriver to collapse them . 7 Push each green thumbscrew gently toward the printer to tighten the screws. Then, push the thumbscrews firmly toward the printer as you turn it fully. 6 Pull the two green thumbscrews out to extend them . Note: Failure to tighten it clockwise to collapse the green thumbscrews can cause jams. 8 Push up the optional duplex unit 19

Setup Guide
Page 36
Overfilling the tray may cause jams. 7 If you load the tray, do not exceed the load line on the label in the Media specifications chapter of the tray. For two-sided ...
Overfilling the tray may cause jams. 7 If you load the tray, do not exceed the load line on the label in the Media specifications chapter of the tray. For two-sided ...

Setup Guide
Page 49
... are correctly listed under "Installed Features." The Network Setup page provides information that is not listed, check your printer to print Quick Reference and Clearing Jams information. Step 10: Verify printer setup The Menu Settings page lists all the options you are attaching your installation. This is on page 45. The...
... are correctly listed under "Installed Features." The Network Setup page provides information that is not listed, check your printer to print Quick Reference and Clearing Jams information. Step 10: Verify printer setup The Menu Settings page lists all the options you are attaching your installation. This is on page 45. The...
Setup Guide
Page 50
... Reference. See Step 6: "Install memory, firmware, or option cards" on page 22 for a solution. Printing Quick Reference information Information about using the printer and clearing jams is installed, you loaded. Printing a network setup page Note: If an optional MarkNet™ print server is included on the publications CD that shipped with...
... Reference. See Step 6: "Install memory, firmware, or option cards" on page 22 for a solution. Printing Quick Reference information Information about using the printer and clearing jams is installed, you loaded. Printing a network setup page Note: If an optional MarkNet™ print server is included on the publications CD that shipped with...

Setup Guide
Page 62
Launch the publications CD and browse the contents to common printing problems • Methods for clearing jams • Overview of printer menus • Explanation of the available information. The type of helpful information provided on the publications CD includes: • Tips for ...
Launch the publications CD and browse the contents to common printing problems • Methods for clearing jams • Overview of printer menus • Explanation of the available information. The type of helpful information provided on the publications CD includes: • Tips for ...
Quick Reference
Page 1
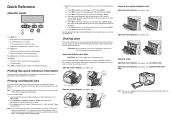
... format, on the drivers CD that shipped with the same user name and PIN immediately to the printer.) f Press Menu until you have removed the jam. This could prevent others from the Ready state. • Scroll through menus or values. • Increase or decrease a numerical value. • ... you print it. Note: This only works with two hands and pull it gently away from its drawer. This may not need to clear any jam, grasp the jammed media with custom printer drivers. Quick Reference Operator panel 1 Menu 2 Select 3 Return 4 Go 5 Stop 6 Press Menu to: • Enter the...
... format, on the drivers CD that shipped with the same user name and PIN immediately to the printer.) f Press Menu until you have removed the jam. This could prevent others from the Ready state. • Scroll through menus or values. • Increase or decrease a numerical value. • ... you print it. Note: This only works with two hands and pull it gently away from its drawer. This may not need to clear any jam, grasp the jammed media with custom printer drivers. Quick Reference Operator panel 1 Menu 2 Select 3 Return 4 Go 5 Stop 6 Press Menu to: • Enter the...
Quick Reference
Page 2
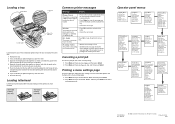
...Guide Print Quality Color Quality Media Guide Connection Guide Moving Guide Print Defects Jam Clearance USB Menu PCL SmartSwitch PS SmartSwitch NPA Mode USB Buffer Job Buffering MAC Binary PS P/N 20K1046 E.C. 2K0125 © 2003 Lexmark International, Inc. All trays are loaded the same way. 1 Remove the... cancel a print job after CR Setup Menu Printer Language Power Saver Resource Save Download Target Print Timeout Wait Timeout Auto Continue Jam Recovery Page Protect Display Language Alarm Control Toner Alarm Job Accounting Job Menu Cancel Job Confidential Job Held Jobs Reset Printer Print ...
...Guide Print Quality Color Quality Media Guide Connection Guide Moving Guide Print Defects Jam Clearance USB Menu PCL SmartSwitch PS SmartSwitch NPA Mode USB Buffer Job Buffering MAC Binary PS P/N 20K1046 E.C. 2K0125 © 2003 Lexmark International, Inc. All trays are loaded the same way. 1 Remove the... cancel a print job after CR Setup Menu Printer Language Power Saver Resource Save Download Target Print Timeout Wait Timeout Auto Continue Jam Recovery Page Protect Display Language Alarm Control Toner Alarm Job Accounting Job Menu Cancel Job Confidential Job Held Jobs Reset Printer Print ...

User's Reference
Page 2
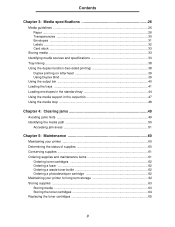
... warranty 15 Chapter 1: Overview 19 Basic model ...19 Configured model ...19 Chapter 2: Printing 20 Tips for successful printing 20 Tips on storing media 20 Avoiding jams ...20 Sending a job to print ...20 Printing a confidential job 21 Entering a personal identification number (PIN 22 Canceling a print job ...22 Canceling from the printer operator...
... warranty 15 Chapter 1: Overview 19 Basic model ...19 Configured model ...19 Chapter 2: Printing 20 Tips for successful printing 20 Tips on storing media 20 Avoiding jams ...20 Sending a job to print ...20 Printing a confidential job 21 Entering a personal identification number (PIN 22 Canceling a print job ...22 Canceling from the printer operator...
User's Reference
Page 3
... the standard tray 44 Using the media support in the output bin 47 Using the media stop ...48 Chapter 4: Clearing jams 49 Avoiding jams hints ...49 Identifying the media path 50 Accessing jam areas 51 Chapter 5: Maintenance 60 Maintaining your printer 60 Determining the status of supplies 60 Conserving supplies ...61 Ordering supplies...
... the standard tray 44 Using the media support in the output bin 47 Using the media stop ...48 Chapter 4: Clearing jams 49 Avoiding jams hints ...49 Identifying the media path 50 Accessing jam areas 51 Chapter 5: Maintenance 60 Maintaining your printer 60 Determining the status of supplies 60 Conserving supplies ...61 Ordering supplies...
User's Reference
Page 20
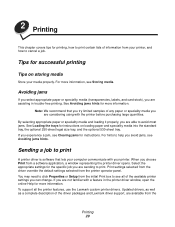
...We recommend that lets your printer, and how to see Avoiding jams hints. To support all of information from the initial Print box to cancel a job. When you avoid jams, see all the printer features, use the Lexmark custom printer drivers. Updated drivers, as well as a complete ...description of any paper or speciality media you try limited samples of the driver packages and Lexmark driver support, are considering using with...
...We recommend that lets your printer, and how to see Avoiding jams hints. To support all of information from the initial Print box to cancel a job. When you avoid jams, see all the printer features, use the Lexmark custom printer drivers. Updated drivers, as well as a complete ...description of any paper or speciality media you try limited samples of the driver packages and Lexmark driver support, are considering using with...

User's Reference
Page 27
... the paper is either grain long, running the length of the paper, or grain short, running the width of the paper to feed properly, causing jams. For best performance, use 90 g/m2 (24 lb bond) grain long paper. This limits the exposure of the paper. Media specifications Weight The printer can...
... the paper is either grain long, running the length of the paper, or grain short, running the width of the paper to feed properly, causing jams. For best performance, use 90 g/m2 (24 lb bond) grain long paper. This limits the exposure of the paper. Media specifications Weight The printer can...
User's Reference
Page 28
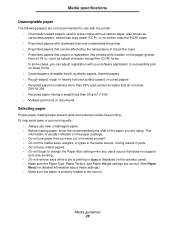
... the page) greater than 60 g/m2 (16 lb) • Multiple-part forms or documents Selecting paper Proper paper loading helps prevent jams and ensures trouble-free printing. To help avoid jams or poor print quality: • Always use paper that do not meet DIN 19 309 • Recycled paper having a weight less... than ±0.09 in the source. mixing results in jams. • Do not use coated papers. • Do not forget to change the Paper Size setting when you use a source that does not support auto...
... the page) greater than 60 g/m2 (16 lb) • Multiple-part forms or documents Selecting paper Proper paper loading helps prevent jams and ensures trouble-free printing. To help avoid jams or poor print quality: • Always use paper that do not meet DIN 19 309 • Recycled paper having a weight less... than ±0.09 in the source. mixing results in jams. • Do not use coated papers. • Do not forget to change the Paper Size setting when you use a source that does not support auto...

User's Reference
Page 30
...transparencies, fan the stack to withstand temperatures of 170°C (338°F) without melting, discoloring, Media guidelines 30 Lexmark recommends Lexmark Part Number 12A5940 letter size transparency and Lexmark Part Number 12A5941 for detailed information about this setting.) Check with the manufacturer or vendor to 170°C (338&#... sources. Selecting transparencies The printer can feed transparencies from sticking together. Use the following table for help prevent jams. (See Paper Type for A4 size transparency. Media specifications Printing on the transparency used.
...transparencies, fan the stack to withstand temperatures of 170°C (338°F) without melting, discoloring, Media guidelines 30 Lexmark recommends Lexmark Part Number 12A5940 letter size transparency and Lexmark Part Number 12A5941 for detailed information about this setting.) Check with the manufacturer or vendor to 170°C (338&#... sources. Selecting transparencies The printer can feed transparencies from sticking together. Use the following table for help prevent jams. (See Paper Type for A4 size transparency. Media specifications Printing on the transparency used.

User's Reference
Page 31
... must not exceed 90 g/m2 (24 lb bond) weight. • Use only new, undamaged envelopes. • For best performance and to minimize jams, do not use up to 105 g/m2 (28 lb bond) weight for the 250-sheet standard tray or 105 g/m2 (28 lb bond) weight... bars. - Have nicked edges or bent corners - Media specifications offsetting, or releasing hazardous emissions. Envelopes You can withstand temperatures of envelope at www.lexmark.com/publications. Have excessive curl or twist. - When printing on envelopes: • To achieve the best possible print quality, use only high-quality...
... must not exceed 90 g/m2 (24 lb bond) weight. • Use only new, undamaged envelopes. • For best performance and to minimize jams, do not use up to 105 g/m2 (28 lb bond) weight for the 250-sheet standard tray or 105 g/m2 (28 lb bond) weight... bars. - Have nicked edges or bent corners - Media specifications offsetting, or releasing hazardous emissions. Envelopes You can withstand temperatures of envelope at www.lexmark.com/publications. Have excessive curl or twist. - When printing on envelopes: • To achieve the best possible print quality, use only high-quality...
User's Reference
Page 32
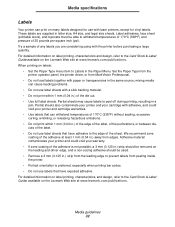
...printable stock), and topcoats must be used. • Remove a 3 mm (0.125 in.) strip from the leading edge to Labels in a jam. These labels are considering using with the printer before purchasing a large quantity. For detailed information on label printing, characteristics, and design, refer ...transparencies in the same source; Partial sheets may cause labels to the Card Stock & Label Guide, available on the Lexmark Web site at www.lexmark.com/publications. Adhesive material contaminates your printer and could void your warranty. • If zone coating of the adhesive...
...printable stock), and topcoats must be used. • Remove a 3 mm (0.125 in.) strip from the leading edge to Labels in a jam. These labels are considering using with the printer before purchasing a large quantity. For detailed information on label printing, characteristics, and design, refer ...transparencies in the same source; Partial sheets may cause labels to the Card Stock & Label Guide, available on the Lexmark Web site at www.lexmark.com/publications. Adhesive material contaminates your printer and could void your warranty. • If zone coating of the adhesive...
User's Reference
Page 33
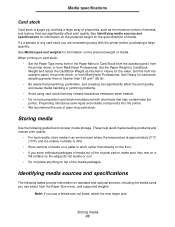
... printing on top of media. Note: If you are considering using with chemicals that can significantly affect the print quality and cause media handling or jamming problems. • Avoid using card stock that may contaminate the printer. Try a sample of grain long card stock. Storing media 33 Preprinting introduces semi-liquid...
... printing on top of media. Note: If you are considering using with chemicals that can significantly affect the print quality and cause media handling or jamming problems. • Avoid using card stock that may contaminate the printer. Try a sample of grain long card stock. Storing media 33 Preprinting introduces semi-liquid...

User's Reference
Page 41
Only one may cause a jam. Doing so may be used at a time. Load the paper or specialty media you use either the standard tray or the optional 250-sheet legal ... the majority of your printing trouble-free. however, all of the 530-sheet drawer and fits into the support unit. Proper media loading helps prevent jams and helps make your print jobs in the same way. Do not remove trays while a job prints or while Busy blinks on the operator panel...
Only one may cause a jam. Doing so may be used at a time. Load the paper or specialty media you use either the standard tray or the optional 250-sheet legal ... the majority of your printing trouble-free. however, all of the 530-sheet drawer and fits into the support unit. Proper media loading helps prevent jams and helps make your print jobs in the same way. Do not remove trays while a job prints or while Busy blinks on the operator panel...

User's Reference
Page 49
...tightly against the stack of media. • Make sure all trays for more information. Refer to the printer are correctly attached. Clearing jams 49 See Media guidelines for simplex (single-sided) printing. • Keep media stored in an acceptable environment. Make sure the stack ...that connect to the Card Stock & Label Guide available on the Lexmark Web site at www.lexmark.com/publications for more information about which media will provide optimum results for more information. 4 Clearing jams Avoiding jams hints The following hints can help you have loaded. Make sure the...
...tightly against the stack of media. • Make sure all trays for more information. Refer to the printer are correctly attached. Clearing jams 49 See Media guidelines for simplex (single-sided) printing. • Keep media stored in an acceptable environment. Make sure the stack ...that connect to the Card Stock & Label Guide available on the Lexmark Web site at www.lexmark.com/publications for more information about which media will provide optimum results for more information. 4 Clearing jams Avoiding jams hints The following hints can help you have loaded. Make sure the...

