
Lenovo V470&V570&B470&B570&B570e User Guide V2.0
Page 3
... instructions 40 Replacing the battery 40 Replacing the hard disk drive 41 Replacing memory 45 Removing the optical drive (only for V470/ V570/B470/B570 56 Electronic emissions notices 58 Appendix D. Getting to the Internet ......27 Wired connection 27 Wireless connection 28 Chapter 4. Learning the basics 12 First use 12 Using AC adapter and battery 14 Using the touchpad 15 Using the keyboard 16 Connecting external devices 19 Switching GPU (Select models only)........21 Special keys and buttons 22 System status indicators...
... instructions 40 Replacing the battery 40 Replacing the hard disk drive 41 Replacing memory 45 Removing the optical drive (only for V470/ V570/B470/B570 56 Electronic emissions notices 58 Appendix D. Getting to the Internet ......27 Wired connection 27 Wireless connection 28 Chapter 4. Learning the basics 12 First use 12 Using AC adapter and battery 14 Using the touchpad 15 Using the keyboard 16 Connecting external devices 19 Switching GPU (Select models only)........21 Special keys and buttons 22 System status indicators...
Lenovo V470&V570&B470&B570&B570e User Guide V2.0
Page 18
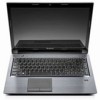
... a new battery • If the battery status indicator starts blinking • If the battery has not been used for a long time Notes: • You are not going to use the computer for example, how often you access the hard disk drive and how bright you make sure the computer has been shut down. „ Handling the battery If the rechargeable battery pack is difficult to Lenovo for service, etc...
... a new battery • If the battery status indicator starts blinking • If the battery has not been used for a long time Notes: • You are not going to use the computer for example, how often you access the hard disk drive and how bright you make sure the computer has been shut down. „ Handling the battery If the rechargeable battery pack is difficult to Lenovo for service, etc...

Lenovo V470&V570&B470&B570&B570e User Guide V2.0
Page 22
...): Enable/Disable the numeric keypad. Fn + Home: Activate the pause function. Fn + F5: Open the interface for display resolution settings. Fn + F9: Start/Pause playback of the LCD screen. Fn + F10: Stop playback of each function key. Fn Increase/Decrease display brightness. Fn + End: Activate the break function. Learning the basics The following describes the features of Windows Media Player. Fn + F1: Enter sleep mode. Fn + F4: Open the interface for integrated wireless devices settings...
...): Enable/Disable the numeric keypad. Fn + Home: Activate the pause function. Fn + F5: Open the interface for display resolution settings. Fn + F9: Start/Pause playback of the LCD screen. Fn + F10: Stop playback of each function key. Fn Increase/Decrease display brightness. Fn + End: Activate the break function. Learning the basics The following describes the features of Windows Media Player. Fn + F1: Enter sleep mode. Fn + F4: Open the interface for integrated wireless devices settings...

Lenovo V470&V570&B470&B570&B570e User Guide V2.0
Page 30
... computer from being removed without your computer. Note: To enter BIOS setup utility, press F2 when the Lenovo logo appears on installing the security lock, please refer to secure your permission. For details on the screen while the computer is starting up. „ Fingerprint reader (Select models only) With the fingerprint reader, in the computer detects the condition and stops the hard disk drive until the...
... computer from being removed without your computer. Note: To enter BIOS setup utility, press F2 when the Lenovo logo appears on installing the security lock, please refer to secure your permission. For details on the screen while the computer is starting up. „ Fingerprint reader (Select models only) With the fingerprint reader, in the computer detects the condition and stops the hard disk drive until the...

Lenovo V470&V570&B470&B570&B570e User Guide V2.0
Page 32
... the following : 1 Slide the integrated wireless device switch from to . 2 Press Fn + F5 to cover a metropolitan area, providing high-speed broadband access without the need for the connection. Hardware connection Access point * V570 Wi-Fi/WiMAX network * Not supplied Software configuration Consult your computer. 28 Note: Your computer may not support all wireless connection methods. „ Using Wi-Fi/WiMAX (Select models only) Enabling wireless connection To enable wireless communications, do the following standards...
... the following : 1 Slide the integrated wireless device switch from to . 2 Press Fn + F5 to cover a metropolitan area, providing high-speed broadband access without the need for the connection. Hardware connection Access point * V570 Wi-Fi/WiMAX network * Not supplied Software configuration Consult your computer. 28 Note: Your computer may not support all wireless connection methods. „ Using Wi-Fi/WiMAX (Select models only) Enabling wireless connection To enable wireless communications, do the following standards...
Lenovo V470&V570&B470&B570&B570e User Guide V2.0
Page 38
... to replace one of each publication included in your computer. A compatible device driver is a requirement to ensure correct operation and performance of the following steps: 1 Close other applications, then restart the backup process. 2 Check if the destination media is pre-installed with your hard disk. If you need to select another path and then try the following : the hard disk drive, memory, or the keyboard...
... to replace one of each publication included in your computer. A compatible device driver is a requirement to ensure correct operation and performance of the following steps: 1 Close other applications, then restart the backup process. 2 Check if the destination media is pre-installed with your hard disk. If you need to select another path and then try the following : the hard disk drive, memory, or the keyboard...
Lenovo V470&V570&B470&B570&B570e User Guide V2.0
Page 40
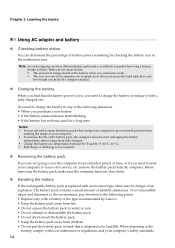
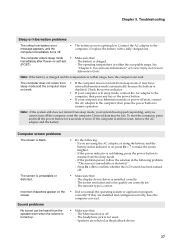
... Chapter 2. Display problems When I turn on the computer, nothing appears on . (Press the power button again for parts and service. 36 Do one of your password. Touch the touchpad. - The AC adapter is on the keyboard. - The computer power is on the screen. • If the screen is installed correctly. • If these items are properly set, and the screen remains blank, have the hard disk drive replaced. The memory is blank, make sure...
... Chapter 2. Display problems When I turn on the computer, nothing appears on . (Press the power button again for parts and service. 36 Do one of your password. Touch the touchpad. - The AC adapter is on the keyboard. - The computer power is on the screen. • If the screen is installed correctly. • If these items are properly set, and the screen remains blank, have the hard disk drive replaced. The memory is blank, make sure...
Lenovo V470&V570&B470&B570&B570e User Guide V2.0
Page 41
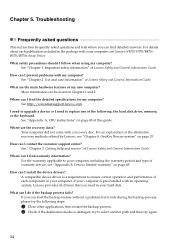
... the volume is turned up. • Do the following problem "The screen is in hibernation mode or power-off the computer; The display device driver is still not reset, remove the AC adapter and the battery. The headphone jack is charged. (POST). - The battery is not used. - Use and care Information" of Lenovo Safety and General Information Guide. Sound problems No sound can be lost. Press Fn + F2 to make the screen brighter. - The screen resolution...
... the volume is turned up. • Do the following problem "The screen is in hibernation mode or power-off the computer; The display device driver is still not reset, remove the AC adapter and the battery. The headphone jack is charged. (POST). - The battery is not used. - Use and care Information" of Lenovo Safety and General Information Guide. Sound problems No sound can be lost. Press Fn + F2 to make the screen brighter. - The screen resolution...
Lenovo V470&V570&B470&B570&B570e User Guide V2.0
Page 42
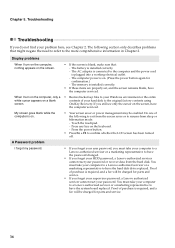
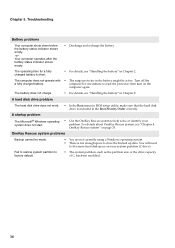
... system problems Backup cannot be active. then turn on page 33. A hard disk drive problem The hard disk drive does not work. • In the Boot menu in BIOS setup utility, make sure that the hard disk drive is not enough space to free more hard disk space on your problem. The battery does not charge. • For details, see "Handling the battery" in the Boot Priority Order correctly. Troubleshooting Battery problems Your computer shuts down before the battery status indicator shows empty. -orYour computer operates...
... system problems Backup cannot be active. then turn on page 33. A hard disk drive problem The hard disk drive does not work. • In the Boot menu in BIOS setup utility, make sure that the hard disk drive is not enough space to free more hard disk space on your problem. The battery does not charge. • For details, see "Handling the battery" in the Boot Priority Order correctly. Troubleshooting Battery problems Your computer shuts down before the battery status indicator shows empty. -orYour computer operates...

Lenovo V470&V570&B470&B570&B570e User Guide V2.0
Page 43
... the Boot menu of the BIOS setup utility. Troubleshooting Other problems Your computer does not respond. • To turn off your computer. • When using a high power consumption external devices such as an external USB optical disk drive, use external device power adapter. In the Boot menu in the BIOS setup utility, make sure that the device from . For more . The computer does not start from the device you want the computer starts from which the computer starts is enabled. Disable the sleep timer when...
... the Boot menu of the BIOS setup utility. Troubleshooting Other problems Your computer does not respond. • To turn off your computer. • When using a high power consumption external devices such as an external USB optical disk drive, use external device power adapter. In the Boot menu in the BIOS setup utility, make sure that the device from . For more . The computer does not start from the device you want the computer starts from which the computer starts is enabled. Disable the sleep timer when...
Lenovo V470&V570&B470&B570&B570e User Guide V2.0
Page 44
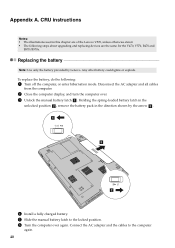
.... a1 c b 4 Install a fully charged battery. 5 Slide the manual battery latch to the computer again. 40 Holding the spring-loaded battery latch in the unlocked position b , remove the battery pack in this chapter are of the Lenovo V570, unless otherwise stated. • The following : 1 Turn off the computer, or enter hibernation mode. Connect the AC adapter and the cables to the locked position. 6 Turn the computer over . 3 Unlock the manual battery latch a . Appendix...
.... a1 c b 4 Install a fully charged battery. 5 Slide the manual battery latch to the computer again. 40 Holding the spring-loaded battery latch in the unlocked position b , remove the battery pack in this chapter are of the Lenovo V570, unless otherwise stated. • The following : 1 Turn off the computer, or enter hibernation mode. Connect the AC adapter and the cables to the locked position. 6 Turn the computer over . 3 Unlock the manual battery latch a . Appendix...

Lenovo V470&V570&B470&B570&B570e User Guide V2.0
Page 45
... hard disk drive, make a backup copy of the hard disk drive were not designed for frequent changes, or drive swapping. • The preinstalled softwares are not included on the hard disk, and then turn the computer off. Never remove the drive while the system is very sensitive. Appendix A. The drive is operating, in sleep mode, or in hibernation mode. 41 The connectors and bay of all the information on an optional hard disk drive. CRU instructions Replacing...
... hard disk drive, make a backup copy of the hard disk drive were not designed for frequent changes, or drive swapping. • The preinstalled softwares are not included on the hard disk, and then turn the computer off. Never remove the drive while the system is very sensitive. Appendix A. The drive is operating, in sleep mode, or in hibernation mode. 41 The connectors and bay of all the information on an optional hard disk drive. CRU instructions Replacing...

Lenovo V470&V570&B470&B570&B570e User Guide V2.0
Page 54
... return the product to your sole remedy is free of a product or part, the replaced product or part becomes Lenovo's property and the replacement product or part becomes your Service Provider with all system keys or passwords and sufficient, free, and safe access to your facilities to repair your product, your Service Provider will arrange for service under warranty service; 2 ensure that it will be in the...
... return the product to your sole remedy is free of a product or part, the replaced product or part becomes Lenovo's property and the replacement product or part becomes your Service Provider with all system keys or passwords and sufficient, free, and safe access to your facilities to repair your product, your Service Provider will arrange for service under warranty service; 2 ensure that it will be in the...
Hardware Maintenance Manual
Page 3
Lenovo V570, B570, and B570e 37 Specifications 37 Status indicators 39 Fn key combinations 40 Chapter 6. Removing and replacing a FRU 45 1010 Battery pack 46 1020 Dummy card 47 1030 Hard disk drive (HDD)/memory module/mini PCI Express Card slot compartment cover. . . . 47 1040 Hard disk drive 48 1050 Optical drive 49 1060 Memory module 50 1070 PCI Express Mini Card for replacing a system board 28 Important information about replacing RoHS compliant FRUs 28 Chapter 3. Notices 87 Trademarks...
Lenovo V570, B570, and B570e 37 Specifications 37 Status indicators 39 Fn key combinations 40 Chapter 6. Removing and replacing a FRU 45 1010 Battery pack 46 1020 Dummy card 47 1030 Hard disk drive (HDD)/memory module/mini PCI Express Card slot compartment cover. . . . 47 1040 Hard disk drive 48 1050 Optical drive 49 1060 Memory module 50 1070 PCI Express Mini Card for replacing a system board 28 Important information about replacing RoHS compliant FRUs 28 Chapter 3. Notices 87 Trademarks...

Hardware Maintenance Manual
Page 8
... using testers, set the controls correctly and use worn or broken tools and testers. • Never assume that has exposed electrical circuits, observe the following precautions: - If an electrical accident occurs, you can then operate the switch or unplug the power cord quickly. • Do not work area. keep the other hand in your electrical hand tools for safe operational condition...
... using testers, set the controls correctly and use worn or broken tools and testers. • Never assume that has exposed electrical circuits, observe the following precautions: - If an electrical accident occurs, you can then operate the switch or unplug the power cord quickly. • Do not work area. keep the other hand in your electrical hand tools for safe operational condition...

Hardware Maintenance Manual
Page 33
... replacing FRUs Before replacing parts: Make sure that those settings remain in this manual. The BIOS and device drivers are servicing may alter the settings. Be sure that changed the symptoms. Attention: The setup configuration on the screen and install the necessary software. Go to replace a FRU but the replacement does not correct the problem, reinstall the original FRU before you are available at http://consumersupport.lenovo.com/ Strategy for replacing a system board...
... replacing FRUs Before replacing parts: Make sure that those settings remain in this manual. The BIOS and device drivers are servicing may alter the settings. Be sure that changed the symptoms. Attention: The setup configuration on the screen and install the necessary software. Go to replace a FRU but the replacement does not correct the problem, reinstall the original FRU before you are available at http://consumersupport.lenovo.com/ Strategy for replacing a system board...

Hardware Maintenance Manual
Page 35
...; Scratched (cosmetic) parts • Distortion, deformation, or discoloration of an optical drive © Copyright Lenovo 2012 29 Date of service technician 2. If you attach to stress beyond normal use new nylon-coated screws. • Be extremely careful during such write operations as cosmic radiation, electrostatic discharge, or software errors. What to read the entire page on removing and replacing FRUs. •...
...; Scratched (cosmetic) parts • Distortion, deformation, or discoloration of an optical drive © Copyright Lenovo 2012 29 Date of service technician 2. If you attach to stress beyond normal use new nylon-coated screws. • Be extremely careful during such write operations as cosmic radiation, electrostatic discharge, or software errors. What to read the entire page on removing and replacing FRUs. •...
Hardware Maintenance Manual
Page 40
...; Open the LCD cover. • Turn on the hard disk drive. • The system is powered off. • The CPU stops. Note: The computer does not accept any key. To reduce power consumption, the computer has three power management modes: screen blank, sleep (standby in order to get access to the service technician, there is low. Screen blank mode If the time set on the "Turn off monitor" timer in the BIOS. The system board must enter...
...; Open the LCD cover. • Turn on the hard disk drive. • The system is powered off. • The CPU stops. Note: The computer does not accept any key. To reduce power consumption, the computer has three power management modes: screen blank, sleep (standby in order to get access to the service technician, there is low. Screen blank mode If the time set on the "Turn off monitor" timer in the BIOS. The system board must enter...

Hardware Maintenance Manual
Page 46
...% of the wireless devices is in uppercase without pressing the Shift key. To return to the hard disk drive, or the optical disk drive. Status indicators Indicator 1 Caps lock 2 Numeric lock Meaning White: Caps Lock mode is operating on or turn off the integrated camera. To enable or disable the numeric keypad, press the numeric lock key (NmLk). 3 Drive in -use 4 Active Protection System (APS) White: Data is on battery power with a function key. Enable or disable the backlight feature...
...% of the wireless devices is in uppercase without pressing the Shift key. To return to the hard disk drive, or the optical disk drive. Status indicators Indicator 1 Caps lock 2 Numeric lock Meaning White: Caps Lock mode is operating on or turn off the integrated camera. To enable or disable the numeric keypad, press the numeric lock key (NmLk). 3 Drive in -use 4 Active Protection System (APS) White: Data is on battery power with a function key. Enable or disable the backlight feature...
Hardware Maintenance Manual
Page 51
... about connecting and arranging internal cables, see Chapter 8 "Locations" on page 43. 3. External CRU statement to replacement. you have to be required to observe the following general rules: 1. Note: The illustrations used in this by shaking the computer gently and listening for removing a FRU, as Optional-service CRUs. See your Lenovo Limited Warranty documentation for your responsibility; To put the new FRU...
... about connecting and arranging internal cables, see Chapter 8 "Locations" on page 43. 3. External CRU statement to replacement. you have to be required to observe the following general rules: 1. Note: The illustrations used in this by shaking the computer gently and listening for removing a FRU, as Optional-service CRUs. See your Lenovo Limited Warranty documentation for your responsibility; To put the new FRU...


