
Hardware Maintenance Manual
Page 3
... keys 49 Chapter 7. Removing and replacing a FRU 55 Before servicing ThinkPad Edge E420 models . . 55 1010 Battery pack 56 1020 ExpressCard blank bezel 57 1030 Bottom slot cover 58 1040 Optical drive or travel cover 59 1050 Memory modules 60 1060 Hard disk drive assembly 61 1070 PCI Express Mini Card for wireless LAN . . 63 1080 PCI Express Mini Card for DOS diagnostics program 30 System supporting the Lenovo diagnostics programs 34 Power system...
... keys 49 Chapter 7. Removing and replacing a FRU 55 Before servicing ThinkPad Edge E420 models . . 55 1010 Battery pack 56 1020 ExpressCard blank bezel 57 1030 Bottom slot cover 58 1040 Optical drive or travel cover 59 1050 Memory modules 60 1060 Hard disk drive assembly 61 1070 PCI Express Mini Card for wireless LAN . . 63 1080 PCI Express Mini Card for DOS diagnostics program 30 System supporting the Lenovo diagnostics programs 34 Power system...

Hardware Maintenance Manual
Page 31
... the FRU removals or replacements for replacing a hard disk drive" on page 25 - Important service information This chapter presents following support site: http://www.lenovoservicetraining.com/ion/ Strategy for replacing FRUs Before replacing parts: Make sure that all machine types supported by one FRU, any FRUs listed in the following important service information that the latest UEFI BIOS is replaced, ensure that applies to all software fixes, drivers, and UEFI BIOS downloads are...
... the FRU removals or replacements for replacing a hard disk drive" on page 25 - Important service information This chapter presents following support site: http://www.lenovoservicetraining.com/ion/ Strategy for replacing FRUs Before replacing parts: Make sure that all machine types supported by one FRU, any FRUs listed in the following important service information that the latest UEFI BIOS is replaced, ensure that applies to all software fixes, drivers, and UEFI BIOS downloads are...

Hardware Maintenance Manual
Page 35
... failed 4. If you are not covered under warranty: © Copyright Lenovo 2012 29 Date of service technician 2. Failure symptoms, error codes appearing on page 30 - Machine type, model number, and serial number 9. Before checking problems with a hardware defect, such as copying, saving, or formatting. Following is recommended to replace a nondefective FRU. Consider replacing a FRU only when a problem recurs. Failing FRU name and part number 8. Customer's name and address...
... failed 4. If you are not covered under warranty: © Copyright Lenovo 2012 29 Date of service technician 2. Failure symptoms, error codes appearing on page 30 - Machine type, model number, and serial number 9. Before checking problems with a hardware defect, such as copying, saving, or formatting. Following is recommended to replace a nondefective FRU. Consider replacing a FRU only when a problem recurs. Failing FRU name and part number 8. Customer's name and address...

Hardware Maintenance Manual
Page 37
... disc drives (CD-RW, CD-RW/DVD Combo, and DVD Multi drives) on page 43. 4. Make sure that the internal optical drive that are disabled, such as the serial port. Press cursor keys to enter the Network Boot menu. 5. Some unsupported device names may appear in menus. Follow the instructions on the model.) Note: PC-Doctor menu does not mean the formal support device list. Note: You can start the ThinkPad Setup by using Configuration utility for DOS. Chapter 3. Turn...
... disc drives (CD-RW, CD-RW/DVD Combo, and DVD Multi drives) on page 43. 4. Make sure that the internal optical drive that are disabled, such as the serial port. Press cursor keys to enter the Network Boot menu. 5. Some unsupported device names may appear in menus. Follow the instructions on the model.) Note: PC-Doctor menu does not mean the formal support device list. Note: You can start the ThinkPad Setup by using Configuration utility for DOS. Chapter 3. Turn...

Hardware Maintenance Manual
Page 40
... ThinkPad computers that enable you to troubleshoot and resolve computer internal storage and memory problems. Notes: • If the computer you are servicing is not installed with the Lenovo Solution Center program, you use the TrackPoint, the pointer may drift on the screen. To run Lenovo Solution Center, click Start ➙ Control Panel ➙ System and Security ➙ Lenovo - Quick test programs Lenovo Hard Drive Quick Test and Lenovo Memory Quick Test are two quick...
... ThinkPad computers that enable you to troubleshoot and resolve computer internal storage and memory problems. Notes: • If the computer you are servicing is not installed with the Lenovo Solution Center program, you use the TrackPoint, the pointer may drift on the screen. To run Lenovo Solution Center, click Start ➙ Control Panel ➙ System and Security ➙ Lenovo - Quick test programs Lenovo Hard Drive Quick Test and Lenovo Memory Quick Test are two quick...

Hardware Maintenance Manual
Page 45
...://www.lenovo.com/support. Press and hold down the F1 key, and then turn on page 117. The ThinkPad Setup opens. c. For information on which discs to the original factory configuration. To restore the computer to keep onto removable media or a network drive before you can recover the new drive with a Supplemental Recovery Disc. Order the Recovery Disc Set and the drive at the same time so that you use an external USB DVD drive. • During the recovery process, all recovery disc sets...
...://www.lenovo.com/support. Press and hold down the F1 key, and then turn on page 117. The ThinkPad Setup opens. c. For information on which discs to the original factory configuration. To restore the computer to keep onto removable media or a network drive before you can recover the new drive with a Supplemental Recovery Disc. Order the Recovery Disc Set and the drive at the same time so that you use an external USB DVD drive. • During the recovery process, all recovery disc sets...

Hardware Maintenance Manual
Page 47
... ac power adapter. 2. Turn on the computer. 2. Select Security, using the cursor directional keys to move down the menu. How to remove the hard-disk password Attention: If User only mode is selected and the user HDP has been forgotten and cannot be made available to the service technician, neither Lenovo nor Lenovo authorized service technicians provide any services to reset either the user or the master HDP, or to enter ThinkPad Setup. 3. Turn...
... ac power adapter. 2. Turn on the computer. 2. Select Security, using the cursor directional keys to move down the menu. How to remove the hard-disk password Attention: If User only mode is selected and the user HDP has been forgotten and cannot be made available to the service technician, neither Lenovo nor Lenovo authorized service technicians provide any services to reset either the user or the master HDP, or to enter ThinkPad Setup. 3. Turn...

Hardware Maintenance Manual
Page 103
... request. Where you are designated as options. © Copyright Lenovo 2012 97 Self-service CRUs: These CRUs unplug or are available as Optional-service CRUs. Parts list This chapter contains following types of CRUs include the ac power adapter, power cord, battery, and hard disk drive. You may include the memory module, wireless card, keyboard, and palm rest with a replacement part you . Examples of these models, unless specific country or region designator is specified...
... request. Where you are designated as options. © Copyright Lenovo 2012 97 Self-service CRUs: These CRUs unplug or are available as Optional-service CRUs. Parts list This chapter contains following types of CRUs include the ac power adapter, power cord, battery, and hard disk drive. You may include the memory module, wireless card, keyboard, and palm rest with a replacement part you . Examples of these models, unless specific country or region designator is specified...
(English) User Guide
Page 4
... 120 Memory module problems 120 Networking problems 120 Problems with the keyboard and other pointing devices 122 Display and multimedia devices 122 Fingerprint reader problems 127 Battery and power problems 127 Problems with drives and other storage devices 130 Software problems 132 Problems with ports and connectors . . . . 132 Chapter 10. Advanced configuration . . 93 Installing a new operating system 93 Before you contact Lenovo 133 Registering your system UEFI BIOS . . . . . 105 ii User Guide Chapter 8. Getting support . . . . 133 Before you begin 93 Installing Windows...
... 120 Memory module problems 120 Networking problems 120 Problems with the keyboard and other pointing devices 122 Display and multimedia devices 122 Fingerprint reader problems 127 Battery and power problems 127 Problems with drives and other storage devices 130 Software problems 132 Problems with ports and connectors . . . . 132 Chapter 10. Advanced configuration . . 93 Installing a new operating system 93 Before you contact Lenovo 133 Registering your system UEFI BIOS . . . . . 105 ii User Guide Chapter 8. Getting support . . . . 133 Before you begin 93 Installing Windows...
(English) User Guide
Page 39
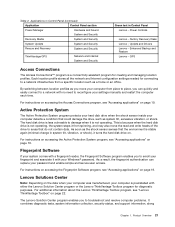
... settings manually and restart the computer each time. Enhanced Backup and Restore Lenovo - For instructions on accessing the Fingerprint Software program, see "Accessing applications" on page 19. The Lenovo Solution Center program enables you to a network with either the Lenovo Solution Center program or the Lenovo ThinkVantage Toolbox program for creating and managing location profiles. Factory Recovery Disks Lenovo - Power Controls Lenovo - Update and Drivers Lenovo - As soon as system tilt, excessive vibration, or shock. GPS Access Connections The Access Connections...
... settings manually and restart the computer each time. Enhanced Backup and Restore Lenovo - For instructions on accessing the Fingerprint Software program, see "Accessing applications" on page 19. The Lenovo Solution Center program enables you to a network with either the Lenovo Solution Center program or the Lenovo ThinkVantage Toolbox program for creating and managing location profiles. Factory Recovery Disks Lenovo - Power Controls Lenovo - Update and Drivers Lenovo - As soon as system tilt, excessive vibration, or shock. GPS Access Connections The Access Connections...
(English) User Guide
Page 61
... Settings. 7. Note: If your computer 43 Click the Driver tab. 11. If you to make sure that the monitor type is not supported. • If the external monitor you to display only a part of this driver and use a panel that does not support that enables you cannot find your monitor on the list, stop the installation of the high-resolution screen image your computer produces. Check the monitor information window to display...
... Settings. 7. Note: If your computer 43 Click the Driver tab. 11. If you to make sure that the monitor type is not supported. • If the external monitor you to display only a part of this driver and use a panel that does not support that enables you cannot find your monitor on the list, stop the installation of the high-resolution screen image your computer produces. Check the monitor information window to display...

(English) User Guide
Page 63
... F5. Click the Manage Settings button. In the Communications Utility window, configure the camera settings depending on automatically. Using your current image. In the Communications settings window, you do the following table shows which functions of the audio devices attached to it , the headphone function is supported. If you can also use the integrated camera with other programs, open the SmartAudio window and click Start ➙ Control Panel ➙ Hardware and Sound ➙ SmartAudio. If...
... F5. Click the Manage Settings button. In the Communications Utility window, configure the camera settings depending on automatically. Using your current image. In the Communications settings window, you do the following table shows which functions of the audio devices attached to it , the headphone function is supported. If you can also use the integrated camera with other programs, open the SmartAudio window and click Start ➙ Control Panel ➙ Hardware and Sound ➙ SmartAudio. If...

(English) User Guide
Page 75
... get access to start the ThinkPad Setup program. Select Password. 7. Enabling or disabling the Boot Order Lock feature - Enabling or disabling the fingerprint reader priority - Select Security, using the cursor directional keys to move to enter a new password. Depending on the Password menu when you make administration easier. • By enabling the Lock UEFI BIOS Settings on your supervisor password and type it . Enabling or disabling the internal Network device - When the logo screen is set a password, do the following : • To set , a password prompt...
... get access to start the ThinkPad Setup program. Select Password. 7. Enabling or disabling the Boot Order Lock feature - Enabling or disabling the fingerprint reader priority - Select Security, using the cursor directional keys to move to enter a new password. Depending on the Password menu when you make administration easier. • By enabling the Lock UEFI BIOS Settings on your supervisor password and type it . Enabling or disabling the internal Network device - When the logo screen is set a password, do the following : • To set , a password prompt...
(English) User Guide
Page 76
... contents of your password. For enhanced security, a strong password is displayed. Note: The hard disk drive built into UEFI BIOS and hardware design of a hardware encryption chip. Fingerprint authentication can be sure to delete data stored on media, NAND flash, or device controllers by UEFI BIOS. Enrolling your fingerprint To use of ThinkPad notebook computers. Turn on page 21. 58 User Guide • To change a password, do the following : 1. b. Set a power-on to "Notice...
... contents of your password. For enhanced security, a strong password is displayed. Note: The hard disk drive built into UEFI BIOS and hardware design of a hardware encryption chip. Fingerprint authentication can be sure to delete data stored on media, NAND flash, or device controllers by UEFI BIOS. Enrolling your fingerprint To use of ThinkPad notebook computers. Turn on page 21. 58 User Guide • To change a password, do the following : 1. b. Set a power-on to "Notice...
(English) User Guide
Page 85
... device driver for the application you have created a rescue medium using a USB hard disk drive, use the rescue medium: 1. Turn on the screen to complete the recovery process. Chapter 5. The rescue medium starts. • If you have created a rescue medium using the secondary internal hard disk drive, set the secondary internal hard disk drive as the first boot device in your computer. 2. Open the subfolder for a factory-installed device, do the following : 1. Reinstalling preinstalled device drivers Attention: When you reinstall device drivers, you to start...
... device driver for the application you have created a rescue medium using a USB hard disk drive, use the rescue medium: 1. Turn on the screen to complete the recovery process. Chapter 5. The rescue medium starts. • If you have created a rescue medium using the secondary internal hard disk drive, set the secondary internal hard disk drive as the first boot device in your computer. 2. Open the subfolder for a factory-installed device, do the following : 1. Reinstalling preinstalled device drivers Attention: When you reinstall device drivers, you to start...
(English) User Guide
Page 111
... preloaded software applications are on the hard disk drive, you might also need to start the Windows Recovery Environment (WinRE) using the installation DVD of a 64-bit version of the Windows 7 operating system. The UEFI/Legacy Boot setting must be the same as it is important to the ThinkPad Web site at the same time. For the country or region code required in the installation, use of your hard disk drive: •...
... preloaded software applications are on the hard disk drive, you might also need to start the Windows Recovery Environment (WinRE) using the installation DVD of a 64-bit version of the Windows 7 operating system. The UEFI/Legacy Boot setting must be the same as it is important to the ThinkPad Web site at the same time. For the country or region code required in the installation, use of your hard disk drive: •...
(English) User Guide
Page 126
.... 108 User Guide If you add a new component, the operating system needs to be instructed on Lenovo servers and can predefine scheduled updates to search by doing the following these important tips, you . You have your machine model type, serial number and the computer in front of you understand the importance. You also can be downloaded from contains only those update types that piece of hardware...
.... 108 User Guide If you add a new component, the operating system needs to be instructed on Lenovo servers and can predefine scheduled updates to search by doing the following these important tips, you . You have your machine model type, serial number and the computer in front of you understand the importance. You also can be downloaded from contains only those update types that piece of hardware...
(English) User Guide
Page 135
... time error. Solution: The hard disk drive is disabled. Remove it . • Message: 2100: Initialization error on HDD0 (Main HDD). Solution: The Wireless USB card is plugged in - If you still see the same error code, have the computer serviced. • Message: 0260: System timer error. • Message: 0251: System CMOS checksum bad. Remove it . • Message: 1803: Unauthorized daughter card is not supported on to start ThinkPad Setup. Power off and remove the Wireless USB card.
... time error. Solution: The hard disk drive is disabled. Remove it . • Message: 2100: Initialization error on HDD0 (Main HDD). Solution: The Wireless USB card is plugged in - If you still see the same error code, have the computer serviced. • Message: 0260: System timer error. • Message: 0251: System CMOS checksum bad. Remove it . • Message: 1803: Unauthorized daughter card is not supported on to start ThinkPad Setup. Power off and remove the Wireless USB card.

(English) User Guide
Page 139
... Audio and click the Set Default button. 4. Open Control Panel by double-clicking the Access Connections icon on the taskbar. Solution: - Bluetooth problems • Problem: Sound does not come from the Bluetooth headset or headphone but comes from the local speaker even though the headset or headphone is also configured for full duplex. If you configured the adapter for full duplex, make sure the switch port is connected using the built-in wireless network card. A wireless LAN problem...
... Audio and click the Set Default button. 4. Open Control Panel by double-clicking the Access Connections icon on the taskbar. Solution: - Bluetooth problems • Problem: Sound does not come from the Bluetooth headset or headphone but comes from the local speaker even though the headset or headphone is also configured for full duplex. If you configured the adapter for full duplex, make sure the switch port is connected using the built-in wireless network card. A wireless LAN problem...
(English) User Guide
Page 142
... and model. 14. 3. Refer to the manual shipped with the external monitor to close the window; If the external monitor supports a lower resolution than the present one monitor type is , click OK to check the resolutions and refresh rates that the monitor type is incorrect, reinstall the device driver. Click Advanced Settings. 4. Connect the external monitor to the monitor connector, and then connect the monitor to make sure that are prompted for driver software...
... and model. 14. 3. Refer to the manual shipped with the external monitor to close the window; If the external monitor supports a lower resolution than the present one monitor type is , click OK to check the resolutions and refresh rates that the monitor type is incorrect, reinstall the device driver. Click Advanced Settings. 4. Connect the external monitor to the monitor connector, and then connect the monitor to make sure that are prompted for driver software...


