Hardware Maintenance Manual
Page 3
... factory contents by using OneKey Recovery 23 Restore of factory default 23 Passwords 24 Power-on password 24 Supervisor password 24 Power management 25 Screen blank mode 25 Sleep (standby) mode 25 Lenovo Z/P Series 26 Specifications 26 Status indicators 28 Function key combinations 30 FRU replacement notices 31 Screw notices 31 Removing and replacing an FRU 32 1010 Keyboard 33 1020 Optical drive 36 1030 Base cover 39 1040 Battery pack 44 1050 Hard disk drive 46 1060 PCI Express Mini Card for wireless LAN...
... factory contents by using OneKey Recovery 23 Restore of factory default 23 Passwords 24 Power-on password 24 Supervisor password 24 Power management 25 Screen blank mode 25 Sleep (standby) mode 25 Lenovo Z/P Series 26 Specifications 26 Status indicators 28 Function key combinations 30 FRU replacement notices 31 Screw notices 31 Removing and replacing an FRU 32 1010 Keyboard 33 1020 Optical drive 36 1030 Base cover 39 1040 Battery pack 44 1050 Hard disk drive 46 1060 PCI Express Mini Card for wireless LAN...

Hardware Maintenance Manual
Page 6
... Replace any heavy object: 1. Do not obstruct fan louvers or cover them away from the end. •• Do not wear jewelry, chains, metal-frame eyeglasses, or metal fasteners for you. •• Do not perform any other parts in your leg muscles; Z/P Series Hardware Maintenance Manual... that makes the machine unsafe. •• Before you start the machine, make sure that other service representatives and the customer are not in a hazardous position. •• Place removed covers and other conditions that may be trapped in the moving parts of the machine. Use a...
... Replace any heavy object: 1. Do not obstruct fan louvers or cover them away from the end. •• Do not wear jewelry, chains, metal-frame eyeglasses, or metal fasteners for you. •• Do not perform any other parts in your leg muscles; Z/P Series Hardware Maintenance Manual... that makes the machine unsafe. •• Before you start the machine, make sure that other service representatives and the customer are not in a hazardous position. •• Place removed covers and other conditions that may be trapped in the moving parts of the machine. Use a...

Hardware Maintenance Manual
Page 7
... shock can then operate the switch or unplug the power cord quickly. •• Do not work on suitable rubber mats (obtained locally, if necessary) to insulate you need to make sure that contain small conductive fibers to work with very high voltages...using testers, set the controls correctly and use such kind of mat to lock the wall box in the safety sections of maintenance information. Many customers have handles covered with a soft material that tester. - Use only one hand when working with powered-on the machine, unplug the power cord. Removing or installing...
... shock can then operate the switch or unplug the power cord quickly. •• Do not work on suitable rubber mats (obtained locally, if necessary) to insulate you need to make sure that contain small conductive fibers to work with very high voltages...using testers, set the controls correctly and use such kind of mat to lock the wall box in the safety sections of maintenance information. Many customers have handles covered with a soft material that tester. - Use only one hand when working with powered-on the machine, unplug the power cord. Removing or installing...
Hardware Maintenance Manual
Page 20
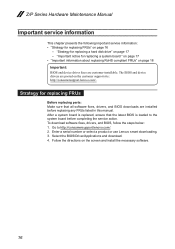
Enter a serial number or select a product or use Lenovo smart downloading. 3. Select the BIOS/Driver/Applications and download. 4. To download software fixes, drivers, and BIOS, follow the steps below: 1. Go to the system board before replacing any FRUs listed in this manual. Follow the directions on the customer support site: http://consumersupport.lenovo.com/. After a system board is replaced, ensure that all software fixes, drivers, and BIOS downloads are customer-installable. Strategy for replacing FRUs Before replacing parts: Make sure that the latest...
Enter a serial number or select a product or use Lenovo smart downloading. 3. Select the BIOS/Driver/Applications and download. 4. To download software fixes, drivers, and BIOS, follow the steps below: 1. Go to the system board before replacing any FRUs listed in this manual. Follow the directions on the customer support site: http://consumersupport.lenovo.com/. After a system board is replaced, ensure that all software fixes, drivers, and BIOS downloads are customer-installable. Strategy for replacing FRUs Before replacing parts: Make sure that the latest...
Hardware Maintenance Manual
Page 21
... computers have been customized. Running Automatic Configuration may cause a system malfunction. then, when service has been completed, verify that the customer has a current backup of the error. Important notice for replacing a hard disk drive Always try to those settings remain in the computer you are instructed to replace an FRU, but the replacement does not solve the problem, reinstall the original FRU before...
... computers have been customized. Running Automatic Configuration may cause a system malfunction. then, when service has been completed, verify that the customer has a current backup of the error. Important notice for replacing a hard disk drive Always try to those settings remain in the computer you are instructed to replace an FRU, but the replacement does not solve the problem, reinstall the original FRU before...
Hardware Maintenance Manual
Page 23
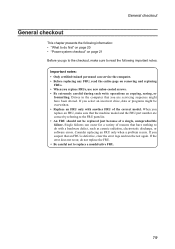
... •• "Power system checkout" on removing and replacing FRUs. • When you replace FRUs, use new nylon-coated screws. • Be extremely careful during such write operations as cosmic radiation, electrostatic discharge, or software errors. If you select an incorrect drive, data or programs might have nothing to do with another FRU of the correct model. If the error does not...
... •• "Power system checkout" on removing and replacing FRUs. • When you replace FRUs, use new nylon-coated screws. • Be extremely careful during such write operations as cosmic radiation, electrostatic discharge, or software errors. If you select an incorrect drive, data or programs might have nothing to do with another FRU of the correct model. If the error does not...

Hardware Maintenance Manual
Page 24
... spindle of a hard disk drive becomes noisy, it : 1. Procedure index and page number in the drive, or the insertion of a diskette with multiple labels •• Damaged or bent diskette eject button •• Fuses blown by attachment of servicer 2. Name and phone number of a nonsupported device •• Forgotten computer password (making the computer unusable) •• Sticky keys caused by...
... spindle of a hard disk drive becomes noisy, it : 1. Procedure index and page number in the drive, or the insertion of a diskette with multiple labels •• Damaged or bent diskette eject button •• Fuses blown by attachment of servicer 2. Name and phone number of a nonsupported device •• Forgotten computer password (making the computer unusable) •• Sticky keys caused by...
Hardware Maintenance Manual
Page 26
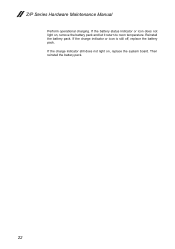
Z/P Series Hardware Maintenance Manual Perform operational charging. If the charge indicator or icon is still off, replace the battery pack. If the charge indicator still does not light on , remove the battery pack and let it return to room temperature. Then reinstall the battery pack. 22 If the battery status indicator or icon does not light on , replace the system board. Reinstall the battery pack.
Z/P Series Hardware Maintenance Manual Perform operational charging. If the charge indicator or icon is still off, replace the battery pack. If the charge indicator still does not light on , remove the battery pack and let it return to room temperature. Then reinstall the battery pack. 22 If the battery status indicator or icon does not light on , replace the system board. Reinstall the battery pack.
Hardware Maintenance Manual
Page 28
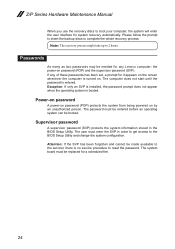
.... Power-on password A power-on password (POP) protects the system from being powered on . The system board must enter the SVP in the BIOS Setup Utility. The user must be booted. Z/P Series Hardware Maintenance Manual When you use the recovery discs to boot your computer, the system will enter the user interface for a scheduled fee. 24 Please follow the prompt to insert the backup discs to the BIOS Setup Utility and change the system configuration. The computer does not start...
.... Power-on password A power-on password (POP) protects the system from being powered on . The system board must enter the SVP in the BIOS Setup Utility. The user must be booted. Z/P Series Hardware Maintenance Manual When you use the recovery discs to boot your computer, the system will enter the user interface for a scheduled fee. 24 Please follow the prompt to insert the backup discs to the BIOS Setup Utility and change the system configuration. The computer does not start...

Hardware Maintenance Manual
Page 29
... time set on the "Turn off monitor" timer in screen blank mode: •• The LCD is powered off. •• The hard disk drive is low. Wait a few seconds before taking any operation with the keyboard, the hard disk, the parallel connector, or the diskette drive within that time. •• If the battery indicator is amber, indicating that the battery power is powered off . Related service information Power management Note: Power management modes are not supported...
... time set on the "Turn off monitor" timer in screen blank mode: •• The LCD is powered off. •• The hard disk drive is low. Wait a few seconds before taking any operation with the keyboard, the hard disk, the parallel connector, or the diskette drive within that time. •• If the battery indicator is amber, indicating that the battery power is powered off . Related service information Power management Note: Power management modes are not supported...
Hardware Maintenance Manual
Page 30
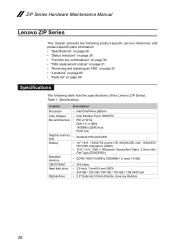
... indicators" on page 28 •• "Function key combinations" on page 30 •• "FRU replacement notices" on page 31 •• "Removing and replacing an FRU" on page 32 •• "Locations" on page 85 •• "Parts list" on page 88 Specifications The following table lists the specifications of the Lenovo Z/P Series : Table 1. Specifications Feature Processor Core Chipset Bus architecture Graphic memory chip Display Standard memory CMOS RAM Hard disk drive...
... indicators" on page 28 •• "Function key combinations" on page 30 •• "FRU replacement notices" on page 31 •• "Removing and replacing an FRU" on page 32 •• "Locations" on page 85 •• "Parts list" on page 88 Specifications The following table lists the specifications of the Lenovo Z/P Series : Table 1. Specifications Feature Processor Core Chipset Bus architecture Graphic memory chip Display Standard memory CMOS RAM Hard disk drive...
Hardware Maintenance Manual
Page 33
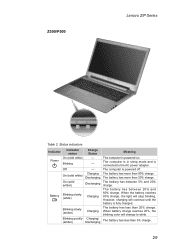
... sleep mode and is fully charged. When the battery reaches 80% charge, the light will change to the AC power adapter. The battery has less than 80% charge. The battery has more than 20% charge. The battery has between 20% and 80% charge. However, charging will continue until the battery is connected to white. The battery has between 5% and 20% charge. When battery charge reaches 20%, the blinking color will stop blinking. Z500/P500 Lenovo Z/P Series...
... sleep mode and is fully charged. When the battery reaches 80% charge, the light will change to the AC power adapter. The battery has less than 80% charge. The battery has more than 20% charge. The battery has between 20% and 80% charge. However, charging will continue until the battery is connected to white. The battery has between 5% and 20% charge. When battery charge reaches 20%, the blinking color will stop blinking. Z500/P500 Lenovo Z/P Series...

Hardware Maintenance Manual
Page 34
... the volume level. : Closes the currently active window. : Refreshes the desktop or the currently active window. : Enables/disables the touchpad. : Enables/disables Airplane mode. : Displays all currently active apps. : Turns on select models): Description Enables/disables the scroll lock. Table 3. Activates the break function. Fn key combinations Key combination Fn + PgUp: Fn + PgDn: Fn + Home: Fn + End: Fn + Space (on /off the backlight of function key. Activates the system request. Activates the pause function. Z/P Series Hardware Maintenance Manual Function key...
... the volume level. : Closes the currently active window. : Refreshes the desktop or the currently active window. : Enables/disables the touchpad. : Enables/disables Airplane mode. : Displays all currently active apps. : Turns on select models): Description Enables/disables the scroll lock. Table 3. Activates the break function. Fn key combinations Key combination Fn + PgUp: Fn + PgDn: Fn + Home: Fn + End: Fn + Space (on /off the backlight of function key. Activates the system request. Activates the pause function. Z/P Series Hardware Maintenance Manual Function key...

Hardware Maintenance Manual
Page 35
... 90° (Cross-section) •• Logic card to removing and replacing parts. Never use a screw that you removed. Screw notices Loose screws can cause a reliability problem. Use a new one should be used only once. In the Lenovo computer, this section carefully before replacing any FRU. Lenovo Z/P Series FRU replacement notices This section presents notices related to plastic Turn an additional 180° after the screw...
... 90° (Cross-section) •• Logic card to removing and replacing parts. Never use a screw that you removed. Screw notices Loose screws can cause a reliability problem. Use a new one should be used only once. In the Lenovo computer, this section carefully before replacing any FRU. Lenovo Z/P Series FRU replacement notices This section presents notices related to plastic Turn an additional 180° after the screw...

Hardware Maintenance Manual
Page 36
... about connecting and arranging internal cables, see "Locations" on page 31. 3. Verify this by the numbers in the steps to observe the following general rules: 1. Before replacing any FRU, review "FRU replacement notices" on page 85. 8. Remove them in the order in place and none are listed at the top of damaging parts. 2. To put the new FRU in the procedures. Metallic parts or...
... about connecting and arranging internal cables, see "Locations" on page 31. 3. Verify this by the numbers in the steps to observe the following general rules: 1. Before replacing any FRU, review "FRU replacement notices" on page 85. 8. Remove them in the order in place and none are listed at the top of damaging parts. 2. To put the new FRU in the procedures. Metallic parts or...

Hardware Maintenance Manual
Page 37
Z400 1 1 Z500/P500 1 1 Step Screw (quantity) 1 M2 × 12 mm, flat-head, nylok-coated (2) (Z400) 1 M2 × 12 mm, flat-head, nylok-coated (2) (Z500/ P500) Color Black Black Torque 1.85+/-0.15 kgf*cm 3.62 kg-cm 33 Removal steps of keyboard Remove the two screws 1. Lenovo Z/P Series 1010 Keyboard Figure 1.
Z400 1 1 Z500/P500 1 1 Step Screw (quantity) 1 M2 × 12 mm, flat-head, nylok-coated (2) (Z400) 1 M2 × 12 mm, flat-head, nylok-coated (2) (Z500/ P500) Color Black Black Torque 1.85+/-0.15 kgf*cm 3.62 kg-cm 33 Removal steps of keyboard Remove the two screws 1. Lenovo Z/P Series 1010 Keyboard Figure 1.

Hardware Maintenance Manual
Page 50
... can cause damages and permanent loss of hard disk drive Remove the four screws 1. Z400 1 1 1 Z500/P500 1 1 1 Step Screw (quantity) 1 M2.5 × 3 mm, flat-head, nylok-coated (4) Color Torque Black 3.0+/-0.3 kgf*cm 46 Z/P Series Hardware Maintenance Manual 1050 Hard disk drive For access, remove these FRUs in suspend mode. Removal steps of data. • Before removing the drive, suggest the customer to backup all the information on page 44 Attention...
... can cause damages and permanent loss of hard disk drive Remove the four screws 1. Z400 1 1 1 Z500/P500 1 1 1 Step Screw (quantity) 1 M2.5 × 3 mm, flat-head, nylok-coated (4) Color Torque Black 3.0+/-0.3 kgf*cm 46 Z/P Series Hardware Maintenance Manual 1050 Hard disk drive For access, remove these FRUs in suspend mode. Removal steps of data. • Before removing the drive, suggest the customer to backup all the information on page 44 Attention...

Hardware Maintenance Manual
Page 53
... Mini Card for wireless LAN (continued) Remove the card in the direction shown by arrow 3. Lenovo Z/P Series Figure 6. Z400 3 Z500/P500 3 When installing: •• In models with a wireless LAN card that has two antenna connectors, plug the black cable (1st) (MAIN) into the jack labeled 1, and the white cable (2nd) (AUX) into jack labeled 2 on the card. •• In models with a wireless LAN card that has three antenna connectors, plug the black cable...
... Mini Card for wireless LAN (continued) Remove the card in the direction shown by arrow 3. Lenovo Z/P Series Figure 6. Z400 3 Z500/P500 3 When installing: •• In models with a wireless LAN card that has two antenna connectors, plug the black cable (1st) (MAIN) into the jack labeled 1, and the white cable (2nd) (AUX) into jack labeled 2 on the card. •• In models with a wireless LAN card that has three antenna connectors, plug the black cable...

Hardware Maintenance Manual
Page 73
Lenovo Z/P Series 1140 LCD unit For access, remove these FRUs in order: •• "1010 Keyboard" on page 33 •• "1020 Optical drive" on page 36 •• "1030 Base cover" on page 39 •• "1040 Battery pack" on page 44 •• "1050 Hard disk drive" on page 46 •• "1060 PCI Express Mini Card for wireless LAN" on page 48 ••...
Lenovo Z/P Series 1140 LCD unit For access, remove these FRUs in order: •• "1010 Keyboard" on page 33 •• "1020 Optical drive" on page 36 •• "1030 Base cover" on page 39 •• "1040 Battery pack" on page 44 •• "1050 Hard disk drive" on page 46 •• "1060 PCI Express Mini Card for wireless LAN" on page 48 ••...

Hardware Maintenance Manual
Page 88
Removal steps of power board Remove the power board in order: •• "1010 Keyboard" on page 33 •• "1020 Optical drive" on page 36 •• "1030 Base cover" on page 39 •• "1040 Battery pack" on page 44 •• "1050 Hard disk drive" on page 46 •• "1060 PCI Express Mini Card for wireless LAN" on page 48 •• "1070 DIMM...
Removal steps of power board Remove the power board in order: •• "1010 Keyboard" on page 33 •• "1020 Optical drive" on page 36 •• "1030 Base cover" on page 39 •• "1040 Battery pack" on page 44 •• "1050 Hard disk drive" on page 46 •• "1060 PCI Express Mini Card for wireless LAN" on page 48 •• "1070 DIMM...


