Lenovo H5 Series User Guide
Page 5
Troubleshooting and Confirming Setup 21 Troubleshooting Display Problems 22 Troubleshooting Audio Problems 23 Troubleshooting Software Problems 24 Troubleshooting Problems with Optical Drives and Hard Disks 24 Special considerations for troubleshooting Windows 25 Windows Help and Support 26 Performing Daily Maintenance Tasks 26 Hardware Replacement Guide 29 Locations 33 Replacing hardware 35 Appendix 47 Declaration 47 Trademarks 48 Energy Star Statement 49 Enabling ErP compliance mode 50 ii Contents
Troubleshooting and Confirming Setup 21 Troubleshooting Display Problems 22 Troubleshooting Audio Problems 23 Troubleshooting Software Problems 24 Troubleshooting Problems with Optical Drives and Hard Disks 24 Special considerations for troubleshooting Windows 25 Windows Help and Support 26 Performing Daily Maintenance Tasks 26 Hardware Replacement Guide 29 Locations 33 Replacing hardware 35 Appendix 47 Declaration 47 Trademarks 48 Energy Star Statement 49 Enabling ErP compliance mode 50 ii Contents

Lenovo H5 Series User Guide
Page 11
... interfaces above steps as followings: 1. Select 5.1 surround from those on your computer, you may use the above are as a reference to setup the sounds in the pop-up dialog box. 2. 5.1 Audio configuration instructions This model of computer supports the transformation of stereo sound into 5.1... surround sound. Select a playback device from the Playback dialog box, then click the Configure button to proceed with the speaker setup by following guides when connecting to the 5.1 surround audio device: Blue line-in connector Surround Green line-out connector Pink Mic-in...
... interfaces above steps as followings: 1. Select 5.1 surround from those on your computer, you may use the above are as a reference to setup the sounds in the pop-up dialog box. 2. 5.1 Audio configuration instructions This model of computer supports the transformation of stereo sound into 5.1... surround sound. Select a playback device from the Playback dialog box, then click the Configure button to proceed with the speaker setup by following guides when connecting to the 5.1 surround audio device: Blue line-in connector Surround Green line-out connector Pink Mic-in...

Lenovo H5 Series User Guide
Page 13
... help you 'll need to the table below. Display connecting instructions when playing Blu-ray Discs Note: Only some hardware. Contact your ISP for detailed setup instructions. Other types of cables do not meet the requirements of an Ethernet cable (purchased separately) to the Ethernet connector on your country. Follow the...
... help you 'll need to the table below. Display connecting instructions when playing Blu-ray Discs Note: Only some hardware. Contact your ISP for detailed setup instructions. Other types of cables do not meet the requirements of an Ethernet cable (purchased separately) to the Ethernet connector on your country. Follow the...

Lenovo H5 Series User Guide
Page 26
Troubleshooting and Confirming Setup This chapter contains the following topic: Troubleshooting and Problem Resolution User Guide 21
Troubleshooting and Confirming Setup This chapter contains the following topic: Troubleshooting and Problem Resolution User Guide 21

Lenovo H5 Series User Guide
Page 50
... that all the cables, including telephone lines and power cords. Make sure that the cables are left inside your computer. Refer to "Starting the Setup Utility" in the Setup Utility program. Completing the installation After replacing a part or parts, you must close the computer cover and reconnect all components have been reassembled...
... that all the cables, including telephone lines and power cords. Make sure that the cables are left inside your computer. Refer to "Starting the Setup Utility" in the Setup Utility program. Completing the installation After replacing a part or parts, you must close the computer cover and reconnect all components have been reassembled...

Lenovo H5 Series User Guide
Page 55
...electricity consumption when your computer by pressing the power switch. 50 User Guide Select Enabled and press Enter. 4. Press Enter when prompted to start the Setup Utility program. 2. Repeatedly press and release the F1 key when turning on the computer to confirm. To enable ErP compliance mode in standby mode or... program main menu, select Power → ErP and press Enter. 3. Press F10 to save changes and exit the Setup Utility program. Enabling ErP compliance mode You can wake up your computer is enabled, you only can enable the energy-related products directive (ErP) ...
...electricity consumption when your computer by pressing the power switch. 50 User Guide Select Enabled and press Enter. 4. Press Enter when prompted to start the Setup Utility program. 2. Repeatedly press and release the F1 key when turning on the computer to confirm. To enable ErP compliance mode in standby mode or... program main menu, select Power → ErP and press Enter. 3. Press F10 to save changes and exit the Setup Utility program. Enabling ErP compliance mode You can wake up your computer is enabled, you only can enable the energy-related products directive (ErP) ...
Lenovo H500 Hardware Maintenance Manual
Page 5
... 20 Undetermined problems 20 Chapter 7. General information . . . . . 9 Specifications 9 Chapter 4. Using the Setup Utility. . . 13 Starting the Lenovo BIOS Setup Utility program . 13 Viewing and changing settings 13 Using passwords 13 Enabling or disabling a device 15 Selecting a ...startup device 16 Exiting the Lenovo BIOS Setup Utility program . . 17 Chapter 6. General information . . . . 45 Additional Service Information 45 © Copyright Lenovo 2013 iii Replacing hardware . . . . 25 General information 25 Replacing...
... 20 Undetermined problems 20 Chapter 7. General information . . . . . 9 Specifications 9 Chapter 4. Using the Setup Utility. . . 13 Starting the Lenovo BIOS Setup Utility program . 13 Viewing and changing settings 13 Using passwords 13 Enabling or disabling a device 15 Selecting a ...startup device 16 Exiting the Lenovo BIOS Setup Utility program . . 17 Chapter 6. General information . . . . 45 Additional Service Information 45 © Copyright Lenovo 2013 iii Replacing hardware . . . . 25 General information 25 Replacing...
Lenovo H500 Hardware Maintenance Manual
Page 19
...key then turn off the computer. 2. If your computer and data. When the Lenovo BIOS Setup Utility program is already on when you decide to perform various tasks are using the Lenovo BIOS Setup Utility menu. To view or change the configuration settings of your user name. &#... configuration options are not case sensitive © Copyright Lenovo 2013 13 See "Starting the Setup Utility program." Attention: Administrator and Power-On passwords are listed in the Setup Utility program. However, if you start the Lenovo BIOS Setup Utility program, do not have to set passwords to...
...key then turn off the computer. 2. If your computer and data. When the Lenovo BIOS Setup Utility program is already on when you decide to perform various tasks are using the Lenovo BIOS Setup Utility menu. To view or change the configuration settings of your user name. &#... configuration options are not case sensitive © Copyright Lenovo 2013 13 See "Starting the Setup Utility program." Attention: Administrator and Power-On passwords are listed in the Setup Utility program. However, if you start the Lenovo BIOS Setup Utility program, do not have to set passwords to...
Lenovo H500 Hardware Maintenance Manual
Page 20
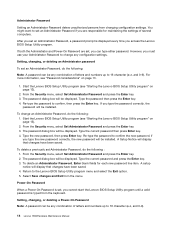
...password, then press Enter key. If you can be installed. Start the Lenovo BIOS Setup Utility program (see "Starting the Lenovo BIOS Setup Utility program" on page 13. 1. Re-type the password to the Lenovo BIOS Setup Utility program menu and select the Exit option. 5. To delete an ... Password, Enter blank fields for maintaining the settings of letters and numbers up to 16 character (a-z, and 0-9). 14 Lenovo H500Hardware Maintenance Manual A setup notice will be displayed. You might want to set an Administrator Password if you must use your Administrator Password to confirm...
...password, then press Enter key. If you can be installed. Start the Lenovo BIOS Setup Utility program (see "Starting the Lenovo BIOS Setup Utility program" on page 13. 1. Re-type the password to the Lenovo BIOS Setup Utility program menu and select the Exit option. 5. To delete an ... Password, Enter blank fields for maintaining the settings of letters and numbers up to 16 character (a-z, and 0-9). 14 Lenovo H500Hardware Maintenance Manual A setup notice will be displayed. You might want to set an Administrator Password if you must use your Administrator Password to confirm...
Lenovo H500 Hardware Maintenance Manual
Page 21
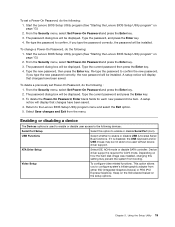
... Password, do the following: 1. A setup notice will display that changes have been saved. A setup notice will be displayed. Return to enable or disable USB (Universal Serial Bus) functions. USB Functions Select whether to the Lenovo BIOS Setup Utility program menu and select the Exit... option. 5. Video Setup To configure video related functions. Using the Setup Utility 15 Start the Lenovo BIOS Setup Utility program (See "Starting the Lenovo BIOS Setup Utility program" on page 13.) ...
... Password, do the following: 1. A setup notice will display that changes have been saved. A setup notice will be displayed. Return to enable or disable USB (Universal Serial Bus) functions. USB Functions Select whether to the Lenovo BIOS Setup Utility program menu and select the Exit... option. 5. Video Setup To configure video related functions. Using the Setup Utility 15 Start the Lenovo BIOS Setup Utility program (See "Starting the Lenovo BIOS Setup Utility program" on page 13.) ...
Lenovo H500 Hardware Maintenance Manual
Page 22
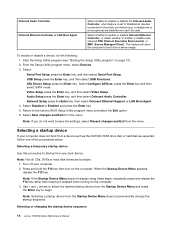
...menu. Select: Serial Port Setup press the Enter key, and then select Serial Port Setup. USB Setup press the Enter key, and then select USB Functions. Video Setup press the Enter key, and then select Video Setup. Selecting or changing the startup device sequence 16 Lenovo H500Hardware Maintenance Manual Select ...turn on page 13). 2. Turn off your computer does not boot from a server image. This feature will allow the computer to the Lenovo BIOS Setup Utility program menu and select the Exit option. 6. Return to boot from a device such as the CD/DVD-ROM drive disk or...
...menu. Select: Serial Port Setup press the Enter key, and then select Serial Port Setup. USB Setup press the Enter key, and then select USB Functions. Video Setup press the Enter key, and then select Video Setup. Selecting or changing the startup device sequence 16 Lenovo H500Hardware Maintenance Manual Select ...turn on page 13). 2. Turn off your computer does not boot from a server image. This feature will allow the computer to the Lenovo BIOS Setup Utility program menu and select the Exit option. 6. Return to boot from a device such as the CD/DVD-ROM drive disk or...

Lenovo H500 Hardware Maintenance Manual
Page 23
...from or include the device in the boot sequence. 5. Use the key to the Lenovo BIOS Setup Utility program main menu. Notes: a. Using the Setup Utility 17 Start the Lenovo BIOS Setup Utility program (see "Starting the Lenovo BIOS Setup Utility program" on the right side of the following : 1. Read the information ... Primary Boot Sequence. When the Save & reset window shows, select the Yes button, and then press the Enter key to exit the Lenovo BIOS Setup Utility program. • If you do not want to the default settings, select Load Optimal Defaults from the menu. If you have...
...from or include the device in the boot sequence. 5. Use the key to the Lenovo BIOS Setup Utility program main menu. Notes: a. Using the Setup Utility 17 Start the Lenovo BIOS Setup Utility program (see "Starting the Lenovo BIOS Setup Utility program" on the right side of the following : 1. Read the information ... Primary Boot Sequence. When the Save & reset window shows, select the Yes button, and then press the Enter key to exit the Lenovo BIOS Setup Utility program. • If you do not want to the default settings, select Load Optimal Defaults from the menu. If you have...


