Hardware Maintenance Manual - Notebook
Page 3
...by using Recovery Disc Set 23 Start Recovery Disc (one disc 23 Operating System Recovery Disc (one or more discs 23 Applications and Drivers Recovery Disc (one or more discs 23 Supplemental Recovery Disc 23 Passwords 24 Power-on password 24 Hard-disk password 24 Supervisor password... 24 Power management 25 Screen blank mode 25 Putting your computer to sleep 25 Shutting down the computer 26 Lenovo G400s/G405s/G400s Touch/G500s/ G505s/G500s Touch 27 Specifications 27 Status indicators 30 Fn key combinations 32 FRU replacement notices 33 Screw notices 33 Removing and ...
...by using Recovery Disc Set 23 Start Recovery Disc (one disc 23 Operating System Recovery Disc (one or more discs 23 Applications and Drivers Recovery Disc (one or more discs 23 Supplemental Recovery Disc 23 Passwords 24 Power-on password 24 Hard-disk password 24 Supervisor password... 24 Power management 25 Screen blank mode 25 Putting your computer to sleep 25 Shutting down the computer 26 Lenovo G400s/G405s/G400s Touch/G500s/ G505s/G500s Touch 27 Specifications 27 Status indicators 30 Fn key combinations 32 FRU replacement notices 33 Screw notices 33 Removing and ...
Hardware Maintenance Manual - Notebook
Page 20
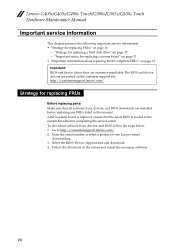
...software. 16 After a system board is loaded to http://consumersupport.lenovo.com/. 2. To download software fixes, drivers, and BIOS, follow the steps below: 1. Follow the directions on page 17 - Select the BIOS/Driver/Applications and download. 4. "Strategy for replacing FRUs Before replacing ...BIOS and device drivers are posted on page 18 Important: BIOS and device driver fixes are installed before completing the service action. Go to the system board before replacing any FRUs listed in this manual. Lenovo G400s/G405s/G400s Touch/G500s/G505s/G500s Touch Hardware Maintenance...
...software. 16 After a system board is loaded to http://consumersupport.lenovo.com/. 2. To download software fixes, drivers, and BIOS, follow the steps below: 1. Follow the directions on page 17 - Select the BIOS/Driver/Applications and download. 4. "Strategy for replacing FRUs Before replacing ...BIOS and device drivers are posted on page 18 Important: BIOS and device driver fixes are installed before completing the service action. Go to the system board before replacing any FRUs listed in this manual. Lenovo G400s/G405s/G400s Touch/G500s/G505s/G500s Touch Hardware Maintenance...

Hardware Maintenance Manual - Notebook
Page 37
Lenovo G400s/G405s/G400s Touch/G500s/G505s/G500s Touch FRU replacement notices This section presents notices related to the ...after the screw head touches the surface of the logic card: more than 180° (Cross-section) • Torque driver If you have a torque screwdriver , refer to the "Torque" column for reuse. • Use a torque screwdriver ...8226; Keep the screw kit in the table. Screw notices Loose screws can cause a reliability problem. In the Lenovo computer, this problem is addressed with shock or vibration. • They are calibrated correctly following when you service this...
Lenovo G400s/G405s/G400s Touch/G500s/G505s/G500s Touch FRU replacement notices This section presents notices related to the ...after the screw head touches the surface of the logic card: more than 180° (Cross-section) • Torque driver If you have a torque screwdriver , refer to the "Torque" column for reuse. • Use a torque screwdriver ...8226; Keep the screw kit in the table. Screw notices Loose screws can cause a reliability problem. In the Lenovo computer, this problem is addressed with shock or vibration. • They are calibrated correctly following when you service this...

Hardware Maintenance Manual - Notebook
Page 45
Removal steps of optical drive Remove the screw a, insert a screw driver into the screw hole and push the optical drive in the direction shown by arrow c. 1 Step a Screw (quantity) Color M2.5 × 3 mm, flat-head, nylok-coated Black (1) (G500s) M 2 × 9 mm, flat-head, nylok-coated (1) Black (G400s) Torque 1.5 ~ ... pack" on page 35 • "1030 Hard disk drive(HDD)/Memory/Mini PCI Express Card slot compartment cover" on page 37 Figure 5. Lenovo G400s/G405s/G400s Touch/G500s/G505s/G500s Touch 1050 Optical drive For access, remove these FRUs in the direction shown by arrow b.
Removal steps of optical drive Remove the screw a, insert a screw driver into the screw hole and push the optical drive in the direction shown by arrow c. 1 Step a Screw (quantity) Color M2.5 × 3 mm, flat-head, nylok-coated Black (1) (G500s) M 2 × 9 mm, flat-head, nylok-coated (1) Black (G400s) Torque 1.5 ~ ... pack" on page 35 • "1030 Hard disk drive(HDD)/Memory/Mini PCI Express Card slot compartment cover" on page 37 Figure 5. Lenovo G400s/G405s/G400s Touch/G500s/G505s/G500s Touch 1050 Optical drive For access, remove these FRUs in the direction shown by arrow b.


