
Hardware Maintenance Manual
Page 17
... devices. 2. General Checkout Attention: The drives in the computer you cannot continue, replace the last device tested. © Copyright Lenovo 2012 11 Be extremely careful during write operations such as copying, saving, or formatting. Check all display controls to step 7. 6. If you did receive the correct response, proceed to the middle position. 4.
... devices. 2. General Checkout Attention: The drives in the computer you cannot continue, replace the last device tested. © Copyright Lenovo 2012 11 Be extremely careful during write operations such as copying, saving, or formatting. Check all display controls to step 7. 6. If you did receive the correct response, proceed to the middle position. 4.

Hardware Maintenance Manual
Page 19
When the Lenovo BIOS Setup Utility program is a good idea to 16 characters (a-z and 0-9). Viewing and changing settings System configuration options are displayed on the bottom of each screen. Password considerations A password can use your computer, regardless of letters and numbers. • ...not be easily compromised. If your computer is used to view and change settings, see "Using passwords." We suggest that cannot be displayed until you start this procedure, shut down the operating system and turn on when you type your password. However, the operating system...
When the Lenovo BIOS Setup Utility program is a good idea to 16 characters (a-z and 0-9). Viewing and changing settings System configuration options are displayed on the bottom of each screen. Password considerations A password can use your computer, regardless of letters and numbers. • ...not be easily compromised. If your computer is used to view and change settings, see "Using passwords." We suggest that cannot be displayed until you start this procedure, shut down the operating system and turn on when you type your password. However, the operating system...

Hardware Maintenance Manual
Page 20
.... A Setup Notice will be displayed. Return to the Lenovo BIOS Setup Utility program menu and select the Exit option. 6. Return to the Lenovo BIOS Setup Utility program menu and select the Exit option. 6. Select Save Changes and Exit from the menu. 14 Lenovo C240/245 All-In-One PC Hardware... Maintenance Manual Type the current password then press the Enter key. 4. Retype the new password to confirm, then press the Enter key. The password dialog box will be displayed confirming that your changes have been saved...
.... A Setup Notice will be displayed. Return to the Lenovo BIOS Setup Utility program menu and select the Exit option. 6. Return to the Lenovo BIOS Setup Utility program menu and select the Exit option. 6. Select Save Changes and Exit from the menu. 14 Lenovo C240/245 All-In-One PC Hardware... Maintenance Manual Type the current password then press the Enter key. 4. Retype the new password to confirm, then press the Enter key. The password dialog box will be displayed confirming that your changes have been saved...

Hardware Maintenance Manual
Page 21
... saved. 5. Type the current password then press the Enter key. 4. The password dialog box will be displayed. Return to the Lenovo BIOS Setup Utility program menu and select the Exit option. 6. A Setup Notice will be displayed. Type the current password and press the Enter key. 4. If you typed the new password correctly, the...
... saved. 5. Type the current password then press the Enter key. 4. The password dialog box will be displayed. Return to the Lenovo BIOS Setup Utility program menu and select the Exit option. 6. A Setup Notice will be displayed. Type the current password and press the Enter key. 4. If you typed the new password correctly, the...
Hardware Maintenance Manual
Page 22
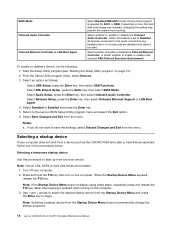
...↑ and ↓ arrows to select the desired startup device from the Startup Device Menu does not permanently change the startup sequence. 16 Lenovo C240/245 All-In-One PC Hardware Maintenance Manual Depending on page 13). 2. When this procedure to save the settings, select Discard Changes and ... Setup, press the Enter key, then select Onboard Ethernet Support or LAN Boot Agent. 4. Note: If the Startup Device Menu does not display using these steps, repeatedly press and release the F12 key rather than keeping it pressed when turning on the computer. Turn off your computer ...
...↑ and ↓ arrows to select the desired startup device from the Startup Device Menu does not permanently change the startup sequence. 16 Lenovo C240/245 All-In-One PC Hardware Maintenance Manual Depending on page 13). 2. When this procedure to save the settings, select Discard Changes and ... Setup, press the Enter key, then select Onboard Ethernet Support or LAN Boot Agent. 4. Note: If the Startup Device Menu does not display using these steps, repeatedly press and release the F12 key rather than keeping it pressed when turning on the computer. Turn off your computer ...
Hardware Maintenance Manual
Page 23
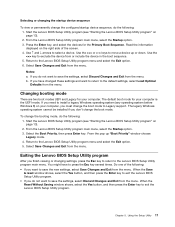
...you must change the boot mode to move a device up "Boot Priority" window choose Legacy mode. 4. Read the information displayed on page 13). 2. Use the key to the Lenovo BIOS Setup Utility program menu and select the Exit option. 6. Return to exclude the device from the menu. Notes: a. ...Changes and Exit from or include the device in the boot sequence. 5. b. To change the booting mode, do the following: 1. From the Lenovo BIOS Setup Utility program main menu, select the Startup option. 3. Select Save Changes and Exit from the menu. You might have changed these settings ...
...you must change the boot mode to move a device up "Boot Priority" window choose Legacy mode. 4. Read the information displayed on page 13). 2. Use the key to the Lenovo BIOS Setup Utility program menu and select the Exit option. 6. Return to exclude the device from the menu. Notes: a. ...Changes and Exit from or include the device in the boot sequence. 5. b. To change the booting mode, do the following: 1. From the Lenovo BIOS Setup Utility program main menu, select the Startup option. 3. Select Save Changes and Exit from the menu. You might have changed these settings ...


