
Specification
Page 1
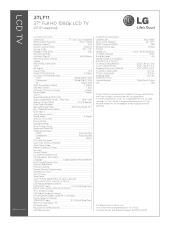
TV • Full HD 1080p Resolution • 30,000:1 Dynamic Contrast Ratio • 5ms Response Time (GTG) • 450 cd/m2 Brightness • Wide Viewing Angle &#... Input (rear) • 2 Composite Input (1 rear/1 side) • 1 Digital Audio Out (Optical) (rear) • PC Connectivity (D-sub 15pin) • RF Antenna Input LGusa.com LCD TV 37LF11 37" Full HD 1080p LCD TV (37.0" diagonal) Full HD 1080p performance has never been so attainable.
TV • Full HD 1080p Resolution • 30,000:1 Dynamic Contrast Ratio • 5ms Response Time (GTG) • 450 cd/m2 Brightness • Wide Viewing Angle &#... Input (rear) • 2 Composite Input (1 rear/1 side) • 1 Digital Audio Out (Optical) (rear) • PC Connectivity (D-sub 15pin) • RF Antenna Input LGusa.com LCD TV 37LF11 37" Full HD 1080p LCD TV (37.0" diagonal) Full HD 1080p performance has never been so attainable.
Specification
Page 2
...1W ENERGY STAR 3.0 Compliant • DIMENSIONS & WEIGHT TV without stand (WxHxD) 36.2" x 24.0" x 3.5" TV with stand (WxHxD) 36.2" x 26.5" x 11.4" Shipping Dimensions (WxHxD) 47.0" x 26.2" x 10.0" TV without notice. "LG Life's Good" is present) • SIDE AUDIO/...LG Corp. RF 1080i/720p Color Temperature Control 3 Modes 24p Real Cinema • (2:2) AV Mode II (Picture & Sound) 3 Modes Picture Mode 7 Modes AUDIO Mono/Stereo/Dual (MTS/SAP) • Audio Output Power (Watts - Component 60p/30p/24p - LCD TV 37LF11 37" Full HD 1080p LCD TV...
...1W ENERGY STAR 3.0 Compliant • DIMENSIONS & WEIGHT TV without stand (WxHxD) 36.2" x 24.0" x 3.5" TV with stand (WxHxD) 36.2" x 26.5" x 11.4" Shipping Dimensions (WxHxD) 47.0" x 26.2" x 10.0" TV without notice. "LG Life's Good" is present) • SIDE AUDIO/...LG Corp. RF 1080i/720p Color Temperature Control 3 Modes 24p Real Cinema • (2:2) AV Mode II (Picture & Sound) 3 Modes Picture Mode 7 Modes AUDIO Mono/Stereo/Dual (MTS/SAP) • Audio Output Power (Watts - Component 60p/30p/24p - LCD TV 37LF11 37" Full HD 1080p LCD TV...
Owner's Manual (English)
Page 1
... 1-800-243-0000 USA, Consumer User 1-888-865-3026 USA, Commercial User 1-888-542-2623 CANADA LG Customer Information Center P/NO : SAC33601901 (0905-REV04) www.lgusa.com / www.lg.ca / www.lgcommercial.com Record it for future reference. Changing the factory default settings or enabling other ...Home Use)" setting. The model and serial number of the TV is located on the back and one side of the TV. LCD TV OWNER'S MANUAL 19LH20 22LH20 26LH20 32LH20 37LH20 42LH20 22LH200C 32LH30 37LH30 42LH30 47LH30 32LF11 37LF11 42LF11 47LF11 19LU55 22LU55 26LU55 32CL20 47LF21 Please read this manual...
... 1-800-243-0000 USA, Consumer User 1-888-865-3026 USA, Commercial User 1-888-542-2623 CANADA LG Customer Information Center P/NO : SAC33601901 (0905-REV04) www.lgusa.com / www.lg.ca / www.lgcommercial.com Record it for future reference. Changing the factory default settings or enabling other ...Home Use)" setting. The model and serial number of the TV is located on the back and one side of the TV. LCD TV OWNER'S MANUAL 19LH20 22LH20 26LH20 32LH20 37LH20 42LH20 22LH200C 32LH30 37LH30 42LH30 47LH30 32LF11 37LF11 42LF11 47LF11 19LU55 22LU55 26LU55 32CL20 47LF21 Please read this manual...
Owner's Manual (English)
Page 2
These limits are not expressly approved by turning the equipment off and on a circuit different from LG Electronics. If this device which are designed to correct the interference by one or more of the following two conditions: (1) This device may be... Code (U.S.A.). The exclamation point within an equilateral triangle is provided to call the CATV system installer's attention to rain or moisture. NOTE TO CABLE/TV INSTALLER This reminder is intended to alert the user to modify this product to Article 820-40 of important operating and maintenance (servicing) instructions in...
These limits are not expressly approved by turning the equipment off and on a circuit different from LG Electronics. If this device which are designed to correct the interference by one or more of the following two conditions: (1) This device may be... Code (U.S.A.). The exclamation point within an equilateral triangle is provided to call the CATV system installer's attention to rain or moisture. NOTE TO CABLE/TV INSTALLER This reminder is intended to alert the user to modify this product to Article 820-40 of important operating and maintenance (servicing) instructions in...
Owner's Manual (English)
Page 4
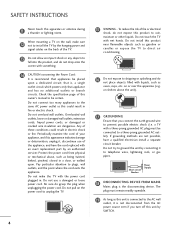
...recommend that appliances be placed upon . SAFETY INSTRUCTIONS 11 Never touch this product near flammable objects such as gasoline or candles or expose the TV to direct air conditioning. 16 Do not expose to dripping or splashing and do not place objects filled with liquids, such as vases,... closed in electric shock or fire. Do not use of your appliance, and if its appearance indicates damage or deterioration, unplug it to unplug the TV. 4 15 WARNING - on the power cord to telephone wires, lightening rods, or gas pipes. Periodically examine the cord of the appliance, and ...
...recommend that appliances be placed upon . SAFETY INSTRUCTIONS 11 Never touch this product near flammable objects such as gasoline or candles or expose the TV to direct air conditioning. 16 Do not expose to dripping or splashing and do not place objects filled with liquids, such as vases,... closed in electric shock or fire. Do not use of your appliance, and if its appearance indicates damage or deterioration, unplug it to unplug the TV. 4 15 WARNING - on the power cord to telephone wires, lightening rods, or gas pipes. Periodically examine the cord of the appliance, and ...
Owner's Manual (English)
Page 5
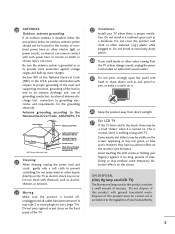
...off, unplugged and all cables have no adverse effect on it. 26 Keep the product away from direct sunlight. 27 For LCD TV If the TV feels cold to an antenna discharge unit, size of grounding conductors, location of this product with general household waste. provides information with...NEC) in the vicinity of time. Do not install in . Some minute dot defects may take 2 or more people to the regulations of the TV. 23 Ventilation Install your local authority. 5 This is normal, there is installed, follow the precautions below. Antenna grounding according to the National Electrical...
...off, unplugged and all cables have no adverse effect on it. 26 Keep the product away from direct sunlight. 27 For LCD TV If the TV feels cold to an antenna discharge unit, size of grounding conductors, location of this product with general household waste. provides information with...NEC) in the vicinity of time. Do not install in . Some minute dot defects may take 2 or more people to the regulations of the TV. 23 Ventilation Install your local authority. 5 This is normal, there is installed, follow the precautions below. Antenna grounding according to the National Electrical...
Owner's Manual (English)
Page 6
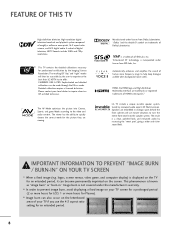
... Wizard 68 Preset Picture Settings (Picture Mode 70 Manual Picture Adjustment - CONTENTS WARNING / CAUTION 2 SAFETY INSTRUCTIONS 3 FEATURE OF THIS TV 8 PREPARATION Accessories 9 Front Panel Information 10 Back Panel Information 13 Stand Instructions 16 VESA Wall Mounting 24 Cable Management 25 Desktop Pedestal... 35 VCR Setup 37 Other A/V Source Setup 39 Audio out Connection 40 PC Setup 41 WATCHING TV / CHANNEL CONTROL Remote Control Functions 48 Turning On TV 50 Channel Selection 50 Volume Adjustment 50 Initial Setting 51 On-Screen Menus Selection 52 Quick Menu 53...
... Wizard 68 Preset Picture Settings (Picture Mode 70 Manual Picture Adjustment - CONTENTS WARNING / CAUTION 2 SAFETY INSTRUCTIONS 3 FEATURE OF THIS TV 8 PREPARATION Accessories 9 Front Panel Information 10 Back Panel Information 13 Stand Instructions 16 VESA Wall Mounting 24 Cable Management 25 Desktop Pedestal... 35 VCR Setup 37 Other A/V Source Setup 39 Audio out Connection 40 PC Setup 41 WATCHING TV / CHANNEL CONTROL Remote Control Functions 48 Turning On TV 50 Channel Selection 50 Volume Adjustment 50 Initial Setting 51 On-Screen Menus Selection 52 Quick Menu 53...
Owner's Manual (English)
Page 7
...Sound Setting Adjustment - Analog Broadcasting System Captions 90 - Caption Option 92 TIME SETTING Clock Setting - User Mode 83 Balance 84 TV Speakers On/Off Setup 85 Audio Reset 86 Stereo/SAP Broadcasts Setup 87 Audio Language 88 On-Screen Menus Language Selection 89 Caption ... Time Setting 95 Sleep Timer Setting 96 PARENTAL CONTROL / RATINGS Set Password & Lock System 97 Channel Blocking 100 Movie & TV Rating 101 Downloadable Rating 106 External Input Blocking 107 APPENDIX Troubleshooting 108 Maintenance 110 Product Specifications 111 IR Codes 115 External Control ...
...Sound Setting Adjustment - Analog Broadcasting System Captions 90 - Caption Option 92 TIME SETTING Clock Setting - User Mode 83 Balance 84 TV Speakers On/Off Setup 85 Audio Reset 86 Stereo/SAP Broadcasts Setup 87 Audio Language 88 On-Screen Menus Language Selection 89 Caption ... Time Setting 95 Sleep Timer Setting 96 PARENTAL CONTROL / RATINGS Set Password & Lock System 97 Channel Blocking 100 Movie & TV Rating 101 Downloadable Rating 106 External Input Blocking 107 APPENDIX Troubleshooting 108 Maintenance 110 Product Specifications 111 IR Codes 115 External Control ...
Owner's Manual (English)
Page 8
...day" and "night" modes will then be made through the ISFccc mode. The AV Mode optimizes the picture into the speaker system. LG TV include a unique invisible speaker system, tuned by the Imaging Science Foundation. logos, screen menus, video game, and computer display) is .... TruSurround XT technology is a trademark of HDMI Licensing LLC." I In order to inquire about an ISF certified technician. This TV contains the detailed calibrations necessary for an extended period. 8 Automatically enhances and amplifies the sound of digital television, HDTV formats include...
...day" and "night" modes will then be made through the ISFccc mode. The AV Mode optimizes the picture into the speaker system. LG TV include a unique invisible speaker system, tuned by the Imaging Science Foundation. logos, screen menus, video game, and computer display) is .... TruSurround XT technology is a trademark of HDMI Licensing LLC." I In order to inquire about an ISF certified technician. This TV contains the detailed calibrations necessary for an extended period. 8 Automatically enhances and amplifies the sound of digital television, HDTV formats include...

Owner's Manual (English)
Page 9
... user must use shielded signal interface cables with ferrite cores to P.19) 9 If an accessory is missing, please contact the dealer where you purchased the TV. LIST 0 9 VOL MUTE FLASHBK ENTER CH P A G E RETURN 1 4 INFO AV MODE POWER 2 ENERGYINSAPVUINGT 753 86 LIST 0 9 VOL MUTE FLASHBK MENU Q.MENU ENTER RETURN FAMVARK CH P A G E 1.5V...
... user must use shielded signal interface cables with ferrite cores to P.19) 9 If an accessory is missing, please contact the dealer where you purchased the TV. LIST 0 9 VOL MUTE FLASHBK ENTER CH P A G E RETURN 1 4 INFO AV MODE POWER 2 ENERGYINSAPVUINGT 753 86 LIST 0 9 VOL MUTE FLASHBK MENU Q.MENU ENTER RETURN FAMVARK CH P A G E 1.5V...

Owner's Manual (English)
Page 10
PREPARATION PREPARATION FRONT PANEL INFORMATION I Image shown may differ from your TV. 19/22/26LH20, 22LH200C INPUT Button POWER Button MENU Button ENTER Button VOLUME CHANNEL (-, +) Buttons (E,D) Buttons INPUT MENU ENTER VOL CH 32/37/42LH20, 32/... VOLUME (+, -) Buttons ENTER Button MENU Button INPUT Button POWER Button ON OFF AC power control switch (Except 19/22LH20, 22LH200C) 10 Illuminates blue when the TV is switched on. (Can be adjusted Power Indicator in standby mode.
PREPARATION PREPARATION FRONT PANEL INFORMATION I Image shown may differ from your TV. 19/22/26LH20, 22LH200C INPUT Button POWER Button MENU Button ENTER Button VOLUME CHANNEL (-, +) Buttons (E,D) Buttons INPUT MENU ENTER VOL CH 32/37/42LH20, 32/... VOLUME (+, -) Buttons ENTER Button MENU Button INPUT Button POWER Button ON OFF AC power control switch (Except 19/22LH20, 22LH200C) 10 Illuminates blue when the TV is switched on. (Can be adjusted Power Indicator in standby mode.

Owner's Manual (English)
Page 12
Illuminates white when the TV is switched on. 12 ❖x AC power control ❖❋❋ switch PREPARATION PREPARATION I Image shown may differ from your TV. 19/22LU55 INPUT Button POWER Button MENU Button ENTER Button VOLUME CHANNEL (-, +) Buttons ( , ) Buttons INPUT MENU ENTER VOL CH SPEAKER 26LU55 CH VOL ENTER MENU INPUT CHANNEL ( , ) Buttons VOLUME (+, -) Buttons ENTER Button MENU Button INPUT Button POWER Button Remote Control Sensor Power/Standby Indicator Illuminates red in standby mode.
Illuminates white when the TV is switched on. 12 ❖x AC power control ❖❋❋ switch PREPARATION PREPARATION I Image shown may differ from your TV. 19/22LU55 INPUT Button POWER Button MENU Button ENTER Button VOLUME CHANNEL (-, +) Buttons ( , ) Buttons INPUT MENU ENTER VOL CH SPEAKER 26LU55 CH VOL ENTER MENU INPUT CHANNEL ( , ) Buttons VOLUME (+, -) Buttons ENTER Button MENU Button INPUT Button POWER Button Remote Control Sensor Power/Standby Indicator Illuminates red in standby mode.

Owner's Manual (English)
Page 15
... port doesn't work. 6 ANTENNA/CABLE IN Connect over-the air signals to this jack. Accepts DVI video using an adapter or HDMI to operate the TV on DC power. 15 Caution: Never attempt to DVI cable (not included). 4 RGB IN (PC) Analog PC Connection. Uses a red, green, and blue cable for...
... port doesn't work. 6 ANTENNA/CABLE IN Connect over-the air signals to this jack. Accepts DVI video using an adapter or HDMI to operate the TV on DC power. 15 Caution: Never attempt to DVI cable (not included). 4 RGB IN (PC) Analog PC Connection. Uses a red, green, and blue cable for...

Owner's Manual (English)
Page 16
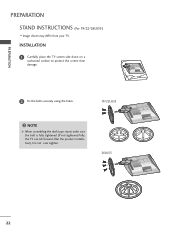
INSTALLATION 1 Carefully place the TV screen side down on a cushioned surface to protect the screen from your TV. PREPARATION PREPARATION STAND INSTRUCTIONS (For 19/22LH20, 22LH200C) I Image shown may differ from damage. 2 Assemble the TV as shown until you hear it click. 16
INSTALLATION 1 Carefully place the TV screen side down on a cushioned surface to protect the screen from your TV. PREPARATION PREPARATION STAND INSTRUCTIONS (For 19/22LH20, 22LH200C) I Image shown may differ from damage. 2 Assemble the TV as shown until you hear it click. 16

Owner's Manual (English)
Page 17
PROTECTION COVER 17 PREPARATION PROTECTION COVER 4 Insert the PROTECTION COVER into the TV. 5 Fix the 4 bolts securely using the holes in the back of the TV. DETACHMENT 1 Carefully place the TV screen side down on a cushioned surface to protect the screen from damage. 2 Loose the bolts from TV. 3 Detach the stand from TV.
PROTECTION COVER 17 PREPARATION PROTECTION COVER 4 Insert the PROTECTION COVER into the TV. 5 Fix the 4 bolts securely using the holes in the back of the TV. DETACHMENT 1 Carefully place the TV screen side down on a cushioned surface to protect the screen from damage. 2 Loose the bolts from TV. 3 Detach the stand from TV.

Owner's Manual (English)
Page 18
NOTE G When assembling the desk type stand, make sure the bolt is fully tightened (If not tightened fully, the TV can tilt forward after the product installation). PREPARATION PREPARATION STAND INSTRUCTIONS (For 26/32/37/42LH20, 32/37/42/47LH30) I Image shown may differ from damage. 2 Assemble the TV as shown. 3 Fix the 4 bolts securely using the holes in the back of the TV. ! INSTALLATION 1 Carefully place the TV screen side down on a cushioned surface to protect the screen from your TV. Do not over tighten. 18
NOTE G When assembling the desk type stand, make sure the bolt is fully tightened (If not tightened fully, the TV can tilt forward after the product installation). PREPARATION PREPARATION STAND INSTRUCTIONS (For 26/32/37/42LH20, 32/37/42/47LH30) I Image shown may differ from damage. 2 Assemble the TV as shown. 3 Fix the 4 bolts securely using the holes in the back of the TV. ! INSTALLATION 1 Carefully place the TV screen side down on a cushioned surface to protect the screen from your TV. Do not over tighten. 18

Owner's Manual (English)
Page 19
PREPARATION DETACHMENT 1 Carefully place the TV screen side down on a cushioned surface to protect the screen from damage. 2 Loose the bolts from TV. 3 Detach the stand from TV. PROTECTION COVER After removing the stand, install the included protection cover over the hole for the stand. Press the PROTECTION COVER into the TV until you hear it click. 19
PREPARATION DETACHMENT 1 Carefully place the TV screen side down on a cushioned surface to protect the screen from damage. 2 Loose the bolts from TV. 3 Detach the stand from TV. PROTECTION COVER After removing the stand, install the included protection cover over the hole for the stand. Press the PROTECTION COVER into the TV until you hear it click. 19

Owner's Manual (English)
Page 20
... side down on a cushioned surface to protect the screen from your TV has a protection tape attached, remove the tape. Do not over tighten. 20 INSTALLATION (For 32/37/42LF11, 32CL20) 1 If your TV. PREPARATION PREPARATION STAND INSTRUCTIONS (For 32/37/42/47LF11, 47LF21, 32CL20) I Image shown may differ from ... 2 Assemble the parts of the STAND BODY with COVER BASE of the TV by using the holes in the back of the TV. ! STAND BODY COVER BASE 4 Fix the 4 bolts securely using the 4 screws supplied. 3 Assemble the TV as shown. NOTE G When assembling the desk type stand, make sure the...
... side down on a cushioned surface to protect the screen from your TV has a protection tape attached, remove the tape. Do not over tighten. 20 INSTALLATION (For 32/37/42LF11, 32CL20) 1 If your TV. PREPARATION PREPARATION STAND INSTRUCTIONS (For 32/37/42/47LF11, 47LF21, 32CL20) I Image shown may differ from ... 2 Assemble the parts of the STAND BODY with COVER BASE of the TV by using the holes in the back of the TV. ! STAND BODY COVER BASE 4 Fix the 4 bolts securely using the 4 screws supplied. 3 Assemble the TV as shown. NOTE G When assembling the desk type stand, make sure the...

Owner's Manual (English)
Page 21
PREPARATION DETACHMENT 1 Carefully place the TV screen side down on a cushioned surface to protect the screen from damage. 2 Loose the bolts from TV. 3 Detach the stand from TV. Press the PROTECTION COVER into the TV until you hear it click. 21 PROTECTION COVER After removing the stand, install the included protection cover over the hole for the stand.
PREPARATION DETACHMENT 1 Carefully place the TV screen side down on a cushioned surface to protect the screen from damage. 2 Loose the bolts from TV. 3 Detach the stand from TV. Press the PROTECTION COVER into the TV until you hear it click. 21 PROTECTION COVER After removing the stand, install the included protection cover over the hole for the stand.
Owner's Manual (English)
Page 22
INSTALLATION 1 Carefully place the TV screen side down on a cushioned surface to protect the screen from your TV. Do not over tighten. 19" 22" 19/22LU55 19" 22" 26LU55 26" 22 NOTE G When assembling the desk type stand, make sure the bolt is fully tightened (If not tightened fully, the TV can tilt forward after the product installation). PREPARATION PREPARATION STAND INSTRUCTIONS (For 19/22/26LU55) I Image shown may differ from damage. 2 Fix the bolts securely using the holes. !
INSTALLATION 1 Carefully place the TV screen side down on a cushioned surface to protect the screen from your TV. Do not over tighten. 19" 22" 19/22LU55 19" 22" 26LU55 26" 22 NOTE G When assembling the desk type stand, make sure the bolt is fully tightened (If not tightened fully, the TV can tilt forward after the product installation). PREPARATION PREPARATION STAND INSTRUCTIONS (For 19/22/26LU55) I Image shown may differ from damage. 2 Fix the bolts securely using the holes. !


