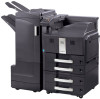

FS-C8500DN Installation Instructions
Page 1
...Follow the procedure above to provide enough space around printer. Lift Plate Stopper Toner Containers (4) Paper Size Sheets (4) 3 Installing the Toner Container and Waste Toner Box 1 Open the front cover. 2 Hold the toner container with both hands and gently push it to the horizontal position. Cap... (Y) Magenta (M) 8 Press on the left edge of the waste toner box. 7 Install the waste toner box. CD-ROMs Manuals and Other Printed Materials 2 Removing the Lift Plate Stoppers 1 Pull out the paper cassettes 1 and 2. Clearance FS-C8500DN 400 mm (15-3/4") 300 mm (11-13/16") 300 ...
...Follow the procedure above to provide enough space around printer. Lift Plate Stopper Toner Containers (4) Paper Size Sheets (4) 3 Installing the Toner Container and Waste Toner Box 1 Open the front cover. 2 Hold the toner container with both hands and gently push it to the horizontal position. Cap... (Y) Magenta (M) 8 Press on the left edge of the waste toner box. 7 Install the waste toner box. CD-ROMs Manuals and Other Printed Materials 2 Removing the Lift Plate Stoppers 1 Pull out the paper cassettes 1 and 2. Clearance FS-C8500DN 400 mm (15-3/4") 300 mm (11-13/16") 300 ...

FS-C8500DN Operation Guide
Page 3
... (Security function setting 4-85 Job Account.Set. (Job Account setting 4-94 Administrator (Administrator settings 4-102 Adjust/Maint. (Adjust/Maintenance selection/setting) ........ 4-105 5 Maintenance General Information 5-2 Toner Container Replacement 5-2 Replacing the Waste Toner Box 5-6 Cleaning the Printer 5-8 6 Troubleshooting General Guidelines 6-2 Print Quality Problems 6-3 Error Messages 6-5 Clearing Paper Jams 6-15 iii
... (Security function setting 4-85 Job Account.Set. (Job Account setting 4-94 Administrator (Administrator settings 4-102 Adjust/Maint. (Adjust/Maintenance selection/setting) ........ 4-105 5 Maintenance General Information 5-2 Toner Container Replacement 5-2 Replacing the Waste Toner Box 5-6 Cleaning the Printer 5-8 6 Troubleshooting General Guidelines 6-2 Print Quality Problems 6-3 Error Messages 6-5 Clearing Paper Jams 6-15 iii

FS-C8500DN Operation Guide
Page 24
Internal Components 23 24 25 26 27 28 29 30 31 32 33 34 23 Black Toner Container (K) 24 Black Toner Container (K) Release Lever 25 Yellow Toner Container (Y) 26 Yellow Toner Container (Y) Release Lever 27 Cyan Toner Container (C) 28 Cyan Toner Container (C) Release Lever 29 Magenta Toner Container (M) 30 Magenta Toner Container (M) Release Lever 31 Cleaning Brush 32 Waste Toner Box 33 Waste Toner Tray 34 Release button 36 35 37 38 39 35 Paper Feed Unit Cover 36 Paper Feed Unit 37 Green Knob 38 Paper Width Adjusting Tab 39 Paper Length Guide 1-4 Machine Parts
Internal Components 23 24 25 26 27 28 29 30 31 32 33 34 23 Black Toner Container (K) 24 Black Toner Container (K) Release Lever 25 Yellow Toner Container (Y) 26 Yellow Toner Container (Y) Release Lever 27 Cyan Toner Container (C) 28 Cyan Toner Container (C) Release Lever 29 Magenta Toner Container (M) 30 Magenta Toner Container (M) Release Lever 31 Cleaning Brush 32 Waste Toner Box 33 Waste Toner Tray 34 Release button 36 35 37 38 39 35 Paper Feed Unit Cover 36 Paper Feed Unit 37 Green Knob 38 Paper Width Adjusting Tab 39 Paper Length Guide 1-4 Machine Parts

FS-C8500DN Operation Guide
Page 175
5 Maintenance This chapter contains explanations on the following topics: General Information 5-2 Toner Container Replacement 5-2 Replacing the Waste Toner Box 5-6 Cleaning the Printer 5-8 Maintenance 5-1
5 Maintenance This chapter contains explanations on the following topics: General Information 5-2 Toner Container Replacement 5-2 Replacing the Waste Toner Box 5-6 Cleaning the Printer 5-8 Maintenance 5-1
FS-C8500DN Operation Guide
Page 176
...the data is anonymous - Toner Container Replacement The toner container in the printer should be used anonymously. Therefore only 50% of the first toner kits can replace the following component according to the printer's display: • Toner Kits • Waste Toner Box Also, the following ...parts need periodic cleaning: • Separator • Transfer Roller Note Information Collection on the amount of the Toner Container (Printable pages) Black Cyan Magenta Yellow 25...
...the data is anonymous - Toner Container Replacement The toner container in the printer should be used anonymously. Therefore only 50% of the first toner kits can replace the following component according to the printer's display: • Toner Kits • Waste Toner Box Also, the following ...parts need periodic cleaning: • Separator • Transfer Roller Note Information Collection on the amount of the Toner Container (Printable pages) Black Cyan Magenta Yellow 25...

FS-C8500DN Operation Guide
Page 177
... move storage media and computer supplies (such as original Kyocera Mita toner containers. Maintenance 5-3 Replacing the Toner Container This section explains how to incinerate the Toner Container. This is also recommended to avoid damaging media by the waste toner that may spill over the box. If this example..., it is to use only the Kyocera Mita toner containers which are supplied in 4 different colors: cyan, magenta, yellow and black. For details, ...
... move storage media and computer supplies (such as original Kyocera Mita toner containers. Maintenance 5-3 Replacing the Toner Container This section explains how to incinerate the Toner Container. This is also recommended to avoid damaging media by the waste toner that may spill over the box. If this example..., it is to use only the Kyocera Mita toner containers which are supplied in 4 different colors: cyan, magenta, yellow and black. For details, ...

FS-C8500DN Operation Guide
Page 179
Use the same procedure to replace the toner containers of the toner container and the waste toner box in . 8 Turn the toner container release lever to the next section. Note After use, always dispose of the other colors. 9 Close the front cover. Maintenance 5-5 7 Hold the new toner container with both hands and gently push it in accordance with Federal, State and Local rules and regulations. Proceed to the horizontal position.
Use the same procedure to replace the toner containers of the toner container and the waste toner box in . 8 Turn the toner container release lever to the next section. Note After use, always dispose of the other colors. 9 Close the front cover. Maintenance 5-5 7 Hold the new toner container with both hands and gently push it in accordance with Federal, State and Local rules and regulations. Proceed to the horizontal position.

FS-C8500DN Operation Guide
Page 180
A new waste toner box is displayed. The waste toner box needs to be replaced before the printer will operate. 1 Open the front cover. 2 Press the release button and pull out the waste toner tray. 3 Cap the old waste toner box. 4 Remove the old waste toner box diagonally. 5 Place the old waste toner box in the provided plastic disposal bag. 5-6 Maintenance Replacing the Waste Toner Box Replace the waste toner box when the Check waste toner box. Message is included with the toner kit.
A new waste toner box is displayed. The waste toner box needs to be replaced before the printer will operate. 1 Open the front cover. 2 Press the release button and pull out the waste toner tray. 3 Cap the old waste toner box. 4 Remove the old waste toner box diagonally. 5 Place the old waste toner box in the provided plastic disposal bag. 5-6 Maintenance Replacing the Waste Toner Box Replace the waste toner box when the Check waste toner box. Message is included with the toner kit.

FS-C8500DN Operation Guide
Page 181
After replacing the toner containers and the waste toner box, clean the paper transfer unit. When the tray reaches the correct position, it . 9 Press the specified position to set the waste toner tray. 6 Open the cap of the new waste toner box to lock it locks into place with a "click" sound. 10 Close the front cover. Maintenance 5-7 For instructions, refer to Cleaning the Printer on the left edge of the new waste toner box. 7 Install the new waste toner box. 8 Press on page 5-8.
After replacing the toner containers and the waste toner box, clean the paper transfer unit. When the tray reaches the correct position, it . 9 Press the specified position to set the waste toner tray. 6 Open the cap of the new waste toner box to lock it locks into place with a "click" sound. 10 Close the front cover. Maintenance 5-7 For instructions, refer to Cleaning the Printer on the left edge of the new waste toner box. 7 Install the new waste toner box. 8 Press on page 5-8.

FS-C8500DN Operation Guide
Page 182
To maintain optimum print quality, it is also recommended that the inside of the printer whenever the toner container or the waste toner box is replaced. Follow the steps below to clean the separator. 1 Open the front cover. 2 Remove the cleaning brush (blue). 3 Pull up the left cover... 1 lever and open left cover 1. 4 Clean the separator by moving the brush from side to side along the separator as when the toner ...
To maintain optimum print quality, it is also recommended that the inside of the printer whenever the toner container or the waste toner box is replaced. Follow the steps below to clean the separator. 1 Open the front cover. 2 Remove the cleaning brush (blue). 3 Pull up the left cover... 1 lever and open left cover 1. 4 Clean the separator by moving the brush from side to side along the separator as when the toner ...

FS-C8500DN Operation Guide
Page 196
... be offset is not correctly installed. Set the paper feed unit. Install the waste toner box. Newly added jobs are printed in B & W. For details, refer to Replacing the Waste Toner Box on page 5-6. The waste toner box is selected. Tray # of Paper. Check waste toner box. Punching is not possible because a paper size that cannot be punched is...
... be offset is not correctly installed. Set the paper feed unit. Install the waste toner box. Newly added jobs are printed in B & W. For details, refer to Replacing the Waste Toner Box on page 5-6. The waste toner box is selected. Tray # of Paper. Check waste toner box. Punching is not possible because a paper size that cannot be punched is...

FS-C8500DN Operation Guide
Page 233
Top Tray 1-2 Transfer Roller Cleaning 5-9 Transparency 3-8 Troubleshooting 6-1 U USB Interface 1-3 USB Memory Print 4-16 Remove 4-21 Slot 1-2, 1-5 W Waste Toner Box 1-4 Replacing 5-6 Wide A4 4-63 X XPS Fit to Page 4-63 Index-3
Top Tray 1-2 Transfer Roller Cleaning 5-9 Transparency 3-8 Troubleshooting 6-1 U USB Interface 1-3 USB Memory Print 4-16 Remove 4-21 Slot 1-2, 1-5 W Waste Toner Box 1-4 Replacing 5-6 Wide A4 4-63 X XPS Fit to Page 4-63 Index-3


