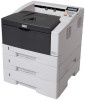
FS-1370DN Operation Guide (Advanced)
Page 6
... printing, click OK. Note Do not remove the toner container from the carton until you ship the printer, remove and pack the developer unit and drum unit in the printer. IMPORTANT Take care not to provide additional or useful information about a function or feature. Torn pieces of paper are ready to...
FS-1370DN Operation Guide (Advanced)
Page 13
... a sample on the machine and check that is more likely than white bond paper to be placed on them carefully by the edges to the drum or rollers will be able to the MP tray. One transparency can be loaded at a time. One label can be loaded at a time. Half speed...
FS-1370DN Operation Guide (Basic)
Page 23
... page phrase or reference to resume printing. Torn pieces of an action. WARNING If you ship the printer, remove and pack the developer unit and drum unit in a plastic bag and ship them separately from the carton until you are difficult to install it in This Guide This manual uses the...
FS-1370DN Operation Guide (Basic)
Page 63
To replace the maintenance kit, contact your service technician. Maintenance Kit Replacement When the machine prints 100,000 pages, a message is displayed. IMPORTANT When the waste toner in the drum unit is almost full, Waste toner near full is displayed indicating that the maintenance kit should be replaced immediately. Maintenance 4-5 Replace the maintenance kit. 6 Turn the lock lever to the lock position. 7 Close the top cover. The maintenance kit must then be replaced.
FS-1370DN Operation Guide (Basic)
Page 64
Note The drum unit is sensitive to light for more than five minutes. 4-6 Maintenance Never expose the drum unit to light. Cleaning the Printer To avoid print quality problems, the interior of the printer. Developer Unit Drum Unit 3 Remove the drum unit from the printer by holding the green levers with the toner container out of the printer must be cleaned with every toner container replacement. 1 Open the top cover and front cover. 2 Lift the developer unit together with both hands.
FS-1370DN Operation Guide (Basic)
Page 65
IMPORTANT Take care not to touch the transfer roller (black) during cleaning. 6 On the drum unit, slide the charger cleaner (green) back and forth 2 or 3 times to clean the charger wire, then return it to the original position. IMPORTANT Remove ... a clean, level surface. Maintenance 4-7 After cleaning, make sure you restore the charger cleaner to its home position. 7 When cleaning is complete, return the drum unit to its original position (CLEANER HOME POSITION). 4 Place the drum unit flat on the charger cleaner in case of the first cleaning. IMPORTANT Do not place the...
FS-1370DN Operation Guide (Basic)
Page 67
... ever leave the printer unused for a long period of the printer. Maintenance 4-9 WARNING If you ship the printer, remove and pack the developer unit and drum unit in a plastic bag and ship them separately from the wall outlet. We recommend you consult with your dealer about the additional actions you move...
FS-1370DN Operation Guide (Basic)
Page 71
... Replacement on page 4-6. Corrective Action Check the toner container. Check the charger cleaner of the printer. Dropouts, stray dots Drum or developer unit may require cleaning or replacing parts of the drum unit is in its original position. If the suggested corrective action will not solve the problem, call for service representative...
FS-1370DN Operation Guide (Basic)
Page 72
... page 4-6. Dirt on page 4-6. Printed Results Faint or blurred printing Corrective Action Check the toner container and if necessary replace. Check the developer unit and drum unit are correct in a parameter to Cleaning the Printer on page 4-2. If the problem occurs only with a specific file or program, the most likely cause...
FS-1370DN Operation Guide (Basic)
Page 75
... has occurred. Cassette 1 Waste toner near full Displayed when the installed toner is not properly closed. Install original Kyocera toner. When one is not the original Kyocera product. The waste toner in the drum unit is indicated in some places.) You can abandon printing by pressing [Cancel]. Look at the error code given...
FS-1370DN Operation Guide (Basic)
Page 83
IMPORTANT Do not try to be pinched by holding the green levers with both hands. Never expose the drum unit to light for more than five minutes. 4 If the jammed paper appears to remove paper that has already been partially fed. Remove any partially ... to step 2. 2 Open the top cover and front cover, and lift the developer unit together with the toner container out of the printer. 3 Remove the drum unit from the printer by rollers, pull it may result in burn injury. Do not touch it, as it along the normal running direction of...
FS-1370DN Operation Guide (Basic)
Page 84
5 Return the drum unit to its position, aligning the guides at both ends with the slots in the printer. 6 Insert the developer unit together with the toner container, back into the machine. The printer warms up and resumes printing. 5-16 Troubleshooting Close the top cover and the front cover.
FS-1370DN Operation Guide (Basic)
Page 91
... of the printer 1-2 at the rear of the printer 1-2 Connection power cord 3-3, 3-4 USB cable 3-2 Custom mode installation method 3-15 D Developer unit clearing paper jams 5-15 Drum unit clearing paper jams 5-15 maintenance 4-6 Duplexer clearing paper jams 5-14 E Environmental standard requirements 6-4 Error messages of memory card 5-8 of RAM disk 5-8 tabled, with corrective...