Service Manual
Page 6
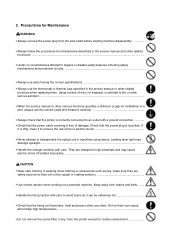
...disassembly • Always follow the procedures for maintenance described in machines using lasers. Leaking laser light may cause electric shock if handled improperly CAUTION • Wear safe clothing. Keep away from the printer except for installation of a part, always use the thermostat or thermal fuse... and measure carefully • Always check that the printer is correctly connected to an outlet with care. 2. Using a piece of wire, for example, could lead to fire or other serious accident...• When the service manual or other related brochure when replacing them can be...
...disassembly • Always follow the procedures for maintenance described in machines using lasers. Leaking laser light may cause electric shock if handled improperly CAUTION • Wear safe clothing. Keep away from the printer except for installation of a part, always use the thermostat or thermal fuse... and measure carefully • Always check that the printer is correctly connected to an outlet with care. 2. Using a piece of wire, for example, could lead to fire or other serious accident...• When the service manual or other related brochure when replacing them can be...

Service Manual
Page 27
2-2 Installing the printer Installing the printer requires several steps. Open the top cover all the way. 2. For details, refer to the optional Paper feeder's Service Manual. 2-2-1 Installing the toner container 1. If the option paper feeder is in the release position. 1 Figure 2-2-1 Confirming the lock lever #1 FS-1050 2-4 If not, pull it forward until it is in the release (forward) position. Confirm that the lock lever #1 1 is used with the printer, begin installation with connecting the printer and the paper feeder. Proceed as follows in sequence.
2-2 Installing the printer Installing the printer requires several steps. Open the top cover all the way. 2. For details, refer to the optional Paper feeder's Service Manual. 2-2-1 Installing the toner container 1. If the option paper feeder is in the release position. 1 Figure 2-2-1 Confirming the lock lever #1 FS-1050 2-4 If not, pull it forward until it is in the release (forward) position. Confirm that the lock lever #1 1 is used with the printer, begin installation with connecting the printer and the paper feeder. Proceed as follows in sequence.

Service Manual
Page 160
... key. STAT 1; This section exclusively describes information obtainable with the service status page. Connect the printer to print. 3. For information on the status page FS-1050 B-3 Ensure that the printer is printed.) Service information on the user (normal) status page, refer to the printer's User's Manual. EXIT; >lpt1: The service status page is printed. (If you omit '1,' a user status...
... key. STAT 1; This section exclusively describes information obtainable with the service status page. Connect the printer to print. 3. For information on the status page FS-1050 B-3 Ensure that the printer is printed.) Service information on the user (normal) status page, refer to the printer's User's Manual. EXIT; >lpt1: The service status page is printed. (If you omit '1,' a user status...


