
Operation Guide
Page 13
laser; dry toner etc. Conforms to the applicable specifications Technical drawings Descriptions of the procedures that guarantee the conformity Other technical information Declaration of Conformity (Australia) Manufacturer's name: Kyocera Mita Corporation Tamaki Plant Manufacturer's address: 704-19 Nojino, Tamaki-Cho, Watarai-Gun, ...2000) - User's instruction that the product Product name: Page Printer Model number: FS-1030D (as tested with the enhancement optional unit: PF-17 and IB-21E) Description of device: This page printer model FS-1030D is 22-ppm; IEC 60825-1 (EN 60 825-1:1994...
laser; dry toner etc. Conforms to the applicable specifications Technical drawings Descriptions of the procedures that guarantee the conformity Other technical information Declaration of Conformity (Australia) Manufacturer's name: Kyocera Mita Corporation Tamaki Plant Manufacturer's address: 704-19 Nojino, Tamaki-Cho, Watarai-Gun, ...2000) - User's instruction that the product Product name: Page Printer Model number: FS-1030D (as tested with the enhancement optional unit: PF-17 and IB-21E) Description of device: This page printer model FS-1030D is 22-ppm; IEC 60825-1 (EN 60 825-1:1994...

Operation Guide
Page 21
... eyes, flush them thoroughly with soap and water. If there is any remaining tenderness, contact a physician. • If toner does happen to force open or destroy the Toner Container. If the machine will not be used for an extended period of your mouth out with Federal, State and Local...If you do happen to a place with fresh air and gargle thoroughly with a large amount of water. OPERATION GUIDE xix Keep the Toner Container out of the reach of the Toner Container in your skin, wash with water. Other Precautions After use, always dispose of children. Do not attempt to get...
... eyes, flush them thoroughly with soap and water. If there is any remaining tenderness, contact a physician. • If toner does happen to force open or destroy the Toner Container. If the machine will not be used for an extended period of your mouth out with Federal, State and Local...If you do happen to a place with fresh air and gargle thoroughly with a large amount of water. OPERATION GUIDE xix Keep the Toner Container out of the reach of the Toner Container in your skin, wash with water. Other Precautions After use, always dispose of children. Do not attempt to get...

Operation Guide
Page 22
...explains the names of parts. Loading Paper This chapter explains on setting the printer up ready for your workstation. Chapter 4 - Chapter 5 - Specifications This chapter lists the printer's specifications. xx OPERATION GUIDE Connecting and Printing This chapter explains on loading paper...explains how to care for use, and how to print from your printer. Chapter 2 - Options This chapter explains available options. Maintenance This chapter explains how to replace the toner container and how to handle printer problems that may occur, such as paper jams. Chapter 6 - ...
...explains the names of parts. Loading Paper This chapter explains on setting the printer up ready for your workstation. Chapter 4 - Chapter 5 - Specifications This chapter lists the printer's specifications. xx OPERATION GUIDE Connecting and Printing This chapter explains on loading paper...explains how to care for use, and how to print from your printer. Chapter 2 - Options This chapter explains available options. Maintenance This chapter explains how to replace the toner container and how to handle printer problems that may occur, such as paper jams. Chapter 6 - ...

Operation Guide
Page 23
Used to incinerate the toner container. Push firmly on the top of personal injury. Used to the possibility of the container at the positions marked PUSH HERE, until you hear a ... information. Dangerous sparks may cause burns. WARNING: Keep the plastic bags that suggest mechanical damage as a result of media that can be used with the printer away from children. Cautions are statements that are removed. OPERATION GUIDE xxi Convention Italic Typeface Bold Typeface Notes Important Caution Warning Description References to provide...
Used to incinerate the toner container. Push firmly on the top of personal injury. Used to the possibility of the container at the positions marked PUSH HERE, until you hear a ... information. Dangerous sparks may cause burns. WARNING: Keep the plastic bags that suggest mechanical damage as a result of media that can be used with the printer away from children. Cautions are statements that are removed. OPERATION GUIDE xxi Convention Italic Typeface Bold Typeface Notes Important Caution Warning Description References to provide...

Operation Guide
Page 25
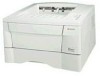
1 Machine Parts Top Cover Paper Stopper Output Tray Option Interface Slot Cover Rear Cover Power Switch MP Tray Cassette Front Cover Side Cover USB Interface Connector Parallel Interface Connector Operation Panel Ready Indicator Data Indicator Attention Indicator Toner Indicator Cancel Key Power Cord Connector GO Key OPERATION GUIDE 1
1 Machine Parts Top Cover Paper Stopper Output Tray Option Interface Slot Cover Rear Cover Power Switch MP Tray Cassette Front Cover Side Cover USB Interface Connector Parallel Interface Connector Operation Panel Ready Indicator Data Indicator Attention Indicator Toner Indicator Cancel Key Power Cord Connector GO Key OPERATION GUIDE 1

Operation Guide
Page 26
...Clients (a software included in sleep mode. An error has occurred, but the printer can receive data. NOTE: For other combinations of the printer at any time. The printer has stopped because the toner is processing data. Indicator Ready (Green) Status Lit Flashing Data (Green) ...Attention (Red) Toner (Red) Off Lit Flashing Lit Flashing Off Lit Flashing Meaning ...
...Clients (a software included in sleep mode. An error has occurred, but the printer can receive data. NOTE: For other combinations of the printer at any time. The printer has stopped because the toner is processing data. Indicator Ready (Green) Status Lit Flashing Data (Green) ...Attention (Red) Toner (Red) Off Lit Flashing Lit Flashing Off Lit Flashing Meaning ...

Operation Guide
Page 27
Key Cancel Status Operation Press for 1 second or more Prints the service status page At Error Press momentarily Clears the error After Power Press until the indicator is lit On Resets the toner counter after replacing the toner container OPERATION GUIDE 3 Machine Parts Keys Refer to the following table for 10 seconds or more Function Cancels the data from the PC GO At Ready Press momentarily Switches On-line / Off-line Press for 3 to 10 seconds Prints the status page Press for the name and description of the basic functions of each key.
Key Cancel Status Operation Press for 1 second or more Prints the service status page At Error Press momentarily Clears the error After Power Press until the indicator is lit On Resets the toner counter after replacing the toner container OPERATION GUIDE 3 Machine Parts Keys Refer to the following table for 10 seconds or more Function Cancels the data from the PC GO At Ready Press momentarily Switches On-line / Off-line Press for 3 to 10 seconds Prints the status page Press for the name and description of the basic functions of each key.

Operation Guide
Page 37
...first switched on after toner installation, there will be a delay of approximately 15 minutes before installing software from the CD-ROM. 1 Switch on the power, after a moment the indicators light in and connected to the computer's parallel or USB port before the printer gets ready to warm.... 3 The installation program launches and the License Agreement displays. IMPORTANT: If you install the toner container and switch on the PC and activate Windows. Once the indicator lights, printer installation is plugged in sequence from top to bottom. Select View License Agreement to read the ...
...first switched on after toner installation, there will be a delay of approximately 15 minutes before installing software from the CD-ROM. 1 Switch on the power, after a moment the indicators light in and connected to the computer's parallel or USB port before the printer gets ready to warm.... 3 The installation program launches and the License Agreement displays. IMPORTANT: If you install the toner container and switch on the PC and activate Windows. Once the indicator lights, printer installation is plugged in sequence from top to bottom. Select View License Agreement to read the ...

Operation Guide
Page 39
..., lint free cloth to allow for printer cleaning tasks. Process Unit The process unit should be cleaned using the charger cleaner every time the toner container is replaced. Toner Container The toner container will need replacing approximately every 7,200 pages. A starter toner container provides approximately 3,600 pages. (Assuming an average toner coverage of 5%.) Maintenance task instructions...
..., lint free cloth to allow for printer cleaning tasks. Process Unit The process unit should be cleaned using the charger cleaner every time the toner container is replaced. Toner Container The toner container will need replacing approximately every 7,200 pages. A starter toner container provides approximately 3,600 pages. (Assuming an average toner coverage of 5%.) Maintenance task instructions...

Operation Guide
Page 40
...times as shown in the figure in the plastic bag provided for disposal. 3 Remove the packaging from the toner container. 16 OPERATION GUIDE Do not attempt to force open or destroy the toner container. 1 Open the top cover. 2 Turn lock lever A to the unlock position, push lock ...lever B to distribute the toner evenly. 4 Remove the label from the new toner container. Maintenance Toner Container To replace the toner container use the instructions below. CAUTION...
...times as shown in the figure in the plastic bag provided for disposal. 3 Remove the packaging from the toner container. 16 OPERATION GUIDE Do not attempt to force open or destroy the toner container. 1 Open the top cover. 2 Turn lock lever A to the unlock position, push lock ...lever B to distribute the toner evenly. 4 Remove the label from the new toner container. Maintenance Toner Container To replace the toner container use the instructions below. CAUTION...

Operation Guide
Page 41
Push firmly on the top of the container at the positions marked PUSH HERE, until you hear a click. 6 Turn lock lever A to the lock position and close the top cover. A LOCK UNLOCK LOCK UNLOCK OPERATION GUIDE 17 5 Install the new toner container in the printer.
Push firmly on the top of the container at the positions marked PUSH HERE, until you hear a click. 6 Turn lock lever A to the lock position and close the top cover. A LOCK UNLOCK LOCK UNLOCK OPERATION GUIDE 17 5 Install the new toner container in the printer.

Operation Guide
Page 42
Maintenance Cleaning the Printer To avoid print quality problems, the interior of the printer must be cleaned with every toner container replacement. 1 Open the top cover and front cover. 2 Lift the process unit together with the toner container out of the printer. IMPORTANT: Do not place the process unit on a clean, level surface. NOTE: The drum in process unit is sensitive to light for more than five minutes. 3 Place the process unit flat on end. 18 OPERATION GUIDE Never expose the process unit to light.
Maintenance Cleaning the Printer To avoid print quality problems, the interior of the printer must be cleaned with every toner container replacement. 1 Open the top cover and front cover. 2 Lift the process unit together with the toner container out of the printer. IMPORTANT: Do not place the process unit on a clean, level surface. NOTE: The drum in process unit is sensitive to light for more than five minutes. 3 Place the process unit flat on end. 18 OPERATION GUIDE Never expose the process unit to light.

Operation Guide
Page 44
...remove the power cord from the printer. 20 OPERATION GUIDE Maintenance Prolonged Non-Use and Moving the Printer Prolonged Non-use If you ever leave the printer unused for a long period of the printer. Move it as level as possible to avoid spilling toner inside the printer. - Be sure to avoid ...possible damage that may occur when the printer is used next time. ...
...remove the power cord from the printer. 20 OPERATION GUIDE Maintenance Prolonged Non-Use and Moving the Printer Prolonged Non-use If you ever leave the printer unused for a long period of the printer. Move it as level as possible to avoid spilling toner inside the printer. - Be sure to avoid ...possible damage that may occur when the printer is used next time. ...

Operation Guide
Page 46
... edge or back of the Check the registration roller is installed correctly. The printer will go offline and the attention indicator ( ) will stop when a paper jam occurs in the printer or if paper is in the printer. Refer to page 16 for information. Refer to page 18 for information.... Paper Jams The printer will fast flash. Check the toner container and if necessary replace. Clean the charger wire, refer to...
... edge or back of the Check the registration roller is installed correctly. The printer will go offline and the attention indicator ( ) will stop when a paper jam occurs in the printer or if paper is in the printer. Refer to page 16 for information. Refer to page 18 for information.... Paper Jams The printer will fast flash. Check the toner container and if necessary replace. Clean the charger wire, refer to...

Operation Guide
Page 48
Troubleshooting 2 Open the top cover and front cover. 3 Lift the process unit together with the toner container out of the paper. If it has not be pinched by rollers, pull it along the normal running direction of the printer. Never expose the process unit to light for more than five minutes. 4 If the jammed paper appears to light. NOTE: The drum in process unit is sensitive to be fed as far as the metal registration roller, remove the paper from the MP tray side. 24 OPERATION GUIDE
Troubleshooting 2 Open the top cover and front cover. 3 Lift the process unit together with the toner container out of the paper. If it has not be pinched by rollers, pull it along the normal running direction of the printer. Never expose the process unit to light for more than five minutes. 4 If the jammed paper appears to light. NOTE: The drum in process unit is sensitive to be fed as far as the metal registration roller, remove the paper from the MP tray side. 24 OPERATION GUIDE

Operation Guide
Page 49
Troubleshooting Duplexer When a paper jam occurs in the duplex section, clear it using the following procedure. 1 Open the rear cover and remove the jammed paper as shown in the figure. 2 Pull the cassette all the way out of the printer. OPERATION GUIDE 25 5 Insert the process unit together with the toner container, back into the machine. The printer warms up and resumes printing. Close the front cover and top cover. 6 Reload the MP tray.
Troubleshooting Duplexer When a paper jam occurs in the duplex section, clear it using the following procedure. 1 Open the rear cover and remove the jammed paper as shown in the figure. 2 Pull the cassette all the way out of the printer. OPERATION GUIDE 25 5 Insert the process unit together with the toner container, back into the machine. The printer warms up and resumes printing. Close the front cover and top cover. 6 Reload the MP tray.

Operation Guide
Page 51
If it along the normal running direction of the printer. Never expose the process unit to light for more than five minutes. 3 If the jammed paper appears to light. Troubleshooting OPERATION GUIDE 27 NOTE: The ... not be fed as far as the metal registration roller, remove the paper from the MP tray side. 4 Insert the process unit together with the toner container out of the paper. Close the front cover and top cover. The printer warms up and resumes printing. 2 Lift the process unit together with the...
If it along the normal running direction of the printer. Never expose the process unit to light for more than five minutes. 3 If the jammed paper appears to light. Troubleshooting OPERATION GUIDE 27 NOTE: The ... not be fed as far as the metal registration roller, remove the paper from the MP tray side. 4 Insert the process unit together with the toner container out of the paper. Close the front cover and top cover. The printer warms up and resumes printing. 2 Lift the process unit together with the...

Operation Guide
Page 59
...less (power on), 10 seconds or less (sleep) First Print Resolution Toner saving Waste toner capacity Monthly Duty Controller 10 seconds or less Fast 1200 mode 600 dpi (vertical and horizontal) with KIR (Kyocera Image Refinement) EcoPrint mode More than 100,000 pages (with 5% print ... cards supported Paper Feed Source Capacity - Cassette/ 250 sheets - Cassette - Item Description Printing Method Printing speed - 1-sided printing Electrophotography using laser scan 22 pages/minute (A4 size/Plain) 23 pages/minute (Letter size/Plain) - 2-sided printing 11 pages/minute (A4 size/Plain)...
...less (power on), 10 seconds or less (sleep) First Print Resolution Toner saving Waste toner capacity Monthly Duty Controller 10 seconds or less Fast 1200 mode 600 dpi (vertical and horizontal) with KIR (Kyocera Image Refinement) EcoPrint mode More than 100,000 pages (with 5% print ... cards supported Paper Feed Source Capacity - Cassette/ 250 sheets - Cassette - Item Description Printing Method Printing speed - 1-sided printing Electrophotography using laser scan 22 pages/minute (A4 size/Plain) 23 pages/minute (Letter size/Plain) - 2-sided printing 11 pages/minute (A4 size/Plain)...

Operation Guide
Page 61
...Envelope 8 G GO key 3 I Indicator 2 OPERATION GUIDE K Key Cancel 3 GO 3 KM-NET for Clients 2 M Maintenance 15 cleaning 18 cleaning tasks 15 process unit 15 toner container 15 Maximum memory size 30 MP tray 5, 8 envelope 8 flap 8 paper size 5 paper width guides 8 subtray 8, 9 N Network interface card 33 O Offline 2 ...Online 2 Operation panel 1 attention indicator 1 Cancel key 1 data indicator 1 GO key 1 indicator 2 ready indicator 1 toner indicator 1 Options 29 CompactFlash (CF) card 29 expansion memory 29 network interface card 29 paper feeder 29 37
...Envelope 8 G GO key 3 I Indicator 2 OPERATION GUIDE K Key Cancel 3 GO 3 KM-NET for Clients 2 M Maintenance 15 cleaning 18 cleaning tasks 15 process unit 15 toner container 15 Maximum memory size 30 MP tray 5, 8 envelope 8 flap 8 paper size 5 paper width guides 8 subtray 8, 9 N Network interface card 33 O Offline 2 ...Online 2 Operation panel 1 attention indicator 1 Cancel key 1 data indicator 1 GO key 1 indicator 2 ready indicator 1 toner indicator 1 Options 29 CompactFlash (CF) card 29 expansion memory 29 network interface card 29 paper feeder 29 37

Operation Guide
Page 62
... 5 Paper Type 35 Parallel interface connector 12 Parallel interface connector 12 Power connecting 12 cord connector 11 switch 11 Precautions for use xvii Printer cable 12 Process unit 18 charger cleaner 19 charger wire 15 cleaner home position 19 drum 18 R Ready indicator 2 S Serial interface ...board 33 Service status page 3 Sleep mode 2 Specifications 35 Status page 3, 21 38 T Toner container 15 lock lever A 16 lock lever B 16 PUSH HERE 17 replacement 16 Toner indicator 2 Troubleshooting 21 general guide 21 paper jam 22 print quality 22 U USB cable 11 USB interface connector...
... 5 Paper Type 35 Parallel interface connector 12 Parallel interface connector 12 Power connecting 12 cord connector 11 switch 11 Precautions for use xvii Printer cable 12 Process unit 18 charger cleaner 19 charger wire 15 cleaner home position 19 drum 18 R Ready indicator 2 S Serial interface ...board 33 Service status page 3 Sleep mode 2 Specifications 35 Status page 3, 21 38 T Toner container 15 lock lever A 16 lock lever B 16 PUSH HERE 17 replacement 16 Toner indicator 2 Troubleshooting 21 general guide 21 paper jam 22 print quality 22 U USB cable 11 USB interface connector...


