bizhub 601 Keyboard - Konica Minolta
bizhub 601 Keyboard
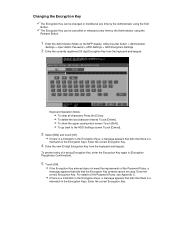
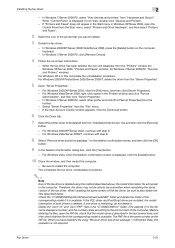
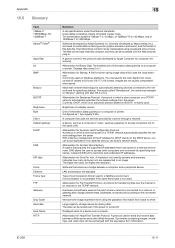
View Results Below
Free Konica Minolta bizhub 601 manuals!
Problems with Konica Minolta bizhub 601?
Ask a Question
Free Konica Minolta bizhub 601 manuals!
Problems with Konica Minolta bizhub 601?
Ask a Question
Related Manual Pages


Similar Questions

How Do You Turn Down The Keyboard Volume On A Bizhub C280
(Posted by mavmsimko 10 years ago)