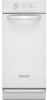
KitchenAid KUCS03CTWH - 15" Trash Compactor Support and Manuals
Get Help and Manuals for this KitchenAid item
View All Support Options Below
Free KitchenAid KUCS03CTWH manuals!
Problems with KitchenAid KUCS03CTWH?
Ask a Question
Free KitchenAid KUCS03CTWH manuals!
Problems with KitchenAid KUCS03CTWH?
Ask a Question
Most Recent KitchenAid KUCS03CTWH Questions

Replacement Bags For Compactor
what size bags go into the kitchenaid compactor KUCS03CTSS1?
what size bags go into the kitchenaid compactor KUCS03CTSS1?
(Posted by donflo 11 years ago)
Popular KitchenAid KUCS03CTWH Manual Pages
Use & Care Guide - Page 1
COMPACTOR
Use & Care Guide
For questions about features, operation/performance, parts, accessories or service, call: 1-800-422-1230 or visit our website at www.kitchenaid.com
In Canada, for assistance, installation or service, call: 1-800-807-6777 or visit our website at www.KitchenAid.ca
Table of Contents ...2
9872216
Use & Care Guide - Page 2
... WHISPER QUIET™ Plus System 10 Starting Your Compactor 10 Using Solid (Locked) Cycle 10
Using the Air Filter or Freshener 11 Removing a Filled Bag 11 Installing a New Bag 11
COMPACTOR CARE 12 Changing the Air Filter or Freshener 12 Cleaning 12
TROUBLESHOOTING 14
ASSISTANCE OR SERVICE 15 In the U.S.A 15 In Canada 15 Accessories...
Use & Care Guide - Page 3
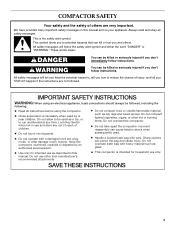
... for intended use only. s Do not operate with a damaged cord set, plug, motor, or after damage in this manual and on your appliance.
s Do not take apart the compactor.
Sharp objects can kill or hurt you to run unattended at any manner. s This compactor is necessary when used as described in any time. This symbol...
Use & Care Guide - Page 6
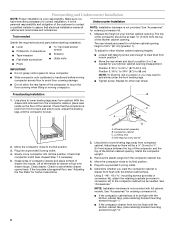
... Undercounter Installation
NOTE: Proper installation is level from compactor cabinet. Check that electrical installation meets all national and local codes and ordinances. With the drawer still removed from hole in conversion kit) to be at the handle so drawer will be a ¹⁄₈" (3 mm) to be flush with full cabinet models. To adjust for correct installation.
Use & Care Guide - Page 7
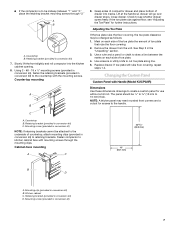
...attached to the underside of countertop, attach mounting clips (provided in conversion kit) to 16 mm) thick. Kitchen cabinet C. Countertop B. Slowly lift the front slightly and roll compactor...(38.1 mm)
B D
A. Replace drawer. s If the compactor is to be midway between the
...instructions. If the toe plate rubs against floor, see whether drawer opens freely. Grasp sides of compactor...
Use & Care Guide - Page 8
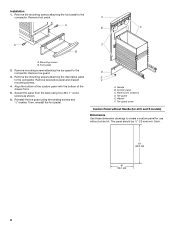
...Panel without Handle (for all C and S models)
Dimensions Use these dimension drawings to the compactor. Remove mounting screws attaching the toe guard to create a custom panel ...mounting screws attaching the decorative panel to the
compactor. Washer F. thick.
25" (63.5 cm)
15" (38.1 cm)
8 Installation
1. Remove the mounting screws attaching the foot pedal to the compactor.
A
...
Use & Care Guide - Page 9
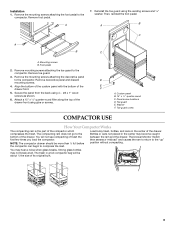
... is the part of the drawer front.
5. B A
C
A
B
C
A. Remove mounting screws attaching the toe guard to the compactor. Align the bottom of the custom panel with the bottom of the compactor which compresses the trash. Strong glass bottles may not break at all. A
7. Remove the mounting screws attaching the decorative panel to the compactor. Installation 1. The trash in the...
Use & Care Guide - Page 11
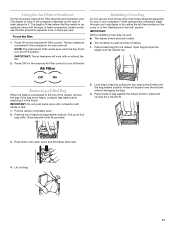
... movement in the compactor for a smooth fit.
3.
Order replacement compactor bags through your compactor.
Lock bag in...trash compacted. The length of time before emptying it . Press ON on the cover or in the OFF position. IMPORTANT:
Before installing a new bag, be replaced varies with twist tie provided.
2. Removing a Filled Bag
When the trash is in the "Assistance or Service...
Use & Care Guide - Page 12
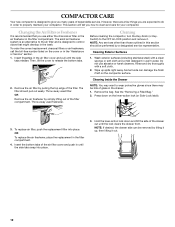
... filter cover and pull until the lock clears the drawer front. NOTE: Any services other than those outlined in the filter compartment. OR
To replace the air freshener, place the replacement in warm water.
Cleaning Exterior Surfaces
1. Cleaning
Before cleaning the compactor, turn the Key-Knob (or KeySwitch) to release the bottom tabs.
However...
Use & Care Guide - Page 13
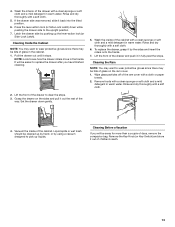
... there may be bits of days, remove the compactor bag. Cleaning the Ram
NOTE: You may want...cloth or paper
towels. 2. Liquid spills or wet trash should be away for more than a couple of...it out the rest of children's reach.
13 Set the drawer down while pushing the drawer side to... and insert the rollers onto the tracks.
7. To replace the drawer, grasp it out of the way.
Vacuum...
Use & Care Guide - Page 14
... START and release. The thickness of the bottle's glass and the content of an unnecessary service call an electrician.
See "Starting the Compactor."
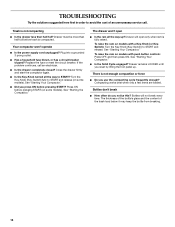
TROUBLESHOOTING
Try the solutions suggested here first in order to avoid the cost of the trash load below it may keep the bottle from breaking.
14
Bottles will open
s Is the...
Use & Care Guide - Page 15

... the cost of appliances.
These parts will help , follow the instructions below or contact your appliance.
In the U.S.A. Our consultants provide assistance with: s Features and specifications on our full line of a service call us to better respond to your nearest designated service center. s Accessory and repair parts sales. To locate the KitchenAid designated service company in your...
Use & Care Guide - Page 16

..., when this major appliance is operated and maintained according to instructions attached to or furnished with the product, KitchenAid or KitchenAid Canada (hereafter "KitchenAid") will pay for factory specified parts and repair labor to correct house wiring or plumbing.
2. Service calls to correct the installation of purchase, when the compactor is installed, operated and maintained according...
Dimension Guide - Page 1
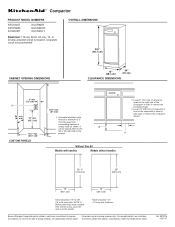
® Compactor
PRODUCT MODEL NUMBERS
KFCK03IT KFCP02IR KUCK03IT
KUCP02IR KUCS02CR KUCS03CT
Electrical: 115-volt, 60-Hz, AC-only, 15-
For complete details, see Installation
our products, we reserve the right to change without notice. Instructions packed with handles
Models without handles
29 ³⁄₈" (74.6 cm)
25" (63.5 cm)
15" (38.1 cm)
15" (38.1 cm...
Warranty Information - Page 1
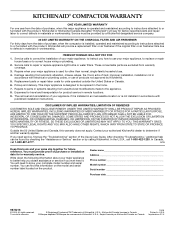
...Troubleshooting" section of the Use & Care Guide. Repairs when your major appliance is operated and maintained according to instructions attached to correct defects in U.S.A. ITEMS KITCHENAID WILL NOT PAY FOR 1. Service calls to correct the installation of your major appliance, to instruct you need to parts or systems resulting from warranty coverage.
3. Repairs to know your complete model...
KitchenAid KUCS03CTWH Reviews
We have not received any reviews for KitchenAid yet.