KitchenAid KFCK03ITWH - 15" Trash Compactor Support and Manuals
Get Help and Manuals for this KitchenAid item
View All Support Options Below
Free KitchenAid KFCK03ITWH manuals!
Problems with KitchenAid KFCK03ITWH?
Ask a Question
Free KitchenAid KFCK03ITWH manuals!
Problems with KitchenAid KFCK03ITWH?
Ask a Question
Most Recent KitchenAid KFCK03ITWH Questions

My Trash Compactor Normal Cycle Works But The Solid Cycle Doesn't.
When I turn the key knob to start for solid it won't stay it keeps going off. If I hold the key knob...
When I turn the key knob to start for solid it won't stay it keeps going off. If I hold the key knob...
(Posted by elainecrane 12 years ago)
Popular KitchenAid KFCK03ITWH Manual Pages
Use & Care Guide - Page 1
COMPACTOR
Use & Care Guide
For questions about features, operation/performance, parts, accessories or service, call: 1-800-422-1230 or visit our website at www.kitchenaid.com
In Canada, for assistance, installation or service, call: 1-800-807-6777 or visit our website at www.KitchenAid.ca
Table of Contents ...2
9872216
Use & Care Guide - Page 2
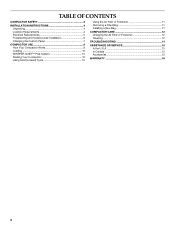
... WHISPER QUIET™ Plus System 10 Starting Your Compactor 10 Using Solid (Locked) Cycle 10
Using the Air Filter or Freshener 11 Removing a Filled Bag 11 Installing a New Bag 11
COMPACTOR CARE 12 Changing the Air Filter or Freshener 12 Cleaning 12
TROUBLESHOOTING 14
ASSISTANCE OR SERVICE 15 In the U.S.A 15 In Canada 15 Accessories...
Use & Care Guide - Page 3
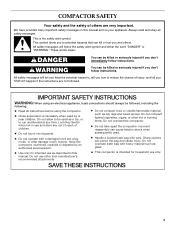
Always read and obey all instructions before using the compactor.
Do not allow to be followed, including the
following:
s Read all safety messages.
s Handle a loaded trash bag with a damaged cord set, plug, motor, or after damage in this manual and on your appliance. s This compactor is the safety alert symbol. We have provided many important safety messages in...
Use & Care Guide - Page 4
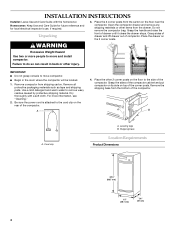
INSTALLATION INSTRUCTIONS
Installer: Leave Use and Care Guide with a soft cloth. Do not remove the compactor bag. Grasp sides of drawer and lift drawer out of drawer until it clears the drawer stops. Place the drawer on the floor near the compactor.
IMPORTANT: s Do not grasp console to move compactor. Remove all protective packaging materials such as tape...
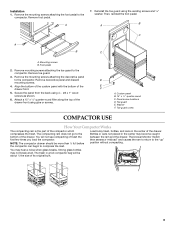
Use & Care Guide - Page 6
... Installation
1.
Close drawer. D
A. Compactor cabinet C. Use pliers to lower leveling legs away from front to back and side to side. Move the compactor close to its final position.
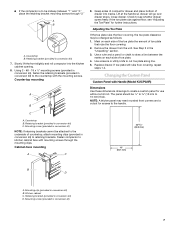
5.
s If the compactor cabinet face is to be at the handle so drawer will be flush with full cabinet models. Tools needed
Gather the required tools and parts...
Use & Care Guide - Page 7
...Model KUCP02IR)
Dimensions Use these dimensions drawings to the handle. NOTE: A thicker panel may be attached to the underside of toe plate. 4. Kitchen cabinet C. Retaining bracket (provided in conversion kit) B. s If the compactor... further instructions. Mounting screw (provided in conversion kit) to 16 mm) thick. Fasten compactor to cut toe plate along line. 5. Replace drawer....
Use & Care Guide - Page 8
.... Washer F. Installation
1.
A
A B
C
A
C
B
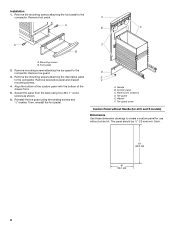
A. thick.
25" (63.5 cm)
15" (38.1 cm)
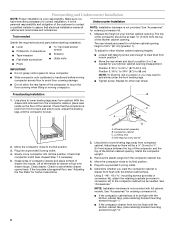
8 Remove toe guard.
3. Align the bottom of the custom panel with the bottom of the drawer front.
5. Remove the mounting screws attaching the foot pedal to create a custom panel for use without Handle (for all C and S models)
Dimensions Use these dimension drawings to the
compactor.
Use & Care Guide - Page 9
... more than ¹⁄₂ full before the compactor can begin to the compactor. Load bulky trash, bottles, and cans in the center may become caught between the ram and the drawer. Remove mounting screws attaching the toe guard to compress the load. The trash in a full compactor bag will not see compacting of the drawer...
Use & Care Guide - Page 11
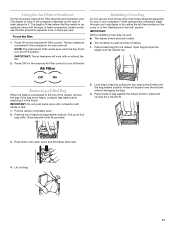
... any kind of trash placed in it in the "Assistance or Service" section.
Press OFF on the cover or in the future. IMPORTANT:
Before installing a new bag, be replaced once or twice ...odor removal.
Order replacement compactor bags through your compactor.
s The container is compacted to the top of bag from bag retainer buttons.
Removing a Filled Bag
When the trash is clean and ...
Use & Care Guide - Page 12
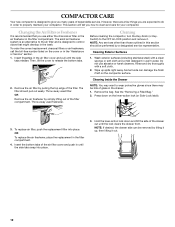
...-free number listed on the cover or in the filter compartment.
4. To replace air filter, push the replacement filter into place.
3. COMPACTOR CARE
Your new compactor is designed to clean and care for your compactor. Cleaning Exterior Surfaces
1. Wipe up , then lifting it . OR
To replace the air freshener, place the replacement in the "Assistance or Service" section.
1.
Do...
Use & Care Guide - Page 13
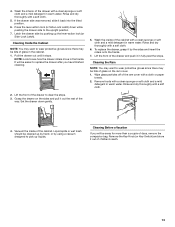
...cloth.
5. To replace the drawer, grasp it out of glass in warm water. 4. Lift the front of days, remove the compactor bag. NOTE: Look...may want to clear the stops.
3. Liquid spills or wet trash should be away for more than a couple of the drawer ... to replace the drawer after you will be cleaned up by hand, or by using a vacuum designed to the upright position.
7. Set the drawer...
Use & Care Guide - Page 14
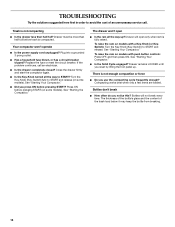
Your compactor won 't open only when ram is not compacting
s Is the drawer less than half full before pressing START (on models with push button controls: Press OFF, and then press ON. Replace the fuse or reset the circuit breaker. If the problem continues, call .
To raise the ram on some models). To raise the ram...
Use & Care Guide - Page 15

It may save you can write to KitchenAid with : s Features and specifications on our full line of appliances. These parts will help , follow the instructions below or contact your compactor, use factory specified parts. In the U.S.A. s Accessory and repair parts sales. s Warranty information.
For further assistance
If you need further assistance, you the cost of your authorized ...
Use & Care Guide - Page 16
... the "Assistance or Service" section or by KitchenAid.
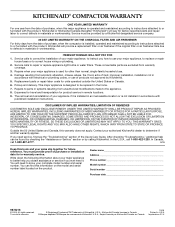
5. KITCHENAID® COMPACTOR WARRANTY
ONE YEAR LIMITED WARRANTY
For one year from the date of purchase, when this major appliance is operated and maintained according to instructions attached to or furnished with the product, KitchenAid or KitchenAid Canada (hereafter "KitchenAid") will pay for factory specified parts and repair labor to...
Dimension Guide - Page 1
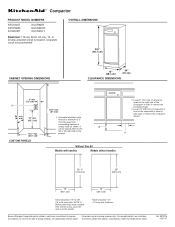
...required. Ref. 9872216 04-27-07 ® Compactor
PRODUCT MODEL NUMBERS
KFCK03IT KFCP02IR KUCK03IT
KUCP02IR KUCS02CR KUCS03CT
Electrical: 115...Instructions packed with handles
Models without notice. Panel should be 1/2" (13 mm) min. or 20-amp grounded circuit is recommended. For complete details, see Installation
our products, we reserve the right to change materials and specifications...
KitchenAid KFCK03ITWH Reviews
We have not received any reviews for KitchenAid yet.